訊息不完整
此條目缺少相關信息。你可以幫助核子百科 補充訊息。
|
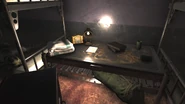
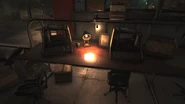
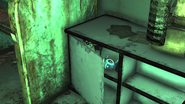
Enclave Research Facility Site J,[1] known in-game as just the Enclave research facility, is a location beneath transmission station 1AT-U03 in the Forest region of Appalachia in 2103. It is the research center of the Enclave's Appalachia division.[2]
Layout[]
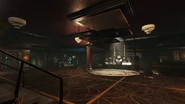
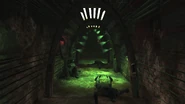
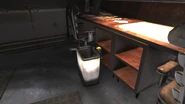
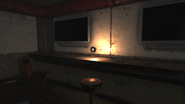
After entering the elevator inside transmission station 1AT-U03, one will enter the research facility's main lobby. There is an Enclave logo on the floor and a SODUS terminal. There are three main entrances to other wings inside the research facility. To the right is a door that can only be opened from the other side, with administrative access acquired during Over and Out. To the left are two doors and a decontamination hallway; the door with the handprint scanner requires the aforementioned administrative access, while the other leads to an observation room for the decontamination hallway. The arches themselves are broken and actually dispense radiation rather than cleansing it. Both sides of the observation room have locked doors (Picklock 0).
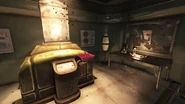
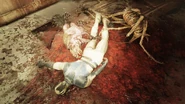
After going through the hallway, there is a stairway leading down to a room with noxious gas. In the center are green holding tubes containing various mutated creatures; the one containing a dead yao guai is broken and can be looted. The northern end of the room has a walled-in laboratory. An hatch on the northeastern side of the room drops down into a ruined lower level with six still-active incinerators, as well as a weapons workbench. The southern stairway leads to another large laboratory - a Mothman fight will occur here during and after Over and Out. The first floor of the laboratory has many of the same tubes, holding wendigos and gulpers. The southwestern door opens to a surgery area with a chemistry station, as well as a staircase leading to the second level of the room. Of note here are the lab console terminal, a door on the eastern end (Picklock 0) leading back to the room with the noxious gas, a destroyed holding cell with several Mothman eggs, and a southern door marked "EXIT" that leads to a small buffer room before reaching cell block A.
This next area contains a varied assortment of Scorched Plague-affected creatures in its holding cells, including a scorched bloatfly, bloodbug, tick and wendigo. The holding cells are mostly barren, though the ones designated A01 and A05 (both Picklock 1 doors) provide access to cell block B. Alternatively, one can head through a side room to access a laboratory with a dead snallygaster; the door at the end of this room will lead into cell block B. This area contains a scorched ant, cave cricket, mole miner and radrat. The northeastern side of the room features the holding cell console terminal. The white door to the south opens into another laboratory with cages and tubes holding dead mirelurks.
Cell block C is next, a large room where a deathclaw will emerge from a destroyed cell and attack the player character. In the center is a table with a dead radscorpion. A chemistry station and power armor station can be utilized here as well. The eastern side of the room has some observation windows, one of which shows some still-living chickens. The staircase at the end of the room leads to a door that requires the holding cell keycard, which can be found on a nearby Enclave corpse. This leads to a small office area with the cell block C console terminal, as well as several junk items and containers to loot.
Continuing through the next door and up some stairs, the next room is a brief storage hallway where the only way forward is intot he mess hall. Several more Enclave corpses litter this area, and the disgusting pink sludge throughout the room can be interacted with once, temporarily disorienting the player character as it is "eaten." A security gate (Picklock 2) opens to a storage and distribution area with various loot. The double doors leads to another buffer room; heading down the stairs and through the next door leads to a large, two-story lounge and cafeteria where Scorched will attack the player character. There are several diner booths and kitchen areas on both floors of the room, which can be looted.
The double doors on the second level lead out of the cafeteria and into the living quarters. The first part of the hallway is a laundry area, before heading north into the quarters themselves, which are also occupied by the Scorched. In total, there are five quarters that can be looted, as well as two restrooms. One room is behind a locked door (Picklock 1), while another has a personal footlocker (Picklock 3) that can be opened with the Walton footlocker key, on the corpse of G. Walton. The door at the end of the hall opens to a stairway, heading down into another section of living quarters, with these being flooded. The first room on the right has a wall safe (Picklock 2).
After another buffer room, one can head up a flight of stairs, leaving behind the flooded portion of the facility, and enter a small reception area with a potential bobblehead spawn. The reception is for the main command center, just past a door to the west. The command center is similar in design to the one at Sugar Grove, though all of its display screens are blank. The room has more Scorched enemies, including a Scorched chief in power armor. The transmission console terminal here will, when interacted with during Over and Out, direct the player character to a side room to the north. Here, the player character can register for administrative access with its administration console terminal and the nearby handprint scanner. The door on the right leads to a hallway with another weapons workbench; at the end is another hand scanner, which, after acquiring administrative access, opens the door that leads back into the lobby.
Finally, the mainframe room (accessed from the lobby with administrative access and the hand scanner to the east) is another two-story area, though this one is where the SODUS AI has been operating from, the large gray machine illuminated by a blue light. A white table near the mainframe has a plan spawn on it. A large robot pod is on the southern end of the first level - during Over and Out, XB-55 will appear from the pod, while after the quest, it will be a legendary Enclave sentry bot. A small room on the northern end of the first floor (the room where one converses with Knight Shin at the end of Over and Out) has a steamer trunk and a few junk items to take. The light blue machine on this floor is the objective of Over and Out: the long-range transmitter.
Notable loot[]
Holotapes and notes[]
- Decontamination note - Note, on a white console in the decontamination observation room.
- Snallygaster - Note, in the cell block A laboratory, next to the corpse of a snallygaster.
- Terminals aren't safe - Note, in the laboratory at cell block B, underneath the overhang with the large white "B" painted on it. It is on a desk near the Holding cell console terminal.
- Mole miners - Note, in the lab in the room just past cell block B.
- Scout letter - Note, on the corpse of a female Enclave scout, in the cell block C laboratory, where the deathclaw fight takes place.
- Feeding chute note - Note, on an Enclave corpse in the deathclaw's room in cell block C, dropped from a feeding chute.
- Lab journal - Note, on a counter on the first level of the lounge/cafeteria, past the northwestern double doors.
- My fault - Note, on a table in the southeastern most room in the first section of living quarters, to the left of a set of double doors.
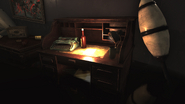
- Glue sniffers - Note, in the easternmost room of the flooded section of the living quarters, on an ornate desk.
- Lost data - Note, on a red and white table on the northern end of the main command center.
Other[]
- Holding cell keycard - Key, on an Enclave corpse outside of the deathclaw holding cell in cell block C.
- Walton footlocker key - Key, on the corpse of G. Walton. It is the same Enclave corpse that holds the feeding chute note, acquired from a feeding hatch in cell block C.
- Potential Vault-Tec bobblehead - Under the desk at the reception area just before the main command center.
- Random plan - On a white table on the first floor of the mainframe room.
- Oathbreaker - Rewarded after completion of Over and Out.
Appearances[]
The Enclave research facility appears only in Fallout 76, introduced in the Steel Dawn update.
Gallery[]
- Holotapes and notes
- Easter Eggs
References[]
- ↑ SODUS: "Task queue interrupted. It seems as though we have a visitor. Welcome to Enclave Research Facility Site J. May I ask the reason for your visit today?"
- ↑ Vault Dweller: "What is this place?"
SODUS: "This is the research center of the Enclave's Appalachia division. Additional information is classified."
Template:Navbox Steel Dawn
