Brantmeierz (talk | contribs) No edit summary |
|||
| (3 intermediate revisions by 2 users not shown) | |||
| Line 13: | Line 13: | ||
|quests =[[Still in the Dark]]<br />''[[Democracy Inaction]]''<br />''[[Suits You, Sarah]]'' |
|quests =[[Still in the Dark]]<br />''[[Democracy Inaction]]''<br />''[[Suits You, Sarah]]'' |
||
|factions =[[Allied Service Workers Bloc]]<br />[[Coalition of Vault 11 Voting Blocs]]<br />[[Divine Will Bloc]]<br />[[Human Dignity Bloc]]<br />[[Justice Bloc]]<br />[[United Vault Technicians Bloc]]<br />[[Utilitarian Bloc]] |
|factions =[[Allied Service Workers Bloc]]<br />[[Coalition of Vault 11 Voting Blocs]]<br />[[Divine Will Bloc]]<br />[[Human Dignity Bloc]]<br />[[Justice Bloc]]<br />[[United Vault Technicians Bloc]]<br />[[Utilitarian Bloc]] |
||
| − | |leaders =[[Katherine Stone]] - |
+ | |leaders =[[Katherine Stone]] - Final [[overseer]] |
|creatures =[[Giant rat (Fallout: New Vegas)|Giant rats]]<br />[[Giant mantis (Fallout: New Vegas)|Giant mantis]]es<br />[[Bark scorpion]]s |
|creatures =[[Giant rat (Fallout: New Vegas)|Giant rats]]<br />[[Giant mantis (Fallout: New Vegas)|Giant mantis]]es<br />[[Bark scorpion]]s |
||
|robots =[[Protectron (Fallout: New Vegas)|Protectrons]]<br />[[Robobrain (Fallout: New Vegas)|Robobrains]]<br />[[Sentry bot (Fallout: New Vegas)|Sentry bots]]<br />[[Automated turret (Fallout: New Vegas)|Automated turrets]] |
|robots =[[Protectron (Fallout: New Vegas)|Protectrons]]<br />[[Robobrain (Fallout: New Vegas)|Robobrains]]<br />[[Sentry bot (Fallout: New Vegas)|Sentry bots]]<br />[[Automated turret (Fallout: New Vegas)|Automated turrets]] |
||
| Line 26: | Line 26: | ||
{{Quotation|Vault 11 has been abandoned for decades, though few people know the story of its terrible past.|[[Fallout: New Vegas loading screens|''Fallout: New Vegas'' loading screen]]}} |
{{Quotation|Vault 11 has been abandoned for decades, though few people know the story of its terrible past.|[[Fallout: New Vegas loading screens|''Fallout: New Vegas'' loading screen]]}} |
||
| − | '''Vault 11''' is one of the [[Vault-Tec Corporation|Vault-Tec]] [[vault]]s, [[Fallout: New Vegas locations|located]] in the [[Mojave Wasteland]]. It is west of [[Boulder City]] and |
+ | '''Vault 11''' is one of the [[Vault-Tec Corporation|Vault-Tec]] [[vault]]s, [[Fallout: New Vegas locations|located]] in the [[Mojave Wasteland]]. It is west of [[Boulder City]] and southwest of the [[188 trading post]]. |
==Background== |
==Background== |
||
| − | Vault 11 was |
+ | Vault 11 was likely constructed along with the other Vault-Tec vaults in the mid-2060s to the early 2070s. As with the majority of other vaults, Vault 11 served as a [[Vault Experiment|social experiment]]. Through this experiment, the inhabitants of Vault 11 were told one of their fellow vault dwellers each year must be killed, lest everyone else meet the same fate should they refuse. In actuality, if the residents refused, an "[[Automated solution response]]" message would be played. The message stated that by choosing not to select one of their own as a sacrifice, the dwellers are "a shining example to humanity" and that no one will be killed. They are also informed that the vault door is hereby unlocked, allowing free passage to and from the vault, but are urged to consult with their overseer before doing so. However, by the time Vault 11 inhabitants chose the enlightened path, only five vault dwellers remained. |
| + | Evidence gathered from computer terminals throughout the vault describes how vault residents selected an annual sacrifice from among their members. This individual would serve as [[overseer]], and at the end of their term, they were required to enter a chamber and submit to execution. According to the residents, this would satisfy the requirement and spare the remaining dwellers. Of the original residents, only the overseer entered the vault with knowledge of such requirements. Shocked and disgusted with the situation they found themselves in, and resentful towards the overseer for neglecting to share the information before sealing the vault doors, the residents chose the original overseer as the first sacrifice. |
||
| − | ==='Elections' and the Overseer's role=== |
||
| − | Evidence gathered from computer terminals throughout the vault attests that the vault residents were required to select an annual sacrifice from among their members. Therefore, at the end of the Overseer's term of office, the Overseer was required to enter a chamber below the Overseer's Office to be executed by the vault's computers. The computer did not require that the sacrifice should be the Overseer, but if a sacrifice was not selected, the computer controlling the vault would kill them all. Of the original residents, only the Overseer had entered the vault knowing about the yearly sacrifice. The residents of the vault, in their shock and anger at discovering this after having already been sealed inside the vault, selected the original Overseer (whom they viewed as having betrayed them) as the first sacrifice. This decision would marry the positions of Overseer and Sacrifice until the end. |
||
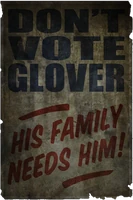
| + | The tradition of electing an overseer as the next condemned resident persisted onward. Several pseudo-political powers, known as voting blocs, emerged to influence nomination and selection. The [[Coalition of Vault 11 Voting Blocs]] provided information and oversight of this process. Six main voting blocs jostled for power, including the [[Allied Service Workers Bloc]], [[Divine Will Bloc]], [[Human Dignity Bloc]], [[Justice Bloc]], [[United Vault Technicians Bloc]], and the [[Utilitarian Bloc]]. These blocs would nominate and support overseer candidates based on their own initiatives, and slather propaganda and libel laded posters on the vault walls to garner support prior to each election. |
||
| − | In this vault, several voting blocs emerged to exercise power and influence over other vault residents. Prior to the final election, [[Roy Gottlieb]], leader of the most powerful of the voting blocs, the [[Justice Bloc]], confronted [[Katherine Stone]]. He threatened that if she did not perform sexual favours for the members of their bloc, they would nominate her husband, [[Nathan Stone]], for Overseer (it is hinted that he may have made enemies of the Justice Bloc because of an unusual winning streak during the poker games he attended). Katherine, fearing for her husband, complied. Much to the shock of the Stone family, the Justice Bloc nominated Nathan for Overseer regardless. Because candidates were typically people who had outraged the community, they were usually nominated by several blocs; in Nathan's case, his nomination was backed only by the Justice Bloc. |
||
| + | ===The final overseer=== |
||
| − | Fearing for the fate of her husband, Nathan Stone, Katherine decided that she had to save him using the only method she felt left available to her: she began to stalk and kill the members of the Justice Bloc, which held a very narrow majority. Upon her capture, she confessed to her crimes immediately, explaining not only her plan but also her reasoning: as a murderer, she was sure the voters would elect her in her husband's stead, because it was a choice "they could live with." |
||
| + | The selection process devolved significantly over time, resulting in deplorable manipulations and actions perpetrated by bloc leaders. Prior to the final election, members of the most powerful group, the Justice Bloc, led by [[Roy Gottlieb]], extorted sexual favors from fellow resident [[Katherine Stone]]. They threatened to nominate her husband, [[Nathan Stone|Nathan]], as overseer should she resist. Due to their overwhelming influence as a voting bloc, this would essentially be a death sentence for her husband, and she capitulated to their demands. Afterward, the Justice Bloc members betrayed Katherine, nominating her husband regardless of her submission to their whims. |
||
| + | Out of desperation, despair, and indignation, Katherine enacted a plan of retribution, subsequently murdering members of the Justice Bloc one by one. This worked for Katherine in two ways, as she had not only set the stage for reprisal but also would be a clear choice for the next overseer in place of her husband, effectively saving his life. Katherine's plan succeeded on both accounts, and after the murder of Justice Bloc members, she was elected as the next vault overseer. |
||
| − | Katherine Stone's first act as Overseer, "Overseer Order 745," dissolved the election process and decreed that the position of Overseer would be chosen using the vault's computer systems and a random number generator. The Justice Bloc, aghast that they were going to lose the ability to control vault life by means of election threats, not only feared that one of their own members would be selected, but also worried that the damage to the vault's social structure would be so severe that they would have permanently lost power by the time one of their own members was elected and could reverse the Order. They decided to stage an armed coup to force Katherine to reverse Overseer Order 745. The fighting that ensued killed nearly all of the remaining vault dwellers population, and in the end only five people survived. |
||
| + | |||
| + | Katherine Stone's first act as overseer, "Overseer Order 745," dissolved the election process entirely and decreed that moving forward, the position of overseer would be chosen at random using the vault's computer systems. The Justice Bloc, aghast at the thought of losing their control and influence over the vault population, decided to stage an armed coup. The fighting that ensued killed nearly all of the remaining vault dwellers. |
||
===The Final Sacrifice=== |
===The Final Sacrifice=== |
||
| − | The first [[System recording: Vault 11 front entrance|audio log]] discovered by the player as they enter the vault |
+ | The first [[System recording: Vault 11 front entrance|audio log]] discovered by the player character as they enter the vault reveals the fate of the few survivors. Despondent after witnessing the deaths of their community members, they chose death by suicide, defying the vault computer's requirement for sacrifices and waiting for the subsequent consequences. They were bewildered by the discovery that their defiance was the original goal of the social experiment all along. They were given the freedom to leave the vault and congratulated for their selflessness. |
| − | + | Learning the harrowing truth about the vault experiment led the survivors further into despair and regret. The five survivors discussed committing suicide to punish themselves for the events that happened in the vault, and to prevent the outside world from learning about their shameful behavior. However, they were not unanimous in their decision. In the audio log, an argument is heard between a man referred to as "Voice 1", trying to convince the other four (three males and a female) to leave the vault. Voice 2 (female), 3 (referred to as [[Harry (Vault 11)|Harry]]), 4 and 5 wish to die. Voice 1 tries to convince the rest to leave the vault and spread the word about what happened there, so that others may learn from their mistakes. At the end of the audio log, four gunshots can be heard, followed by a heavy sigh and the sound of a gun falling to the floor. Four bodies are found in the entrance of the vault. |
|
==Layout== |
==Layout== |
||
| + | Prior to entering the vault, there is a hollowed-out rock to the right of the main door. The reactor and the water purification system of Vault 11 has been damaged by age and the civil war among the dwellers. Therefore radioactivity and radioactive water are some of the main hazards of the vault. Since portions of the vault are underwater, many sections can only be explored while wearing a [[rebreather]] or by judicious use of air pockets in the flooded areas. Enemies encountered inside the vault include [[Giant mantis (Fallout: New Vegas)|giant mantis]]es, [[Giant rat (Fallout: New Vegas)|giant rat]]s, and [[bark scorpion]]s. |
||
| ⚫ | |||
| − | In 2281 the reactor and the water purification system of Vault 11 has been damaged by age and the destruction from a civil war among the dwellers. Radioactivity, and especially radioactive water, are some of the hazards of the vault. It is therefore advisable to pack some [[RadAway (Fallout: New Vegas)|RadAway]] and [[Rad-X (Fallout 3)|Rad-X]] when journeying to Vault 11. Since portions of the vault are under water, you may want to head over to [[Nellis Air Force Base]] and acquire the [[rebreather]] (from the quest, [[Volare!]]) that allows you to breathe under water before entering this vault, although there are also air pockets in the flooded areas. Other than the radiation on the lower levels, the only enemies you will encounter inside the vault are [[Giant mantis (Fallout: New Vegas)|giant mantis]]es, [[Giant rat (Fallout: New Vegas)|giant rat]]s and two [[bark scorpion]]s just inside the entrance from the [[Mojave Wasteland]]. |
||
| ⚫ | The entire vault has been plastered with propaganda for an election for a new overseer, with each candidate is expressing outrage and incredulity at having been nominated and why the other candidates deserve to be overseer instead. This is juxtaposed to commonly understood elections, where the opposite goals are seen, and instills a sense of perplexity to the uninitiated. Throughout the vault, sandbag barricades, multiple traps, and several skeletons serve as evidence of violent conflict. |
||
| − | Prior to entering the vault, there is a hollowed out rock on the right as you approach the outer door. The entry tunnel is filled mostly with mantises of various sizes and a few bark scorpions, and the open vault door leads to a larger entry room than vaults on the [[Capital Wasteland|East Coast]]. [[System recording: Vault 11 front entrance|Four skeletons]] lie on the floor here. A working terminal near the door allows the [[Courier]] to access an audio log with [[Vault 11 (note)|some information]] about the fate of the vault. The next room has exits to the clinic straight ahead. On the left is a dead-end hallway with a classroom and a cigar lounge. On the right a hallway with bathrooms and another clinic entrance has stairs on either end. |
||
| ⚫ | |||
| − | The stairs nearest the entrance hall lead to a floor containing a lab, and more stairs down. The stairs on the opposite end lead to a floor containing a computer room. One of the computers is booby-trapped, and will explode if you try to access it. |
||
| + | The vault's entryway contains four skeletons and an audio log. A working terminal near the door allows the [[Courier]] to access [[Vault 11 (note)|more information]] regarding the fate of the vault. The next room has hallways to the vault clinic, classroom, and cigar lounge. To the right, a hallway with access to bathrooms and a staircase can be found. |
||
| − | |||
| ⚫ | The entire vault has been plastered with propaganda for an election for a new |
||
===Living quarters=== |
===Living quarters=== |
||
| − | + | The stairs lead to a lab and a computer room. One of the computers is booby-trapped with explosives. A large common room connects hallways leading to the male and female dorms, as well as an exit labeled "Admin". This doorway leads to the security office, and to the levels containing the overseer's office and the utility room. The dorms are comprised of long, interconnected hallways and bedrooms. Several [[Vault jumpsuit (Fallout: New Vegas)#Vault 11 jumpsuit|Vault 11 jumpsuit]]s can be found here in lockers and dressers. Another audio log can be found on a locked terminal, with the password in a footlocker a short distance away. |
|
| − | There is a copy of [[Pugilism Illustrated (Fallout: New Vegas)|Pugilism Illustrated]] in the female dorm, second door on the right, under the overturned dresser |
+ | There is a copy of [[Pugilism Illustrated (Fallout: New Vegas)|Pugilism Illustrated]] in the female dorm, second door on the right, under the overturned dresser upon entering. A small cache of [[Flamer fuel (Fallout: New Vegas)|flamer fuel]] and [[5.56mm round (Fallout: New Vegas)|5.56 round]]s is concealed under and behind a large immovable mop bucket in the male dorms. |
| − | Through the door marked "Admin |
+ | Through the door marked "Admin", following the stairs and turning to the left is a Hard locked door, which can also be unlocked by the adjacent Very Hard locked terminal. This door leads to a storage room with an assortment of ammunition, including a [[Mini nuke (Fallout: New Vegas)|mini nuke]]. The security office contains a terminal with Katherine Stone's deposition, and more ammunition. At the opposite end of the hall are several flights of stairs leading down to the lower levels. |
===Lower level=== |
===Lower level=== |
||
| − | The |
+ | The overseer's office is past a hallway on the right and has a rigged shotgun pointed at the entrance. The terminal here requires a password to access. Past the office is a blocked passage to the atrium. The hallway before the office leads to the utility room and another blocked passage to the atrium. |
| − | + | In the utility room, the [[differential pressure controller]] required for the [[Still in the Dark]] quest for the [[Brotherhood of Steel (Mojave chapter)|Brotherhood of Steel]] is located in a locker in the right-hand side of the submerged room. The utility room provides access to the atrium via the flooded lower reactor level. Conversely, a set of Average locked doors can be picked one floor above to circumvent the flooded areas. In the atrium, the [[Vault 11 overseer's terminal password]] is found on the upper balcony terminal. A holotape, [[Prepared speech of Gus Olson, ombudsman, for the annual overseer election]], is found on the podium below. This level also features the vault cafeteria, which has a large supply of food and a first aid box. The cafeteria's entrance is boobytrapped with explosives and a gas leak located here can cause a violent chain reaction. |
|
| ⚫ | |||
| − | To access the atrium, the [[Courier]] must go down through the flooded, radioactive engineering level via the utility room. The totally flooded lower reactor level is the only way to proceed without 50 [[Lockpick]] to open a door above the flooded level. There is only one air pocket in this area, so one must be careful about getting out of the flooded area alive. It is recommended to open one or two doors then backtrack to the air pocket, and with the way clear you can proceed to the next set of stairs and forward (the [[rebreather]] from [[Volare!]] is also useful here). |
||
| ⚫ | Accessing the overseer's terminal with the aforementioned password can open a chamber under the desk. This opens into a long tunnel. At this point, a pre-programmed voice speaks as the Courier approaches a door illuminated by a bright light. At the end of the tunnel is a room with a single chair in the center, along with a projector. The voice instructs the player character to sit in the chair to start the presentation. Delaying this will cause the recording to repeat, "you have no choice but to sit in the chair" until the Courier complies. The exit door locks as soon as the presentation starts. Pleasant scenes are shown while a voice reassures the individual that they lived a good life and their next one will be better yet. At the conclusion of the presentation, wall panels on both sides of the room slide back, and four robots and eight turrets will simultaneously attack the player character. Remaining in the chair until the film concludes is dangerous as the robots and turrets open fire immediately. Once the automatons are dealt with, the player character can access a small room with the vault mainframe computer inside. This computer unlocks the door and reveals the true purpose of the vault, determining how long it would take for the population to refuse further sacrifices, essentially a test of self-preservation versus morality. |
||
| − | |||
| − | The atrium can now be accessed, and the [[Vault 11 overseer's terminal password]] can be learned from the terminal on the upper balcony or a holotape, [[Prepared speech of Gus Olson, ombudsman, for the annual overseer election]], on the podium below. This level also features the vault cafeteria, which has a large supply of food and a first aid box. Be careful when entering the cafeteria as there are lethal explosive traps in the doorway. In the back of the cafeteria you will find a kitchen in which there is a gas leak and an explosive trap that is triggered upon entering, which will cause a chain reaction. |
||
| − | |||
| ⚫ | |||
| ⚫ | Accessing the |
||
===="Happy Trails" slides==== |
===="Happy Trails" slides==== |
||
| Line 80: | Line 76: | ||
==Notable loot== |
==Notable loot== |
||
{{Notable content |
{{Notable content |
||
| − | | [[Mini nuke (Fallout: New Vegas)|Mini nuke]] |
+ | | [[Mini nuke (Fallout: New Vegas)|Mini nuke]] - Behind the Hard locked door in the living quarters within the security section. |
| − | | Around 16 to 28 [[Vault jumpsuit (Fallout: New Vegas)#Vault 11 jumpsuit|Vault 11 jumpsuit]]s |
+ | | Around 16 to 28 [[Vault jumpsuit (Fallout: New Vegas)#Vault 11 jumpsuit|Vault 11 jumpsuit]]s - In dressers and lockers in the dorms, which can be sold to Sarah Weintraub in [[Vault 21]] as a part of the unmarked quest ''[[Suits You, Sarah]]''. |
| − | | |
+ | | [[Pugilism Illustrated (Fallout: New Vegas)|Pugilism Illustrated]] - In the northwestern female dorm room, near the southern edge of the local map. It is leaning against the base of an overturned dresser. |
| − | | [[System recording: Vault 11 solution]] and [[Automated solution response]] - |
+ | | [[System recording: Vault 11 solution]] and [[Automated solution response]] holotapes - Can be found on the mainframe terminal next to the sacrificial chamber. |
| − | | [[Differential pressure controller]] - |
+ | | [[Differential pressure controller]] - Found in one of the flooded rooms south in the lower level. |
| − | | [[Justice Bloc HQ security tapes]] - |
+ | | [[Justice Bloc HQ security tapes]] - Given after reading the personal terminal in the living quarters. |
| − | | [[Vault 11 overseer's terminal password]] - |
+ | | [[Vault 11 overseer's terminal password]] - On the atrium terminal in the vault's lower level. |
| [[Prepared speech of Gus Olson, ombudsman, for the annual overseer election]] - On the podium stand in the atrium. |
| [[Prepared speech of Gus Olson, ombudsman, for the annual overseer election]] - On the podium stand in the atrium. |
||
| − | | [[Roy Gottlieb's terminal password]] - |
+ | | [[Roy Gottlieb's terminal password]] - In a footlocker near the terminal in the southwestern room of the male dorm area in the living quarters. |
| − | | Up to 20 bottles of [[Nuka-Cola (Fallout: New Vegas)|Nuka-Cola]] |
+ | | Up to 20 bottles of [[Nuka-Cola (Fallout: New Vegas)|Nuka-Cola]] - Can be found inside a large metal crate in the kitchen area of the cafeteria. |
}} |
}} |
||
==Related quests== |
==Related quests== |
||
| + | * [[Still in the Dark]] |
||
| − | * [[Still in the Dark]] - find the [[differential pressure controller]], one of the parts needed to repair [[Hidden Valley]]'s air filtration system. |
||
| + | * ''[[Democracy Inaction]]'' |
||
| − | * ''[[Democracy Inaction]]'' - at the entrance lies a [[10mm pistol (Fallout: New Vegas)|10mm pistol]] and four skeletons. Discovering the fate of these bodies is the objective of the quest. |
||
| − | * ''[[Suits You, Sarah]]'' |
+ | * ''[[Suits You, Sarah]]'' |
==Notes== |
==Notes== |
||
* The background music is ''[[Industrial Junk]]'', which was originally used for [[Junktown]] in ''[[Fallout]]'', and [[Gecko (town)|Gecko]] in ''[[Fallout 2]]''. |
* The background music is ''[[Industrial Junk]]'', which was originally used for [[Junktown]] in ''[[Fallout]]'', and [[Gecko (town)|Gecko]] in ''[[Fallout 2]]''. |
||
| − | * Failing to take the differential pressure controller |
+ | * Failing to take the differential pressure controller when leaving Vault 11 can result in failing the quest [[Still in the Dark]]. |
| − | * Due to the large number of [[Giant rat (Fallout: New Vegas)|giant rats]] in this vault, if [[Rex (Fallout: New Vegas)|Rex]] is |
+ | * Due to the large number of [[Giant rat (Fallout: New Vegas)|giant rats]] in this vault, if [[Rex (Fallout: New Vegas)|Rex]] is a [[Fallout: New Vegas companions|companion]], he will constantly growl and stalk around the floor he is currently on until all rats in the area are dead. The player character will usually be unable to talk to Rex when he is doing this, and upon selecting the ''Talk'' option in the companion wheel, Rex will reply with a high-pitched *bark-bark*. |
| − | * Right past a classroom in the common areas |
+ | * Right past a classroom in the common areas in the first hallway to the left, just past the vault entrance, an [[NCR trooper]] corpse can be found. |
| − | * When facing the door to the |
+ | * When facing the door to the Mojave Wasteland from the entrance tunnel, the direction is exactly south, but after exiting the vault, the door faces southeast. |
* Vault 11 is in the opening cinematic of ''Fallout: New Vegas''. |
* Vault 11 is in the opening cinematic of ''Fallout: New Vegas''. |
||
* When closed, the vault number on the main door doesn't light up like the rest of the vault doors. |
* When closed, the vault number on the main door doesn't light up like the rest of the vault doors. |
||
| − | * |
+ | * With the [[Wild Wasteland]] perk, [[Rodent of unusual size|rodents of unusual size]] can appear in here. |
* In the sacrificial chamber, after the presentation is finished and the doors open up, there are 16 skeletons on the ground. |
* In the sacrificial chamber, after the presentation is finished and the doors open up, there are 16 skeletons on the ground. |
||
* South of the vault, on the edge of the El Dorado dry lake, a worn billboard for the Lucky 38 can be found. On it is the number 11 next to a torn section of the billboard, if positioned right, the tear will line up with the entrance to Vault 11 on the other side of the dry lake. |
* South of the vault, on the edge of the El Dorado dry lake, a worn billboard for the Lucky 38 can be found. On it is the number 11 next to a torn section of the billboard, if positioned right, the tear will line up with the entrance to Vault 11 on the other side of the dry lake. |
||
{{FNVCC}} |
{{FNVCC}} |
||
| − | * Though the first audio log is ambiguous as to the fate of the fifth survivor, a male NPC identified as "[[Vault 11 survivor]]" exists in the resources of ''Fallout: New Vegas''. Though he was ultimately cut prior to the release of the game, the presence of the NPC points to the |
+ | * Though the first audio log is ambiguous as to the fate of the fifth survivor, a male NPC identified as "[[Vault 11 survivor]]" exists in the resources of ''Fallout: New Vegas''. Though he was ultimately cut prior to the release of the game, the presence of the NPC points to the survival of the last person heard on the audio log. |
{{FNVCC|end}} |
{{FNVCC|end}} |
||
| Line 117: | Line 113: | ||
==Behind the scenes== |
==Behind the scenes== |
||
* Vault 11 was designed by [[Eric Fenstermaker]]. |
* Vault 11 was designed by [[Eric Fenstermaker]]. |
||
| − | * The vault may be a variation on the [[Wikipedia:Milgram experiment|Milgram experiment on obedience to authority figures |
+ | * The vault may be a variation on the [[Wikipedia:Milgram experiment|Milgram experiment]], focused on obedience to authority figures. The experiment involved assessing to what extent participants would violate their own morals when given an order from an authority figure. The commands telling you to sit in the chair in the sacrificial chamber are clearly patterned after the ones used in the Milgram experiment: |
{| class="va-table va-table-top va-table-full" |
{| class="va-table va-table-top va-table-full" |
||
| Line 141: | Line 137: | ||
* The actions that took place in Vault 11 may also be inspired by the short story ''[[Wikipedia:The Lottery|The Lottery]]'' by [[Wikipedia:Shirley Jackson|Shirley Jackson]]. In the story, a lottery is held annually, and the person who "wins" is stoned to death. The stoning is also to ensure the prosperity of the community. |
* The actions that took place in Vault 11 may also be inspired by the short story ''[[Wikipedia:The Lottery|The Lottery]]'' by [[Wikipedia:Shirley Jackson|Shirley Jackson]]. In the story, a lottery is held annually, and the person who "wins" is stoned to death. The stoning is also to ensure the prosperity of the community. |
||
| − | * The sacrifice sequence in the vault is very similar to the euthanasia scene in the film Soylent Green. |
+ | * The sacrifice sequence in the vault is very similar to the euthanasia scene in the film ''Soylent Green''. |
* The poster with the slogan "I Hate Nate" is a reference to U.S. President Dwight D. Eisenhower's "I Like Ike" campaign. |
* The poster with the slogan "I Hate Nate" is a reference to U.S. President Dwight D. Eisenhower's "I Like Ike" campaign. |
||
==Bugs== |
==Bugs== |
||
| − | * {{Platforms|ps3,xbox360}} You can obtain XP until you reach level 30 by interacting with the computer in the sacrificial chamber and choosing the last option repeatedly. This will not work after logging off of the terminal.(patched){{verify|verified}} |
+ | * {{Platforms|ps3,xbox360}} You can obtain XP until you reach level 30 by interacting with the computer in the sacrificial chamber and choosing the last option repeatedly. This will not work after logging off of the terminal. (patched){{verify|verified}} |
* {{Platforms|ps3,xbox360}} The giant mantis appear to be extremely large here, to the point where they get stuck on the terrain and furniture.{{verify|verified}} |
* {{Platforms|ps3,xbox360}} The giant mantis appear to be extremely large here, to the point where they get stuck on the terrain and furniture.{{verify|verified}} |
||
| − | * {{Platforms|pc,xbox360}} There is a dresser in the |
+ | * {{Platforms|pc,xbox360}} There is a dresser in the central north area of the male dorm which does not show as empty, but which contains nothing.{{verify|verified}} |
| − | * {{Platforms|pc,ps3,xbox360}} Once completing the suicide chamber it is possible to fail [[The House Always Wins]] quests leaving your aid to Mr. House at a dead end. This bug occurs when you have companions with you, so it's best to have them wait in the tunnel before entering the suicide chamber.{{verify|verified}} |
+ | * {{Platforms|pc,ps3,xbox360}} Once completing the suicide chamber, it is possible to fail [[The House Always Wins]] quests leaving your aid to Mr. House at a dead end. This bug occurs when you have companions with you, so it's best to have them wait in the tunnel before entering the suicide chamber.{{verify|verified}} |
* {{Platforms|ps3,xbox360}} It is possible for ED-E to be knocked unconscious and disappear, but still appear on the world map as if in the vault.{{verify|verified}} |
* {{Platforms|ps3,xbox360}} It is possible for ED-E to be knocked unconscious and disappear, but still appear on the world map as if in the vault.{{verify|verified}} |
||
| − | * {{Platforms|ps3}} There are lockers that appear as though they have something in them. However when they are opened, they turn out to be empty. This is similar to the Xbox glitch mentioned above with the dresser.{{verify|verified}} |
+ | * {{Platforms|ps3}} There are lockers that appear as though they have something in them. However, when they are opened, they turn out to be empty. This is similar to the Xbox glitch mentioned above with the dresser.{{verify|verified}} |
* {{Platforms|xbox360}} The infinite XP glitch will work by transferring mantis forelegs back and forth from a giant mantis corpse, or between a companion.{{verify|verified}} |
* {{Platforms|xbox360}} The infinite XP glitch will work by transferring mantis forelegs back and forth from a giant mantis corpse, or between a companion.{{verify|verified}} |
||
| − | * {{Platforms|pc}} When saving inside the vault, reloading that save may |
+ | * {{Platforms|pc}} When saving inside the vault, reloading that save may cause companions to disappear.{{verify|verified}} |
* {{Platforms|pc,xbox360}} Saving after beginning the descent down the stairs to the sacrificial chamber causes the quest to stop responding when you reload that saved game. The first time the quest will trigger and finish, upon loading the saved game, you can walk all the way to the end of the hallway, but the movie will not start and there will not be a blinding light as you enter the final room. (Have not checked by exiting and reentering the vault. That may reset it entirely).{{verify|verified}} |
* {{Platforms|pc,xbox360}} Saving after beginning the descent down the stairs to the sacrificial chamber causes the quest to stop responding when you reload that saved game. The first time the quest will trigger and finish, upon loading the saved game, you can walk all the way to the end of the hallway, but the movie will not start and there will not be a blinding light as you enter the final room. (Have not checked by exiting and reentering the vault. That may reset it entirely).{{verify|verified}} |
||
| − | *{{Platforms|xbox360}} The Stealth Boy in the locked security room may not spawn.{{ |
+ | *{{Platforms|xbox360}} The Stealth Boy in the locked security room may not spawn.{{verify|verified}} |
| − | * {{Platforms|pc,xbox360}} |
+ | * {{Platforms|pc,xbox360}} Members of the NCR Military Police appear suddenly in the cafeteria. They speak briefly then attack without cause.{{verify|verified}} |
==Gallery== |
==Gallery== |
||
<gallery widths=200> |
<gallery widths=200> |
||
| − | Vault11_Sacrificial_Chamber.jpg|Sacrificial |
+ | Vault11_Sacrificial_Chamber.jpg|Sacrificial chamber |
Vault 11 mainframe ASR.jpg|The mainframe |
Vault 11 mainframe ASR.jpg|The mainframe |
||
Vault 11 Interior.jpeg|An overview of the Vault 11 walls with propaganda posters |
Vault 11 Interior.jpeg|An overview of the Vault 11 walls with propaganda posters |
||
| Line 177: | Line 173: | ||
{{Navbox Vault 11}} |
{{Navbox Vault 11}} |
||
| + | {{DEFAULTSORT:Vault 011}} |
||
| − | [[Category:Vaults]] |
||
| + | |||
[[Category:Vault 11| ]] |
[[Category:Vault 11| ]] |
||
| − | [[Category:Fallout: New Vegas locations]] |
||
[[de:Vault 11]] |
[[de:Vault 11]] |
||
Revision as of 03:26, 14 February 2020
Vault 11 is one of the Vault-Tec vaults, located in the Mojave Wasteland. It is west of Boulder City and southwest of the 188 trading post.
Background
Vault 11 was likely constructed along with the other Vault-Tec vaults in the mid-2060s to the early 2070s. As with the majority of other vaults, Vault 11 served as a social experiment. Through this experiment, the inhabitants of Vault 11 were told one of their fellow vault dwellers each year must be killed, lest everyone else meet the same fate should they refuse. In actuality, if the residents refused, an "Automated solution response" message would be played. The message stated that by choosing not to select one of their own as a sacrifice, the dwellers are "a shining example to humanity" and that no one will be killed. They are also informed that the vault door is hereby unlocked, allowing free passage to and from the vault, but are urged to consult with their overseer before doing so. However, by the time Vault 11 inhabitants chose the enlightened path, only five vault dwellers remained.
Evidence gathered from computer terminals throughout the vault describes how vault residents selected an annual sacrifice from among their members. This individual would serve as overseer, and at the end of their term, they were required to enter a chamber and submit to execution. According to the residents, this would satisfy the requirement and spare the remaining dwellers. Of the original residents, only the overseer entered the vault with knowledge of such requirements. Shocked and disgusted with the situation they found themselves in, and resentful towards the overseer for neglecting to share the information before sealing the vault doors, the residents chose the original overseer as the first sacrifice.
The tradition of electing an overseer as the next condemned resident persisted onward. Several pseudo-political powers, known as voting blocs, emerged to influence nomination and selection. The Coalition of Vault 11 Voting Blocs provided information and oversight of this process. Six main voting blocs jostled for power, including the Allied Service Workers Bloc, Divine Will Bloc, Human Dignity Bloc, Justice Bloc, United Vault Technicians Bloc, and the Utilitarian Bloc. These blocs would nominate and support overseer candidates based on their own initiatives, and slather propaganda and libel laded posters on the vault walls to garner support prior to each election.
The final overseer
The selection process devolved significantly over time, resulting in deplorable manipulations and actions perpetrated by bloc leaders. Prior to the final election, members of the most powerful group, the Justice Bloc, led by Roy Gottlieb, extorted sexual favors from fellow resident Katherine Stone. They threatened to nominate her husband, Nathan, as overseer should she resist. Due to their overwhelming influence as a voting bloc, this would essentially be a death sentence for her husband, and she capitulated to their demands. Afterward, the Justice Bloc members betrayed Katherine, nominating her husband regardless of her submission to their whims.
Out of desperation, despair, and indignation, Katherine enacted a plan of retribution, subsequently murdering members of the Justice Bloc one by one. This worked for Katherine in two ways, as she had not only set the stage for reprisal but also would be a clear choice for the next overseer in place of her husband, effectively saving his life. Katherine's plan succeeded on both accounts, and after the murder of Justice Bloc members, she was elected as the next vault overseer.
Katherine Stone's first act as overseer, "Overseer Order 745," dissolved the election process entirely and decreed that moving forward, the position of overseer would be chosen at random using the vault's computer systems. The Justice Bloc, aghast at the thought of losing their control and influence over the vault population, decided to stage an armed coup. The fighting that ensued killed nearly all of the remaining vault dwellers.
The Final Sacrifice
The first audio log discovered by the player character as they enter the vault reveals the fate of the few survivors. Despondent after witnessing the deaths of their community members, they chose death by suicide, defying the vault computer's requirement for sacrifices and waiting for the subsequent consequences. They were bewildered by the discovery that their defiance was the original goal of the social experiment all along. They were given the freedom to leave the vault and congratulated for their selflessness.
Learning the harrowing truth about the vault experiment led the survivors further into despair and regret. The five survivors discussed committing suicide to punish themselves for the events that happened in the vault, and to prevent the outside world from learning about their shameful behavior. However, they were not unanimous in their decision. In the audio log, an argument is heard between a man referred to as "Voice 1", trying to convince the other four (three males and a female) to leave the vault. Voice 2 (female), 3 (referred to as Harry), 4 and 5 wish to die. Voice 1 tries to convince the rest to leave the vault and spread the word about what happened there, so that others may learn from their mistakes. At the end of the audio log, four gunshots can be heard, followed by a heavy sigh and the sound of a gun falling to the floor. Four bodies are found in the entrance of the vault.
Layout
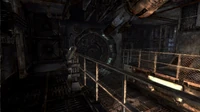
Prior to entering the vault, there is a hollowed-out rock to the right of the main door. The reactor and the water purification system of Vault 11 has been damaged by age and the civil war among the dwellers. Therefore radioactivity and radioactive water are some of the main hazards of the vault. Since portions of the vault are underwater, many sections can only be explored while wearing a rebreather or by judicious use of air pockets in the flooded areas. Enemies encountered inside the vault include giant mantises, giant rats, and bark scorpions.
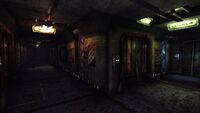
The entire vault has been plastered with propaganda for an election for a new overseer, with each candidate is expressing outrage and incredulity at having been nominated and why the other candidates deserve to be overseer instead. This is juxtaposed to commonly understood elections, where the opposite goals are seen, and instills a sense of perplexity to the uninitiated. Throughout the vault, sandbag barricades, multiple traps, and several skeletons serve as evidence of violent conflict.
Entrance level
The vault's entryway contains four skeletons and an audio log. A working terminal near the door allows the Courier to access more information regarding the fate of the vault. The next room has hallways to the vault clinic, classroom, and cigar lounge. To the right, a hallway with access to bathrooms and a staircase can be found.
Living quarters
The stairs lead to a lab and a computer room. One of the computers is booby-trapped with explosives. A large common room connects hallways leading to the male and female dorms, as well as an exit labeled "Admin". This doorway leads to the security office, and to the levels containing the overseer's office and the utility room. The dorms are comprised of long, interconnected hallways and bedrooms. Several Vault 11 jumpsuits can be found here in lockers and dressers. Another audio log can be found on a locked terminal, with the password in a footlocker a short distance away.
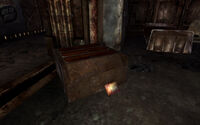
There is a copy of Pugilism Illustrated in the female dorm, second door on the right, under the overturned dresser upon entering. A small cache of flamer fuel and 5.56 rounds is concealed under and behind a large immovable mop bucket in the male dorms.
Through the door marked "Admin", following the stairs and turning to the left is a Hard locked door, which can also be unlocked by the adjacent Very Hard locked terminal. This door leads to a storage room with an assortment of ammunition, including a mini nuke. The security office contains a terminal with Katherine Stone's deposition, and more ammunition. At the opposite end of the hall are several flights of stairs leading down to the lower levels.
Lower level
The overseer's office is past a hallway on the right and has a rigged shotgun pointed at the entrance. The terminal here requires a password to access. Past the office is a blocked passage to the atrium. The hallway before the office leads to the utility room and another blocked passage to the atrium.
In the utility room, the differential pressure controller required for the Still in the Dark quest for the Brotherhood of Steel is located in a locker in the right-hand side of the submerged room. The utility room provides access to the atrium via the flooded lower reactor level. Conversely, a set of Average locked doors can be picked one floor above to circumvent the flooded areas. In the atrium, the Vault 11 overseer's terminal password is found on the upper balcony terminal. A holotape, Prepared speech of Gus Olson, ombudsman, for the annual overseer election, is found on the podium below. This level also features the vault cafeteria, which has a large supply of food and a first aid box. The cafeteria's entrance is boobytrapped with explosives and a gas leak located here can cause a violent chain reaction.
Sacrificial chamber
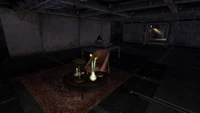
Accessing the overseer's terminal with the aforementioned password can open a chamber under the desk. This opens into a long tunnel. At this point, a pre-programmed voice speaks as the Courier approaches a door illuminated by a bright light. At the end of the tunnel is a room with a single chair in the center, along with a projector. The voice instructs the player character to sit in the chair to start the presentation. Delaying this will cause the recording to repeat, "you have no choice but to sit in the chair" until the Courier complies. The exit door locks as soon as the presentation starts. Pleasant scenes are shown while a voice reassures the individual that they lived a good life and their next one will be better yet. At the conclusion of the presentation, wall panels on both sides of the room slide back, and four robots and eight turrets will simultaneously attack the player character. Remaining in the chair until the film concludes is dangerous as the robots and turrets open fire immediately. Once the automatons are dealt with, the player character can access a small room with the vault mainframe computer inside. This computer unlocks the door and reveals the true purpose of the vault, determining how long it would take for the population to refuse further sacrifices, essentially a test of self-preservation versus morality.
"Happy Trails" slides
The Happy Trails slide show is a presentation created by Vault-Tec Industries specifically for use in Vault 11 and its experiment. The slide show would play when a chosen sacrifice would enter the sacrificial chamber and sit down in the chair in the middle of the room. The purpose of the slide show was meant to bring the sacrifice to false sense calm and acceptance before their violent death.
Notable loot
- Mini nuke - Behind the Hard locked door in the living quarters within the security section.
- Around 16 to 28 Vault 11 jumpsuits - In dressers and lockers in the dorms, which can be sold to Sarah Weintraub in Vault 21 as a part of the unmarked quest Suits You, Sarah.
- Pugilism Illustrated - In the northwestern female dorm room, near the southern edge of the local map. It is leaning against the base of an overturned dresser.
- System recording: Vault 11 solution and Automated solution response holotapes - Can be found on the mainframe terminal next to the sacrificial chamber.
- Differential pressure controller - Found in one of the flooded rooms south in the lower level.
- Justice Bloc HQ security tapes - Given after reading the personal terminal in the living quarters.
- Vault 11 overseer's terminal password - On the atrium terminal in the vault's lower level.
- Prepared speech of Gus Olson, ombudsman, for the annual overseer election - On the podium stand in the atrium.
- Roy Gottlieb's terminal password - In a footlocker near the terminal in the southwestern room of the male dorm area in the living quarters.
- Up to 20 bottles of Nuka-Cola - Can be found inside a large metal crate in the kitchen area of the cafeteria.
Related quests
Notes
- The background music is Industrial Junk, which was originally used for Junktown in Fallout, and Gecko in Fallout 2.
- Failing to take the differential pressure controller when leaving Vault 11 can result in failing the quest Still in the Dark.
- Due to the large number of giant rats in this vault, if Rex is a companion, he will constantly growl and stalk around the floor he is currently on until all rats in the area are dead. The player character will usually be unable to talk to Rex when he is doing this, and upon selecting the Talk option in the companion wheel, Rex will reply with a high-pitched *bark-bark*.
- Right past a classroom in the common areas in the first hallway to the left, just past the vault entrance, an NCR trooper corpse can be found.
- When facing the door to the Mojave Wasteland from the entrance tunnel, the direction is exactly south, but after exiting the vault, the door faces southeast.
- Vault 11 is in the opening cinematic of Fallout: New Vegas.
- When closed, the vault number on the main door doesn't light up like the rest of the vault doors.
- With the Wild Wasteland perk, rodents of unusual size can appear in here.
- In the sacrificial chamber, after the presentation is finished and the doors open up, there are 16 skeletons on the ground.
- South of the vault, on the edge of the El Dorado dry lake, a worn billboard for the Lucky 38 can be found. On it is the number 11 next to a torn section of the billboard, if positioned right, the tear will line up with the entrance to Vault 11 on the other side of the dry lake.
| The following is based on Fallout: New Vegas cut content. |
- Though the first audio log is ambiguous as to the fate of the fifth survivor, a male NPC identified as "Vault 11 survivor" exists in the resources of Fallout: New Vegas. Though he was ultimately cut prior to the release of the game, the presence of the NPC points to the survival of the last person heard on the audio log.
| End of information based on Fallout: New Vegas cut content |
Appearances
Vault 11 appears only in Fallout: New Vegas.
Behind the scenes
- Vault 11 was designed by Eric Fenstermaker.
- The vault may be a variation on the Milgram experiment, focused on obedience to authority figures. The experiment involved assessing to what extent participants would violate their own morals when given an order from an authority figure. The commands telling you to sit in the chair in the sacrificial chamber are clearly patterned after the ones used in the Milgram experiment:
| Vault 11 | Milgram experiment |
|---|---|
| Welcome. Please sit in the chair. The show is about to begin. | Please continue. |
| The show requires that you sit in the chair. | The experiment requires that you continue. |
| It is absolutely essential that you sit in the chair. | It is absolutely essential that you continue. |
| You have no other choice. You must sit in the chair. | You have no other choice. You must go on. |
- The actions that took place in Vault 11 may also be inspired by the short story The Lottery by Shirley Jackson. In the story, a lottery is held annually, and the person who "wins" is stoned to death. The stoning is also to ensure the prosperity of the community.
- The sacrifice sequence in the vault is very similar to the euthanasia scene in the film Soylent Green.
- The poster with the slogan "I Hate Nate" is a reference to U.S. President Dwight D. Eisenhower's "I Like Ike" campaign.
Bugs
- You can obtain XP until you reach level 30 by interacting with the computer in the sacrificial chamber and choosing the last option repeatedly. This will not work after logging off of the terminal. (patched)[verified]
- The giant mantis appear to be extremely large here, to the point where they get stuck on the terrain and furniture.[verified]
- There is a dresser in the central north area of the male dorm which does not show as empty, but which contains nothing.[verified]
- Once completing the suicide chamber, it is possible to fail The House Always Wins quests leaving your aid to Mr. House at a dead end. This bug occurs when you have companions with you, so it's best to have them wait in the tunnel before entering the suicide chamber.[verified]
- It is possible for ED-E to be knocked unconscious and disappear, but still appear on the world map as if in the vault.[verified]
- There are lockers that appear as though they have something in them. However, when they are opened, they turn out to be empty. This is similar to the Xbox glitch mentioned above with the dresser.[verified]
- The infinite XP glitch will work by transferring mantis forelegs back and forth from a giant mantis corpse, or between a companion.[verified]
- When saving inside the vault, reloading that save may cause companions to disappear.[verified]
- Saving after beginning the descent down the stairs to the sacrificial chamber causes the quest to stop responding when you reload that saved game. The first time the quest will trigger and finish, upon loading the saved game, you can walk all the way to the end of the hallway, but the movie will not start and there will not be a blinding light as you enter the final room. (Have not checked by exiting and reentering the vault. That may reset it entirely).[verified]
- The Stealth Boy in the locked security room may not spawn.[verified]
- Members of the NCR Military Police appear suddenly in the cafeteria. They speak briefly then attack without cause.[verified]
Gallery
| |||||||||||||||||||||||||||||||||||||||||||||||||||
| |||||||||||||||||||||||||

