Lakewalker (talk | contribs) m (→General Information: T-series chances of finding different types) |
Lakewalker (talk | contribs) (Improved maps of all locations, locations reorganized by map areas) |
||
| Line 15: | Line 15: | ||
There are three quest related power armors, [[Excavator power armor]], [[Ultracite power armor]], and [[X-01 power armor]]. For details on obtaining them look on their pages |
There are three quest related power armors, [[Excavator power armor]], [[Ultracite power armor]], and [[X-01 power armor]]. For details on obtaining them look on their pages |
||
| − | Power armor has very little scrap or sale value, the chassis cannot be scrapped or sold. Players abandon power armor after finding more desirable pieces and these locations have sometimes been erroneously reported on other websites as spawn points. |
+ | Power armor has very little scrap or sale value, the chassis cannot be scrapped or sold. Players abandon power armor after finding more desirable pieces and these locations have sometimes been erroneously reported on other websites as spawn points. All locations listed here have been verified by multiple sightings. |
| − | Some spawn points are at named locations, some are not and are listed with the nearest named location. The |
+ | Some spawn points are at named locations, some are not and are listed with the nearest named location. The power armor icon on the map images show the actual power armor location or the entrance to the building, mine, cave, or tunnel if the location is inside since the map marker does not move once a player character enters one of those areas. |
==[[The Forest]]== |
==[[The Forest]]== |
||
| + | ===North Forest=== |
||
| + | [[File:FO76_Power_Armor_map_Forest_North.jpg|thumb|600px]] |
||
{| class="va-table va-table-center va-table-full" |
{| class="va-table va-table-center va-table-full" |
||
|- valign="top" |
|- valign="top" |
||
| Line 26: | Line 28: | ||
! Description |
! Description |
||
! Image |
! Image |
||
| + | |- |
||
| − | ! Map image |
||
| + | | [[The Crosshair]] |
||
| + | | Raider |
||
| + | | Under the rock overhang in the back of the area. |
||
| + | | [[File:PowerArmor_The_Crosshair.png|170px]] |
||
| + | |- |
||
| + | | [[WV Lumber Co.]] |
||
| + | | T-series |
||
| + | | At a power armor station in the two story metal building on the east side of the complex. |
||
| + | | [[File:PowerArmor_WV_Lumber_Co.png|170px]] |
||
|- |
|- |
||
| [[Aaronholt homestead]] |
| [[Aaronholt homestead]] |
||
| Line 32: | Line 43: | ||
| In the shed with a skill 1 lock next to the two silos far south of the farm houses, next to the road. The door can be picked or opened with the [[Fallout 76 keys|Aaronholt granary shed key]]. |
| In the shed with a skill 1 lock next to the two silos far south of the farm houses, next to the road. The door can be picked or opened with the [[Fallout 76 keys|Aaronholt granary shed key]]. |
||
| [[File:PowerArmor_Aaronholt_Homestead.png|170px]] |
| [[File:PowerArmor_Aaronholt_Homestead.png|170px]] |
||
| − | | [[File:PowerArmor_Map_The_Forest_Aaronholt_Homestead.jpg|170px]] |
||
|- |
|- |
||
| + | |} |
||
| − | | [[Arktos Pharma]] |
||
| + | ===East Central Forest=== |
||
| − | | T-Series |
||
| + | [[File:FO76_Power_Armor_Map_Forest_Central_East.jpg|thumb|700px]] |
||
| − | | On the third floor of the loading dock area, behind a security gate opened by a computer terminal, skill 0 hack. |
||
| + | {| class="va-table va-table-center va-table-full" |
||
| − | | [[File:PowerArmor_Arktos_Pharma.png|170px]] |
||
| + | |- valign="top" |
||
| − | | [[File:PowerArmor_Map_The_Forest_Arktos_Pharma.jpg|170px]] |
||
| + | ! Location |
||
| + | ! Type |
||
| + | ! Description |
||
| + | ! Image |
||
|- |
|- |
||
| − | | [[ |
+ | | [[Point Pleasant]] |
| + | | T-series |
||
| − | | Raider |
||
| + | | On the roof of the hardware store. The hardware store is in the north end of the town across the road from the rest of the town beside the bridge. |
||
| − | | Outside of the raider wall on the northwest side |
||
| − | | [[File: |
+ | | [[File:PowerArmor_Point_Pleasant.png|170px]] |
| − | | [[File:PowerArmor_Map_The_Forest_Cliffwatch.jpg|170px]] |
||
|- |
|- |
||
| + | |} |
||
| − | | [[The Crosshair]] |
||
| + | ===West Central Forest=== |
||
| − | | Raider |
||
| + | [[File:FO76_Power_Armor_Map_Forest_Central_West.jpg|thumb|700px]] |
||
| − | | Under the rock overhang in the back of the area. |
||
| + | {| class="va-table va-table-center va-table-full" |
||
| − | | [[File:PowerArmor_The_Crosshair.png|170px]] |
||
| + | |- valign="top" |
||
| − | | [[File:PowerArmor_Map_The_Forest_The_Crosshair.jpg|170px]] |
||
| + | ! Location |
||
| − | |- |
||
| + | ! Type |
||
| − | | [[Fujiniya Intelligence Base]] |
||
| + | ! Description |
||
| − | | T-Series |
||
| + | ! Image |
||
| − | | The intelligence base is underneath [[Mama Dolce's Food Processing]] and the needed entrance keycard is inside the plant. The power armor is in a locked security cage in the lowest level. It can be opened with a second keycard or from a nearby terminal, skill 1 hack. |
||
| − | | [[File:PowerArmor_Fujiniya_Intelligence_Base.png|170px]] |
||
| − | | [[File:PowerArmor_Map_The_Forest_Fujiniya_Intelligence_Base.jpg|170px]] |
||
|- |
|- |
||
| [[Gorge junkyard]] |
| [[Gorge junkyard]] |
||
| Line 62: | Line 73: | ||
| In a green truck trailer w/skill 3 lock, beside a wooden shed east of the workshop. Opening this lock while another player claims the workshop is no longer considered a crime. This was corrected in [[Fallout 76 patch 1.1.0.8]]. |
| In a green truck trailer w/skill 3 lock, beside a wooden shed east of the workshop. Opening this lock while another player claims the workshop is no longer considered a crime. This was corrected in [[Fallout 76 patch 1.1.0.8]]. |
||
| [[File:PowerArmor_Gorge_Junkyard.png|170px]] |
| [[File:PowerArmor_Gorge_Junkyard.png|170px]] |
||
| − | | [[File:PowerArmor_Map_The_Forest_Gorge_Junkyard.jpg|170px]] |
||
|- |
|- |
||
| + | | [[Morgantown trainyard]] |
||
| − | | [[Hornwright Industrial headquarters]] |
||
| − | | T- |
+ | | T-series |
| + | | In a railcar with a crane over it beside the building. |
||
| − | | In the sub-basement. Accessible during and after the side quest [[The Motherlode]]. When entering the sub-basement, the armor is straight ahead, in sight. |
||
| − | | [[File: |
+ | | [[File:PowerArmor_Morgantown_Trainyard.png|170px]] |
| − | | [[File:PowerArmor_Map_The_Forest_Hornwright_Industrial_Headquarters.jpg|170px]] |
||
|- |
|- |
||
| − | | [[ |
+ | | [[Fujiniya Intelligence Base]] |
| T-Series |
| T-Series |
||
| − | | |
+ | | The intelligence base is underneath [[Mama Dolce's Food Processing]] and the needed entrance keycard is inside the plant. The power armor is in a locked security cage in the lowest level. It can be opened with a second keycard or from a nearby terminal, skill 1 hack. |
| − | | [[File: |
+ | | [[File:PowerArmor_Fujiniya_Intelligence_Base.png|170px]] |
| − | | [[File:PowerArmor_Map_The_Forest_Kanawha_Nuka-Cola_Plant.jpg|170px]] |
||
| − | |- |
||
| − | | [[Lewis & Sons Farming Supply]] |
||
| − | | T-Series |
||
| − | | At the power armor station in the barn. |
||
| − | | [[File:PowerArmor_Lewis_&_Sons.png|170px]] |
||
| − | | [[File:PowerArmor_Map_The_Forest_Lewis_&_Sons_Farming_Supply.jpg|170px]] |
||
|- |
|- |
||
| [[Mama Dolce's Food Processing]] |
| [[Mama Dolce's Food Processing]] |
||
| Line 86: | Line 88: | ||
| In a boobytrapped and mined warehouse southwest of Mama Dolce's. It is the building with the outside stairway to the roof. |
| In a boobytrapped and mined warehouse southwest of Mama Dolce's. It is the building with the outside stairway to the roof. |
||
| [[File:PowerArmor_Mama_Dolces_Food_Processing.png|170px]] |
| [[File:PowerArmor_Mama_Dolces_Food_Processing.png|170px]] |
||
| − | | [[File:PowerArmor_Map_The_Forest_Mama_Dulces_Food_Processing.jpg|170px]] |
||
|- |
|- |
||
| − | | [[ |
+ | | [[Arktos Pharma]] |
| − | | T- |
+ | | T-Series |
| + | | On the third floor of the loading dock area, behind a security gate opened by a computer terminal, skill 0 hack. |
||
| − | | In a railcar with a crane over it beside the building. |
||
| − | | [[File: |
+ | | [[File:PowerArmor_Arktos_Pharma.png|170px]] |
| + | |- |
||
| − | | [[File:PowerArmor_Map_The_Forest_Morgantown_Trainyard.jpg|170px]] |
||
| + | |} |
||
| + | |||
| + | ===Southeast Forest=== |
||
| + | [[File:FO76_Power_Armor_Map_Forest_South_East.jpg|thumb|700px]] |
||
| + | {| class="va-table va-table-center va-table-full" |
||
| + | |- valign="top" |
||
| + | ! Location |
||
| + | ! Type |
||
| + | ! Description |
||
| + | ! Image |
||
| + | |- |
||
| + | | [[Silva homestead]] |
||
| + | | T-Series |
||
| + | | At the power armor station in the large rounded metal building near a silo. It is south of Silva Homestead and north of [[Billings homestead]] |
||
| + | | [[File:PowerArmor_Silva_Homestead.png|170px]] |
||
|- |
|- |
||
| [[New River Gorge Bridge]] West |
| [[New River Gorge Bridge]] West |
||
| Line 98: | Line 114: | ||
| West end, behind a locked door that cannot be picked. The key is at [[Camden Park]] on the roller coaster. A fusion core can spawn in the closet just inside the entry door. |
| West end, behind a locked door that cannot be picked. The key is at [[Camden Park]] on the roller coaster. A fusion core can spawn in the closet just inside the entry door. |
||
| [[File:PowerArmor_New_River_Gorge_Bridge.png|170px]] |
| [[File:PowerArmor_New_River_Gorge_Bridge.png|170px]] |
||
| − | | [[File:PowerArmor_Map_The_Forest_New_River_Gorge_Bridge_-_West.jpg|170px]] |
||
|- |
|- |
||
| − | | [[ |
+ | | [[Lewis & Sons Farming Supply]] |
| − | | T- |
+ | | T-Series |
| + | | At the power armor station in the barn. |
||
| − | | On the roof of the hardware store. The hardware store is in the north end of the town across the road from the rest of the town beside the bridge. |
||
| − | | [[File: |
+ | | [[File:PowerArmor_Lewis_&_Sons.png|170px]] |
| + | |- |
||
| − | | [[File:PowerArmor_Map_The_Forest_Point_Pleasant.jpg|170px]] |
||
| + | | [[Kanawha Nuka-Cola plant]] |
||
| + | | T-Series |
||
| + | | Enter the loading dock, use the door on the left and it is in the large room at a power armor station. A fusion core can spawn in a locked security cage through the door to the left of the power armor. |
||
| + | | [[File:PowerArmor_Kanawha_Nuka-Cola_plant.png|170px]] |
||
|- |
|- |
||
| [[Poseidon Energy Plant WV-06]] |
| [[Poseidon Energy Plant WV-06]] |
||
| Line 110: | Line 129: | ||
| In the basement, in a locked security cage in the room labled "Workroom." The key to the room is found in the main office or the skill 2 lock can be picked. A fusion core can also spawn on the table. One route is to look for the single cooling tower on the left (south). Go in the door closest to the tower, follow signs for "Cooling Tower #3". Go through the cooling tower then follow the hallway to the door labeled "Main Plant". The Workroom is straight ahead. |
| In the basement, in a locked security cage in the room labled "Workroom." The key to the room is found in the main office or the skill 2 lock can be picked. A fusion core can also spawn on the table. One route is to look for the single cooling tower on the left (south). Go in the door closest to the tower, follow signs for "Cooling Tower #3". Go through the cooling tower then follow the hallway to the door labeled "Main Plant". The Workroom is straight ahead. |
||
| [[File:PowerArmor_Poseidon_Energy_Plant_WV-06.png|170px]] |
| [[File:PowerArmor_Poseidon_Energy_Plant_WV-06.png|170px]] |
||
| − | | [[File:PowerArmor_Map_The_Forest_Poseidon_Energy_Plant_WV_06.jpg|170px]] |
||
|- |
|- |
||
| + | | [[Hornwright Industrial headquarters]] |
||
| − | | [[Silva homestead]] |
||
| T-Series |
| T-Series |
||
| + | | In the sub-basement. Accessible during and after the side quest [[The Motherlode]]. When entering the sub-basement, the armor is straight ahead, in sight. |
||
| − | | At the power armor station in the large rounded metal building near a silo. It is south of Silva Homestead and north of [[Billings homestead]] |
||
| − | | [[File: |
+ | | [[File:PowerArmor_Hornwright_HQ.png|170px]] |
| − | | [[File:PowerArmor_Map_The_Forest_Silva_Homestead.jpg|170px]] |
||
|- |
|- |
||
| [[Wade Airport]] North |
| [[Wade Airport]] North |
||
| Line 122: | Line 139: | ||
| In the hanger immediately north of the control tower. |
| In the hanger immediately north of the control tower. |
||
| [[File:PowerArmor_Wade_Airport_North.png|170px]] |
| [[File:PowerArmor_Wade_Airport_North.png|170px]] |
||
| − | | [[File:PowerArmor_Map_The_Forest_Wade_Airport_-_North.jpg|170px]] |
||
|- |
|- |
||
| [[Wade Airport]] South |
| [[Wade Airport]] South |
||
| Line 128: | Line 144: | ||
| In a blue truck trailer at the south end of the runway with a skill 2 lock. There can also be a plasma mine under the trailer. Opening this lock while another player claims the workshop is no longer considered a crime. This was corrected in [[Fallout 76 patch 1.1.0.8]]. |
| In a blue truck trailer at the south end of the runway with a skill 2 lock. There can also be a plasma mine under the trailer. Opening this lock while another player claims the workshop is no longer considered a crime. This was corrected in [[Fallout 76 patch 1.1.0.8]]. |
||
| [[File:PowerArmor_Wade_Airport_South.png|170px]] |
| [[File:PowerArmor_Wade_Airport_South.png|170px]] |
||
| − | | [[File:PowerArmor_Map_The_Forest_Wade_Airport_-_South.jpg|170px]] |
||
|- |
|- |
||
| + | |} |
||
| − | | [[WV Lumber Co.]] |
||
| + | ===Southwest Forest=== |
||
| − | | T-series |
||
| + | [[File:FO76_Power_Armor_Map_Forest_South_West.jpg|thumb|700px]] |
||
| − | | At a power armor station in the two story metal building on the east side of the complex. |
||
| + | {| class="va-table va-table-center va-table-full" |
||
| − | | [[File:PowerArmor_WV_Lumber_Co.png|170px]] |
||
| + | |- valign="top" |
||
| − | | [[File:PowerArmor_Map_The_Forest_WV_Lumber_Co.jpg|170px]] |
||
| + | ! Location |
||
| + | ! Type |
||
| + | ! Description |
||
| + | ! Image |
||
| + | |- |
||
| + | | [[Cliffwatch]] |
||
| + | | Raider |
||
| + | | Outside of the raider wall on the northwest side |
||
| + | | [[File:PowerArmor_Cliffwatch.png|170px]] |
||
| + | |- |
||
|} |
|} |
||
==[[Toxic Valley]]== |
==[[Toxic Valley]]== |
||
| + | [[File:FO76_Power_Armor_Map_Toxic_Valley.jpg|thumb|700px]] |
||
{| class="va-table va-table-center va-table-full" |
{| class="va-table va-table-center va-table-full" |
||
|- valign="top" |
|- valign="top" |
||
| Line 144: | Line 170: | ||
! Description |
! Description |
||
! Image |
! Image |
||
| + | |- |
||
| − | | Map image |
||
| + | | [[Crashed space station]] |
||
| + | | Raider |
||
| + | | Outside on the upper deck of the observation shack on the southeast rim of the crater. In verifying this location, armor was found only 3 times in 20-25 visits. |
||
| + | | [[File:PowerArmor_Crashed_space_station.png|170px]] |
||
|- |
|- |
||
| [[Black Bear lodge]] |
| [[Black Bear lodge]] |
||
| Line 150: | Line 180: | ||
| In the shed on the west side of the lodge. |
| In the shed on the west side of the lodge. |
||
| [[File:PowerArmor_Black_Bear_Lodge.png|170px]] |
| [[File:PowerArmor_Black_Bear_Lodge.png|170px]] |
||
| − | | [[File:PowerArmor_Map_Toxic_Valley_Black_Bear_Lodge.jpg|170px]] |
||
|- |
|- |
||
| [[Clarksburg]] |
| [[Clarksburg]] |
||
| Line 156: | Line 185: | ||
| In the room on the top floor of the tallest building which is in the southeast corner of town. Access is across the rooftops. |
| In the room on the top floor of the tallest building which is in the southeast corner of town. Access is across the rooftops. |
||
| [[File:PowerArmor_Clarksburg.png|170px]] |
| [[File:PowerArmor_Clarksburg.png|170px]] |
||
| − | | [[File:PowerArmor_Map_Toxic_Valley_Clarksburg.jpg|170px]] |
||
| − | |- |
||
| − | | [[Crashed space station]] |
||
| − | | Raider |
||
| − | | Outside on the upper deck of the observation shack on the southeast rim of the crater. In verifying this location, armor was found only 3 times in 20-25 visits. |
||
| − | | [[File:PowerArmor_Crashed_space_station.png|170px]] |
||
| − | | [[File:PowerArmor_Map_Toxic_Valley_Crashed_Space_Station.jpg|170px]] |
||
|- |
|- |
||
| [[Eastern Regional Penitentiary]] |
| [[Eastern Regional Penitentiary]] |
||
| Line 168: | Line 190: | ||
| In a shed in the prison yard. There are a quite a number of low level super mutants in this area. |
| In a shed in the prison yard. There are a quite a number of low level super mutants in this area. |
||
| [[File:PowerArmor_Eastern_Regional_Penitentiary.png|170px]] |
| [[File:PowerArmor_Eastern_Regional_Penitentiary.png|170px]] |
||
| − | | [[File:PowerArmor_Map_Toxic_Valley_Eastern_Regional_Penitentiary.jpg|170px]] |
||
|- |
|- |
||
| [[Grafton Dam]] |
| [[Grafton Dam]] |
||
| Line 174: | Line 195: | ||
| In a shed in a fenced area on the west side of the dam. There are a half dozen super mutants in this area. |
| In a shed in a fenced area on the west side of the dam. There are a half dozen super mutants in this area. |
||
| [[File:PowerArmor_Grafton_Dam.png|170px]] |
| [[File:PowerArmor_Grafton_Dam.png|170px]] |
||
| − | | [[File:PowerArmor_Map_Toxic_Valley_Grafton_Dam.jpg|170px]] |
||
|} |
|} |
||
==[[Savage Divide]]== |
==[[Savage Divide]]== |
||
| + | ===North Savage Divide=== |
||
| + | [[File:FO76_Power_Armor_map_Savage_Divide_North.jpg|thumb|700px]] |
||
{| class="va-table va-table-center va-table-full" |
{| class="va-table va-table-center va-table-full" |
||
|- valign="top" |
|- valign="top" |
||
| Line 184: | Line 206: | ||
! Description |
! Description |
||
! Image |
! Image |
||
| − | | Map image |
||
| − | |- |
||
| − | | [[Ammo dump]] |
||
| − | | T-Series |
||
| − | | In plain sight at a power armor station |
||
| − | | [[File:PowerArmor_Ammo_Dump.png|170px]] |
||
| − | | [[File:PowerArmor_Map_Savage_Divide_Ammo_Dump.jpg|170px]] |
||
| − | |- |
||
| − | | [[Blackwater Mine]] |
||
| − | | Raider |
||
| − | | In the building on the right going to the entrance of the mine. It is at a power armor station. |
||
| − | | [[File:PowerArmor_Blackwater_Mine.png|170px]] |
||
| − | | [[File:PowerArmor_Map_Savage_Divide_Blackwater_Mine.jpg|170px]] |
||
|- |
|- |
||
| [[Converted munitions factory]] |
| [[Converted munitions factory]] |
||
| Line 202: | Line 211: | ||
| Behind a skill 1 locked door inside the building. The room is accessible from a catwalk that overlooks the workshop. Note that if the workshop is claimed by another player, picking this lock results in a bounty. This has been reported to Bethesda. |
| Behind a skill 1 locked door inside the building. The room is accessible from a catwalk that overlooks the workshop. Note that if the workshop is claimed by another player, picking this lock results in a bounty. This has been reported to Bethesda. |
||
| [[File:PowerArmor_Converted_Munitions_Factory.png|170px]] |
| [[File:PowerArmor_Converted_Munitions_Factory.png|170px]] |
||
| − | | [[File:PowerArmor_Map_Savage_Divide_Converted_Munitions_Factory.jpg|170px]] |
||
|- |
|- |
||
| − | | [[ |
+ | | [[Sunnytop Ski Lanes]] |
| + | | Raider |
||
| − | | T-series |
||
| + | | On the lower floor next to the stairs to the lobby at a power armor station. |
||
| − | | Enter the disposal tunnel. The power armor is in a security cage in the mechanical room on the right. Just outside the security cage is a generator with a fusion core. |
||
| − | | [[File: |
+ | | [[File:PowerArmor_Sunnytop_Ski_Lanes.png|170px]] |
| − | | [[File:PowerArmor_Map_Savage_Divide_Emmett_Mountain_Disposal_Site.jpg|170px]] |
||
|- |
|- |
||
| − | | [[ |
+ | | [[Ammo dump]] |
| T-Series |
| T-Series |
||
| + | | In plain sight at a power armor station |
||
| − | | At a power armor station behind the barn with military tents in front of it in the north end of town on the east side of the road, outside the raider walls. |
||
| − | | [[File: |
+ | | [[File:PowerArmor_Ammo_Dump.png|170px]] |
| − | | [[File:PowerArmor_Map_Savage_Divide_Huntersville.jpg|170px]] |
||
|- |
|- |
||
| − | | [[ |
+ | | [[Sons of Dane compound]] |
| + | | T-Series |
||
| + | | In the basement of the house west of the main building behind a skill 3 locked security gate. |
||
| + | | [[File:PowerArmor_Sons_of_Dane_Compound.png|170px]] |
||
| + | |- |
||
| + | |} |
||
| + | ===Central Savage Divide=== |
||
| + | [[File:FO76_Power_Armor_Map_Savage_Divide_Central.jpg|thumb|700px]] |
||
| + | {| class="va-table va-table-center va-table-full" |
||
| + | |- valign="top" |
||
| + | ! Location |
||
| + | ! Type |
||
| + | ! Description |
||
| + | ! Image |
||
| + | |- |
||
| + | | [[Monongah power plant]] |
||
| Raider |
| Raider |
||
| + | | Inside the door labeled "Loading Dock" in the main building. The armor is on the ground floor with two power armor stations straight ahead upon entering. When the plant is populated by super mutants, a player character can face as many as six in the confined space of the loading dock making this one of the tougher fights at a power armor location. |
||
| − | | On the high rocks at the edge of the cliff. There is a trail to the top. |
||
| − | | [[File: |
+ | | [[File:PowerArmor_Monongah_power_plant.png|170px]] |
| − | | [[File:PowerArmor_Map_Savage_Divide_Johnson's_Acre.jpg|170px]] |
||
|- |
|- |
||
| − | | [[ |
+ | | [[Seneca Gang camp]] |
| Raider |
| Raider |
||
| + | | By the steps to the lookout tower. |
||
| − | | Just inside, behind a chained door that can be accessed by going upstairs and dropping down. |
||
| − | | [[File: |
+ | | [[File:PowerArmor_Seneca_Gang_Camp.png|170px]] |
| − | | [[File:PowerArmor_Map_Savage_Divide_Lucky_Hole_Mine.jpg|170px]] |
||
|- |
|- |
||
| − | | [[ |
+ | | [[Wendigo cave]] |
| Raider |
| Raider |
||
| + | | This location is explored during the main quest [[Key to the Past]]. It is a difficult and dangerous area to navigate. For the armor, always go to the right. (There is one small dead end room on the right before finding the armor.) The armor is in plain sight in a short side tunnel that ends at the foot of a cliff. There are two bodies on the ground. |
||
| − | | In front of the middle cabin. |
||
| − | | [[File: |
+ | | [[File:PowerArmor_Wendigo_Cave.png|170px]] |
| − | | [[File:PowerArmor_Map_Savage_Divide_Middle_Mountain_Cabins.jpg|170px]] |
||
|- |
|- |
||
| − | | [[ |
+ | | [[Pleasant Valley cabins]] |
| Raider |
| Raider |
||
| + | | In the center of an arena on a road with raider shacks which is between 2 roads with pre-war buildings. |
||
| − | | Inside the door labeled "Loading Dock" in the main building. The armor is on the ground floor with two power armor stations straight ahead upon entering. When the plant is populated by super mutants, a player character can face as many as six in the confined space of the loading dock making this one of the tougher fights at a power armor location. |
||
| − | | [[File: |
+ | | [[File:PowerArmor_Pleasant_Valley_cabins.png|170px]] |
| − | | [[File:PowerArmor_Map_Savage_Divide_Monongah_Power_Plant.jpg|170px]] |
||
|- |
|- |
||
| + | |} |
||
| − | | [[National Isolated Radio Array]] |
||
| + | ===South Savage Divide=== |
||
| − | | T-series |
||
| + | [[File:FO76_Power_Armor_Map_Savage_Divide_South.jpg|thumb|700px]] |
||
| − | | In a side room of the barn with a skill 2 lock in the northeast corner of the compound. |
||
| + | {| class="va-table va-table-center va-table-full" |
||
| − | | [[File:PowerArmor_National_Isolated_Radio_Array.png|170px]] |
||
| + | |- valign="top" |
||
| − | | [[File:PowerArmor_Map_Savage_Divide_National_Isolated_Radio_Array.jpg|170px]] |
||
| + | ! Location |
||
| + | ! Type |
||
| + | ! Description |
||
| + | ! Image |
||
|- |
|- |
||
| [[New Appalachian central trainyard]] |
| [[New Appalachian central trainyard]] |
||
| Line 250: | Line 271: | ||
| Inside the main building beside a train car with "USA" written on it. |
| Inside the main building beside a train car with "USA" written on it. |
||
| [[File:PowerArmor_New_Appalachian_Central_Trainyard.png|170px]] |
| [[File:PowerArmor_New_Appalachian_Central_Trainyard.png|170px]] |
||
| − | | [[File:PowerArmor_Map_Savage_Divide_New_Appalachian_Central_Trainyard.jpg|170px]] |
||
|- |
|- |
||
| − | | [[ |
+ | | [[Middle Mountain Cabins]] |
| Raider |
| Raider |
||
| + | | In front of the middle cabin. |
||
| − | | In the center of an arena on a road with raider shacks which is between 2 roads with pre-war buildings. |
||
| − | | [[File: |
+ | | [[File:PowerArmor_Middle_Mountain_Cabins.png|170px]] |
| − | | [[File:PowerArmor_Map_Savage_Divide_Pleasant_Valley_Cabins.jpg|170px]] |
||
|- |
|- |
||
| − | | [[ |
+ | | [[National Isolated Radio Array]] |
| + | | T-series |
||
| − | | |
||
| + | | In a side room of the barn with a skill 2 lock in the northeast corner of the compound. |
||
| − | | NO POWER ARMOR HERE. Verification has failed for this site. over 30 visits have been made without a single sighting of power armor. Supposedly the armor was in the maintenance building on the east end of the station, at a power armor station. |
||
| + | | [[File:PowerArmor_National_Isolated_Radio_Array.png|170px]] |
||
| − | | |
||
| − | | |
||
|- |
|- |
||
| − | | [[ |
+ | | [[Blackwater Mine]] |
| Raider |
| Raider |
||
| − | | In the |
+ | | In the building on the right going to the entrance of the mine. It is at a power armor station. |
| − | | [[File: |
+ | | [[File:PowerArmor_Blackwater_Mine.png|170px]] |
| − | | [[File:PowerArmor_Map_Savage_Divide_Ripper_Alley.jpg|170px]] |
||
|- |
|- |
||
| − | | [[ |
+ | | [[Emmett Mountain disposal site]] |
| + | | T-series |
||
| − | | Raider |
||
| + | | Enter the disposal tunnel. The power armor is in a security cage in the mechanical room on the right. Just outside the security cage is a generator with a fusion core. |
||
| − | | By the steps to the lookout tower. |
||
| − | | [[File: |
+ | | [[File:PowerArmor_Emmett_Mountain_Disposal_Site.png|170px]] |
| − | | [[File:PowerArmor_Map_Savage_Divide_Seneca_Gang_Camp.jpg|170px]] |
||
| − | |- |
||
| − | | [[Site Alpha]], [[Site Bravo]], and [[Site Charlie]] |
||
| − | | |
||
| − | | These sites are reported on other websites to have power armor spawn in a workroom deep inside. Since they are some of the least accessible and toughest areas in the game, they are not good locations to look for power armor even if it does spawn.{{Verify|type=cite|21:17, February 21, 2019 (UTC)}} |
||
| − | | |
||
| − | | |
||
|- |
|- |
||
| [[Solomon's pond]] |
| [[Solomon's pond]] |
||
| Line 286: | Line 296: | ||
| At a power armor station on the platform with the blue water treatment equipment. |
| At a power armor station on the platform with the blue water treatment equipment. |
||
| [[File:PowerArmor_Solomon's_Pond.png|170px]] |
| [[File:PowerArmor_Solomon's_Pond.png|170px]] |
||
| − | | [[File:PowerArmor_Map_Savage_Divide_Solomon's_Pond.jpg|170px]] |
||
|- |
|- |
||
| − | | [[ |
+ | | [[Ripper Alley]] |
| + | | Raider |
||
| + | | In the back of the compound by the raised platform |
||
| + | | [[File:PowerArmor_Ripper_Alley.png|170px]] |
||
| + | |- |
||
| + | | [[Huntersville]] |
||
| T-Series |
| T-Series |
||
| + | | At a power armor station behind the barn with military tents in front of it in the north end of town on the east side of the road, outside the raider walls. |
||
| − | | In the basement of the house west of the main building behind a skill 3 locked security gate. |
||
| − | | [[File: |
+ | | [[File:PowerArmor_Huntersville.png|170px]] |
| − | | [[File:PowerArmor_Map_Savage_Divide_Sons_of_Dane_Compound.jpg|170px]] |
||
|- |
|- |
||
| + | |} |
||
| − | | [[Sunnytop Ski Lanes]] |
||
| + | |||
| + | ===Far South Savage Divide=== |
||
| + | [[File:FO76_Power_Armor_Map_Savage_Divide_Far_South.jpg|thumb|700px]] |
||
| + | {| class="va-table va-table-center va-table-full" |
||
| + | |- valign="top" |
||
| + | ! Location |
||
| + | ! Type |
||
| + | ! Description |
||
| + | ! Image |
||
| + | |- |
||
| + | | [[Lucky Hole mine]] |
||
| Raider |
| Raider |
||
| + | | Just inside, behind a chained door that can be accessed by going upstairs and dropping down. |
||
| − | | On the lower floor next to the stairs to the lobby at a power armor station. |
||
| − | | [[File: |
+ | | [[File:PowerArmor_Lucky_Hole_Mine.png|170px]] |
| − | | [[File:PowerArmor_Map_Savage_Divide_Sunnytop_Ski_Lanes.jpg|170px]] |
||
|- |
|- |
||
| − | | [[ |
+ | | [[Johnson's Acre]] |
| Raider |
| Raider |
||
| + | | On the high rocks at the edge of the cliff. There is a trail to the top. |
||
| − | | This location is explored during the main quest [[Key to the Past]]. It is a difficult and dangerous area to navigate. For the armor, always go to the right. (There is one small dead end room on the right before finding the armor.) The armor is in plain sight in a short side tunnel that ends at the foot of a cliff. There are two bodies on the ground. |
||
| − | | [[File: |
+ | | [[File:PowerArmor_Johnson's_Acre.png|170px]] |
| + | |- |
||
| − | | [[File:PowerArmor_Map_Savage_Divide_Wendigo_Cave.jpg|170px]] |
||
|} |
|} |
||
==[[Ash Heap]]== |
==[[Ash Heap]]== |
||
| + | ===East Ash Heap=== |
||
| + | [[File:FO76_Power_Armor_Map_Ash_Heap_East.jpg|thumb|541px]] |
||
{| class="va-table va-table-center va-table-full" |
{| class="va-table va-table-center va-table-full" |
||
|- valign="top" |
|- valign="top" |
||
| Line 314: | Line 339: | ||
! Description |
! Description |
||
! Image |
! Image |
||
| − | | Map image |
||
|- |
|- |
||
| − | | [[ |
+ | | [[Camden Park]] |
| + | | Raider |
||
| − | | T-series |
||
| + | | In the Raider compound in the south end, enclosed by the frame of the roller coaster, at a power armor station. |
||
| − | | Outside with a power armor station, between the locker room building and a bus. |
||
| − | | [[File: |
+ | | [[File:PowerArmor_Camden_Park.png|170px]] |
| − | | [[File:PowerArmor_Map_Ash_Heap_Abandoned_Mineshaft_Elaine.jpg|170px]] |
||
| − | |- |
||
| − | | [[AMS testing site]] |
||
| − | | T-Series |
||
| − | | In the back of the rounded metal building at one of two power armor stations. |
||
| − | | [[File:PowerArmor_AMS_Testing_Site.png|170px]] |
||
| − | | [[File:PowerArmor_Map_Ash_Heap_AMS_Testing_Site.jpg|170px]] |
||
|- |
|- |
||
| [[Beckley]] |
| [[Beckley]] |
||
| Line 332: | Line 349: | ||
| Outside the south Raider wall next to an [[Armored personnel carrier]] |
| Outside the south Raider wall next to an [[Armored personnel carrier]] |
||
| [[File:Beckley south.png|170px]] |
| [[File:Beckley south.png|170px]] |
||
| + | |- |
||
| − | | [[File:PowerArmor_Map_Ash_Heap_Beckley.jpg|170px]] |
||
| + | |} |
||
| + | ===Central Ash Heap=== |
||
| + | [[File:FO76_Power_Armor_Map_Ash_Heap_Central.jpg|thumb|700px]] |
||
| + | {| class="va-table va-table-center va-table-full" |
||
| + | |- valign="top" |
||
| + | ! Location |
||
| + | ! Type |
||
| + | ! Description |
||
| + | ! Image |
||
| + | |- |
||
| + | | [[The Rusty Pick]] |
||
| + | | Raider |
||
| + | | At the entrance to the tunnel in the basement the building in a security cage. |
||
| + | | [[File:PowerArmor_The_Rusty_Pick.png|170px]] |
||
|- |
|- |
||
| [[Belching Betty]] |
| [[Belching Betty]] |
||
| Line 338: | Line 369: | ||
| Outside the mine in the [[Fire Breathers]] shack with [[Bernie]], after completion of [[Into the Fire]]. |
| Outside the mine in the [[Fire Breathers]] shack with [[Bernie]], after completion of [[Into the Fire]]. |
||
| [[File:PowerArmor_Belching_Betty.png|170px]] |
| [[File:PowerArmor_Belching_Betty.png|170px]] |
||
| − | | [[File:PowerArmor_Map_Ash_Heap_Belching_Betty.jpg|170px]] |
||
|- |
|- |
||
| − | | [[ |
+ | | [[Mount Blair]] |
| − | | T- |
+ | | T-Series |
| + | | In a warehouse beside a green pickup truck east of the tower of the huge mining machine. It is due north of [[Abandoned mine shaft 6]] and is actually closer to that location. |
||
| − | | In the brick building on the top of the hill above the mine at a power armor station. |
||
| − | | [[File: |
+ | | [[File:PowerArmor_Mount_Blair.png|170px]] |
| − | | [[File:PowerArmor_Map_Ash_Heap_The_Burning_Mine.jpg|170px]] |
||
|- |
|- |
||
| − | | [[ |
+ | | [[Abandoned mine shaft Elaine]] |
| T-series |
| T-series |
||
| + | | Outside with a power armor station, between the locker room building and a bus. |
||
| − | | Located behind a locked door halfway down the tunnel that can only be opened with the [[Big Bend Tunnel door key|door key]]. It is possible to access the locked area without the key by jumping on containers and then onto the catwalk over the tracks. The map image shows the west entrance in the Ash Heap. The tunnel can also be entered from the east in the Cranberry Bog. The two routes have about the same number of scorched. |
||
| − | | [[File: |
+ | | [[File:PowerArmor_Abandoned_Mine_Shaft_Elaine.png|170px]] |
| − | | [[File:PowerArmor_Map_Ash_Heap_Big_Bend_Tunnel.jpg|170px]] |
||
|- |
|- |
||
| − | | [[ |
+ | | [[Rollins work camp]] |
| − | | Raider |
||
| − | | In the Raider compound in the south end, enclosed by the frame of the roller coaster, at a power armor station. |
||
| − | | [[File:PowerArmor_Camden_Park.png|170px]] |
||
| − | | [[File:PowerArmor_Map_Ash_Heap_Camden_Park.jpg|170px]] |
||
| − | |- |
||
| − | | [[Garrahan Mining HQ]] |
||
| T-series |
| T-series |
||
| + | | On the west side of the three orange and white modular buildings at a power armor station. |
||
| − | | Once inside, down the stairs, take the hall to the left, down more stairs. It is in the R&D Department at a power armor station. Two power armor pieces can also spawn on the counters in the middle of the room, one is shown in the image. This is also the location for the side quest [[Miner Miracles]] which gives plans for [[Excavator power armor]]. |
||
| − | | [[File: |
+ | | [[File:PowerArmor_Rollins_Work_Camp.png|170px]] |
| − | | [[File:PowerArmor_Map_Ash_Heap_Garrahan_Mining_Headquarters.jpg|170px]] |
||
| − | |- |
||
| − | | [[Lewisburg station]] |
||
| − | | T-series |
||
| − | | East on the train tracks beside a derailed boxcar with "Jobs now or else!" written on it. halfway to the [[Big Bend Tunnel West]]. |
||
| − | | [[File:PowerArmor_Lewisburg_Station.png|170px]] |
||
| − | | [[File:PowerArmor_Map_Ash_Heap_Lewisburg_Station.jpg|170px]] |
||
| − | |- |
||
| − | | [[Mount Blair]] |
||
| − | | T-Series |
||
| − | | In a warehouse beside a green pickup truck east of the tower of the huge mining machine. It is due north of [[Abandoned mine shaft 6]] and is actually closer to that location. |
||
| − | | [[File:PowerArmor_Mount_Blair.png|170px]] |
||
| − | | [[File:PowerArmor_Map_Ash_Heap_Mount_Blair.jpg|170px]] |
||
|- |
|- |
||
| [[Mount Blair trainyard]] |
| [[Mount Blair trainyard]] |
||
| Line 380: | Line 389: | ||
| At a power armor station on the ground floor in the west end of the large building with rail cars on the tracks running through it. There can be a large number of robots, scorched, or mole miners in this area. |
| At a power armor station on the ground floor in the west end of the large building with rail cars on the tracks running through it. There can be a large number of robots, scorched, or mole miners in this area. |
||
| [[File:PowerArmor_Mout_Blair_Trainyard.png|170px]] |
| [[File:PowerArmor_Mout_Blair_Trainyard.png|170px]] |
||
| − | | [[File:PowerArmor_Map_Ash_Heap_Mount_Blair_Trainyard.jpg|170px]] |
||
|- |
|- |
||
| [[Red Rocket filling station]] |
| [[Red Rocket filling station]] |
||
| Line 386: | Line 394: | ||
| Behind the boarded-up brick filling station and the orange fuel tanks (north side) at a power armor station. |
| Behind the boarded-up brick filling station and the orange fuel tanks (north side) at a power armor station. |
||
| [[File:PowerArmor_Red_Rocket_FIlling_Station.png|170px]] |
| [[File:PowerArmor_Red_Rocket_FIlling_Station.png|170px]] |
||
| − | | [[File:PowerArmor_Map_Ash_Heap_Red_Rocket_Filling_Station.jpg|170px]] |
||
|- |
|- |
||
| − | | [[ |
+ | | [[AMS testing site]] |
| − | | T- |
+ | | T-Series |
| − | | |
+ | | In the back of the rounded metal building at one of two power armor stations. |
| − | | [[File: |
+ | | [[File:PowerArmor_AMS_Testing_Site.png|170px]] |
| − | | [[File:PowerArmor_Map_Ash_Heap_Rollins_Work_Camp.jpg|170px]] |
||
| − | |- |
||
| − | | [[The Rusty Pick]] |
||
| − | | Raider |
||
| − | | At the entrance to the tunnel in the basement the building in a security cage. |
||
| − | | [[File:PowerArmor_The_Rusty_Pick.png|170px]] |
||
| − | | [[File:PowerArmor_Map_Ash_Heap_The_Rusty_Pick.jpg|170px]] |
||
|- |
|- |
||
| [[Striker Row]] |
| [[Striker Row]] |
||
| Line 404: | Line 404: | ||
| In the southeast corner, up the hill from the tents. There are a fair number of scorched. Did I mention the [[Scorchbeast|scorchbeast]] from the [[Fissure site|fissure site]] next door? |
| In the southeast corner, up the hill from the tents. There are a fair number of scorched. Did I mention the [[Scorchbeast|scorchbeast]] from the [[Fissure site|fissure site]] next door? |
||
| [[File:PowerArmor_Striker's_Row.png|170px]] |
| [[File:PowerArmor_Striker's_Row.png|170px]] |
||
| + | |- |
||
| − | | [[File:PowerArmor_Map_Ash_Heap_Striker_Row.jpg|170px]] |
||
| + | |} |
||
| + | ===West Ash Heap=== |
||
| + | [[File:FO76_Power_Armor_Map_Ash_Heap_West.jpg|thumb|700px]] |
||
| + | {| class="va-table va-table-center va-table-full" |
||
| + | |- valign="top" |
||
| + | ! Location |
||
| + | ! Type |
||
| + | ! Description |
||
| + | ! Image |
||
| + | |- |
||
| + | | [[Burning mine]] |
||
| + | | T-series |
||
| + | | In the brick building on the top of the hill above the mine at a power armor station. |
||
| + | | [[File:PowerArmor_The_Burning_Mine.png|170px]] |
||
| + | |- |
||
| + | | [[Lewisburg station]] |
||
| + | | T-series |
||
| + | | East on the train tracks beside a derailed boxcar with "Jobs now or else!" written on it. halfway to the [[Big Bend Tunnel West]]. |
||
| + | | [[File:PowerArmor_Lewisburg_Station.png|170px]] |
||
| + | |- |
||
| + | | [[Big Bend Tunnel]] |
||
| + | | T-series |
||
| + | | Located behind a locked door halfway down the tunnel that can only be opened with the [[Big Bend Tunnel door key|door key]]. It is possible to access the locked area without the key by jumping on containers and then onto the catwalk over the tracks. The map image shows the west entrance in the Ash Heap. The tunnel can also be entered from the east in the Cranberry Bog. The two routes have about the same number of scorched. |
||
| + | | [[File:PowerArmor_Big_Bend_Tunnel.png|170px]] |
||
| + | |- |
||
| + | | [[Garrahan Mining HQ]] |
||
| + | | T-series |
||
| + | | Once inside, down the stairs, take the hall to the left, down more stairs. It is in the R&D Department at a power armor station. Two power armor pieces can also spawn on the counters in the middle of the room, one is shown in the image. This is also the location for the side quest [[Miner Miracles]] which gives plans for [[Excavator power armor]]. |
||
| + | | [[File:PowerArmor_Garrahan_Mining_HQ.png|170px]] |
||
| + | |- |
||
|} |
|} |
||
==[[The Mire]]== |
==[[The Mire]]== |
||
| + | ===North Mire=== |
||
| + | [[File:FO76_Power_Armor_Map_Mire_North.jpg|thumb|700px]] |
||
{| class="va-table va-table-center va-table-full" |
{| class="va-table va-table-center va-table-full" |
||
|- valign="top" |
|- valign="top" |
||
| Line 414: | Line 446: | ||
! Description |
! Description |
||
! Image |
! Image |
||
| − | | Map image |
||
|- |
|- |
||
| − | | [[ |
+ | | [[Thunder Mountain power plant]] |
| T-series |
| T-series |
||
| + | | Enter the door labeled "Loading Dock" on the southeast side of the main building, go to the left. Armor is at one of the two power armor stations. Another single piece of power armor can spawn on a table in one of the tents in the south part of the power plant yard. |
||
| − | | Behind the building at a power armor station. |
||
| − | | [[File: |
+ | | [[File:PowerArmor_Thunder_Mountain_Power_Plant.png|170px]] |
| − | | [[File:PowerArmor_Map_The_Mire_Big_B's_Rest_Stop.jpg|170px]] |
||
|- |
|- |
||
| − | | [[ |
+ | | [[Dolly Sods wilderness]] |
| − | | T- |
+ | | T-series |
| + | | From the back porch of the east-most cabin, look to the southeast. You should see a pickup truck immediately beside the porch and a stump about 18 steps away. Go southeast past the stump and then past the firepit partially hidden in the grass. The armor is just a bit farther down the hill, about 16 steps from the stump. |
||
| − | | In the southeast corner of the metal wall enclosed compound at one of the two power armor stations. |
||
| − | | [[File: |
+ | | [[File:PowerArmor_Dolly_Sods_wilderness.png|170px]] |
| − | | [[File:PowerArmor_Map_The_Mire_Camp_Venture.jpg|170px]] |
||
|- |
|- |
||
| [[Crevasse Dam]] |
| [[Crevasse Dam]] |
||
| Line 432: | Line 461: | ||
| In the truck trailer beside the buildings with a skill 2 lock. The key can be found on a body on the roof of the building closest to the road. |
| In the truck trailer beside the buildings with a skill 2 lock. The key can be found on a body on the roof of the building closest to the road. |
||
| [[File:PowerArmor_Crevasse_Dam.png|170px]] |
| [[File:PowerArmor_Crevasse_Dam.png|170px]] |
||
| − | | [[File:PowerArmor_Map_The_Mire_Crevasse_Dam.jpg|170px]] |
||
| − | |- |
||
| − | | [[Dolly Sods wilderness]] |
||
| − | | T-series |
||
| − | | From the back porch of the east-most cabin, look to the southeast. You should see a pickup truck immediately beside the porch and a stump about 18 steps away. Go southeast past the stump and then past the firepit partially hidden in the grass. The armor is just a bit farther down the hill, about 16 steps from the stump. |
||
| − | | [[File:PowerArmor_Dolly_Sods_wilderness.png|170px]] |
||
| − | | [[File:PowerArmor_Map_The_Mire_Dolly_Sods_Wilderness.jpg|170px]] |
||
|- |
|- |
||
| [[Dyer Chemical]] Sewers |
| [[Dyer Chemical]] Sewers |
||
| Line 444: | Line 466: | ||
| Entrance to the sewers requires a key card found in the side quest [[Tracking Unknowns]]. There are three entrances to the sewers. Any of them can be used but the most convenient is in the building in the southeast corner of the complex. There is a generator with a fusion core further down in the sewers and another between buildings in the middle of the Dyer Chemical complex. |
| Entrance to the sewers requires a key card found in the side quest [[Tracking Unknowns]]. There are three entrances to the sewers. Any of them can be used but the most convenient is in the building in the southeast corner of the complex. There is a generator with a fusion core further down in the sewers and another between buildings in the middle of the Dyer Chemical complex. |
||
| [[File:PowerArmor_Dyer_Chemical.png|170px]] |
| [[File:PowerArmor_Dyer_Chemical.png|170px]] |
||
| + | |- |
||
| − | | [[File:PowerArmor_Map_The_Mire_Dyer_Chemical.jpg|170px]] |
||
| + | | [[Treehouse village]] |
||
| + | | Raider |
||
| + | | In the treehouse that has the red dump truck used as a platform in the stairs. A fusion core can spawn on a shelf in another of the treehouses. |
||
| + | | [[File:PowerArmor_Treehouse_Village.png|170px]] |
||
| + | |- |
||
| + | |} |
||
| + | ===South Mire=== |
||
| + | [[File:FO76_Power_Armor_Map_Mire_South.jpg|thumb|700px]] |
||
| + | {| class="va-table va-table-center va-table-full" |
||
| + | |- valign="top" |
||
| + | ! Location |
||
| + | ! Type |
||
| + | ! Description |
||
| + | ! Image |
||
|- |
|- |
||
| [[Hawke's Refuge]] |
| [[Hawke's Refuge]] |
||
| Line 450: | Line 486: | ||
| On a raised walkway in the large well lit room. A fusion core can spawn on a box on the same walkway; another can spawn on a table down the stairs to the right from the raider shack in the image. |
| On a raised walkway in the large well lit room. A fusion core can spawn on a box on the same walkway; another can spawn on a table down the stairs to the right from the raider shack in the image. |
||
| [[File:PowerArmor_Hawke's_Refuge.png|170px]] |
| [[File:PowerArmor_Hawke's_Refuge.png|170px]] |
||
| − | | [[File:PowerArmor_Map_The_Mire_Hawke's_Refuge.jpg|170px]] |
||
|- |
|- |
||
| [[Sunday Brothers' cabin]] |
| [[Sunday Brothers' cabin]] |
||
| Line 456: | Line 491: | ||
| In the barn next to the house |
| In the barn next to the house |
||
| [[File:PowerArmor_The_Mire_Sunday_Brother's_Cabin.jpg|170px]] |
| [[File:PowerArmor_The_Mire_Sunday_Brother's_Cabin.jpg|170px]] |
||
| − | | [[File:PowerArmor_Map_The_Mire_Sunday_Brothers'_Cabin.jpg|170px]] |
||
|- |
|- |
||
| − | | [[ |
+ | | [[Big B's Rest Stop]] |
| T-series |
| T-series |
||
| + | | Behind the building at a power armor station. |
||
| − | | Enter the door labeled "Loading Dock" on the southeast side of the main building, go to the left. Armor is at one of the two power armor stations. Another single piece of power armor can spawn on a table in one of the tents in the south part of the power plant yard. |
||
| − | | [[File: |
+ | | [[File:PowerArmor_Big_B's_Rest_Stop.png|170px]] |
| + | |- |
||
| − | | [[File:PowerArmor_Map_The_Mire_Thunder_Mountain_Power_Plant.jpg|170px]] |
||
| + | | [[Camp Venture]] |
||
| + | | T-Series |
||
| + | | In the southeast corner of the metal wall enclosed compound at one of the two power armor stations. |
||
| + | | [[File:PowerArmor_Camp_Venture.png|170px]] |
||
|- |
|- |
||
| − | | [[Treehouse village]] |
||
| − | | Raider |
||
| − | | In the treehouse that has the red dump truck used as a platform in the stairs. A fusion core can spawn on a shelf in another of the treehouses. |
||
| − | | [[File:PowerArmor_Treehouse_Village.png|170px]] |
||
| − | | [[File:PowerArmor_Map_The_Mire_Treehouse_Village.jpg|170px]] |
||
|} |
|} |
||
==[[Cranberry Bog]]== |
==[[Cranberry Bog]]== |
||
| + | ===North Cranberry Bog=== |
||
| + | [[File:FO76_Power_Armor_Map_Cranberry_Bog_North.jpg|thumb|700px]] |
||
{| class="va-table va-table-center va-table-full" |
{| class="va-table va-table-center va-table-full" |
||
|- valign="top" |
|- valign="top" |
||
| Line 478: | Line 513: | ||
! Description |
! Description |
||
! Image |
! Image |
||
| − | | Map image |
||
|- |
|- |
||
| − | | [[ |
+ | | [[Kerwood Mine]] |
| T-series |
| T-series |
||
| + | | Found in the larger of the two dry areas that are accessible only by swimming. It is in a stub side tunnel standing in very shallow water. If you find the [[Kerwood Mine key]], the armor is in that same dry area. |
||
| − | | At a power armor station in a Brotherhood compound outside the tunnel |
||
| − | | [[File: |
+ | | [[File:PowerArmor_Kerwood_Mine.png|170px]] |
| − | | [[File:PowerArmor_Map_Cranberry_Bog_Big_Bend_Tunnel_East.jpg|170px]] |
||
|- |
|- |
||
| − | | [[ |
+ | | [[Firebase Major]] |
| − | | Raider |
||
| − | | Inside the west perimeter wall behind a truck cab |
||
| − | | [[File:Power_Armor_Bootlegger’s_shack.png|170px]] |
||
| − | | [[File:PowerArmor_Map_Cranberry_Bog_Bootlegger's_Shack.jpg|170px]] |
||
| − | |- |
||
| − | | [[Drop site V9]] |
||
| T-series |
| T-series |
||
| − | | |
+ | | Behind the jeep. |
| − | | [[File: |
+ | | [[File:PowerArmor_Firebase_Major.png|170px]] |
| − | | [[File:PowerArmor_Map_Cranberry_Bog_Drop_Site_V9.jpg|170px]] |
||
| − | |- |
||
| − | | [[Firebase Hancock]] |
||
| − | | T-series |
||
| − | | Between the modular buildings |
||
| − | | [[File:PowerArmor_Firebase_Hancock.png|170px]] |
||
| − | | [[File:PowerArmor_Map_Cranberry_Bog_Firebase_Hancock.jpg|170px]] |
||
|- |
|- |
||
| [[Firebase LT]] |
| [[Firebase LT]] |
||
| Line 508: | Line 528: | ||
| On the east side of the tent. |
| On the east side of the tent. |
||
| [[File:PowerArmor_Firebase_LT.png|170px]] |
| [[File:PowerArmor_Firebase_LT.png|170px]] |
||
| − | | [[File:PowerArmor_Map_Cranberry_Bog_Firebase_LT.jpg|170px]] |
||
| − | |- |
||
| − | | [[Firebase Major]] |
||
| − | | T-series |
||
| − | | Behind the jeep. |
||
| − | | [[File:PowerArmor_Firebase_Major.png|170px]] |
||
| − | | [[File:PowerArmor_Map_Cranberry_Bog_Firebase_Major.jpg|170px]] |
||
| − | |- |
||
| − | | [[Fort Defiance]] |
||
| − | | T-series |
||
| − | | On the forth floor at one of the two power armor stations. |
||
| − | | [[File:PowerArmor_Fort_Defiance.png|170px]] |
||
| − | | [[File:PowerArmor_Map_Cranberry_Bog_Fort_Defiance.jpg|170px]] |
||
| − | |- |
||
| − | | [[Forward Station Delta]] |
||
| − | | T-series |
||
| − | | At a power armor station in the compound. |
||
| − | | [[File:PowerArmor_Forward_Station_Delta.png|170px]] |
||
| − | | [[File:PowerArmor_Map_Cranberry_Bog_Forward_Station_Delta.jpg|170px]] |
||
|- |
|- |
||
| [[The General's Steakhouse]] |
| [[The General's Steakhouse]] |
||
| Line 532: | Line 533: | ||
| In the metal garden shed in the walled garden west of the main building. |
| In the metal garden shed in the walled garden west of the main building. |
||
| [[File:PowerArmor_The_General's_Steakhouse.png|170px]] |
| [[File:PowerArmor_The_General's_Steakhouse.png|170px]] |
||
| − | | [[File:PowerArmor_Map_Cranberry_Bog_The_General's_Steakhouse.jpg|170px]] |
||
|- |
|- |
||
| − | | [[ |
+ | | [[RobCo Research Center]] |
| T-series |
| T-series |
||
| + | | In the northwest wing, Robotic research. This part of the building has an open plaza under it. Take the elevator in the round red support column to the bottom floor. The power armor is at a power armor station in one of the research bays on the right. Note that there is another bay with an empty power armor station. |
||
| − | | Found in the larger of the two dry areas that are accessible only by swimming. It is in a stub side tunnel standing in very shallow water. If you find the [[Kerwood Mine key]], the armor is in that same dry area. |
||
| − | | [[File: |
+ | | [[File:PowerArmor_Robco_Research_Center.png|170px]] |
| − | | [[File:PowerArmor_Map_Cranberry_Bog_Kerwood_Mine.jpg|170px]] |
||
|- |
|- |
||
| − | | [[ |
+ | | [[Bootlegger's shack]] |
| + | | Raider |
||
| − | | T-Series |
||
| − | | |
+ | | Inside the west perimeter wall behind a truck cab |
| − | | [[File: |
+ | | [[File:Power_Armor_Bootlegger’s_shack.png|170px]] |
| − | | [[File:PowerArmor_Map_Cranberry_Bog_Lost_Home.jpg|170px]] |
||
|- |
|- |
||
| [[Quarry X3]] |
| [[Quarry X3]] |
||
| Line 550: | Line 548: | ||
| At the edge of the road next to the modular building. |
| At the edge of the road next to the modular building. |
||
| [[File:PowerArmor_Quarry_X3.png|170px]] |
| [[File:PowerArmor_Quarry_X3.png|170px]] |
||
| − | | [[File:PowerArmor_Map_Cranberry_Bog_Quarry_X3.jpg|170px]] |
||
|- |
|- |
||
| + | |} |
||
| − | | [[RobCo Research Center]] |
||
| + | ===South Cranberry Bog=== |
||
| + | [[File:FO76_Power_Armor_Map_Cranberry_Bog_South.jpg|thumb|700px]] |
||
| + | {| class="va-table va-table-center va-table-full" |
||
| + | |- valign="top" |
||
| + | ! Location |
||
| + | ! Type |
||
| + | ! Description |
||
| + | ! Image |
||
| + | |- |
||
| + | | [[Fort Defiance]] |
||
| T-series |
| T-series |
||
| + | | On the forth floor at one of the two power armor stations. |
||
| − | | In the northwest wing, Robotic research. This part of the building has an open plaza under it. Take the elevator in the round red support column to the bottom floor. The power armor is at a power armor station in one of the research bays on the right. Note that there is another bay with an empty power armor station. |
||
| − | | [[File: |
+ | | [[File:PowerArmor_Fort_Defiance.png|170px]] |
| − | | [[File:PowerArmor_Map_Cranberry_Bog_RobCo_Research_Center.jpg|170px]] |
||
|- |
|- |
||
| − | | [[ |
+ | | [[Big Bend Tunnel East]] |
| + | | T-series |
||
| + | | At a power armor station in a Brotherhood compound outside the tunnel |
||
| + | | [[File:PowerArmor_Big_Bend_Tunnel_East.png|170px]] |
||
| + | |- |
||
| + | | [[Lost home]] |
||
| T-Series |
| T-Series |
||
| − | | |
+ | | In the largest shack at a power armor station |
| − | | [[File: |
+ | | [[File:PowerArmor_Lost_Home.png|170px]] |
| + | |- |
||
| − | | [[File:PowerArmor_Map_Cranberry_Bog_Survey_Camp_Alpha.jpg|170px]] |
||
| + | | [[Firebase Hancock]] |
||
| + | | T-series |
||
| + | | Between the modular buildings |
||
| + | | [[File:PowerArmor_Firebase_Hancock.png|170px]] |
||
|- |
|- |
||
| [[Watoga]] |
| [[Watoga]] |
||
| Line 568: | Line 583: | ||
| There are at least six locations that can spawn T-series pieces around Watoga, most of them not too far from the two local merchants that sell T-type power armor mods too, making the city very good location for hunting the armor. One is in the central square next to a defunct [[Vertibot]]. |
| There are at least six locations that can spawn T-series pieces around Watoga, most of them not too far from the two local merchants that sell T-type power armor mods too, making the city very good location for hunting the armor. One is in the central square next to a defunct [[Vertibot]]. |
||
| [[File:PowerArmor_Watoga.png|170px]] |
| [[File:PowerArmor_Watoga.png|170px]] |
||
| − | | [[File:PowerArmor_Map_Cranberry_Bog_Watoga_central_plaza.jpg|170px]] |
||
|- |
|- |
||
| [[Watoga]] rooftop |
| [[Watoga]] rooftop |
||
| Line 574: | Line 588: | ||
| On the roof of the building east of the Watoga Civic Center. There are several access routes, one is the fire escapes on the east wall of the civic center. At the top, look for a Vertibot. |
| On the roof of the building east of the Watoga Civic Center. There are several access routes, one is the fire escapes on the east wall of the civic center. At the top, look for a Vertibot. |
||
| [[File:PowerArmor_Watoga_Rooftop.png|170px]] |
| [[File:PowerArmor_Watoga_Rooftop.png|170px]] |
||
| − | | [[File:PowerArmor_Map_Cranberry_Bog_Watoga_rooftop.jpg|170px]] |
||
|- |
|- |
||
| [[Watoga Civic Center]] |
| [[Watoga Civic Center]] |
||
| Line 580: | Line 593: | ||
| In the main arena, at the west wall. |
| In the main arena, at the west wall. |
||
| [[File:PowerArmor_Watoga_Civic_Center.png|170px]] |
| [[File:PowerArmor_Watoga_Civic_Center.png|170px]] |
||
| + | |- |
||
| − | | [[File:PowerArmor_Map_Cranberry_Bog_Watoga_Civic_Center.jpg|170px]] |
||
| + | | [[Watoga Transit Hub]] |
||
| + | | T-series |
||
| + | | In a room just off the lobby with a skill 3 lock. The room also contains a generator with a [[Fusion core (Fallout 76)|fusion core]]. |
||
| + | | [[File:PowerArmor_Watoga_Transit_Hub.png|170px]] |
||
|- |
|- |
||
| [[Watoga Emergency Services]] |
| [[Watoga Emergency Services]] |
||
| Line 586: | Line 603: | ||
| On the roof. Access using the stairs from the top floor to the roof or jump in power armor from the roof of the [[Watoga Municipal Center]] |
| On the roof. Access using the stairs from the top floor to the roof or jump in power armor from the roof of the [[Watoga Municipal Center]] |
||
| [[File:PowerArmor_Watoga_Emergency_Services.png|170px]] |
| [[File:PowerArmor_Watoga_Emergency_Services.png|170px]] |
||
| − | | [[File:PowerArmor_Map_Cranberry_Bog_Watoga_Emergency_Services.jpg|170px]] |
||
|- |
|- |
||
| [[Watoga High School]] |
| [[Watoga High School]] |
||
| Line 592: | Line 608: | ||
| On the roof. Stairs to roof are outside on the south side of the building. |
| On the roof. Stairs to roof are outside on the south side of the building. |
||
| [[File:PowerArmor_Watoga_High_School.png|170px]] |
| [[File:PowerArmor_Watoga_High_School.png|170px]] |
||
| − | | [[File:PowerArmor_Map_Cranberry_Bog_Watoga_High_School.jpg|170px]] |
||
|- |
|- |
||
| − | | [[ |
+ | | [[Survey camp Alpha]] |
| + | | T-Series |
||
| + | | Under a canopy at a power armor station |
||
| + | | [[File:PowerArmor_Survey_Camp_Alpha.png|170px]] |
||
| + | |- |
||
| + | | [[Drop site V9]] |
||
| T-series |
| T-series |
||
| + | | In front of the building. |
||
| − | | In a room just off the lobby with a skill 3 lock. The room also contains a generator with a [[Fusion core (Fallout 76)|fusion core]]. |
||
| − | | [[File: |
+ | | [[File:PowerArmor_Drop_site_V9.png|170px]] |
| + | |- |
||
| − | | [[File:PowerArmor_Map_Cranberry_Bog_Watoga_Transit_Hub.jpg|170px]] |
||
| + | | [[Forward Station Delta]] |
||
| + | | T-series |
||
| + | | At a power armor station in the compound. |
||
| + | | [[File:PowerArmor_Forward_Station_Delta.png|170px]] |
||
| + | |- |
||
|} |
|} |
||
Revision as of 04:54, 14 May 2019
General Information
Below is a list of over 80 verified power armor locations. The locations are listed by region. The regions are listed from easiest to most challenging.
Power armor chassis with pieces of armor can be found throughout Appalachia. A full set never spawns; there will usually be two or three of the six armor pieces. There are two types of spawn points; the first will spawn with Raider power armor, the second will spawn with T-45 (most common), T-60 (next most common), or T-51 (least common). The armor pieces will all be of the same type and level. The armor pieces at the next spawn at a given location may be for the same set or may be a different level (and/or a different type for T-series armors). The power armor chassis always spawns with a fusion core. Some locations also have a power armor station and/or a nearby extra fusion core. Power armor can be mixed and matched, there is no advantage to a matched set except for the carry bonus on quest related Excavator power armor. Plans for crafting Raider, T-45, T-51, and T-60 power armors are so rare as to be almost non-existent. It is much easier to find the armor pieces than to find the plans.
There are three quest related power armors, Excavator power armor, Ultracite power armor, and X-01 power armor. For details on obtaining them look on their pages
Power armor has very little scrap or sale value, the chassis cannot be scrapped or sold. Players abandon power armor after finding more desirable pieces and these locations have sometimes been erroneously reported on other websites as spawn points. All locations listed here have been verified by multiple sightings.
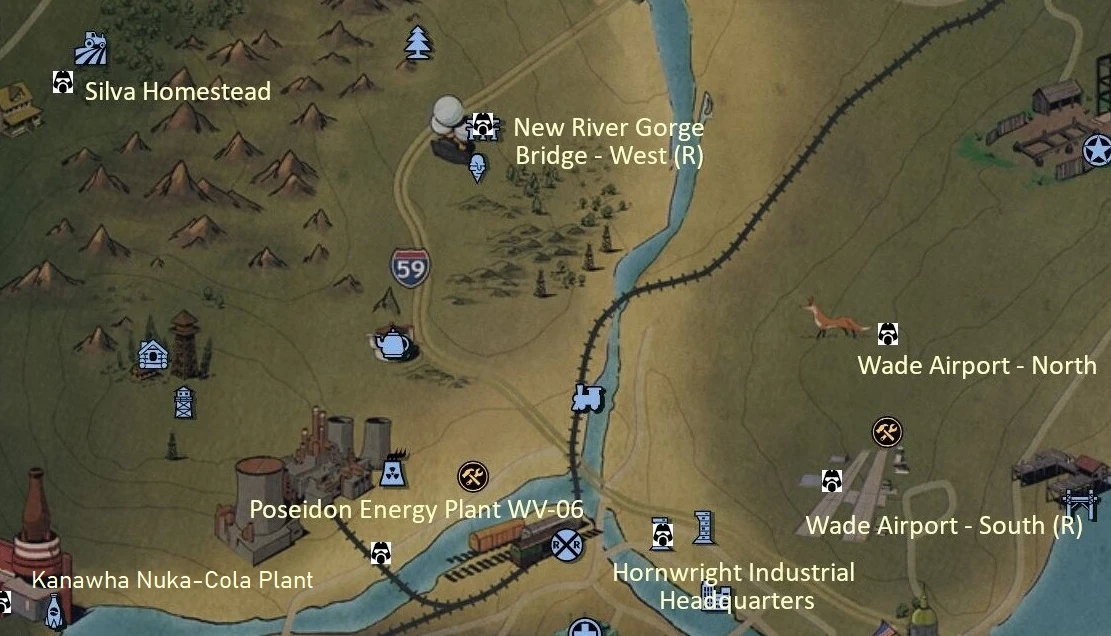
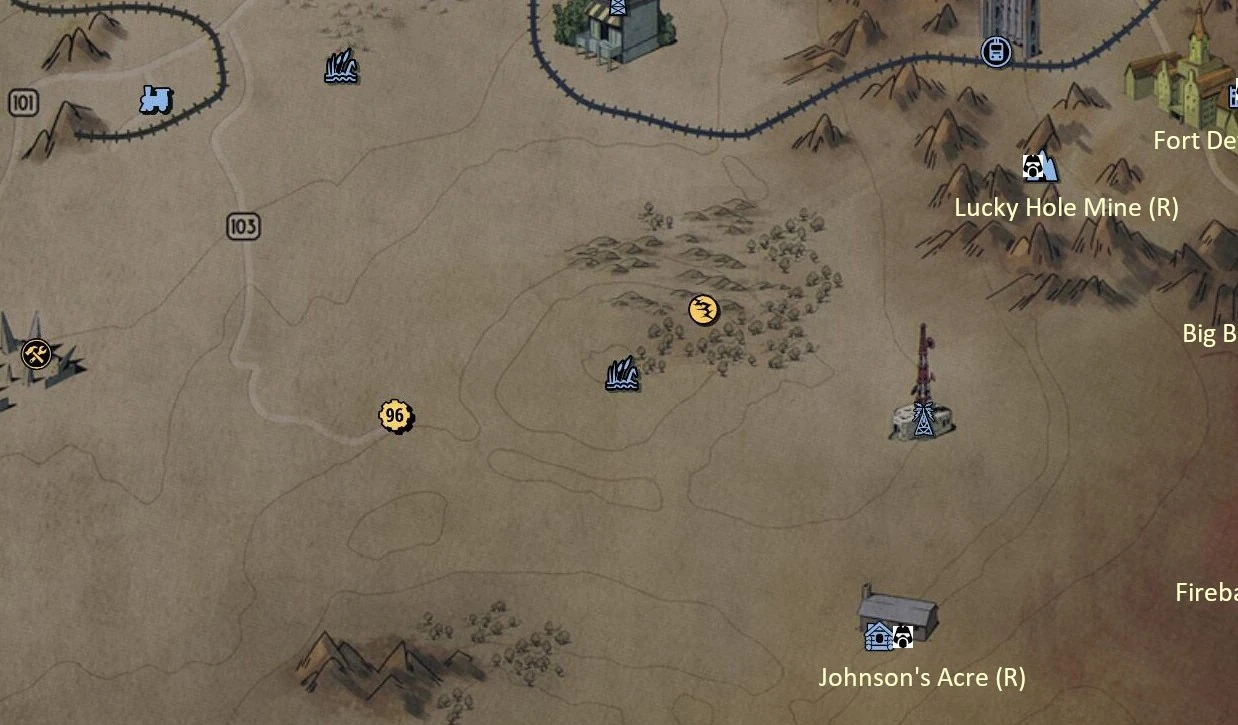
Some spawn points are at named locations, some are not and are listed with the nearest named location. The power armor icon on the map images show the actual power armor location or the entrance to the building, mine, cave, or tunnel if the location is inside since the map marker does not move once a player character enters one of those areas.
The Forest
North Forest

| Location | Type | Description | Image |
|---|---|---|---|
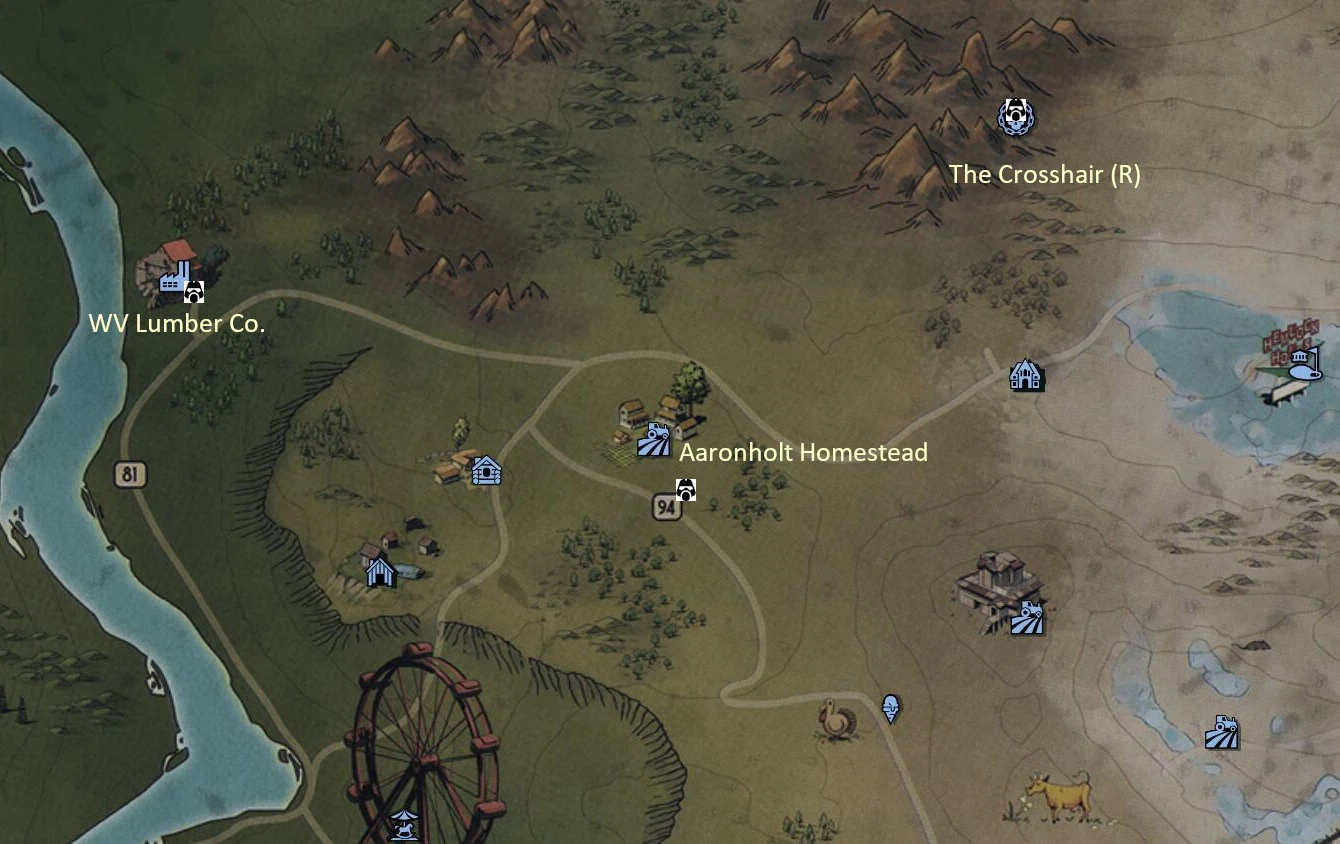
| The Crosshair | Raider | Under the rock overhang in the back of the area. | 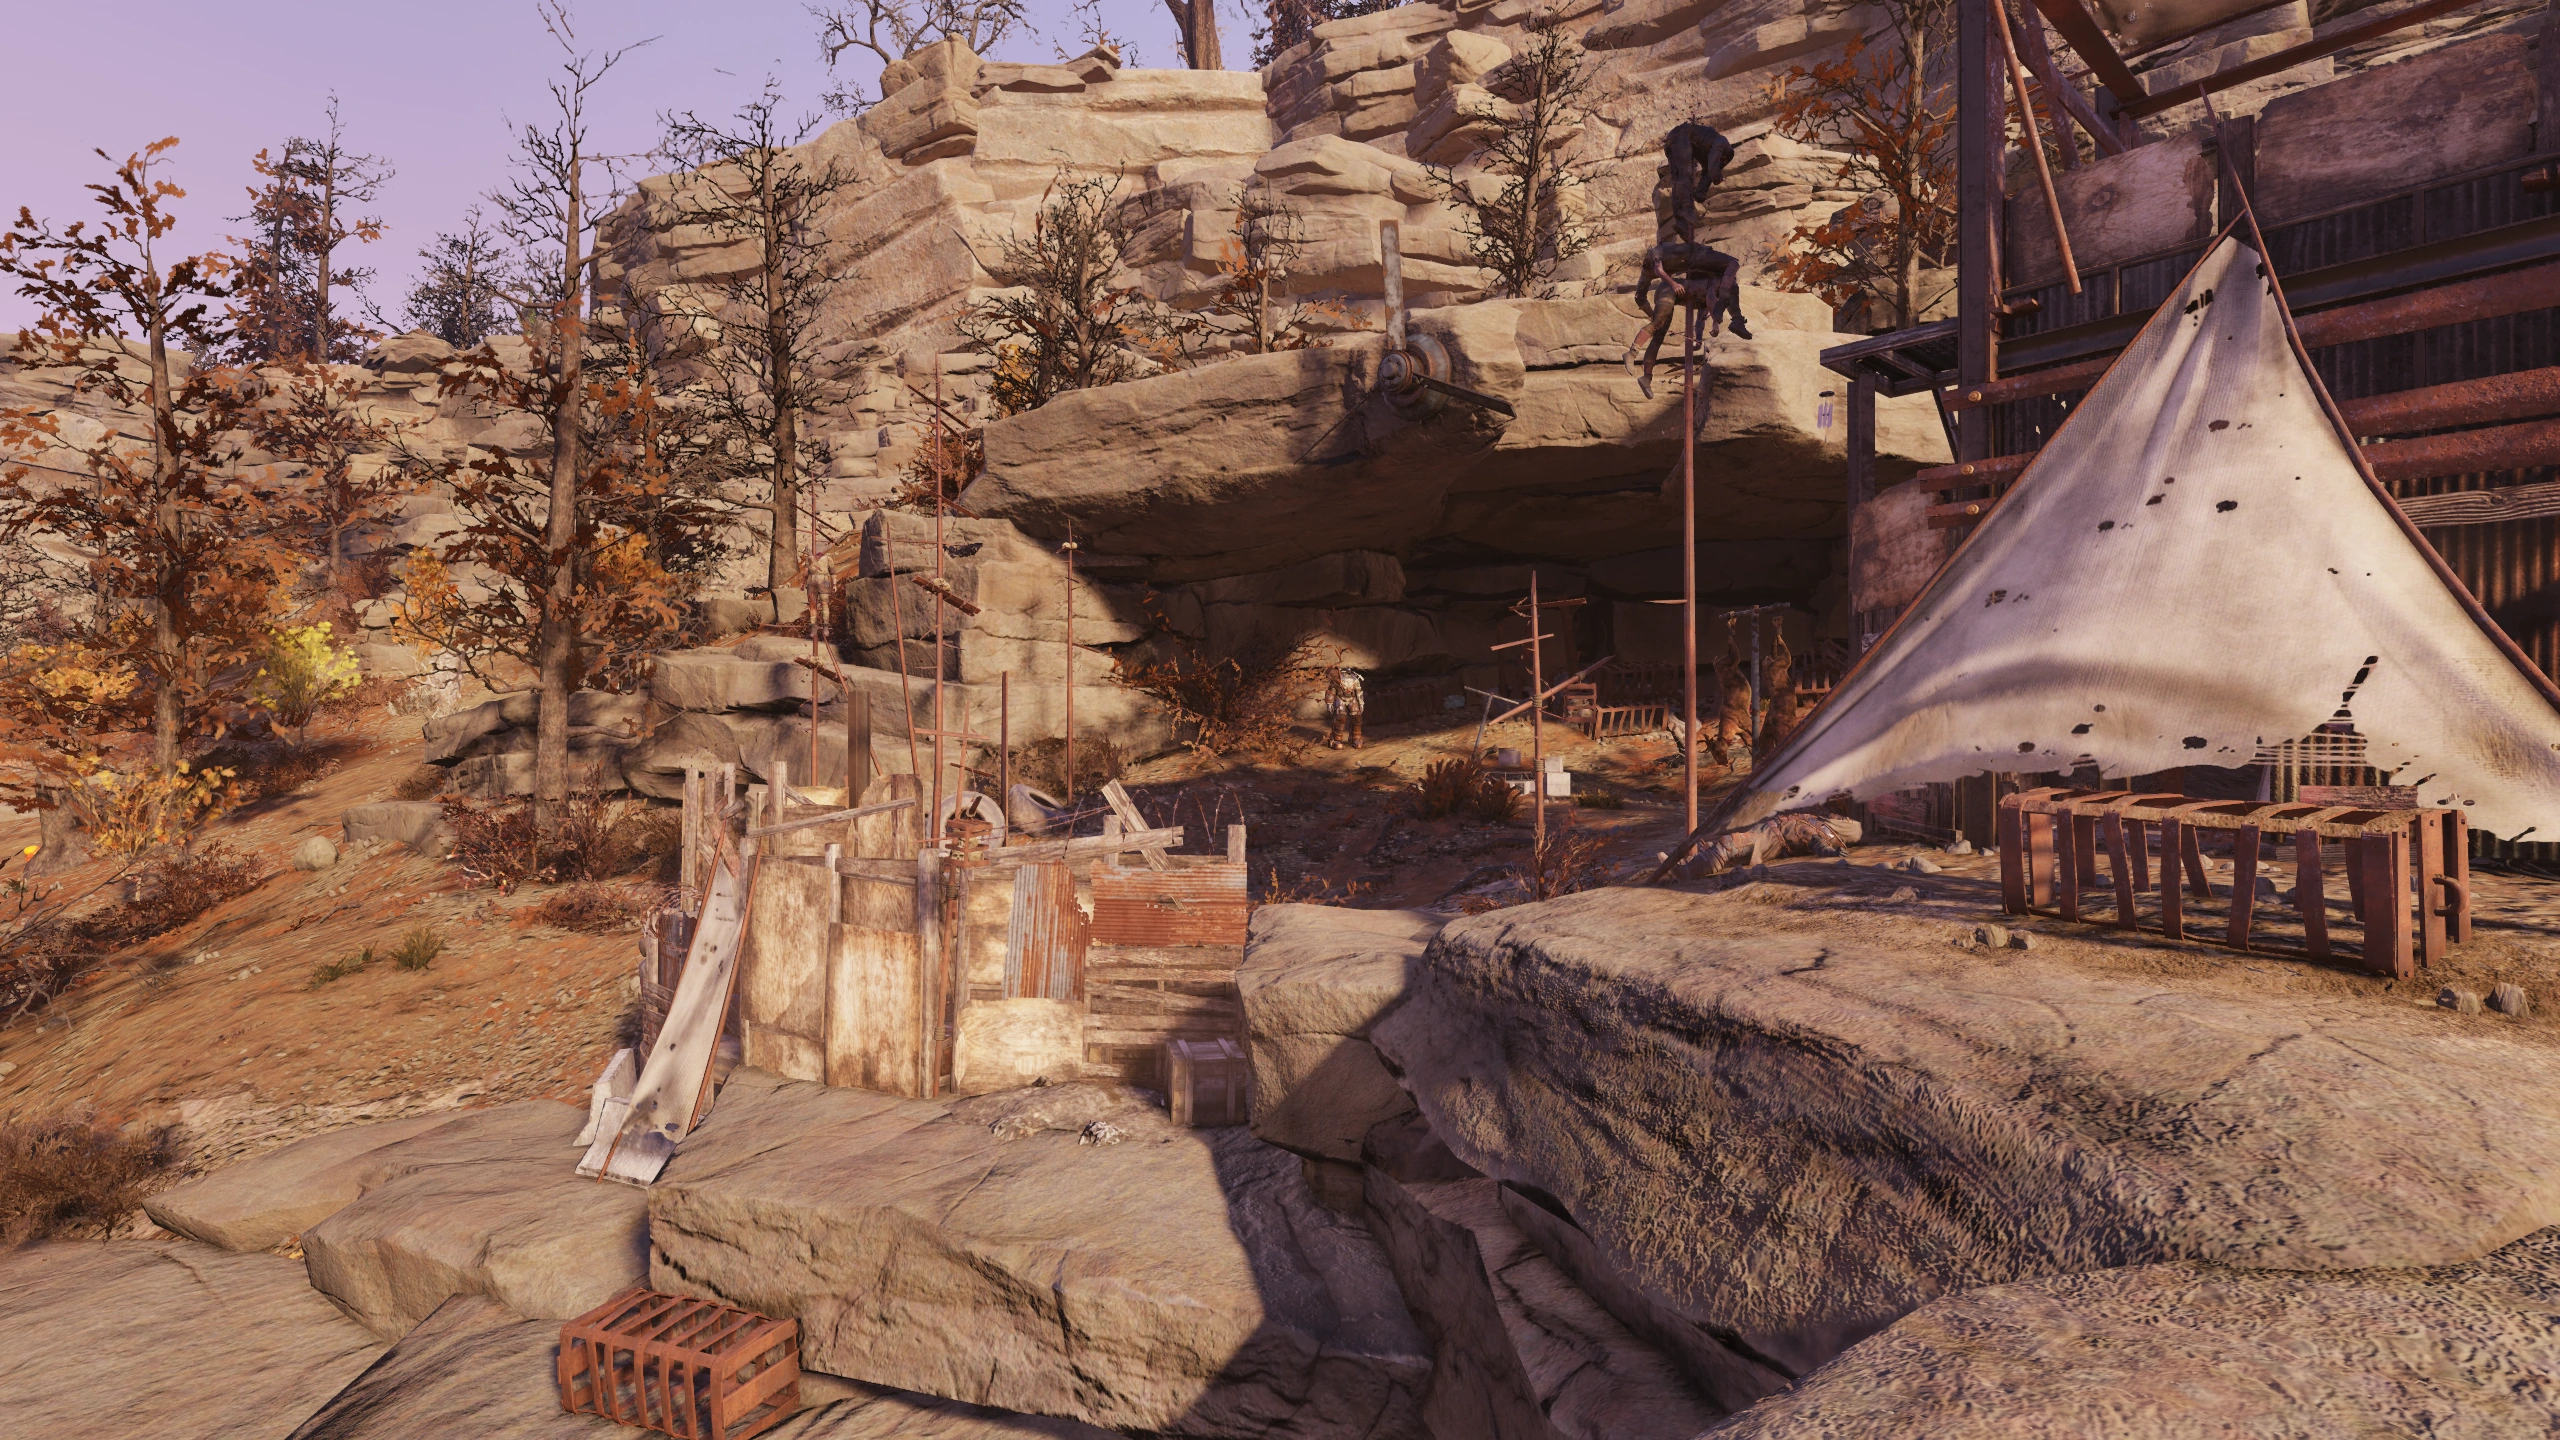
|
| WV Lumber Co. | T-series | At a power armor station in the two story metal building on the east side of the complex. | 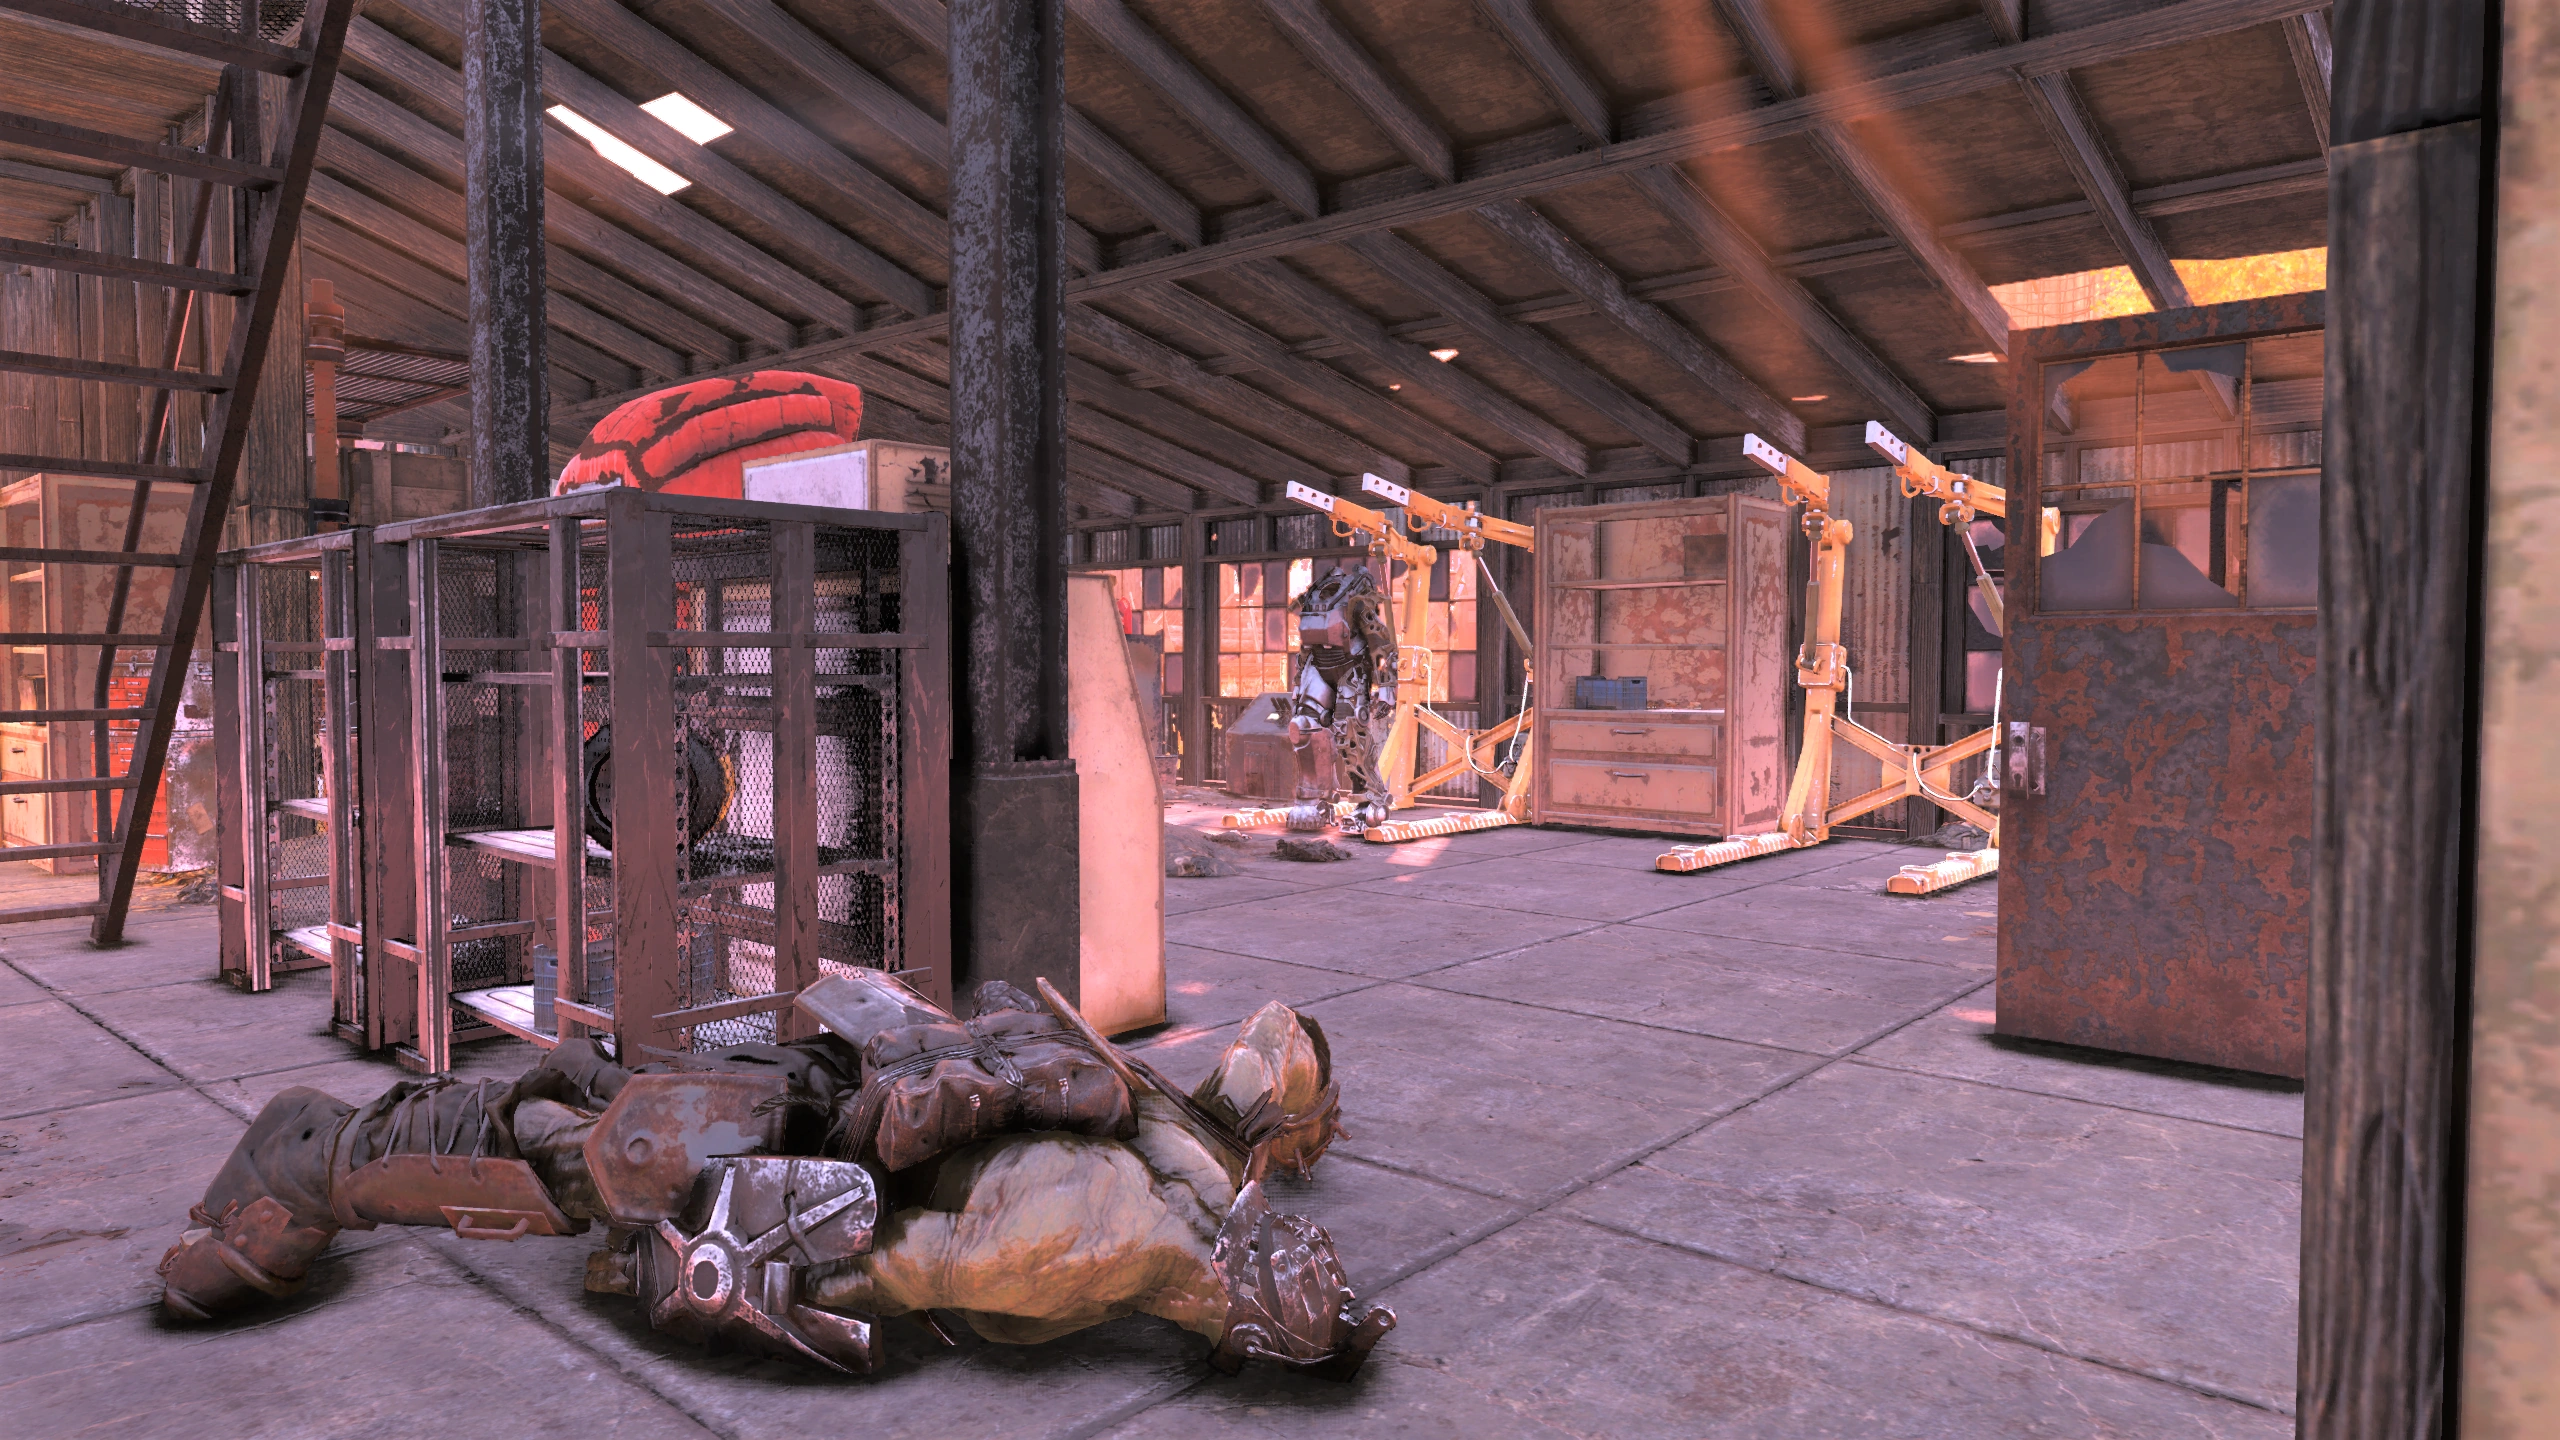
|
| Aaronholt homestead | T-series | In the shed with a skill 1 lock next to the two silos far south of the farm houses, next to the road. The door can be picked or opened with the Aaronholt granary shed key. | 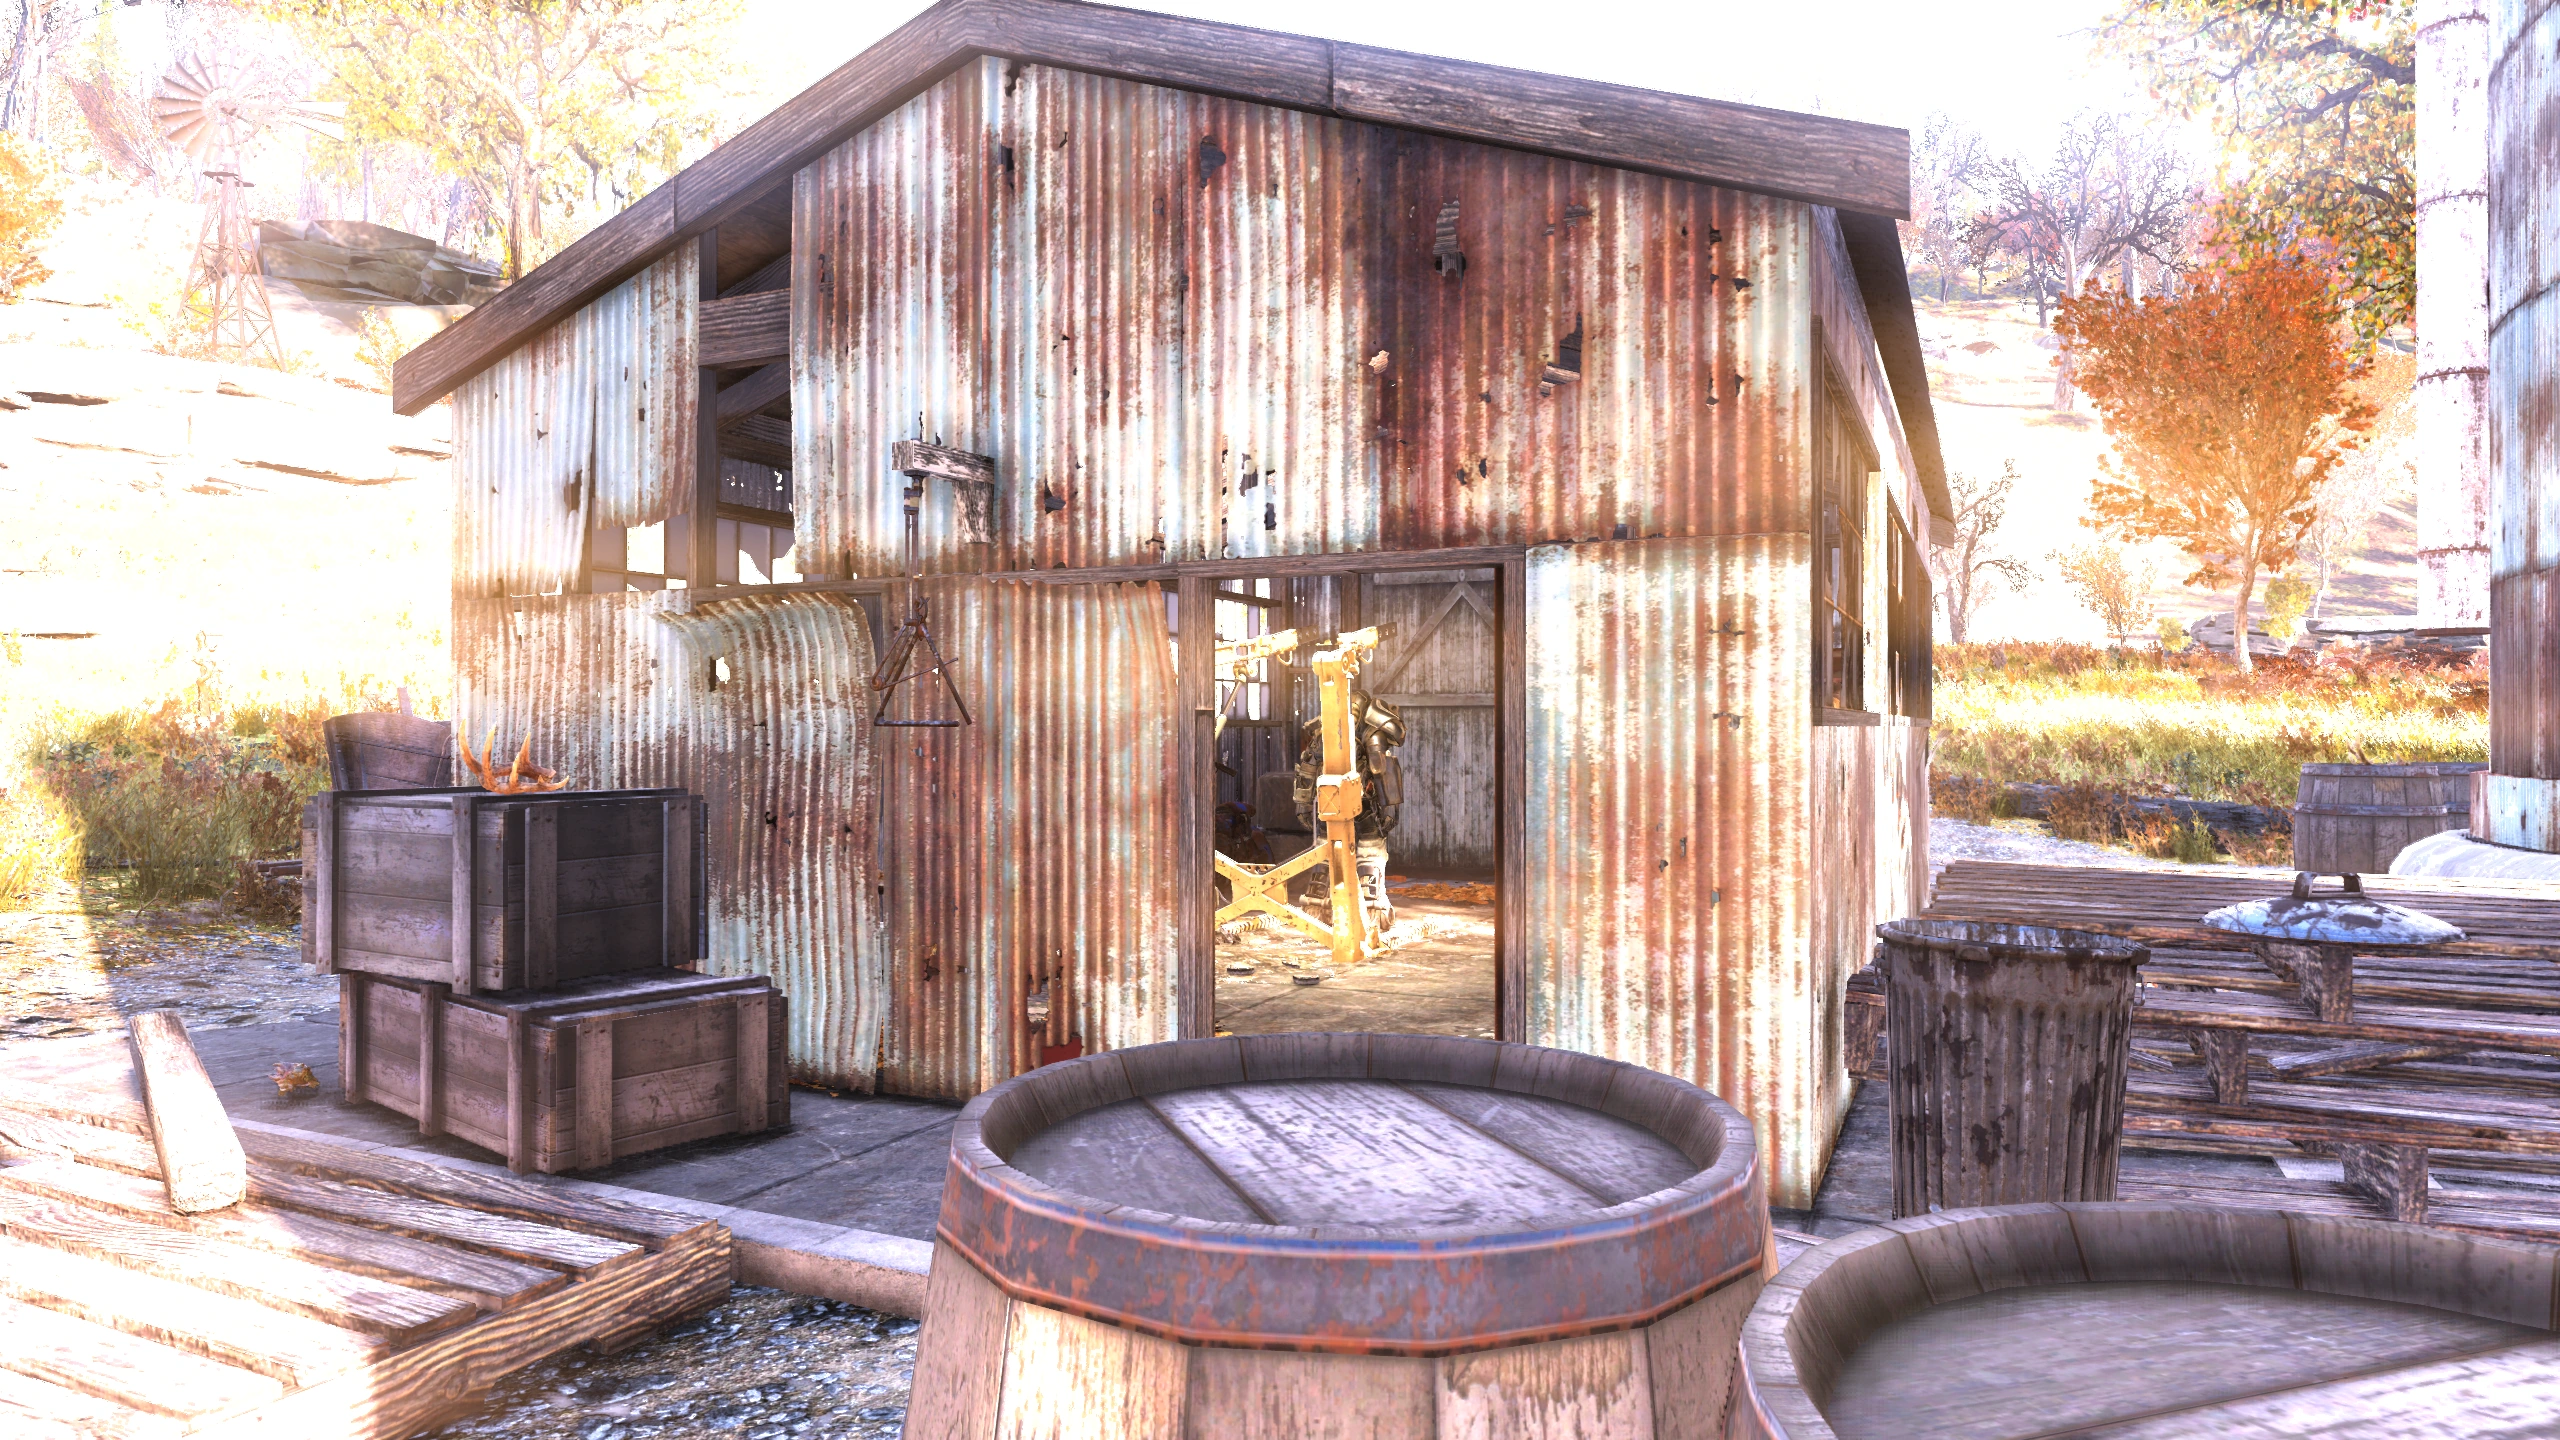
|
East Central Forest

| Location | Type | Description | Image |
|---|---|---|---|
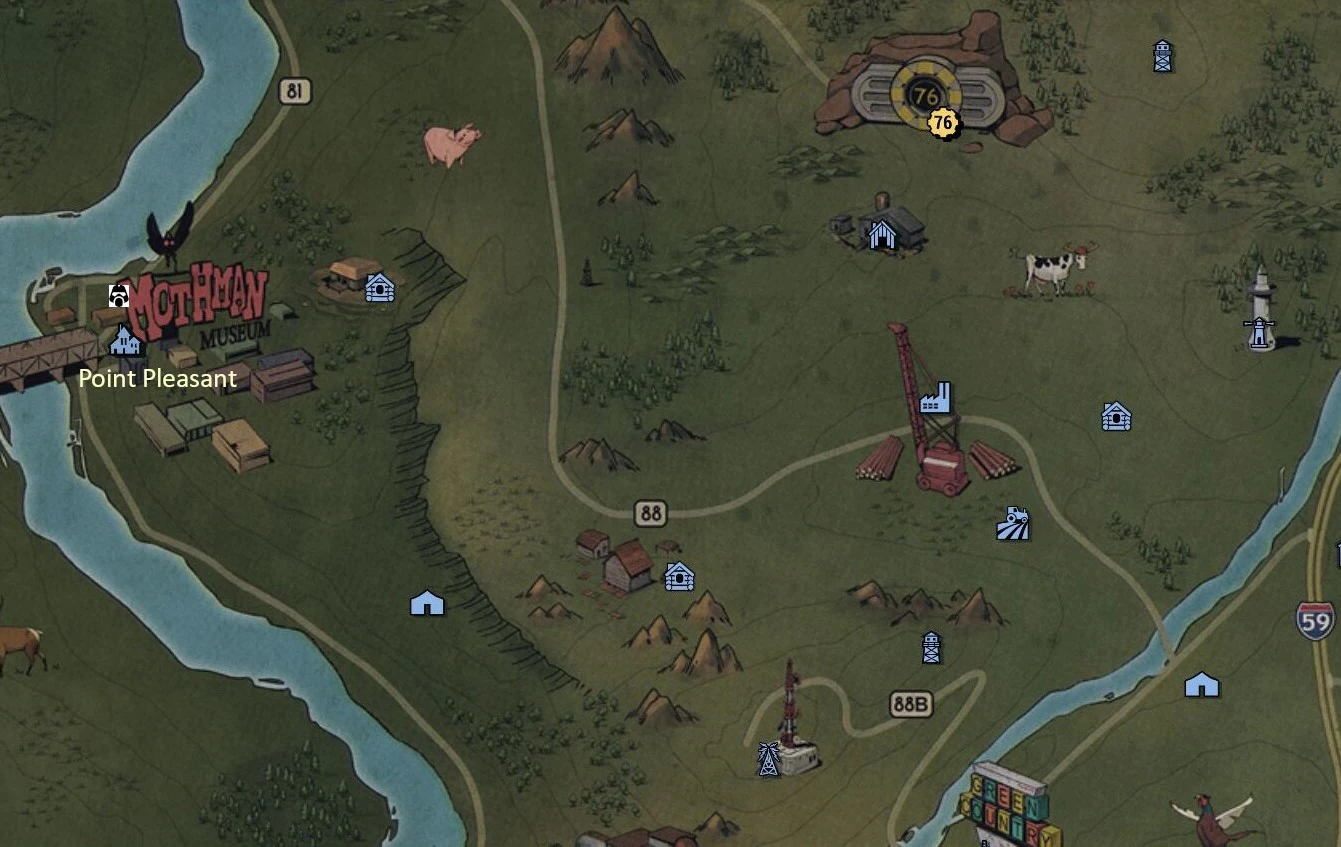
| Point Pleasant | T-series | On the roof of the hardware store. The hardware store is in the north end of the town across the road from the rest of the town beside the bridge. | 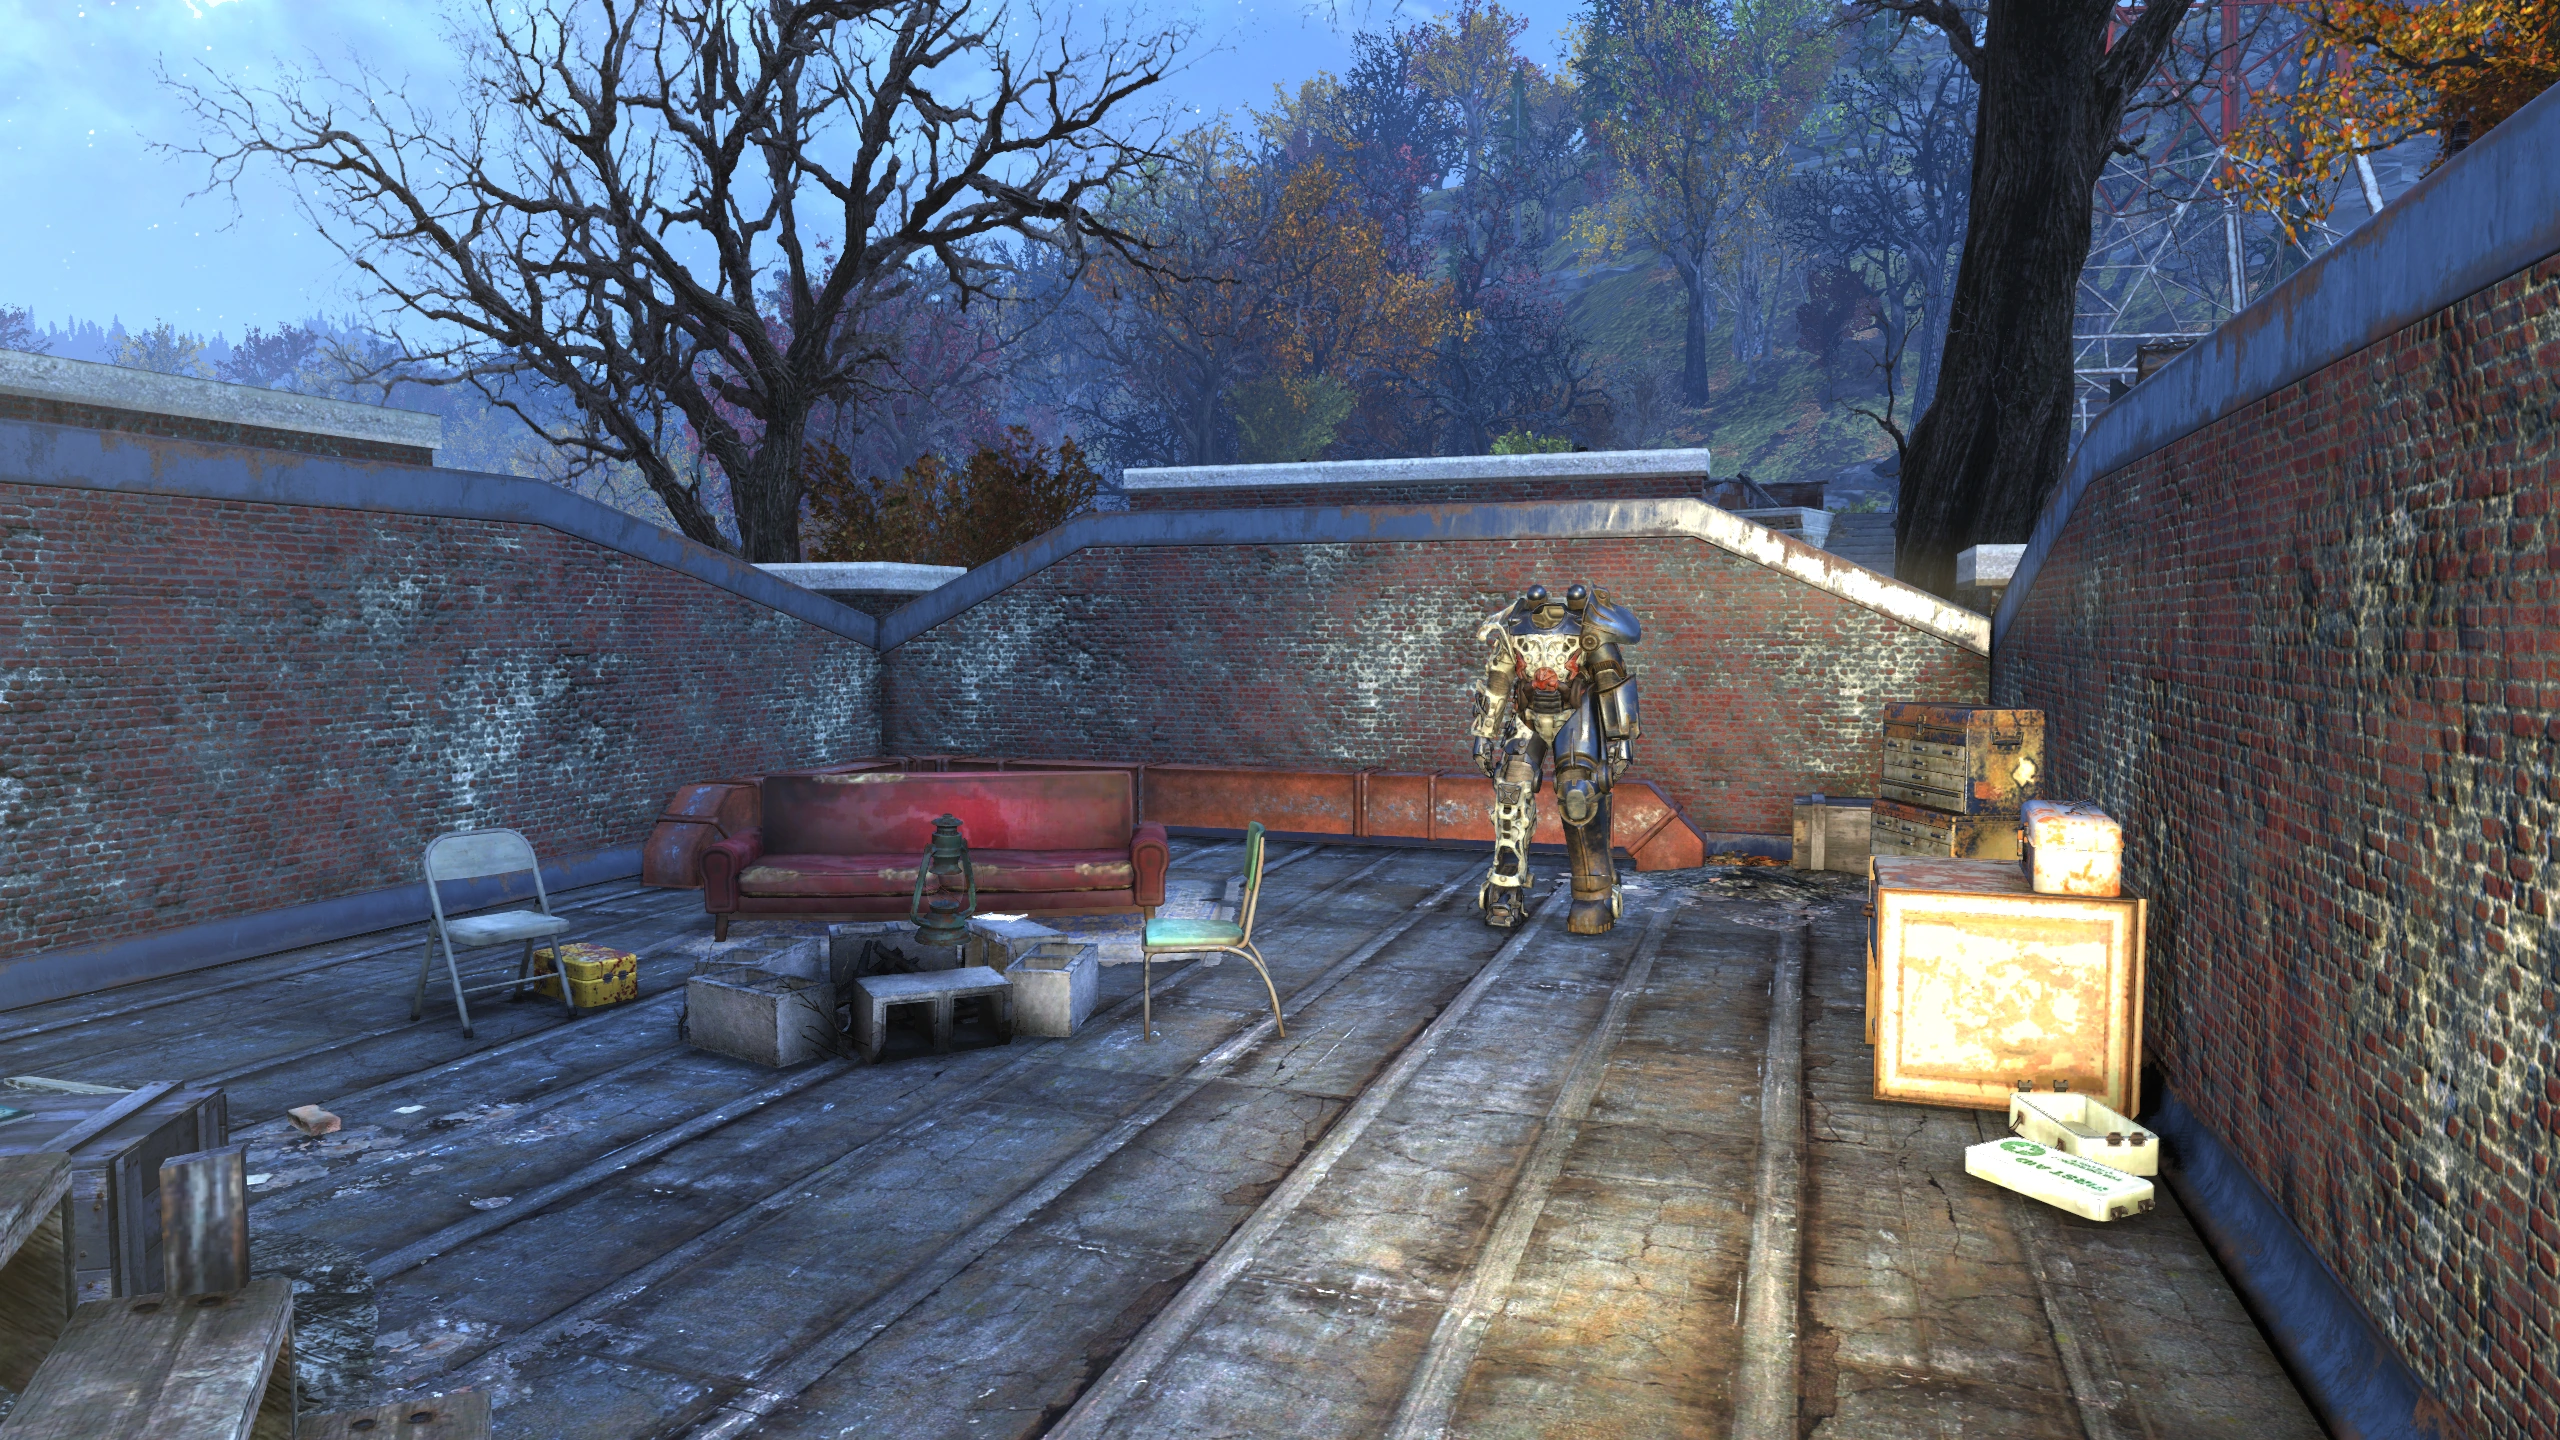
|
West Central Forest

| Location | Type | Description | Image |
|---|---|---|---|
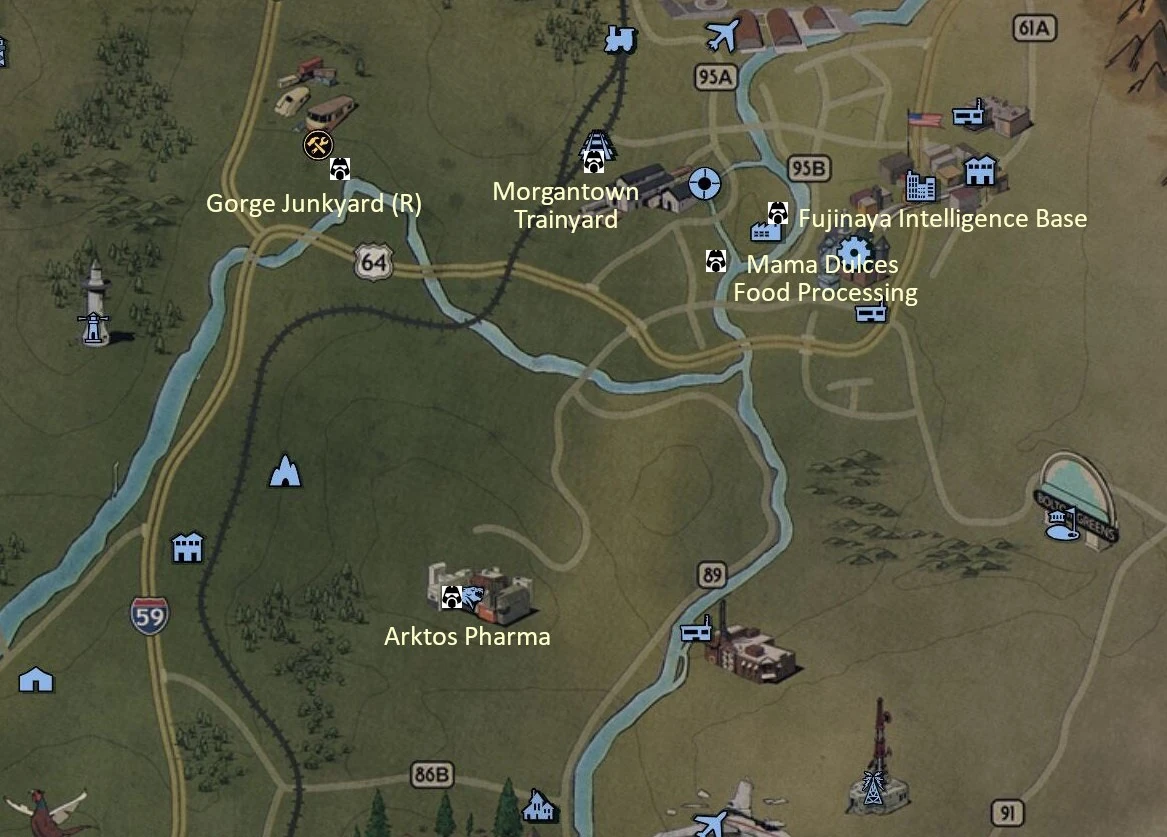
| Gorge junkyard | Raider | In a green truck trailer w/skill 3 lock, beside a wooden shed east of the workshop. Opening this lock while another player claims the workshop is no longer considered a crime. This was corrected in Fallout 76 patch 1.1.0.8. | 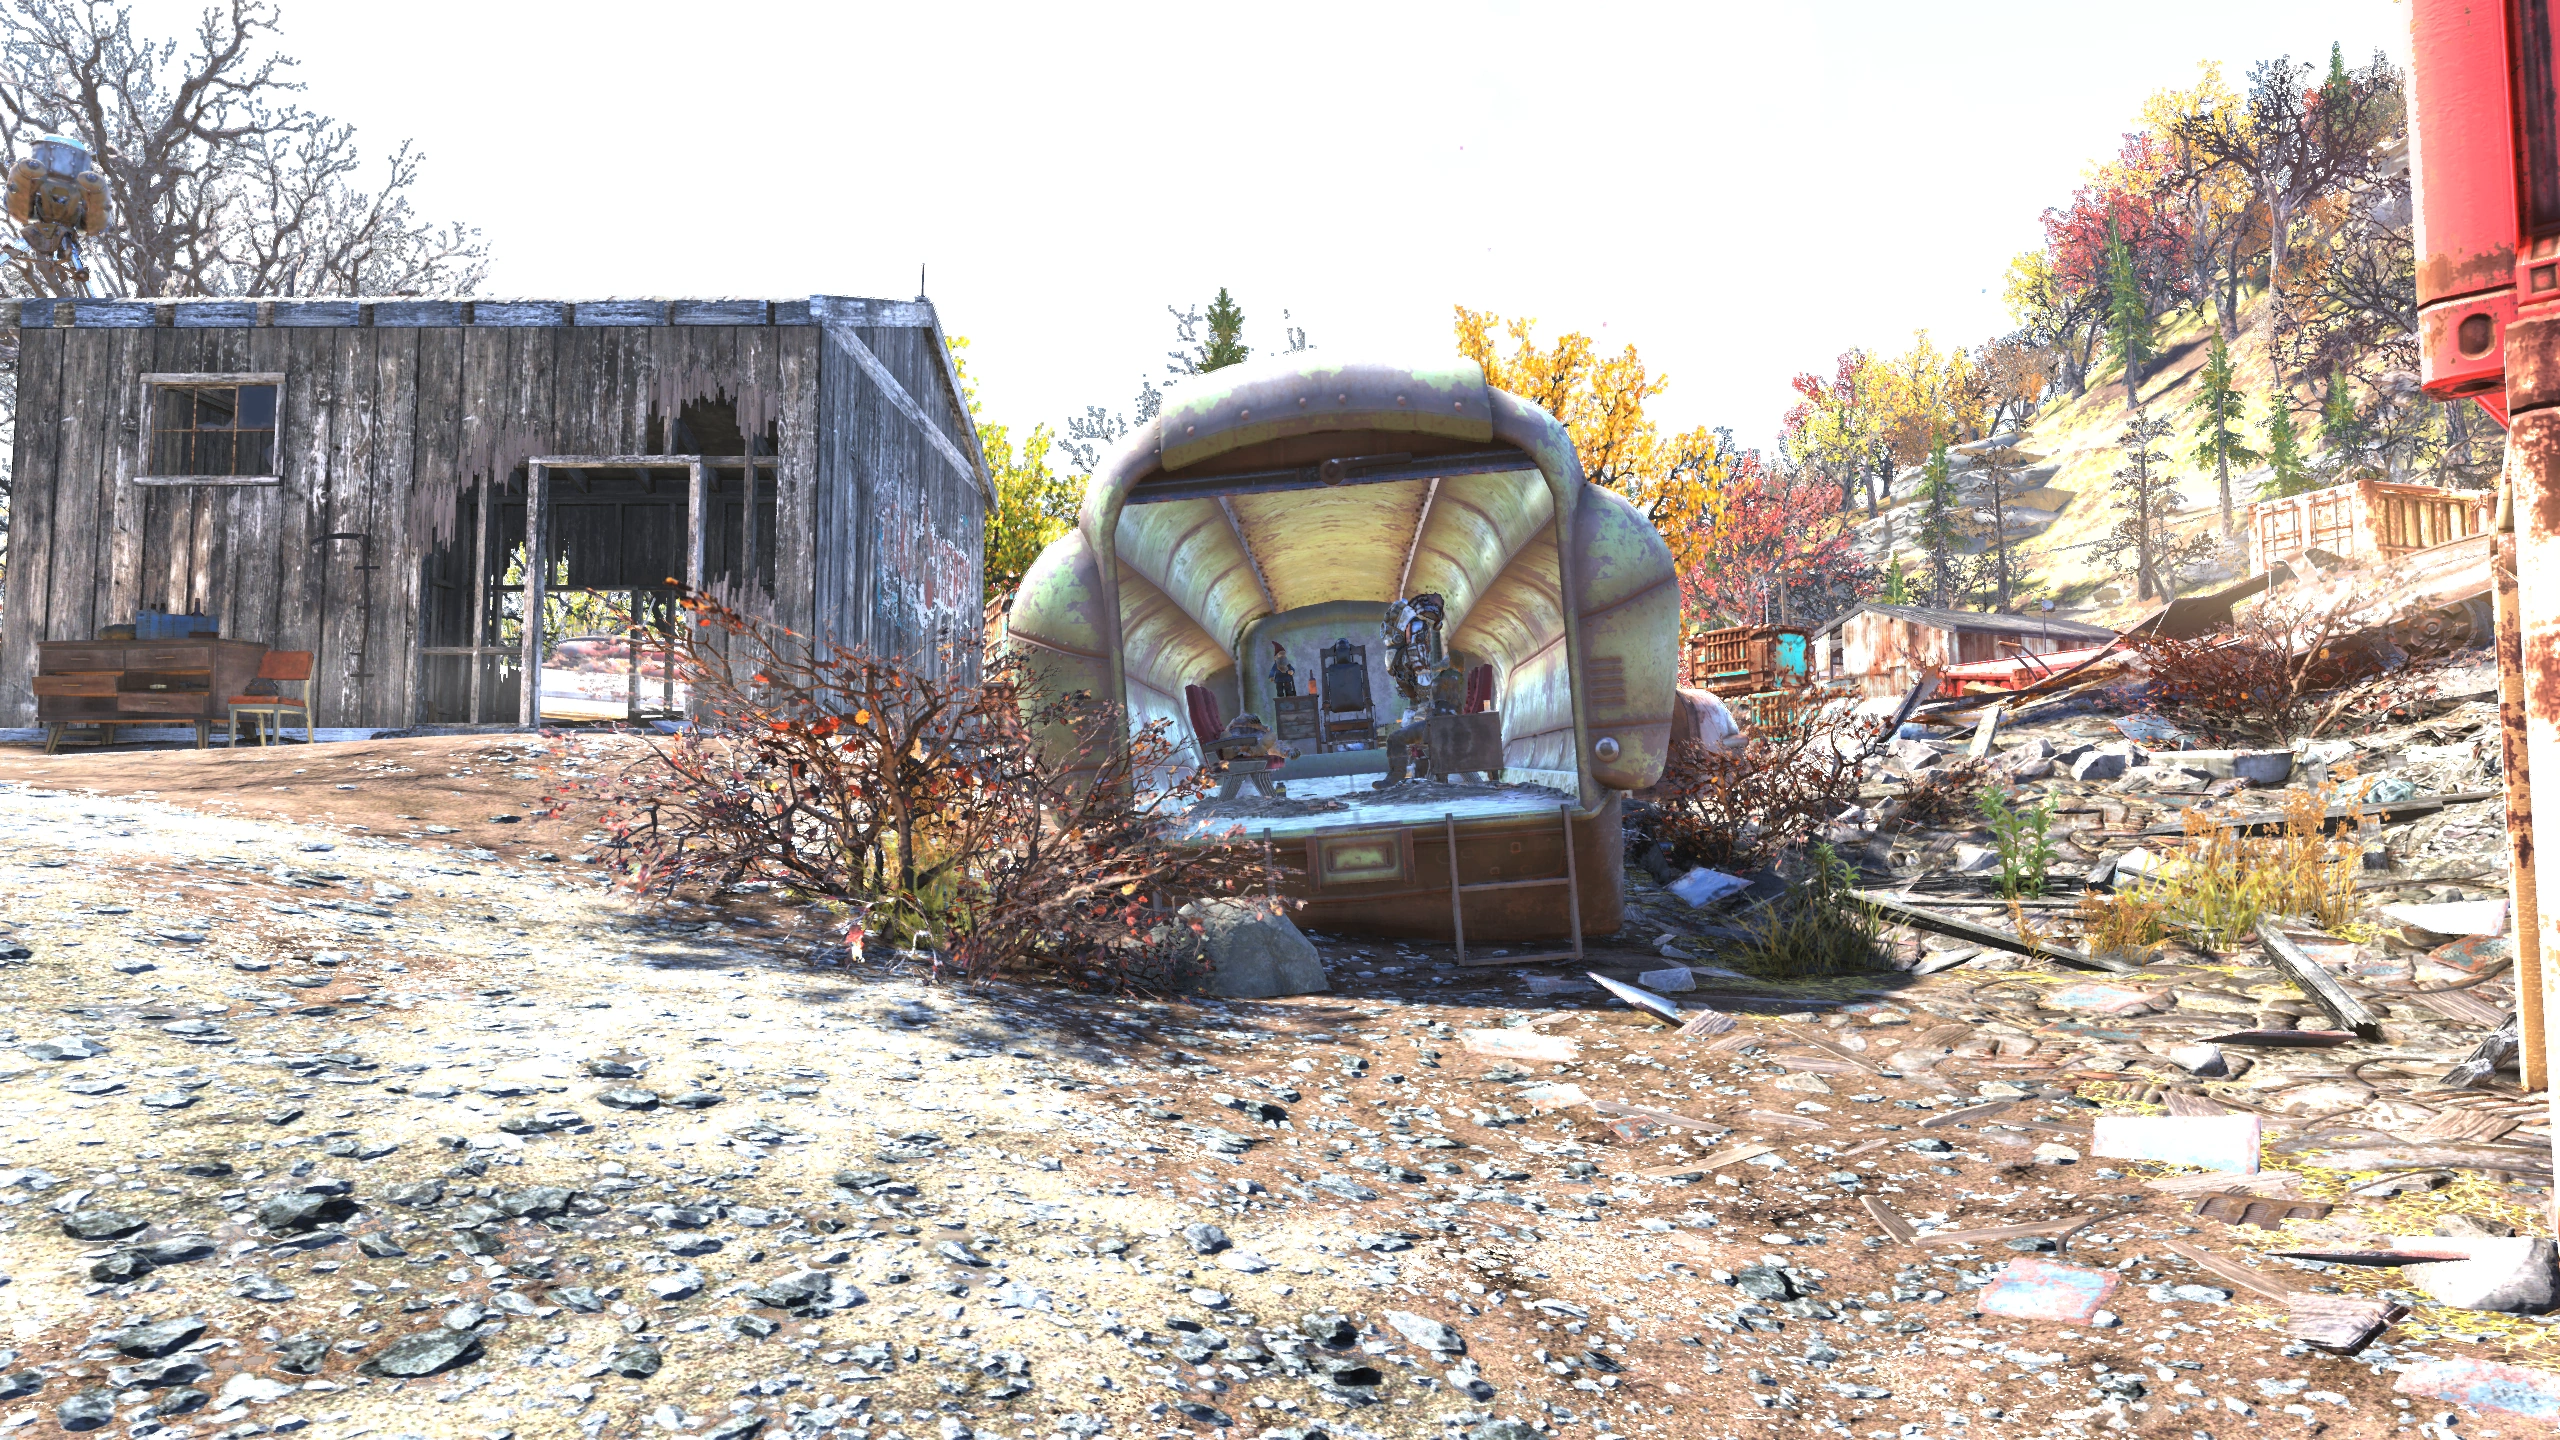
|
| Morgantown trainyard | T-series | In a railcar with a crane over it beside the building. | 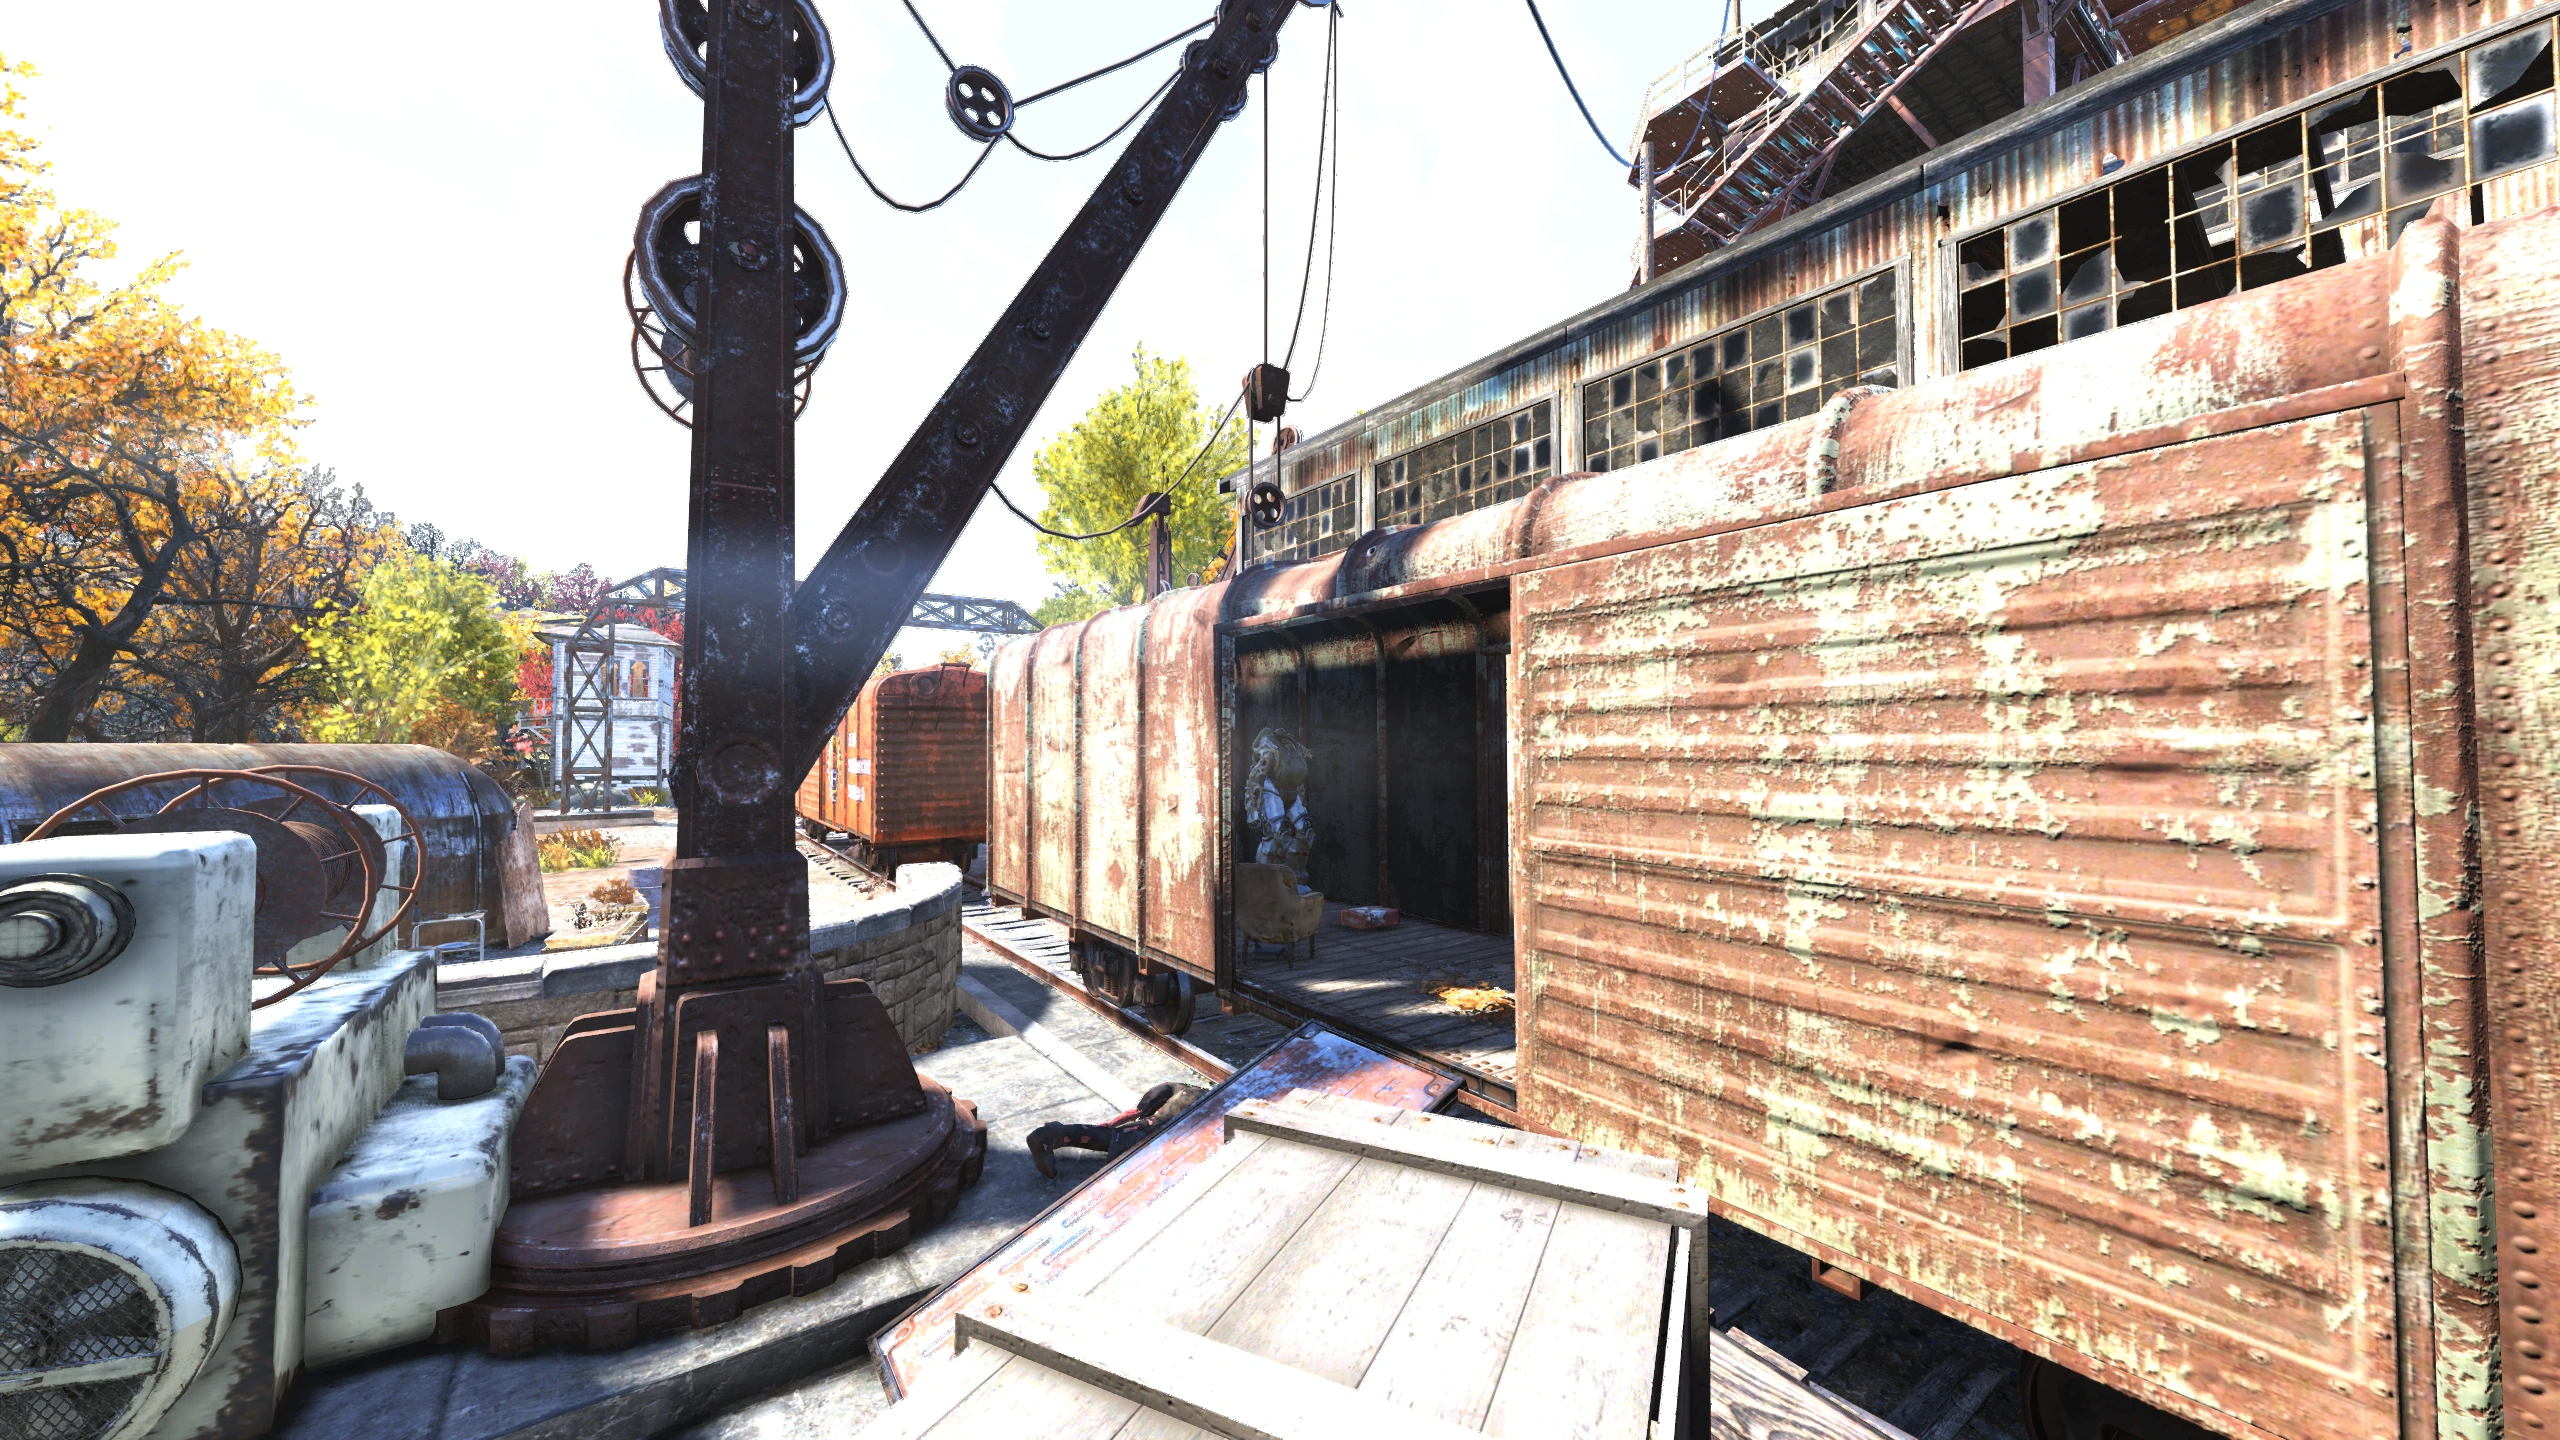
|
| Fujiniya Intelligence Base | T-Series | The intelligence base is underneath Mama Dolce's Food Processing and the needed entrance keycard is inside the plant. The power armor is in a locked security cage in the lowest level. It can be opened with a second keycard or from a nearby terminal, skill 1 hack. | 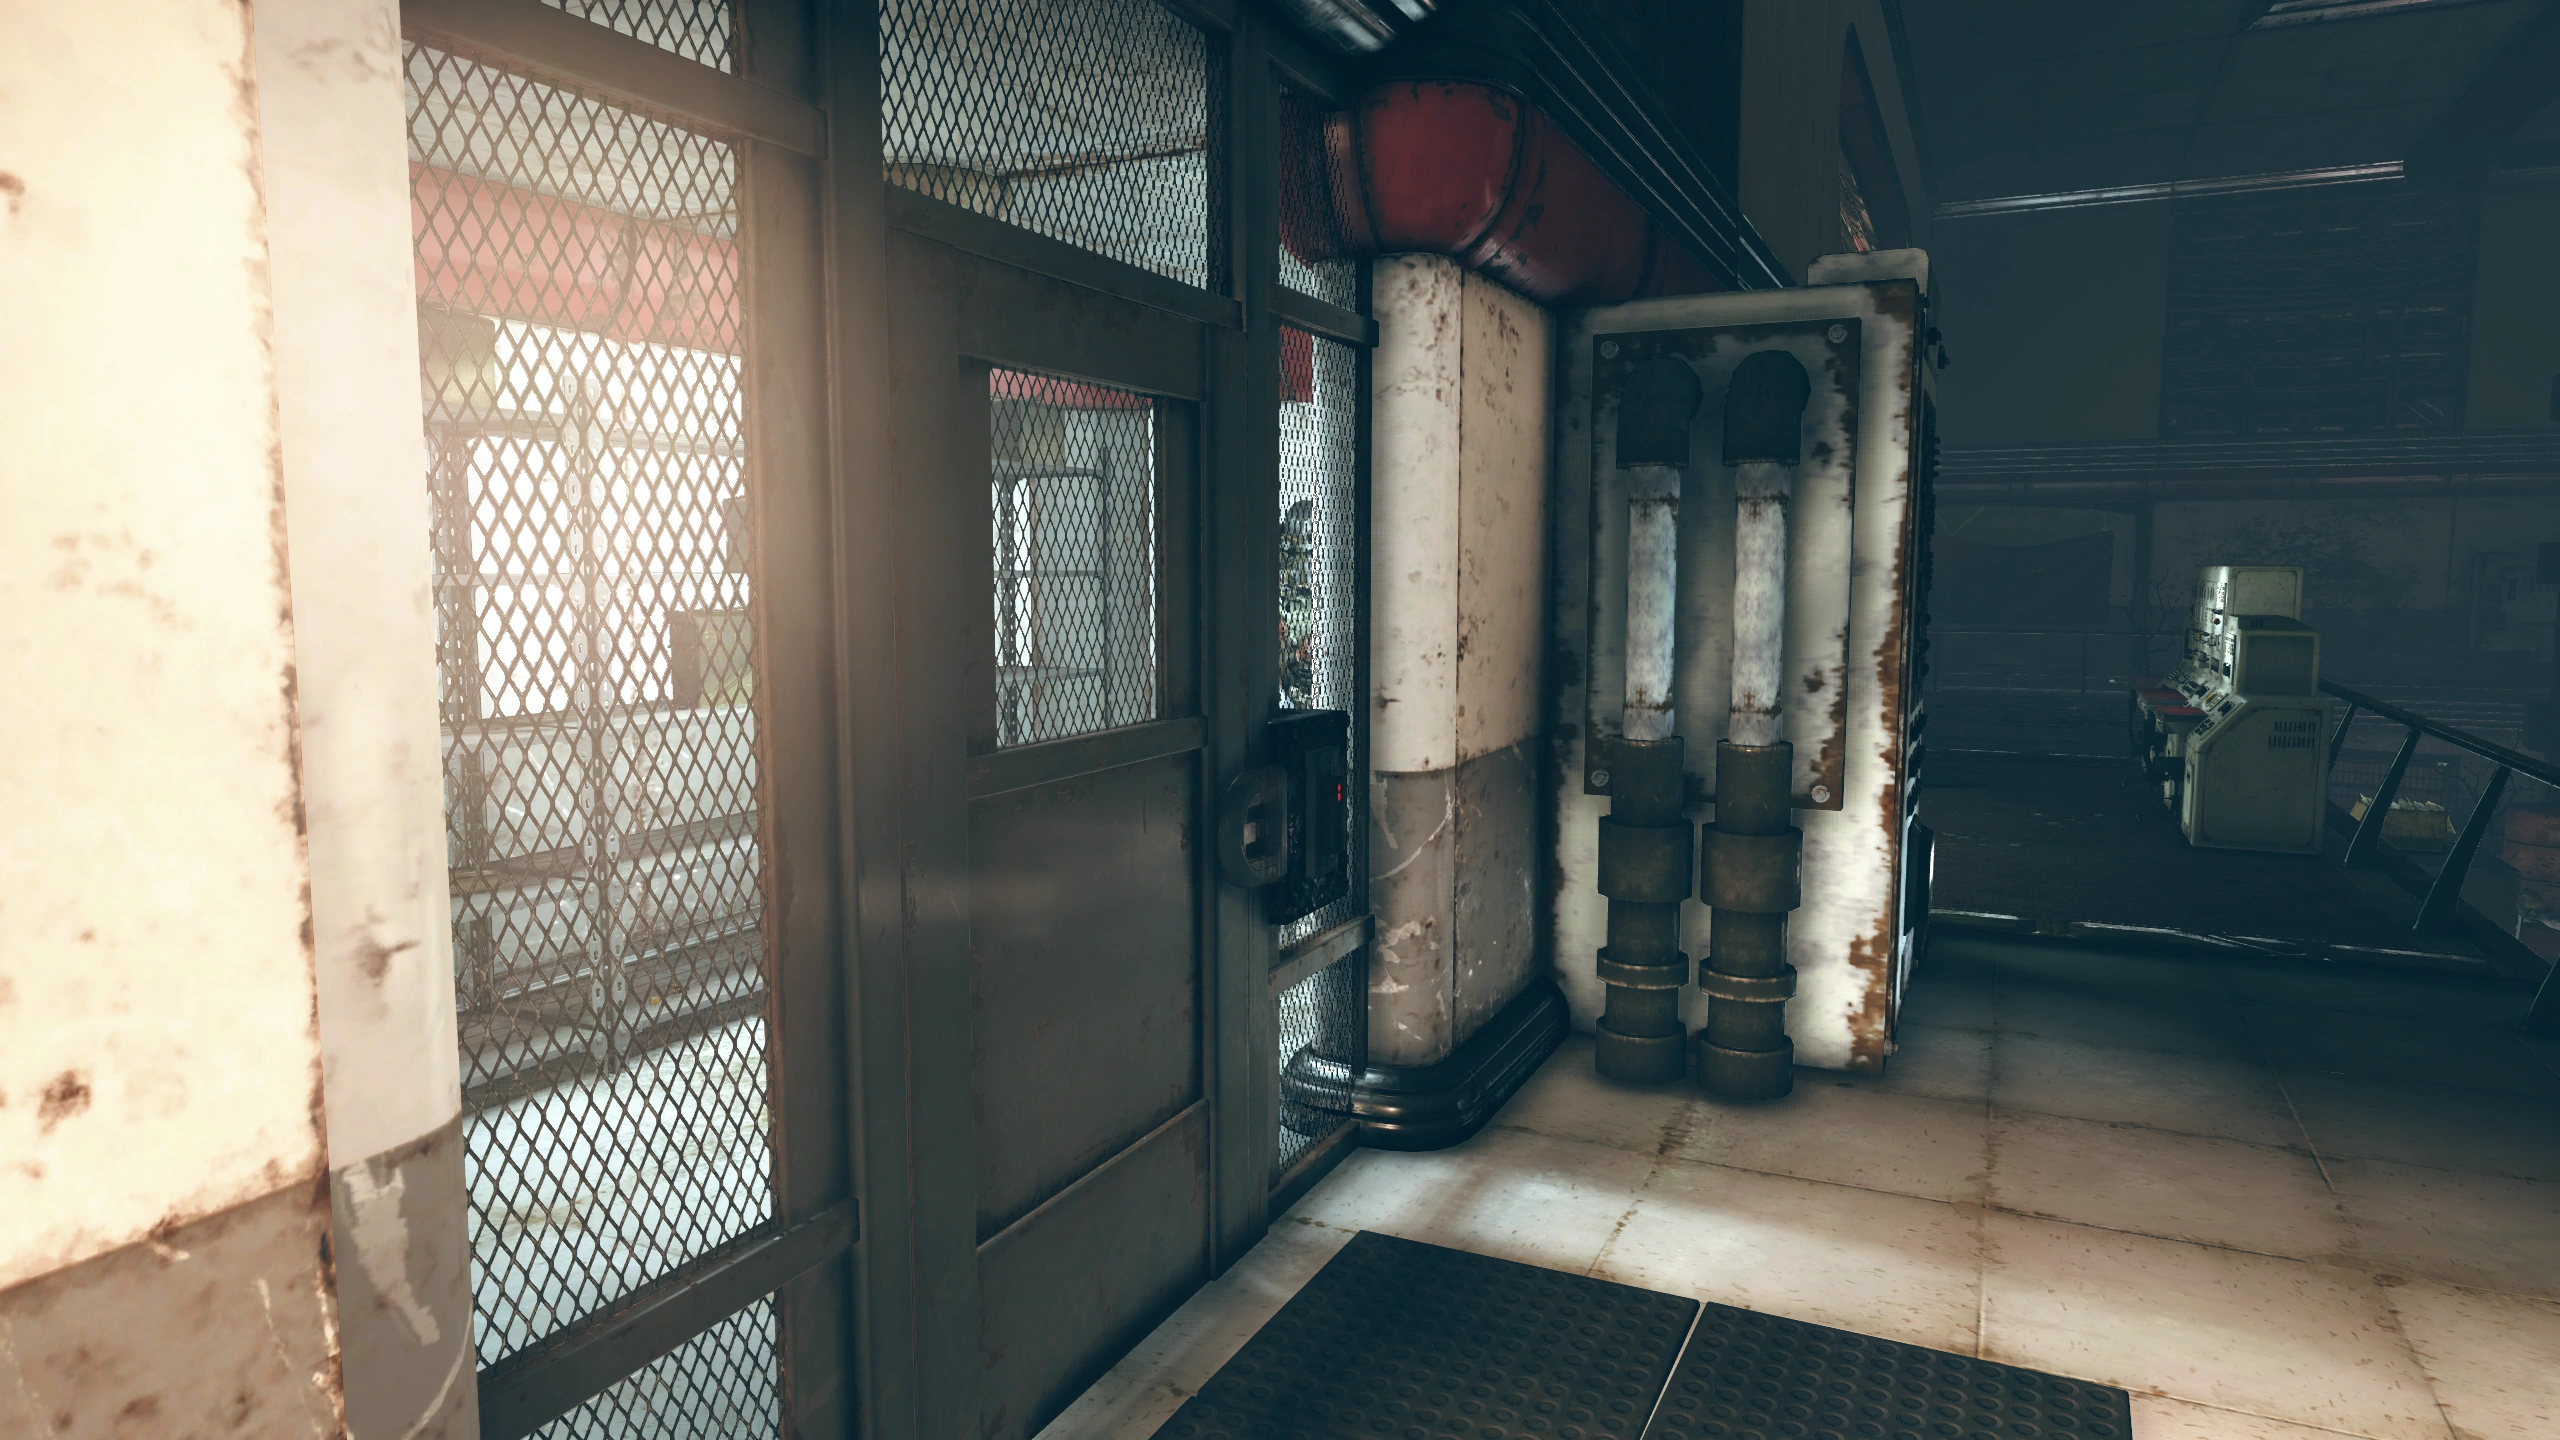
|
| Mama Dolce's Food Processing | T-Series | In a boobytrapped and mined warehouse southwest of Mama Dolce's. It is the building with the outside stairway to the roof. | 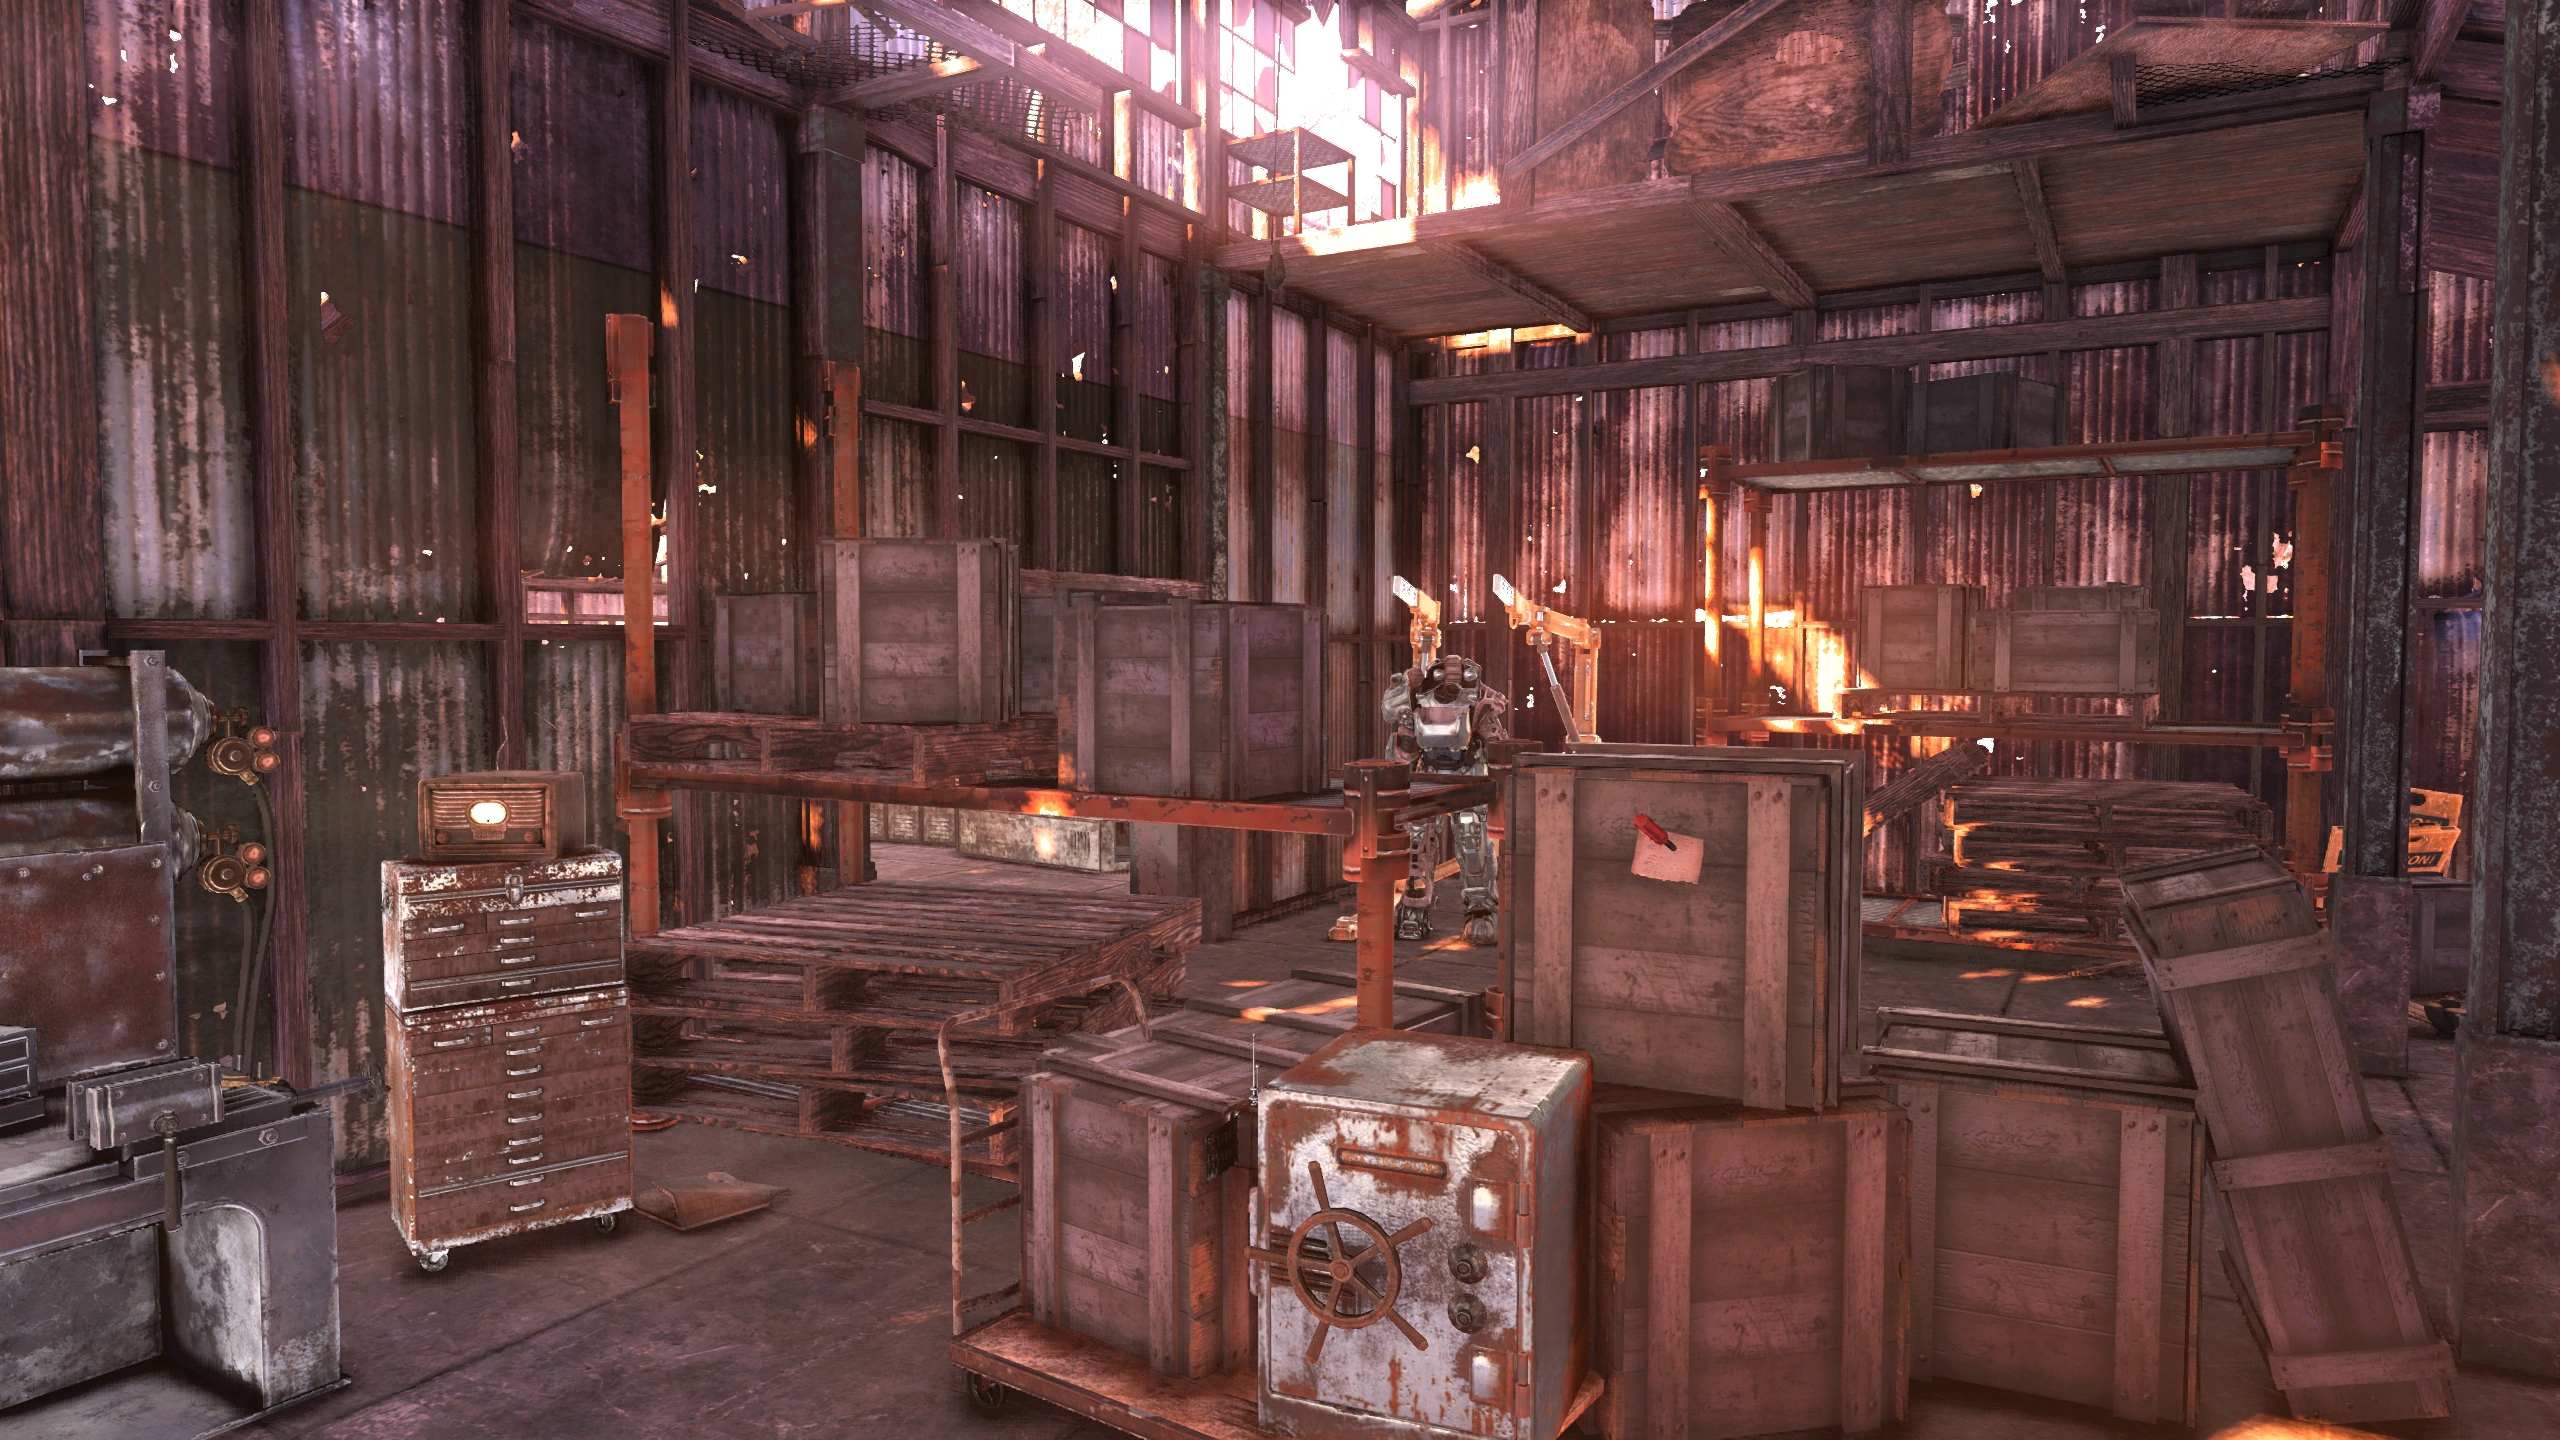
|
| Arktos Pharma | T-Series | On the third floor of the loading dock area, behind a security gate opened by a computer terminal, skill 0 hack. | 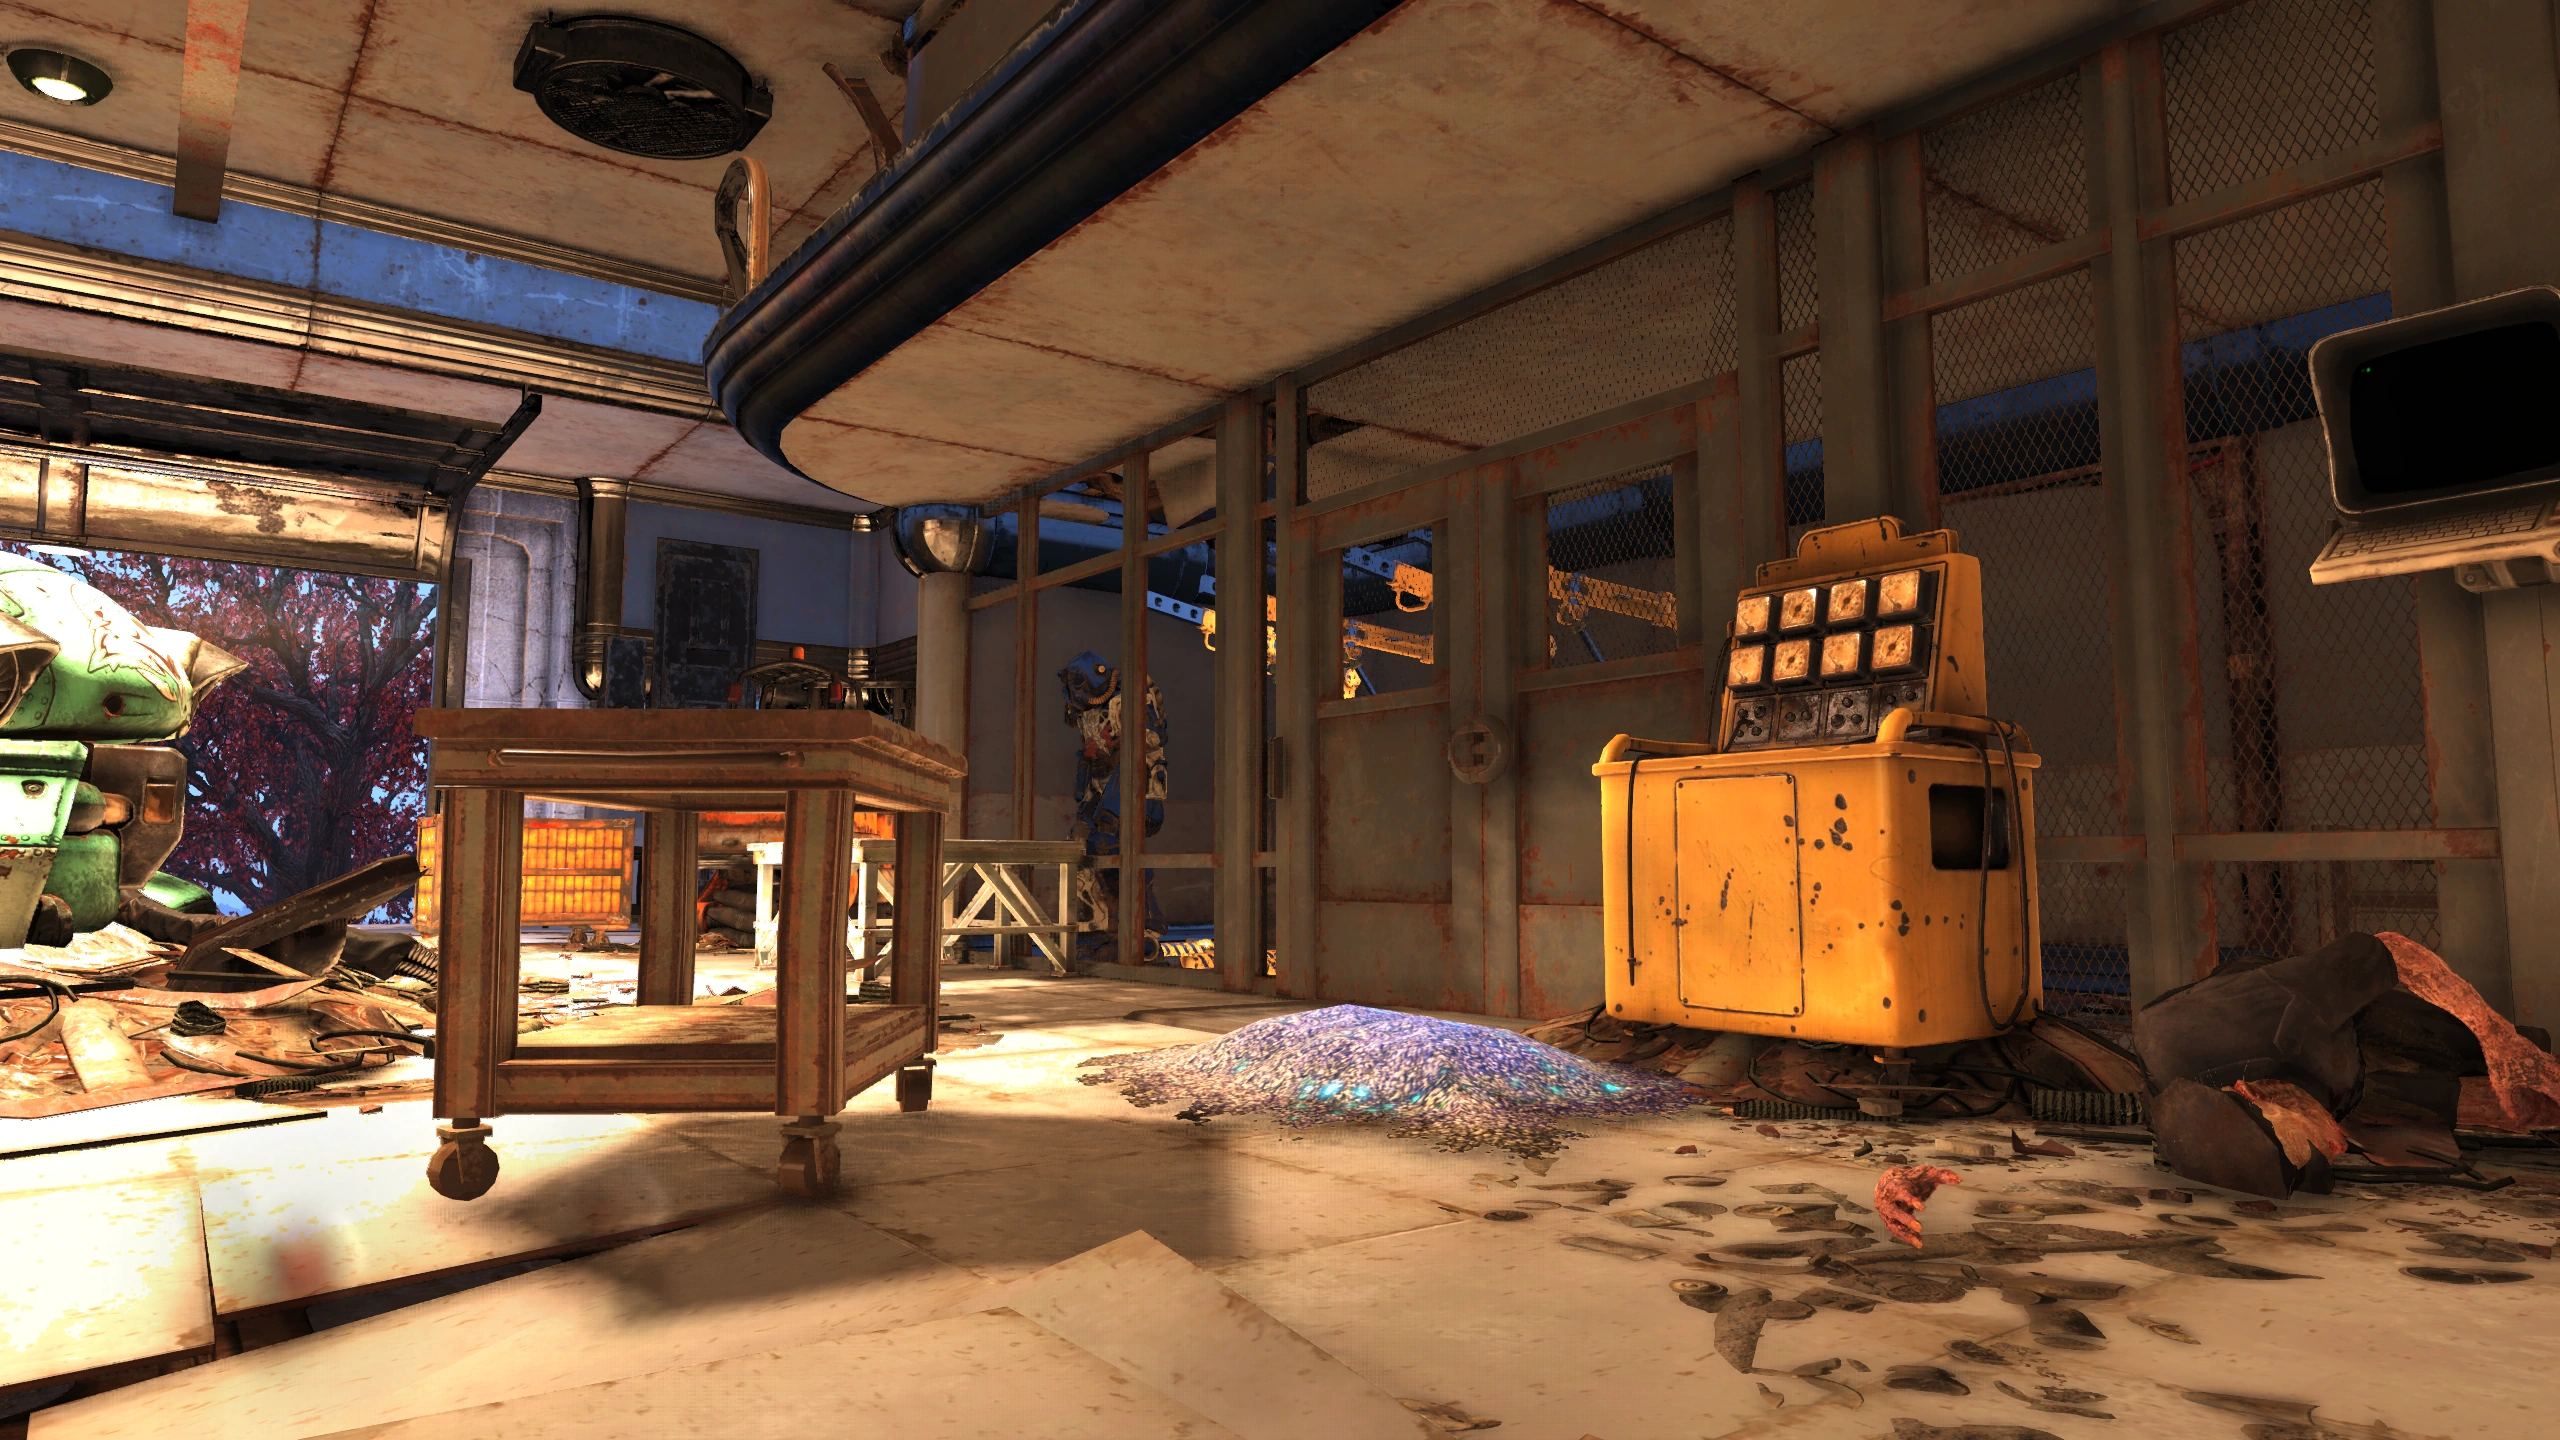
|
Southeast Forest

| Location | Type | Description | Image |
|---|---|---|---|
| Silva homestead | T-Series | At the power armor station in the large rounded metal building near a silo. It is south of Silva Homestead and north of Billings homestead | 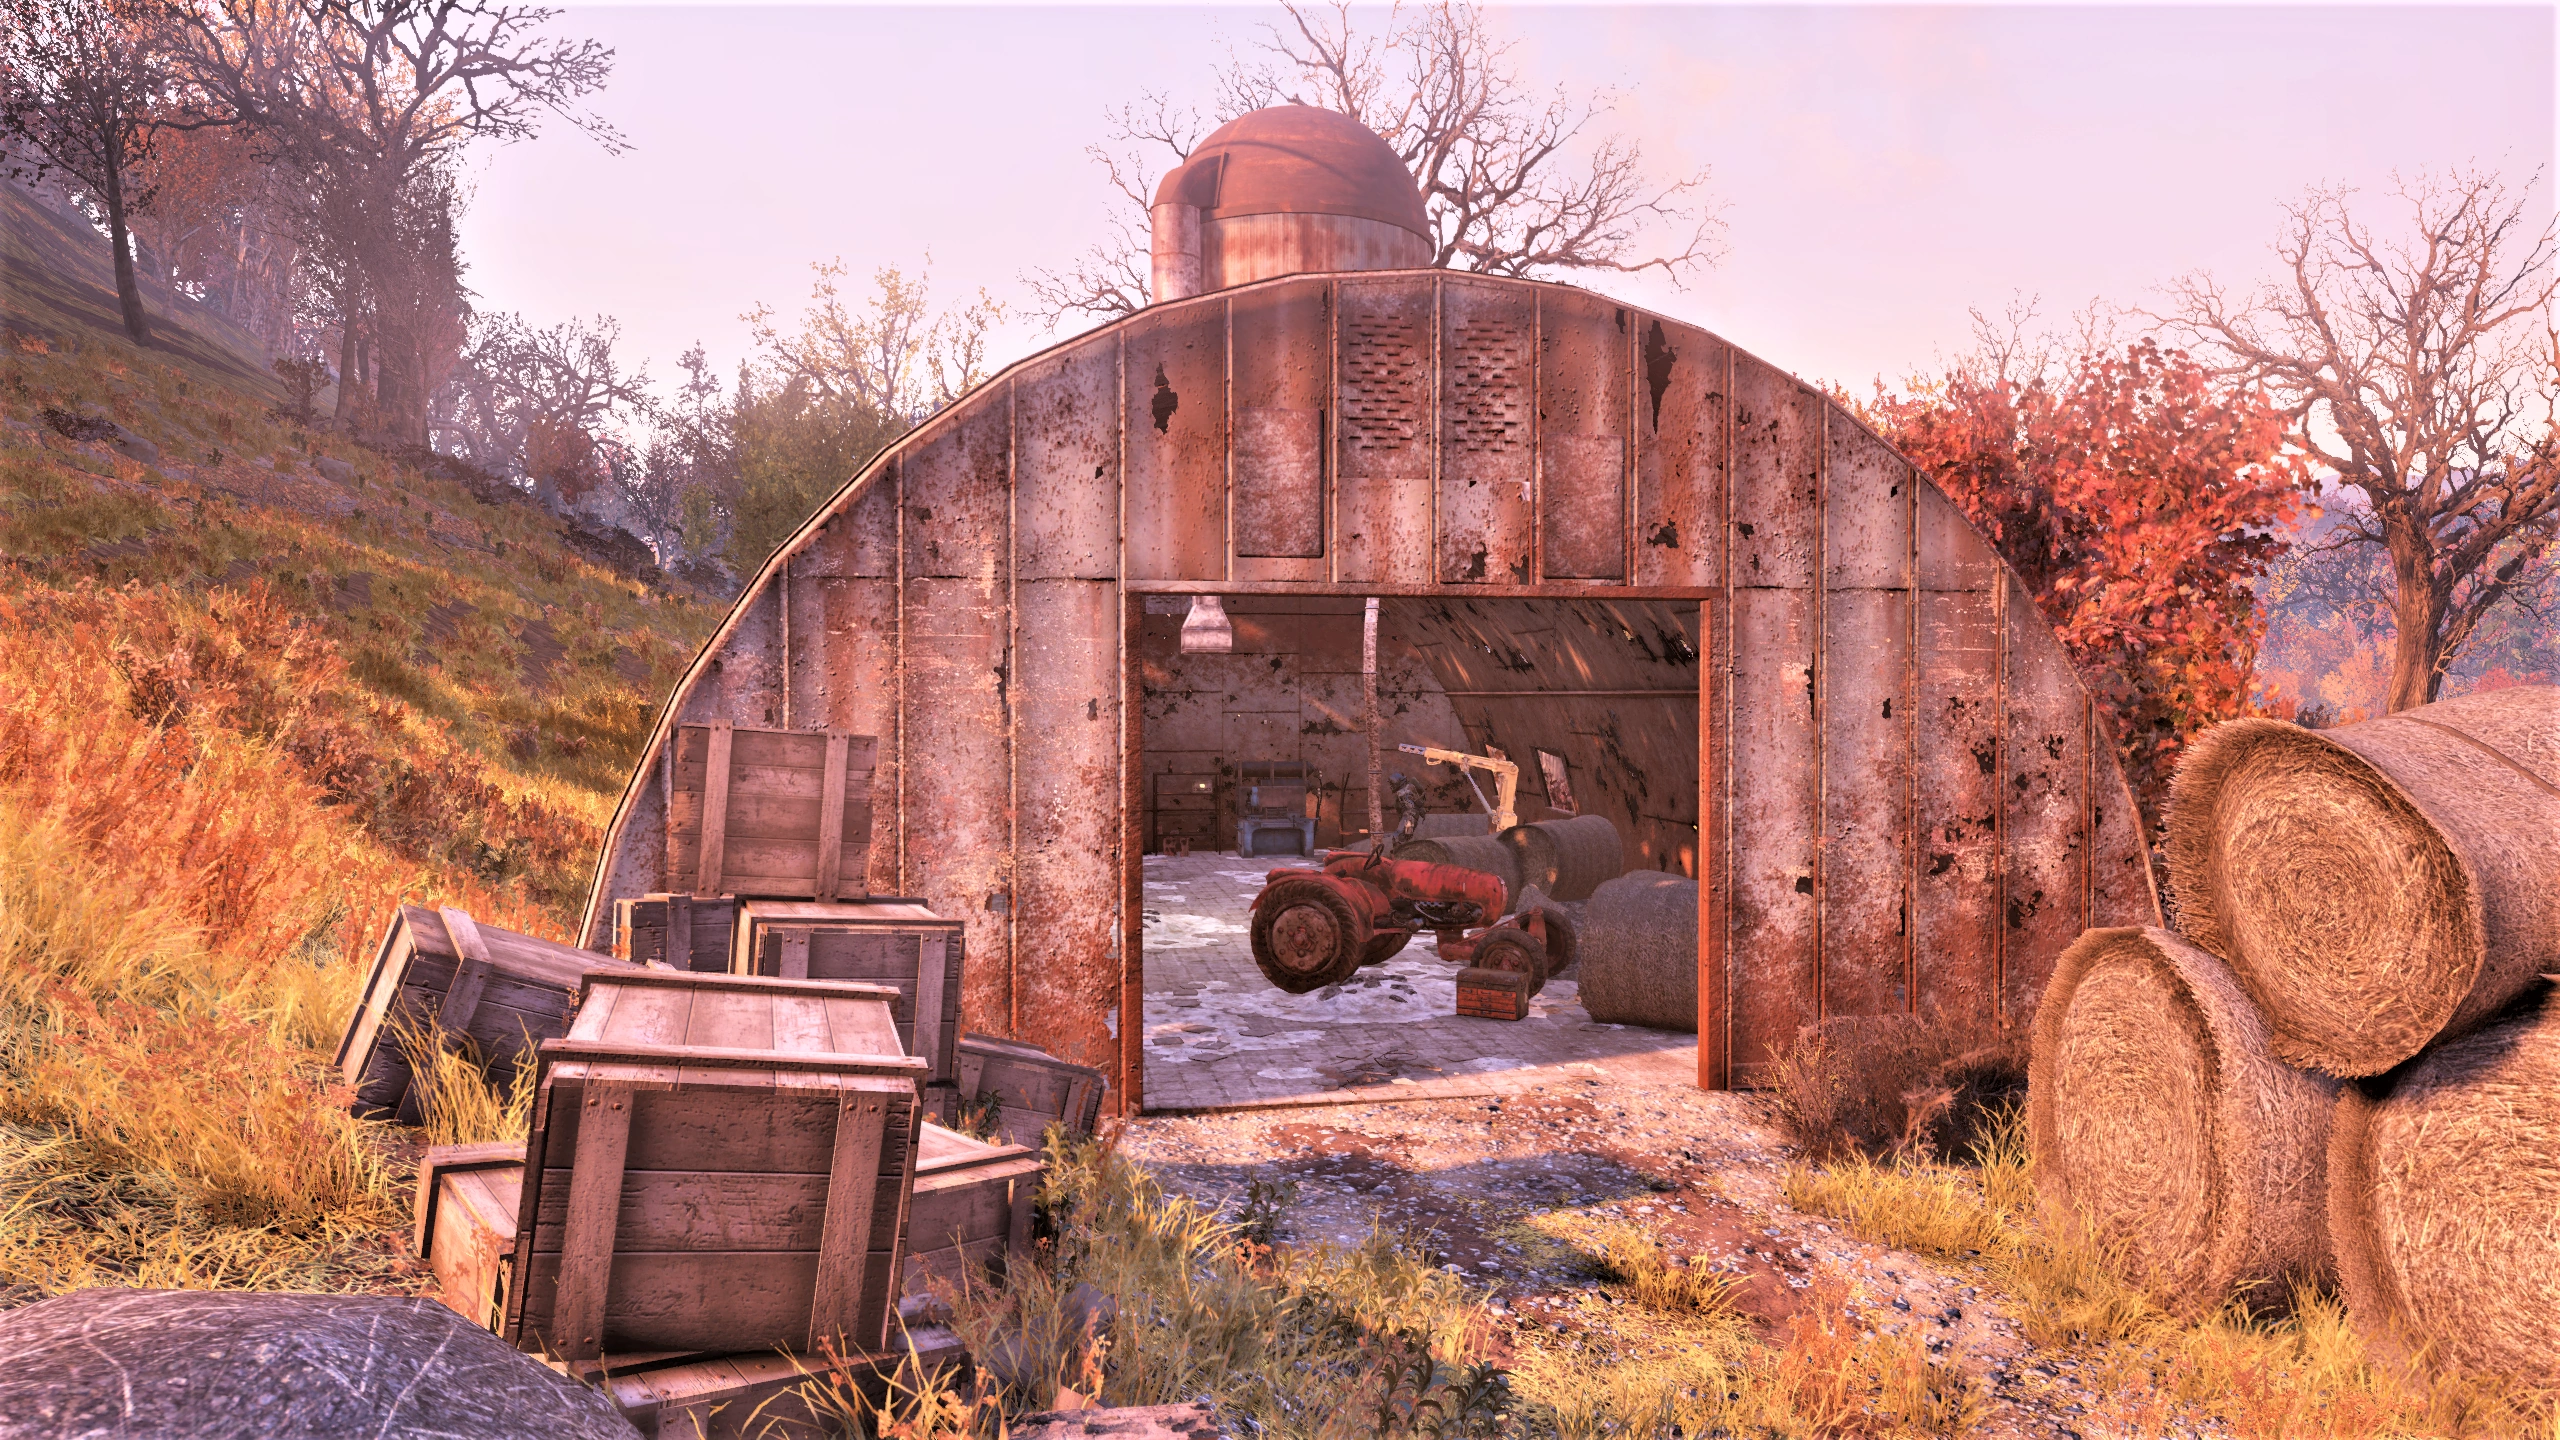
|
| New River Gorge Bridge West | Raider | West end, behind a locked door that cannot be picked. The key is at Camden Park on the roller coaster. A fusion core can spawn in the closet just inside the entry door. | 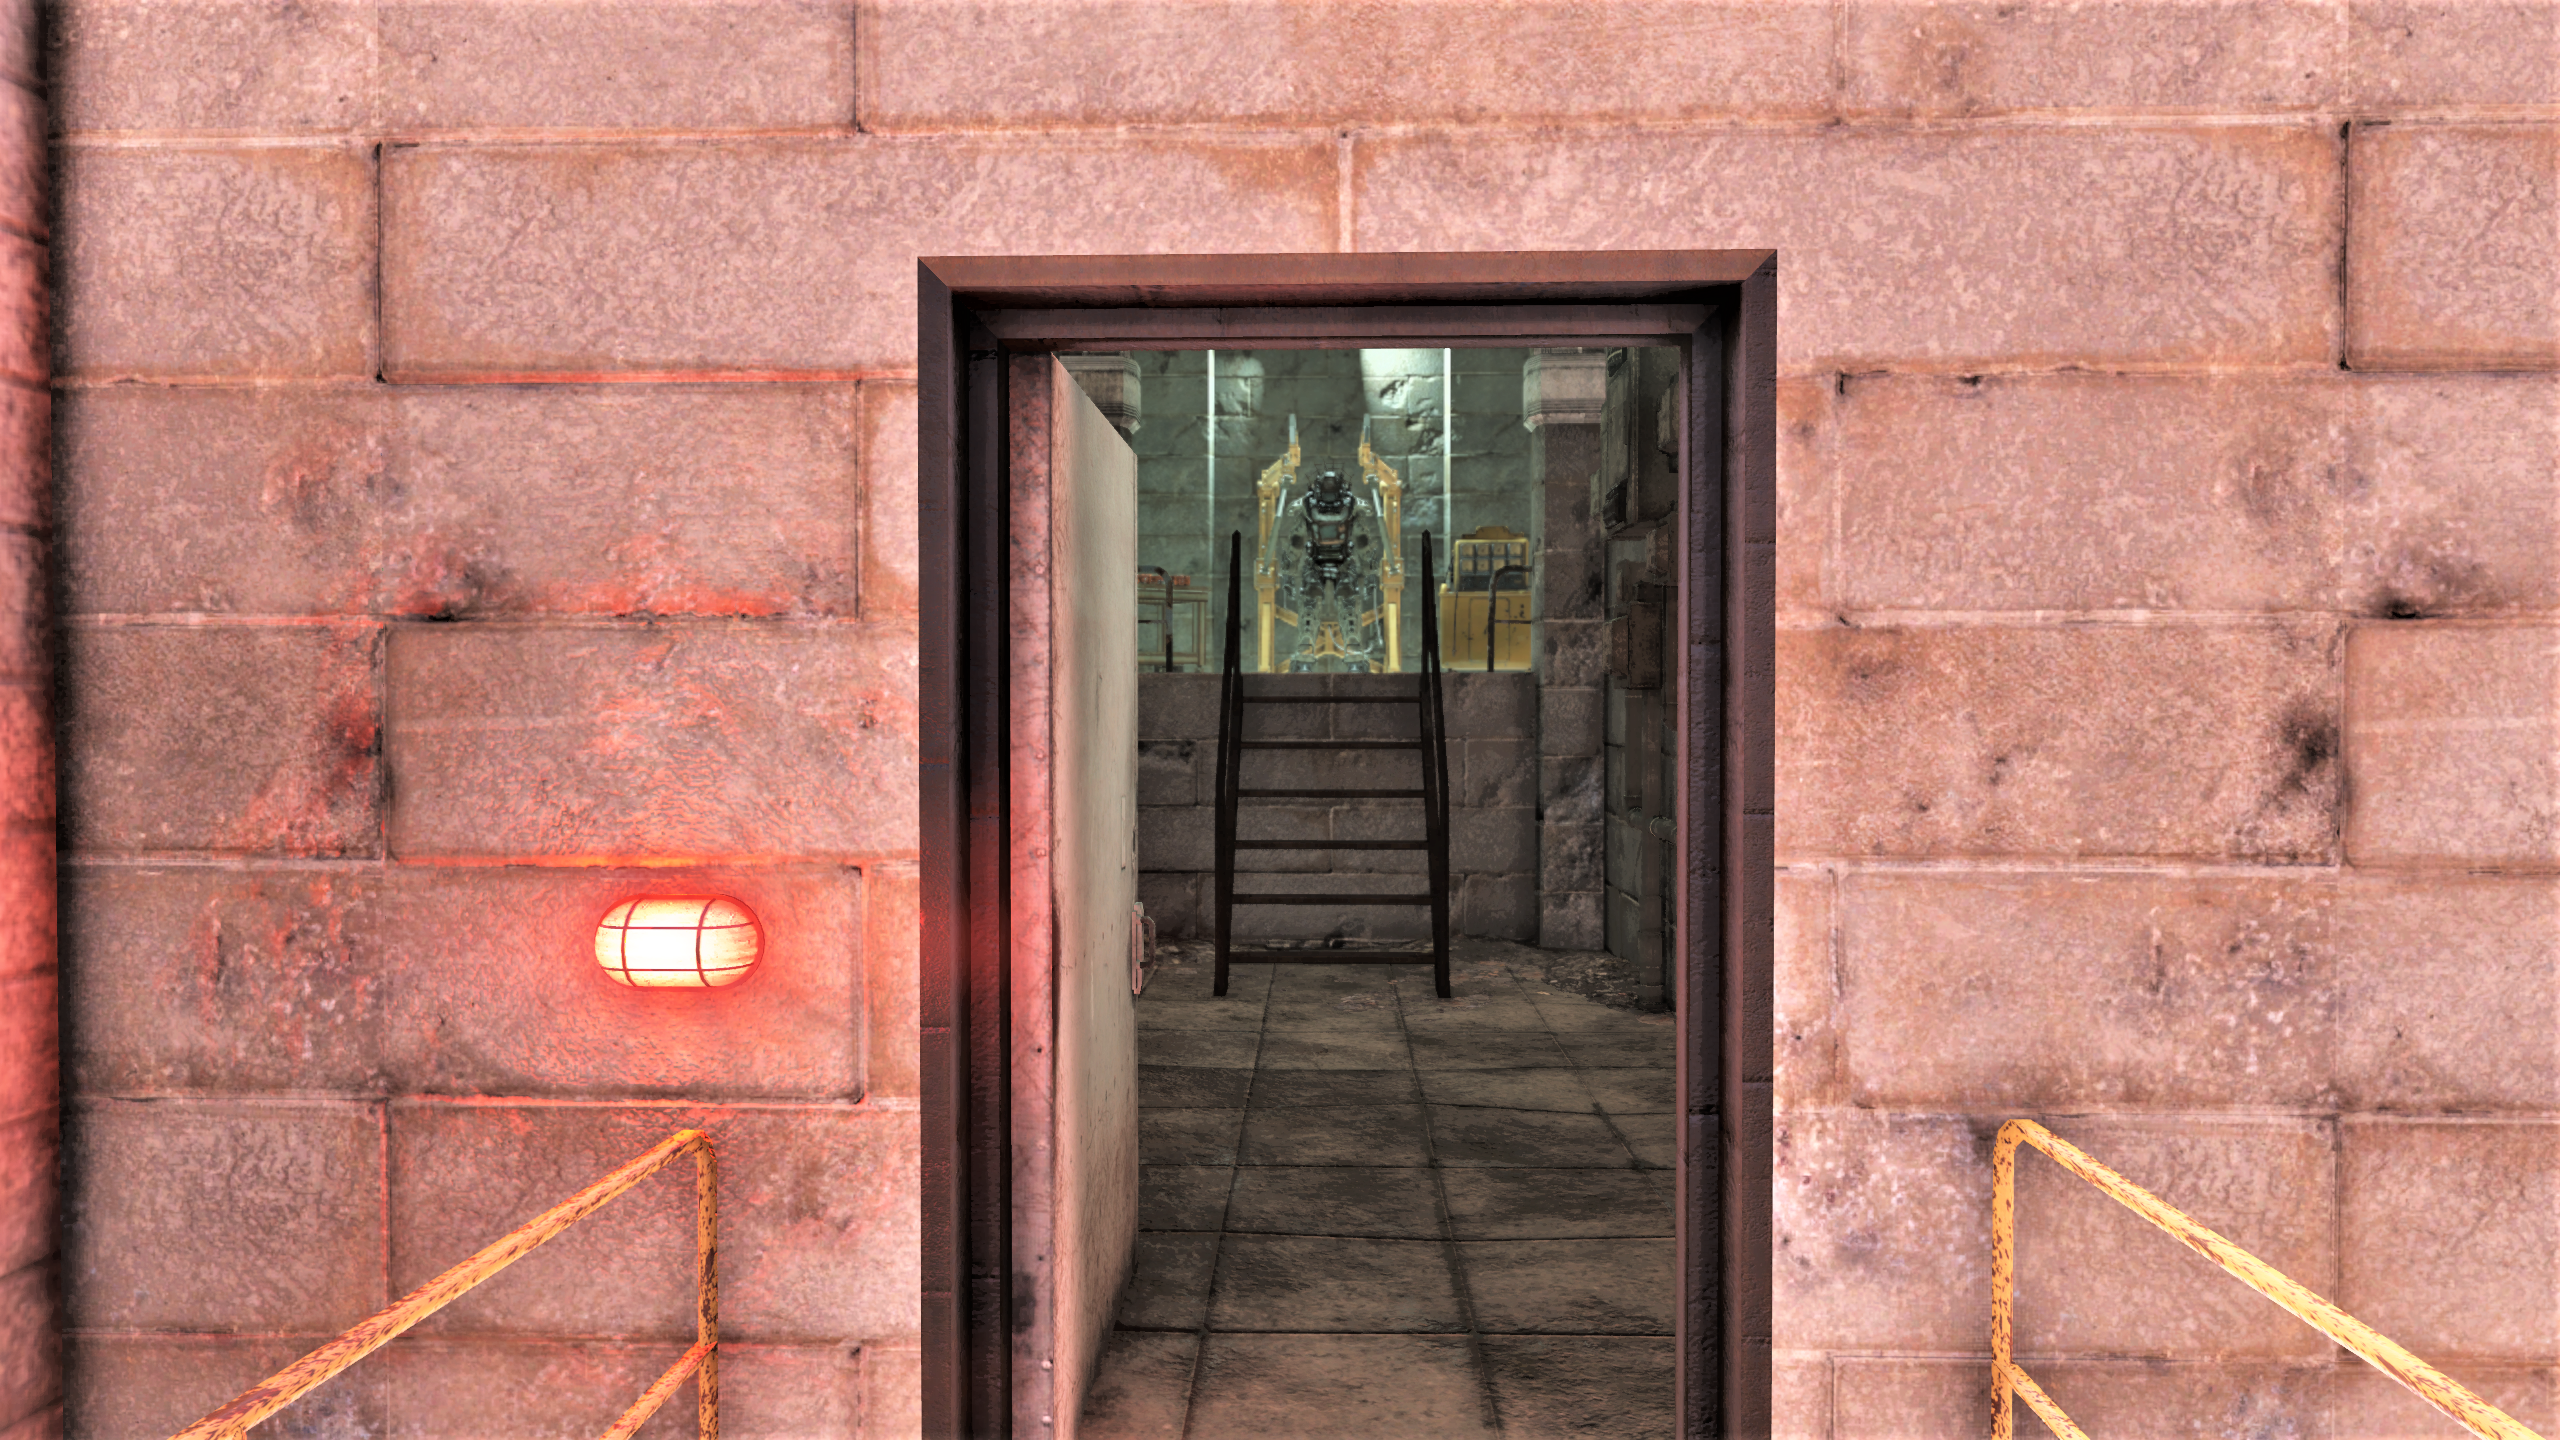
|
| Lewis & Sons Farming Supply | T-Series | At the power armor station in the barn. | 
|
| Kanawha Nuka-Cola plant | T-Series | Enter the loading dock, use the door on the left and it is in the large room at a power armor station. A fusion core can spawn in a locked security cage through the door to the left of the power armor. | 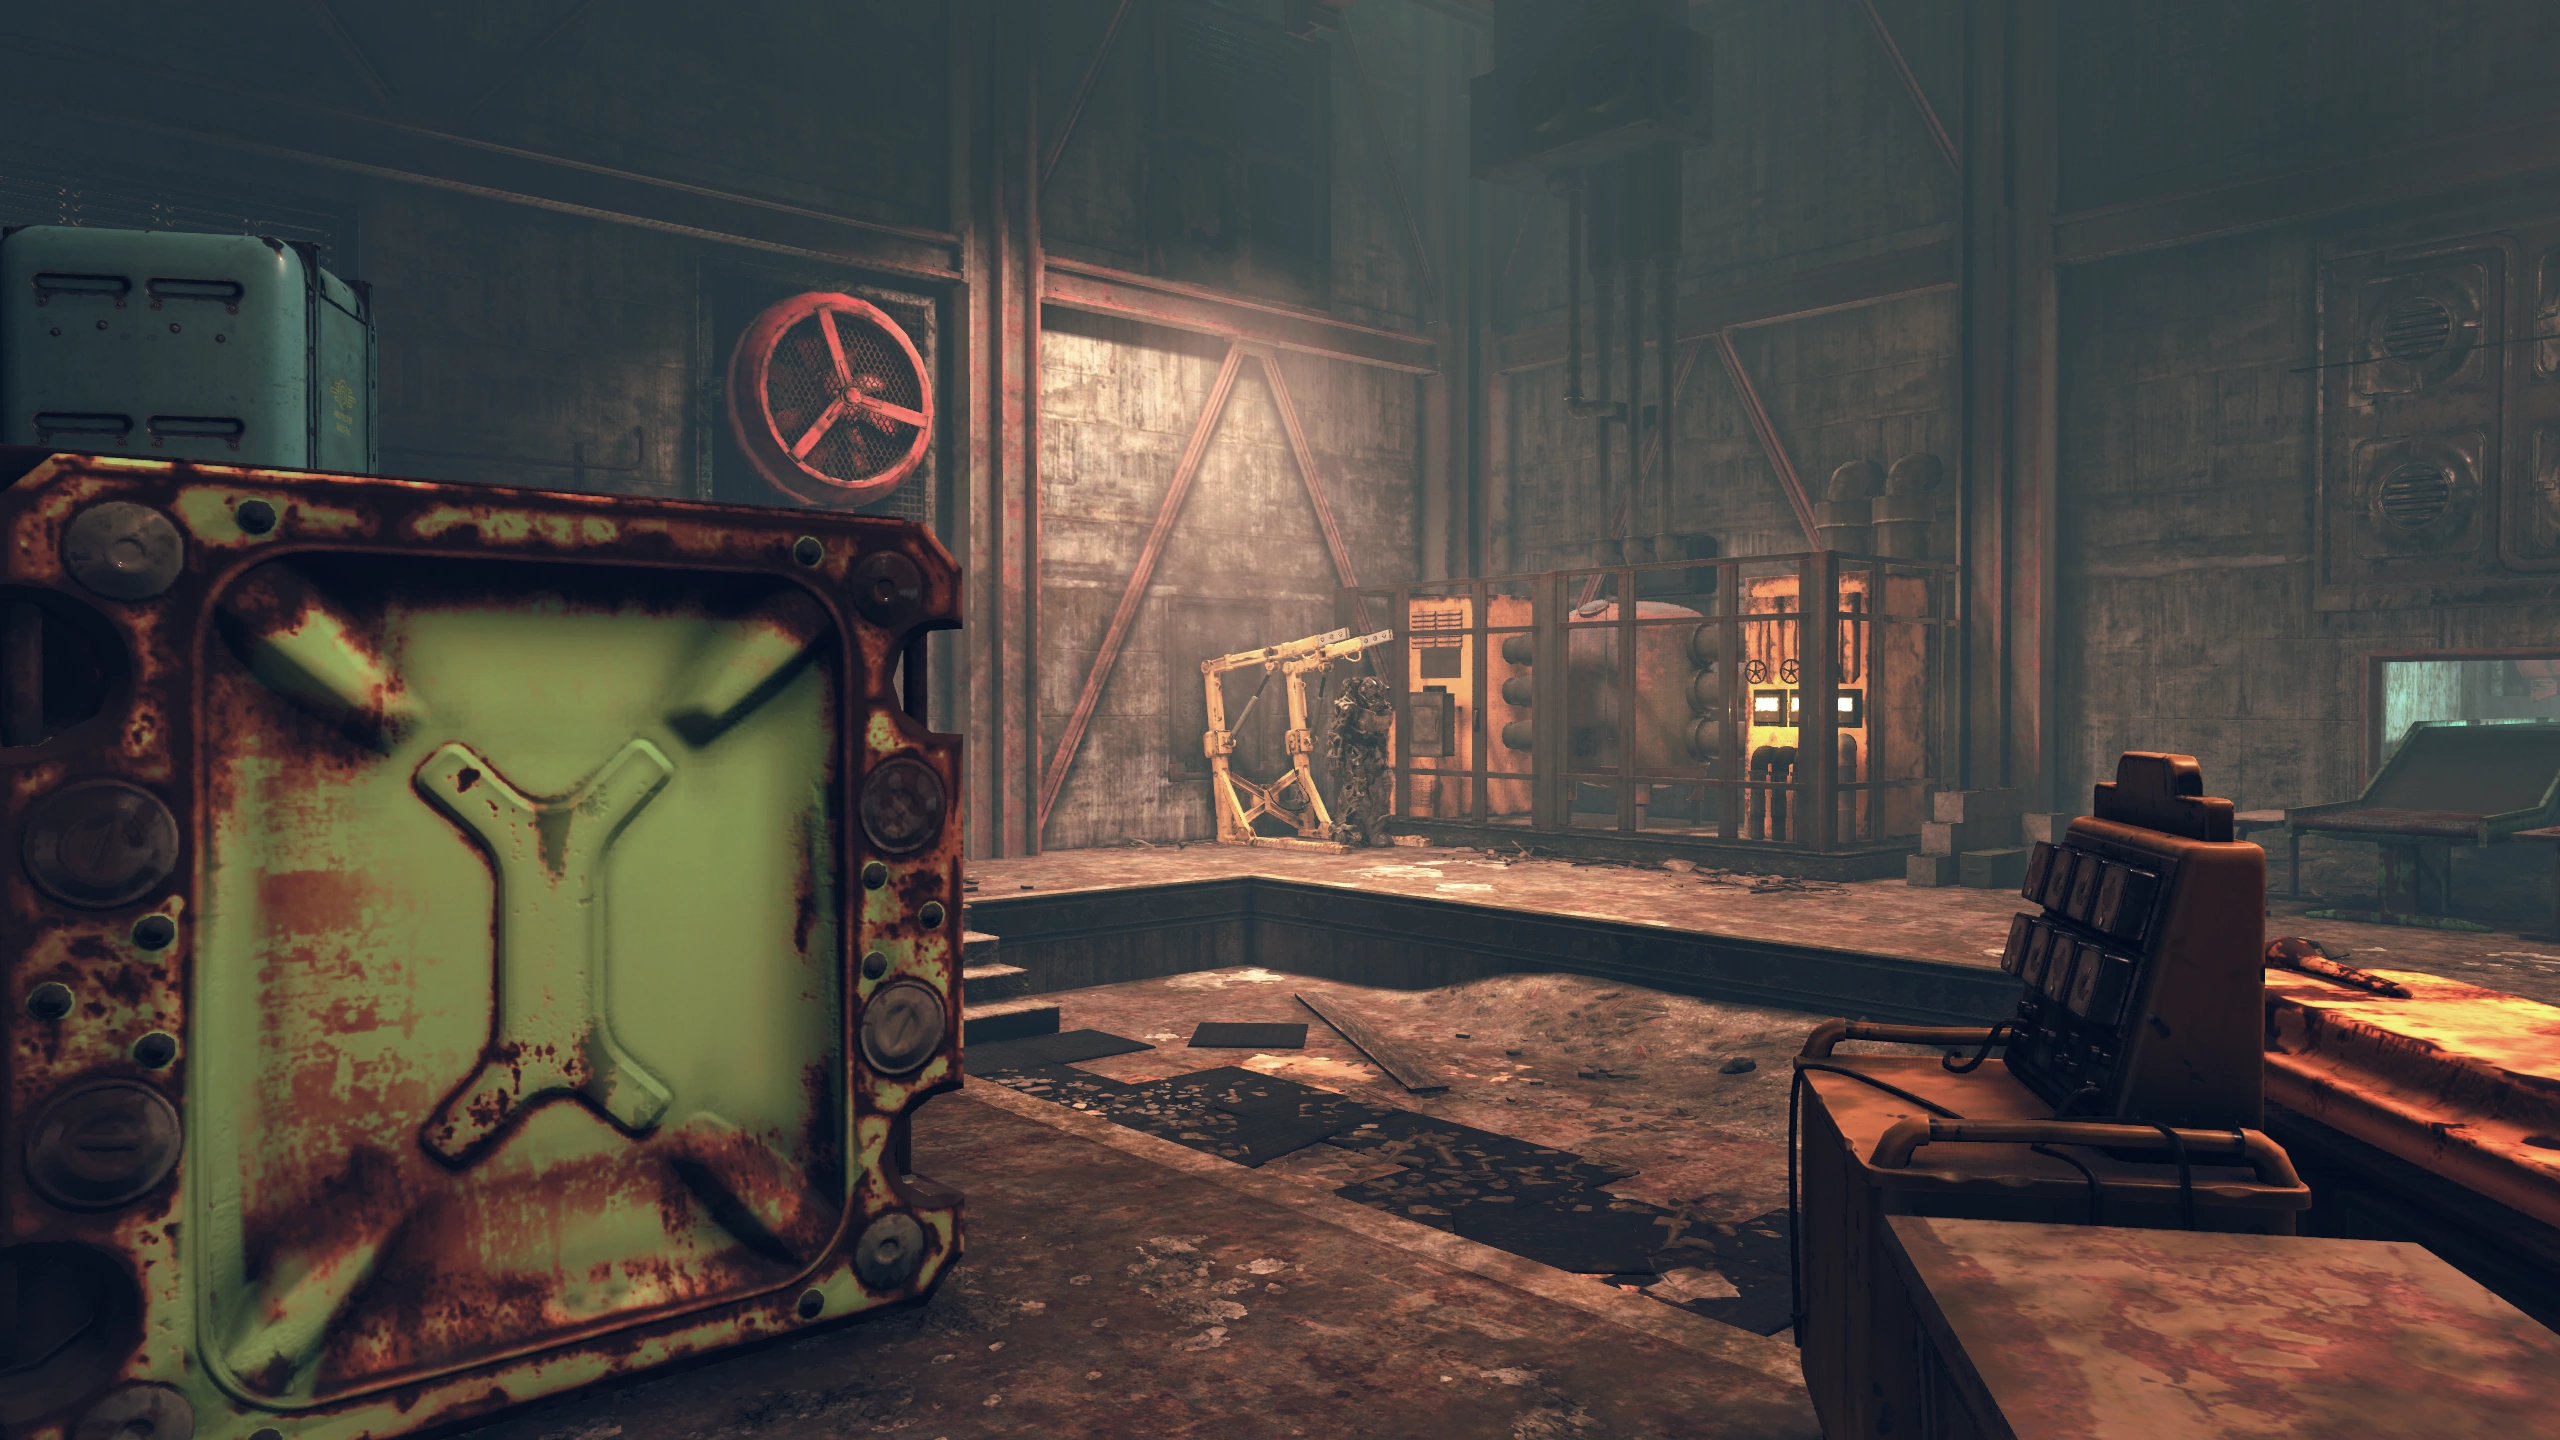
|
| Poseidon Energy Plant WV-06 | T-series | In the basement, in a locked security cage in the room labled "Workroom." The key to the room is found in the main office or the skill 2 lock can be picked. A fusion core can also spawn on the table. One route is to look for the single cooling tower on the left (south). Go in the door closest to the tower, follow signs for "Cooling Tower #3". Go through the cooling tower then follow the hallway to the door labeled "Main Plant". The Workroom is straight ahead. | 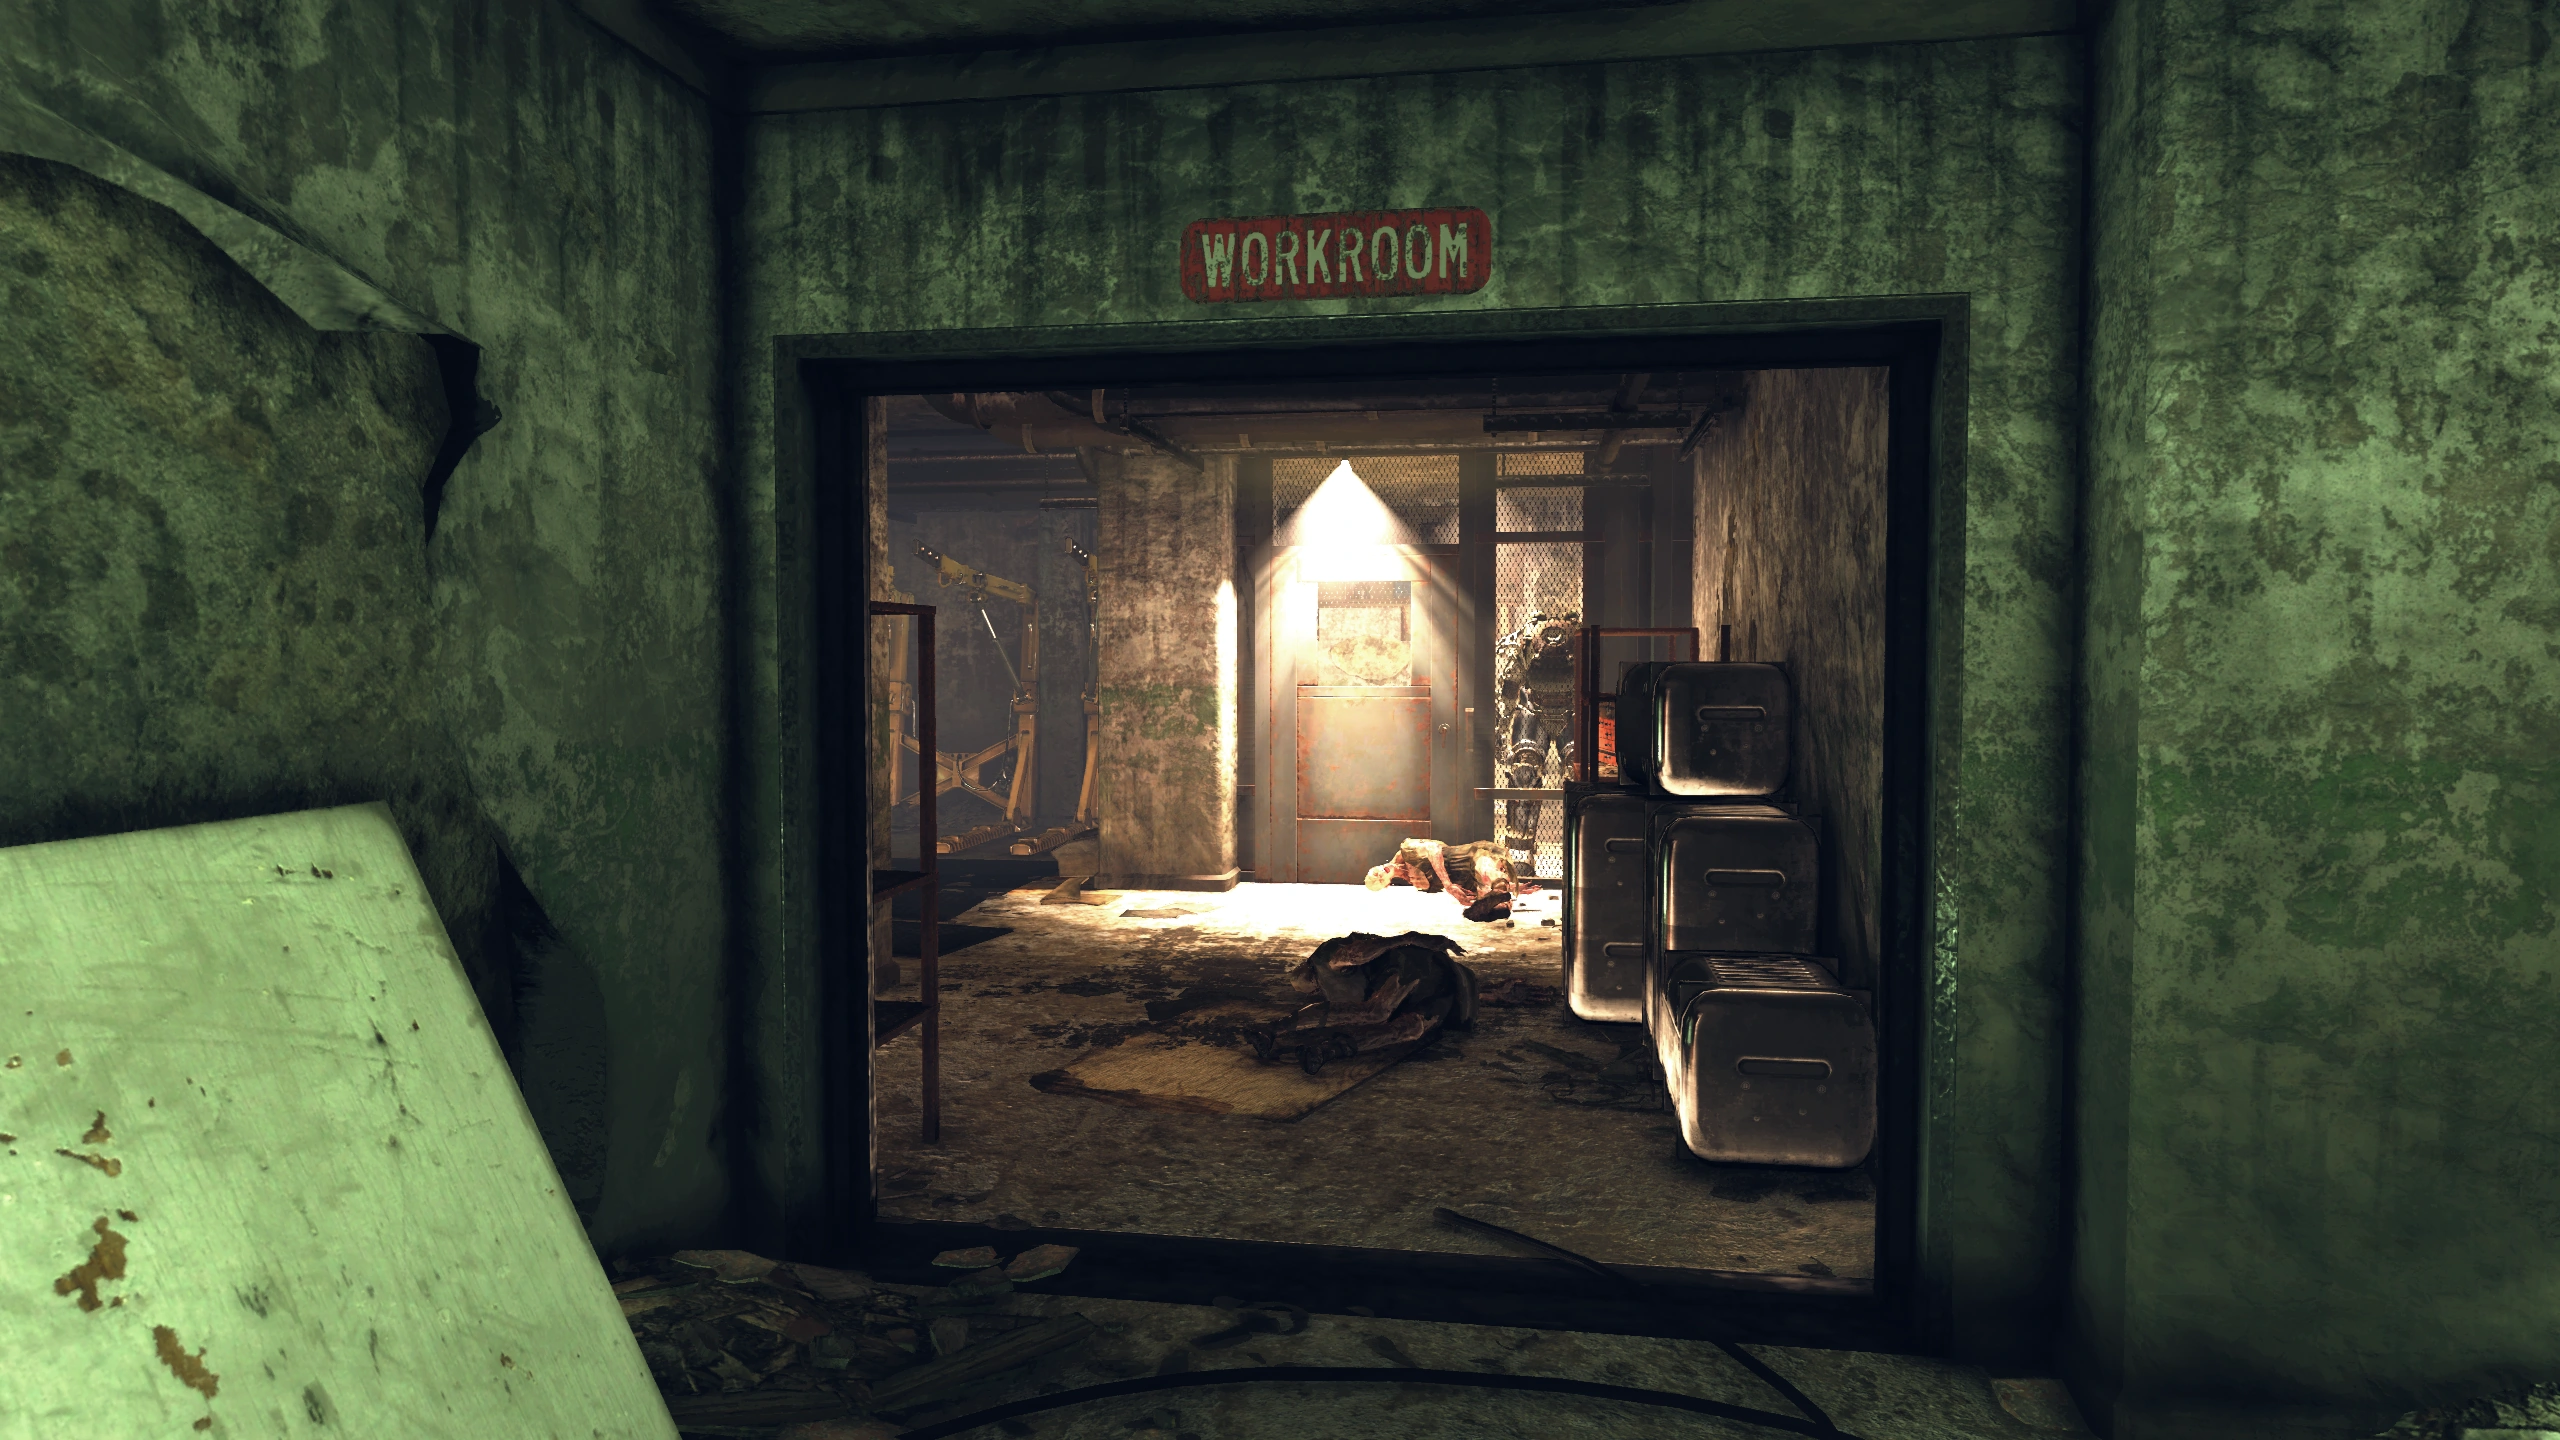
|
| Hornwright Industrial headquarters | T-Series | In the sub-basement. Accessible during and after the side quest The Motherlode. When entering the sub-basement, the armor is straight ahead, in sight. | 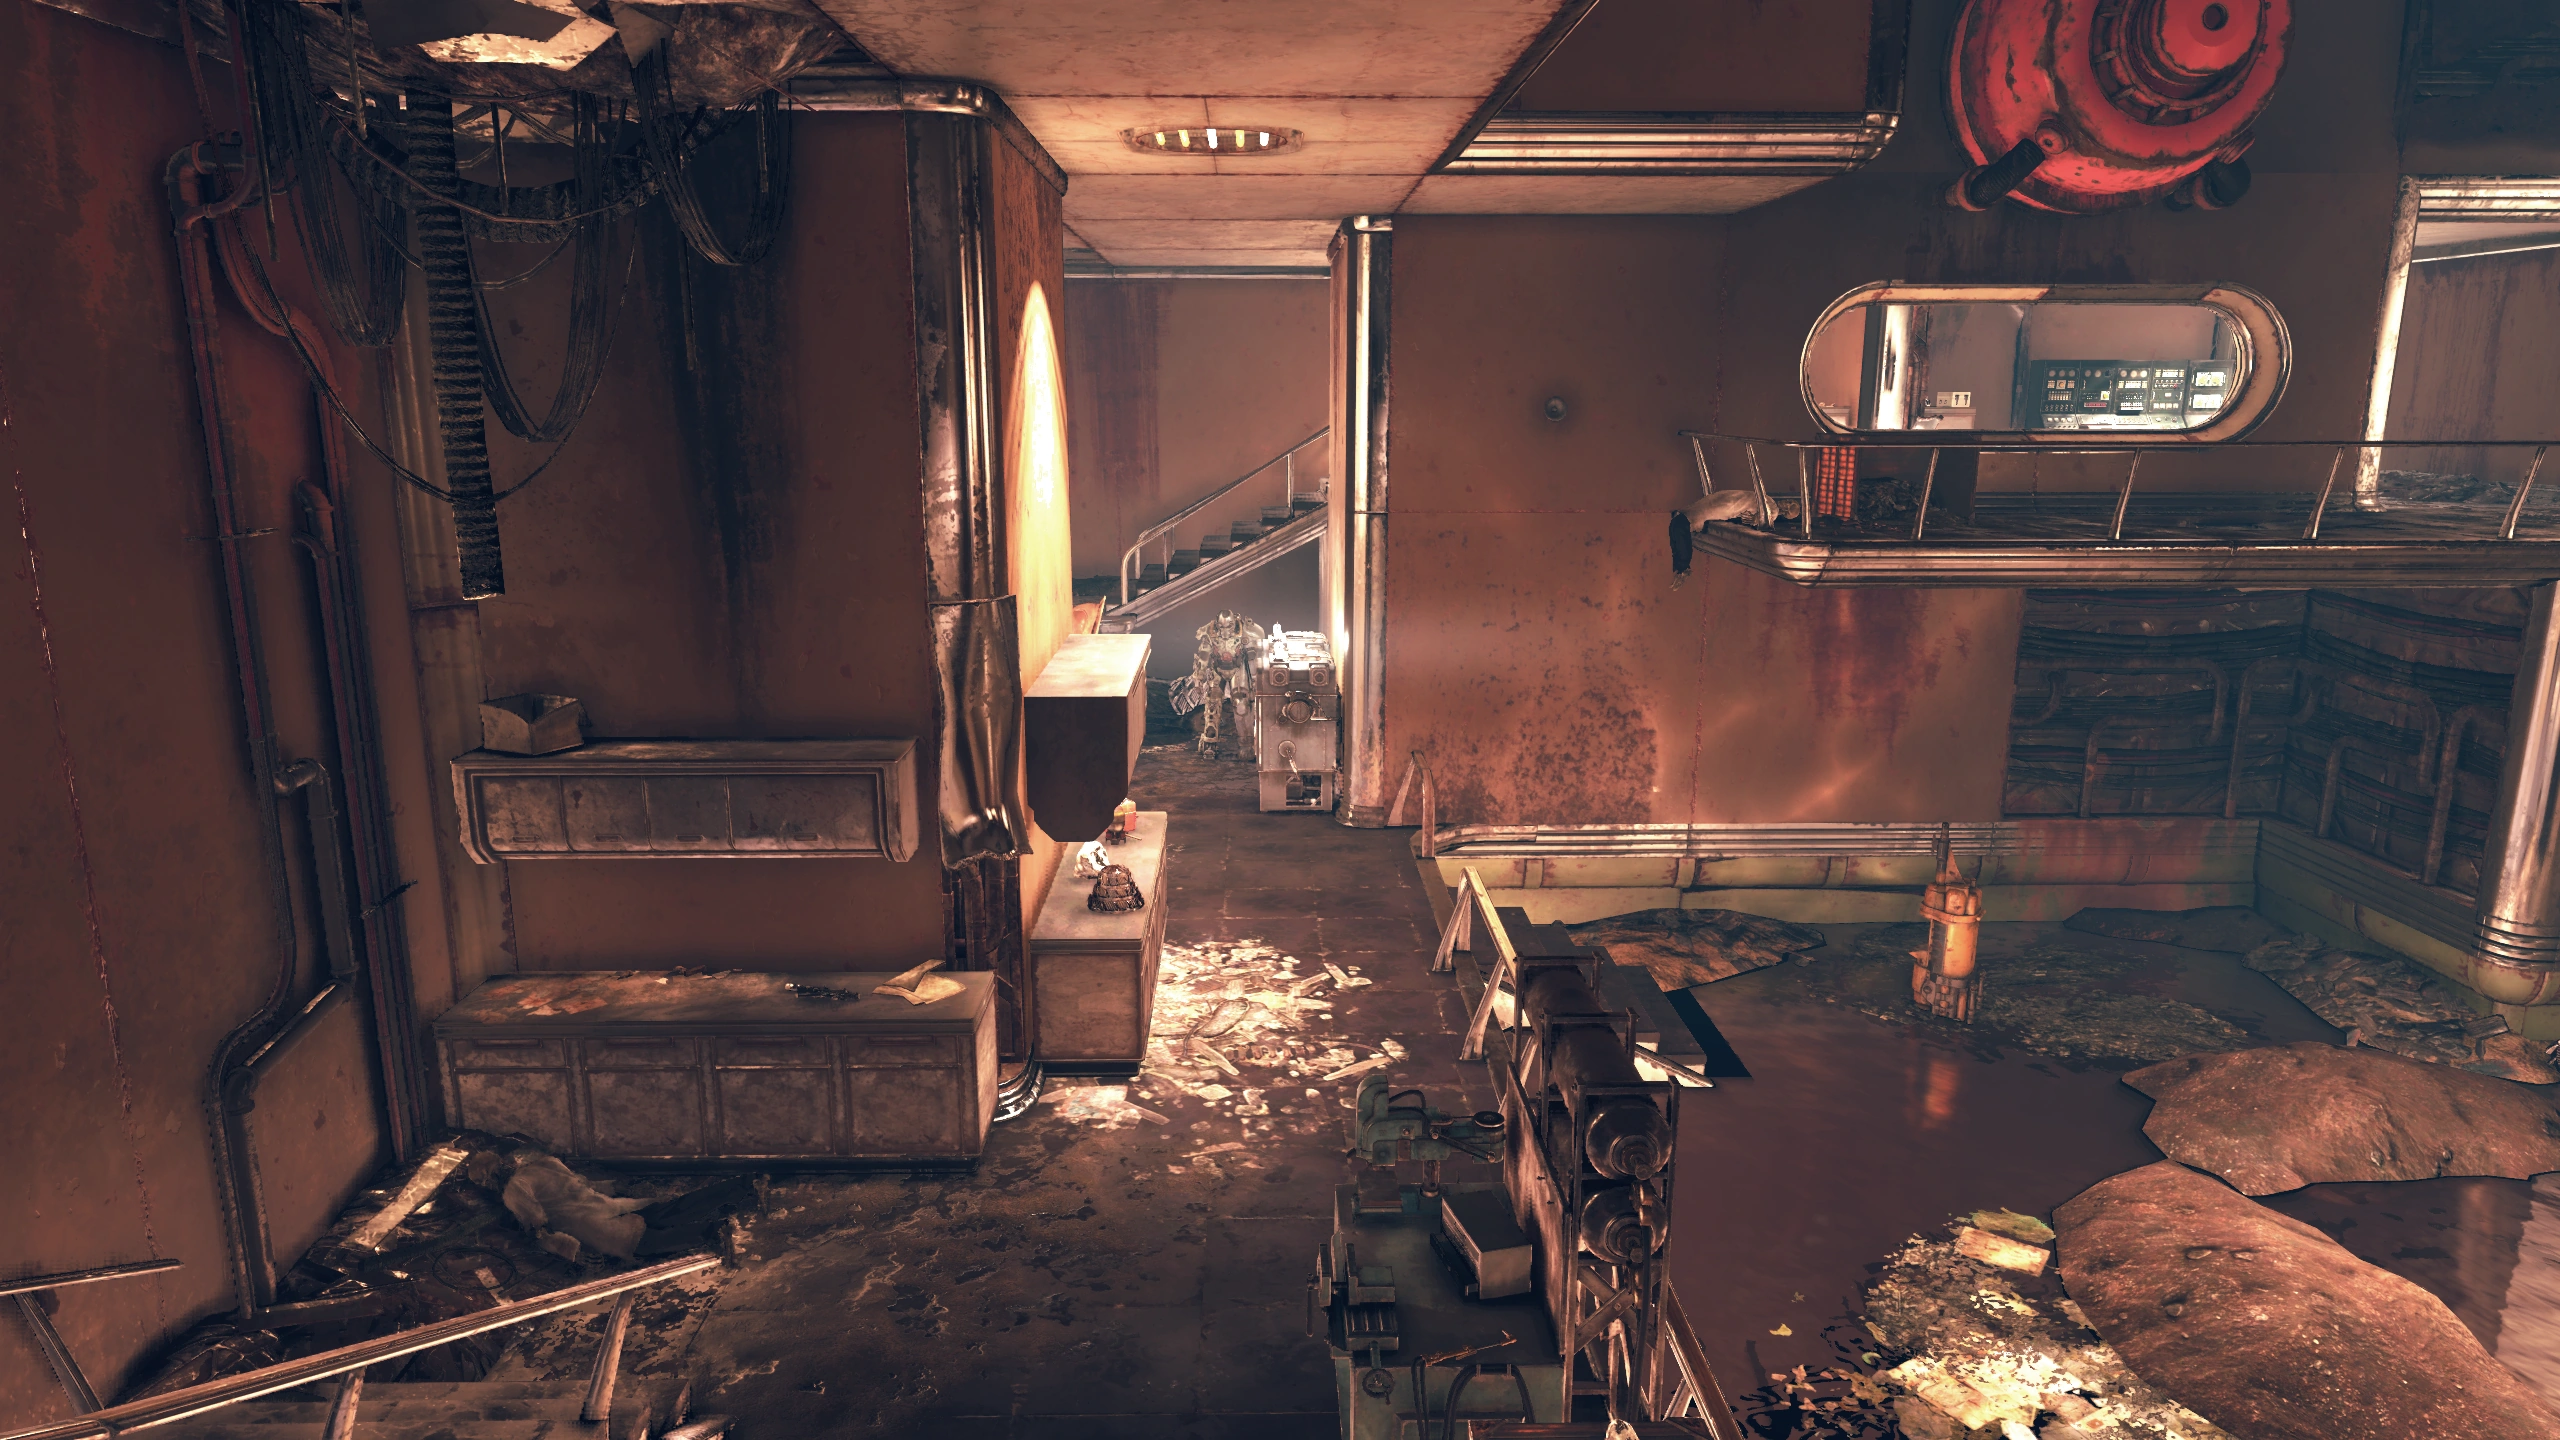
|
| Wade Airport North | T-series | In the hanger immediately north of the control tower. | 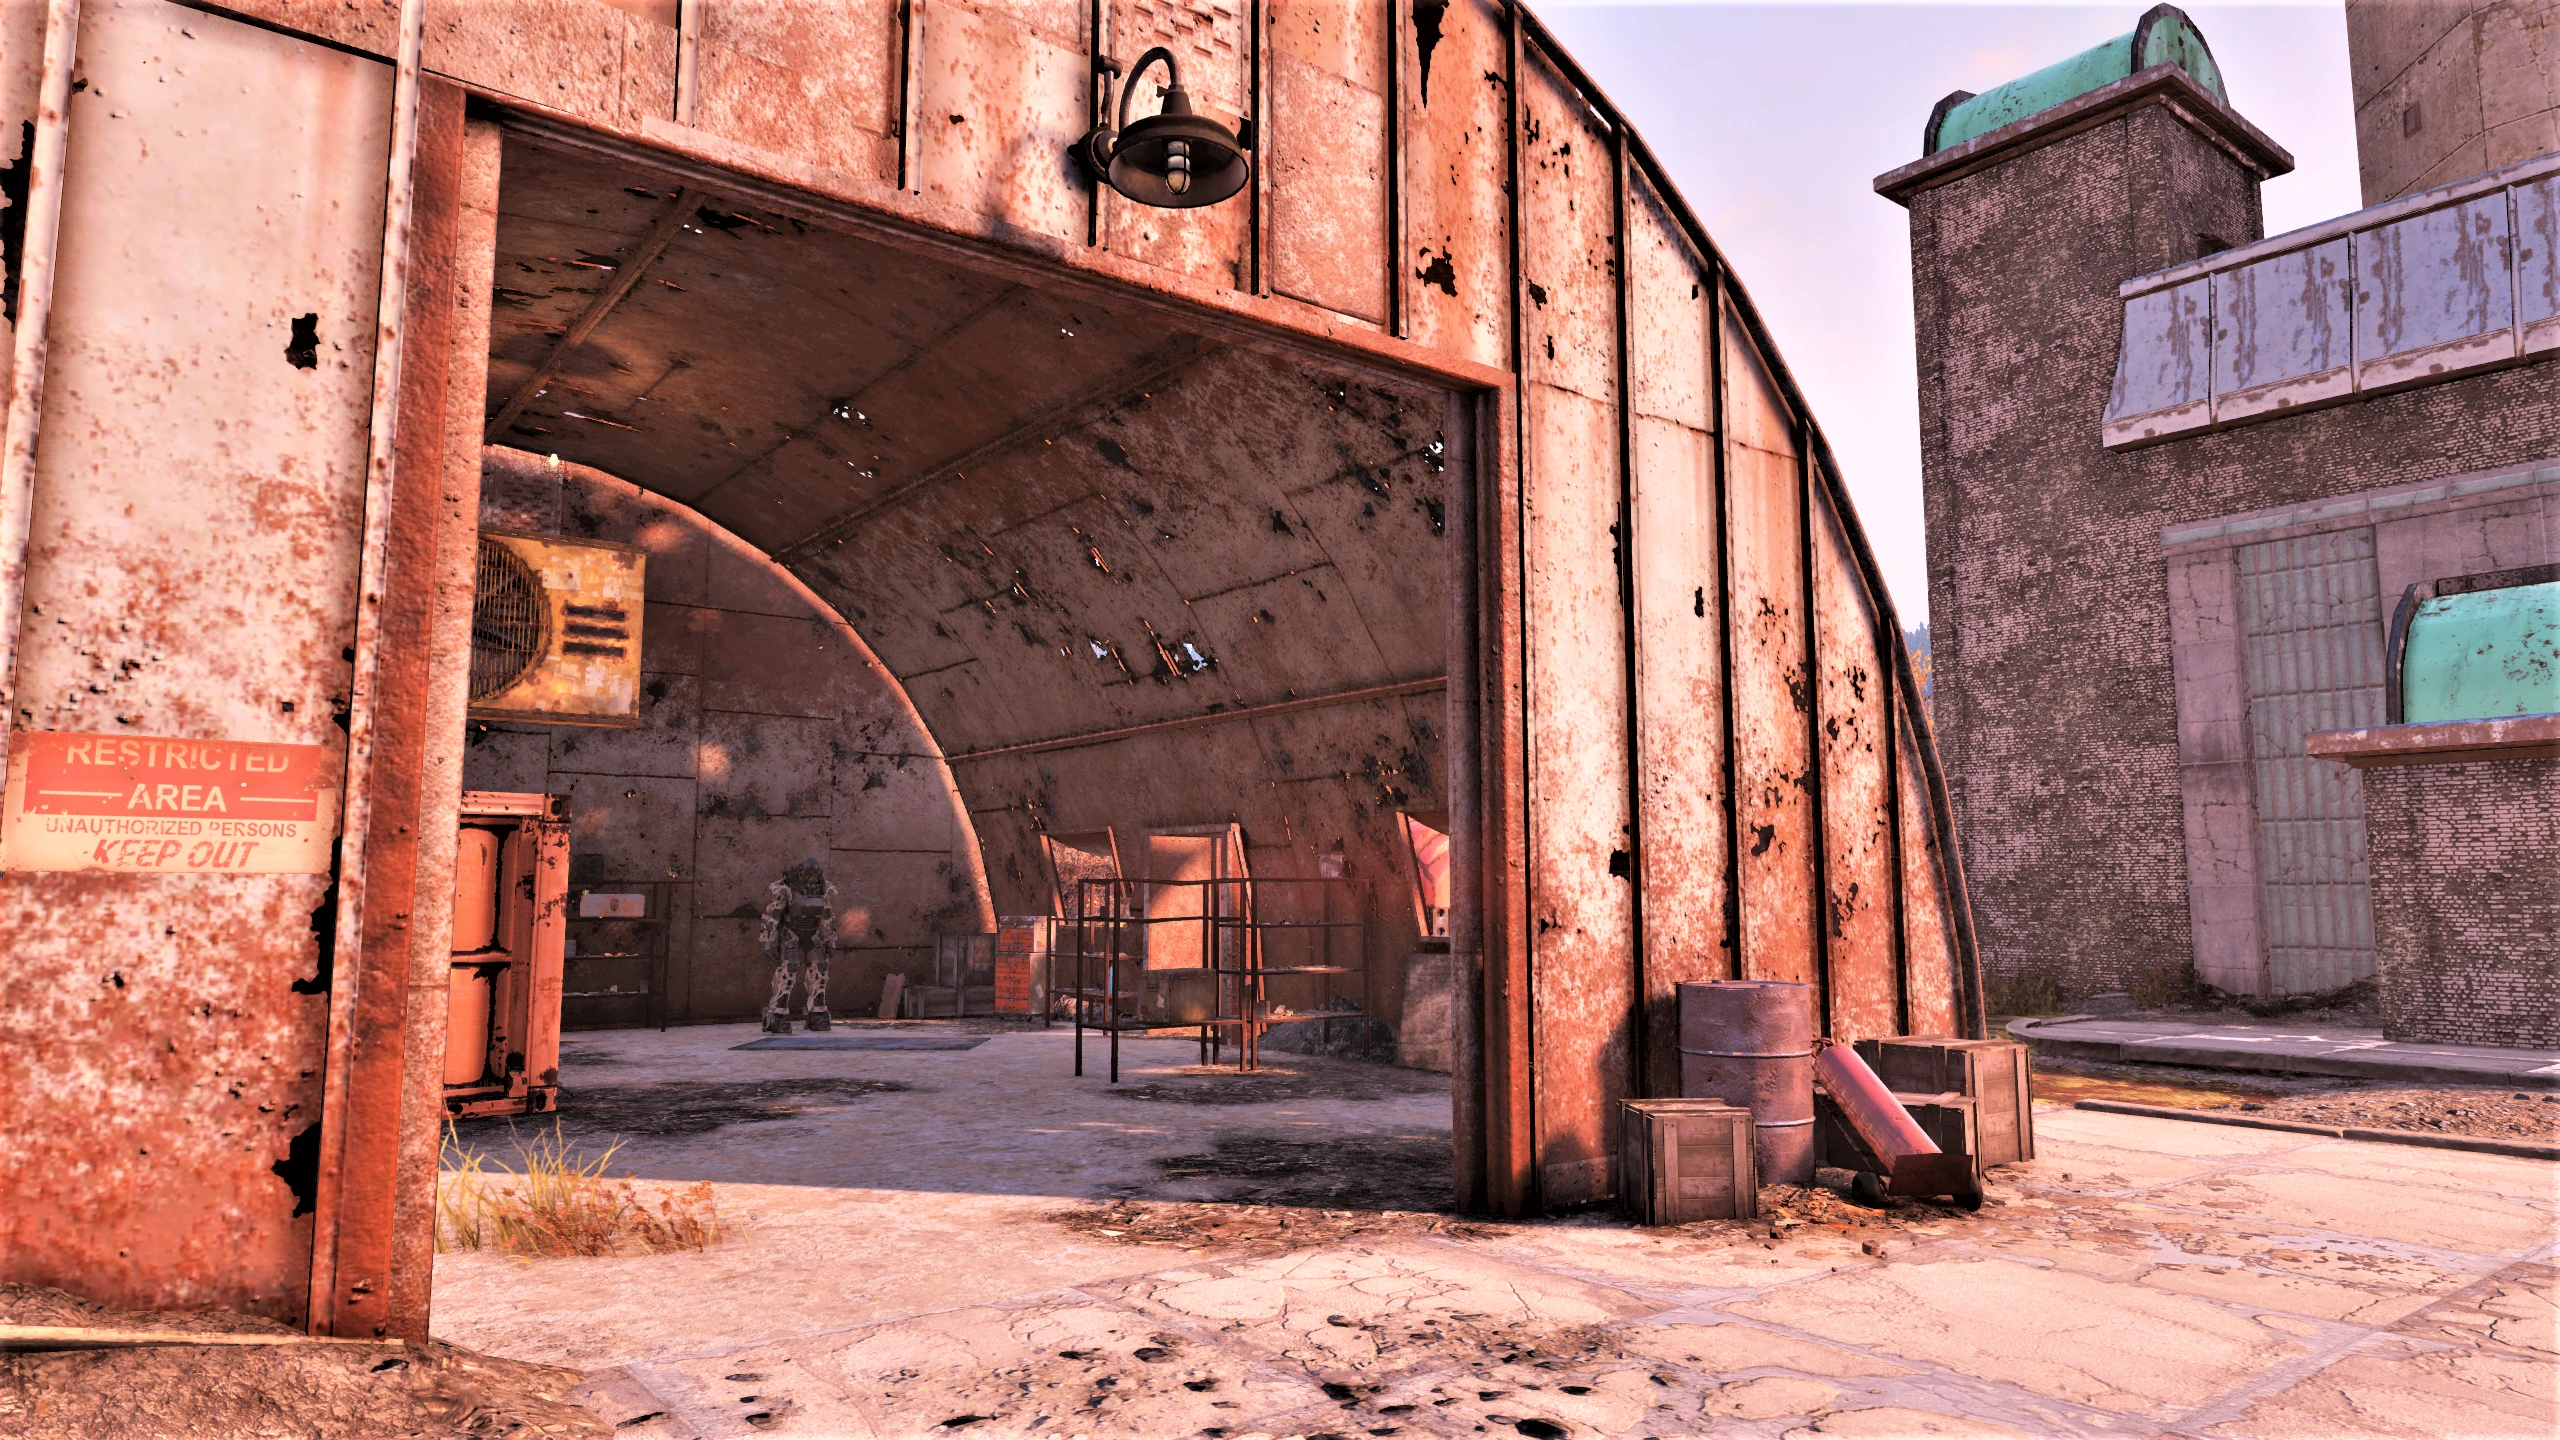
|
| Wade Airport South | Raider | In a blue truck trailer at the south end of the runway with a skill 2 lock. There can also be a plasma mine under the trailer. Opening this lock while another player claims the workshop is no longer considered a crime. This was corrected in Fallout 76 patch 1.1.0.8. | 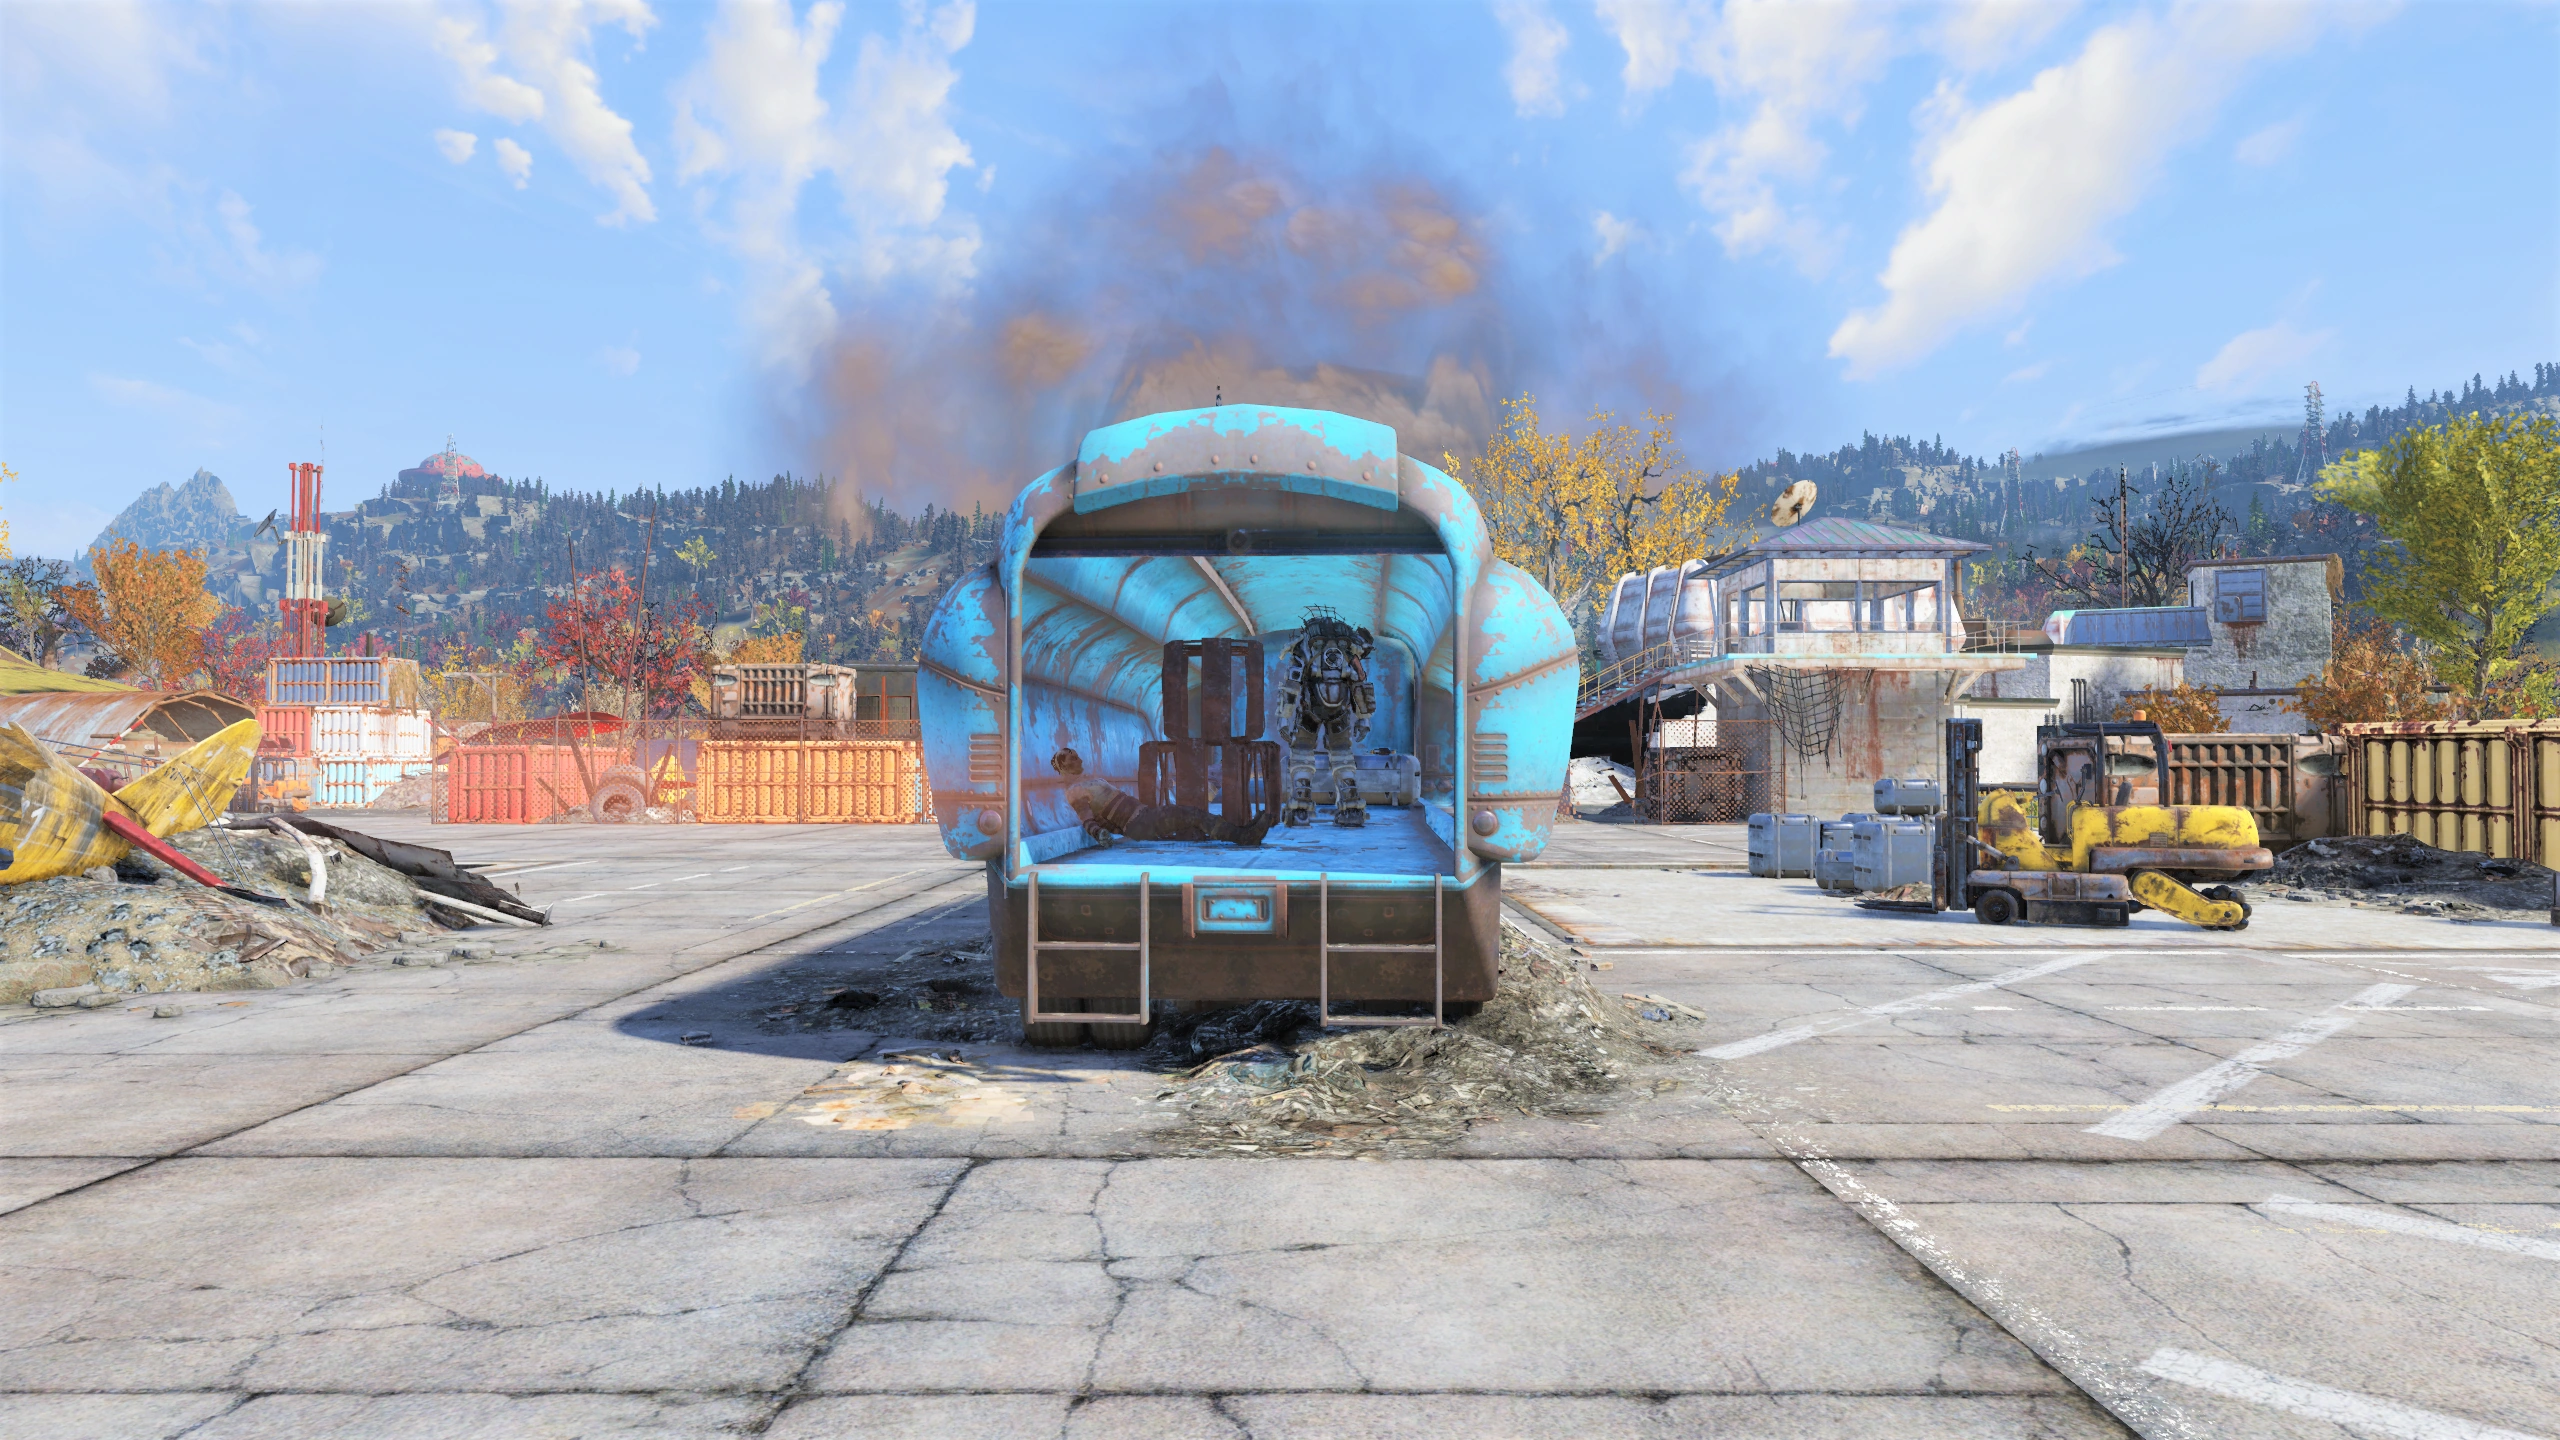
|
Southwest Forest

| Location | Type | Description | Image |
|---|---|---|---|
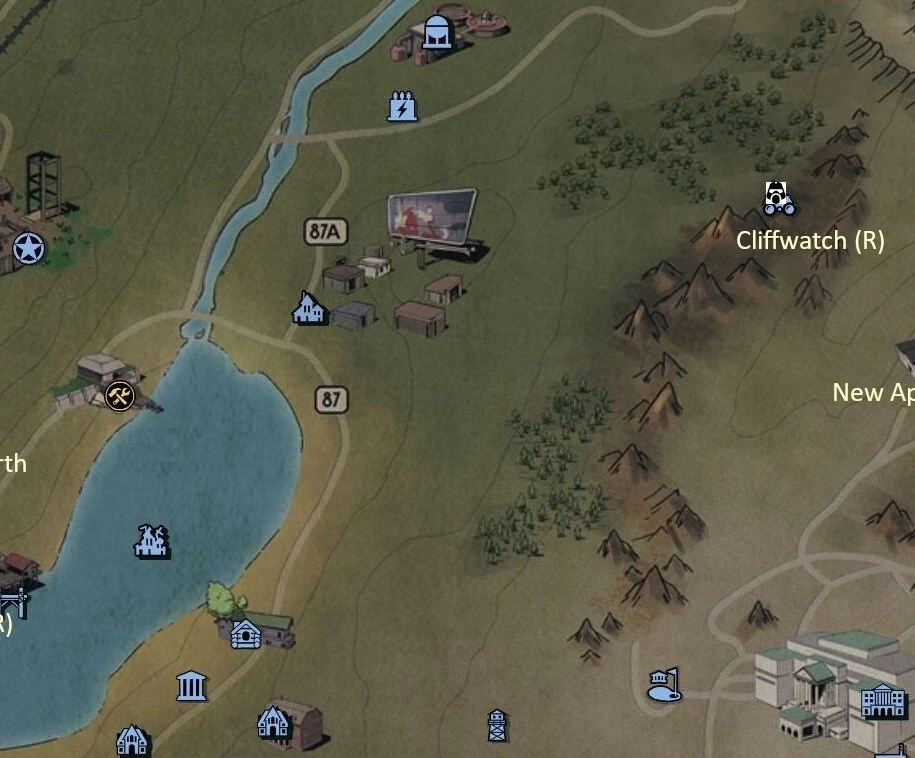
| Cliffwatch | Raider | Outside of the raider wall on the northwest side | 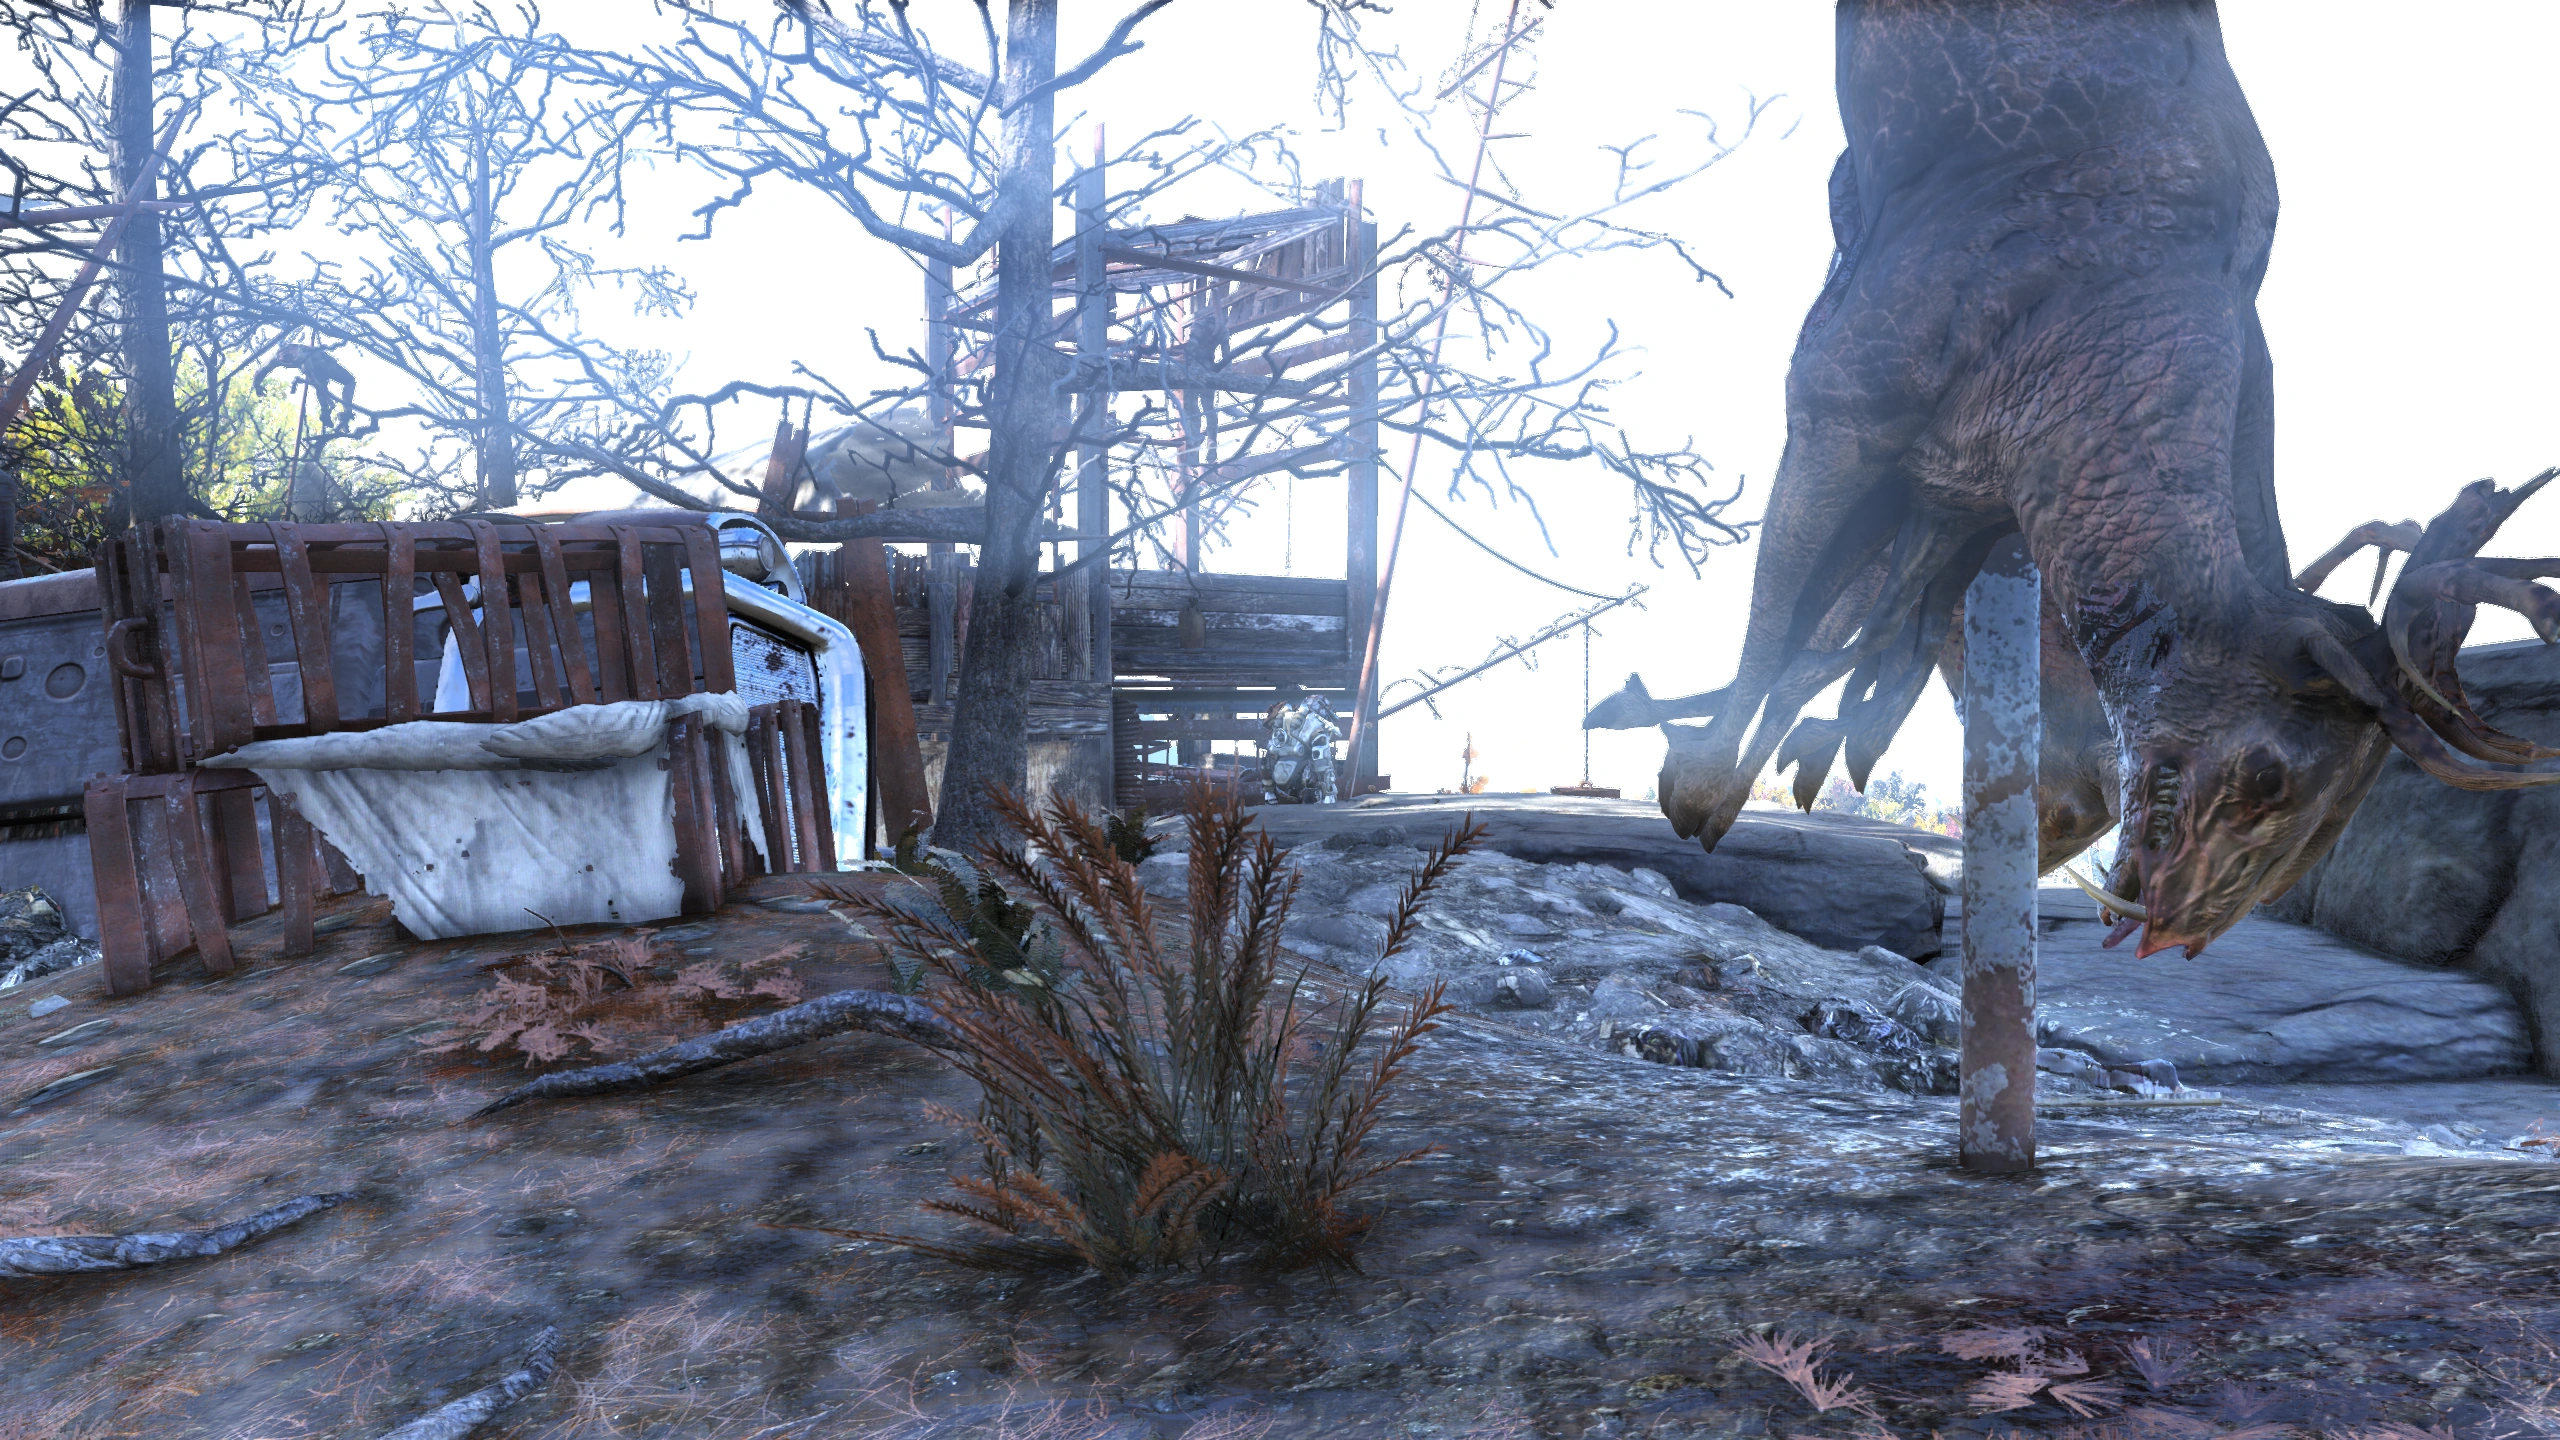
|
Toxic Valley

| Location | Type | Description | Image |
|---|---|---|---|
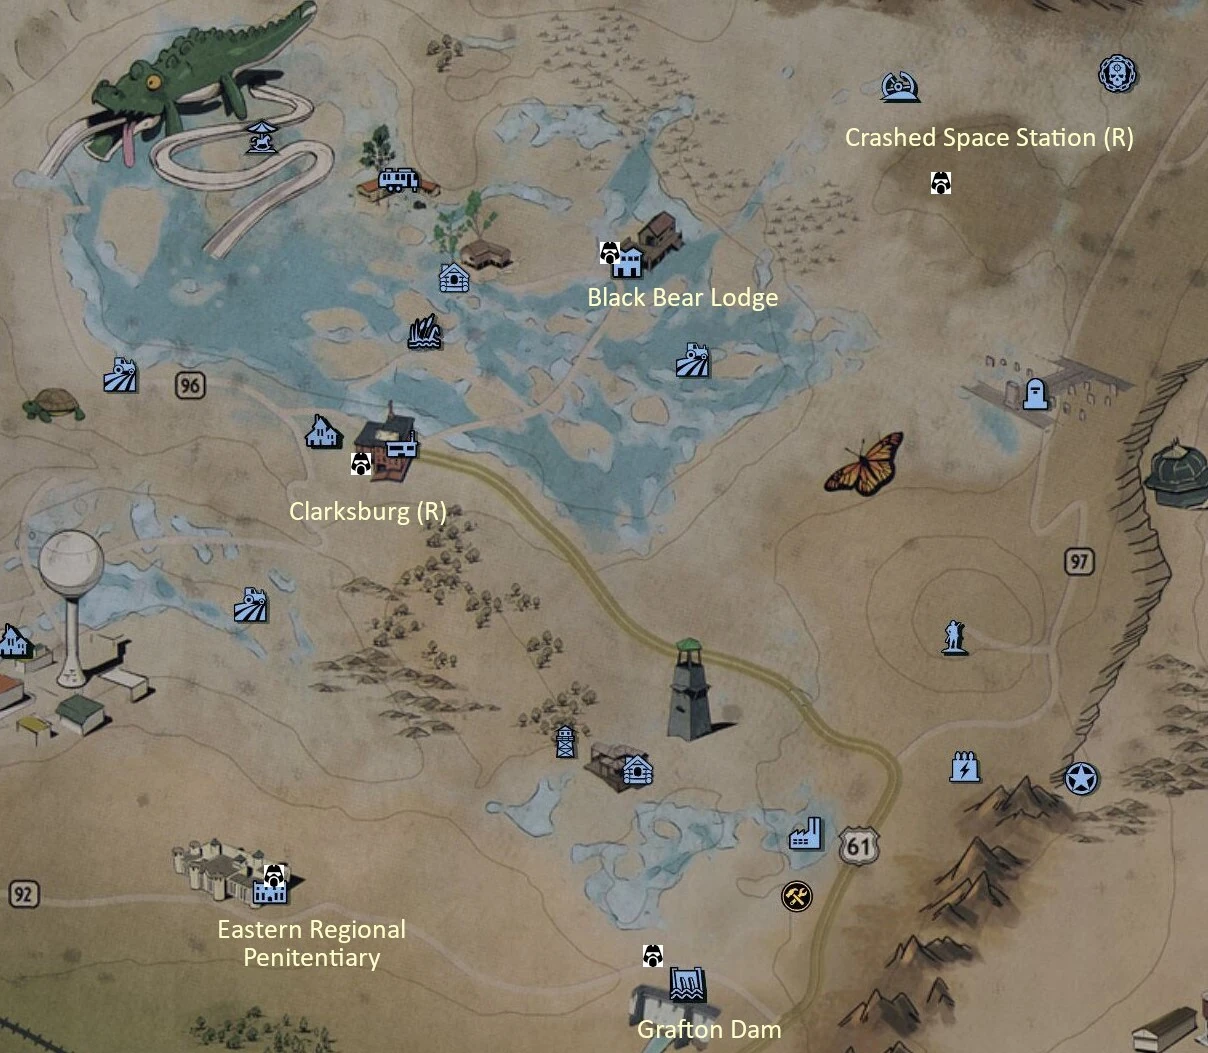
| Crashed space station | Raider | Outside on the upper deck of the observation shack on the southeast rim of the crater. In verifying this location, armor was found only 3 times in 20-25 visits. | 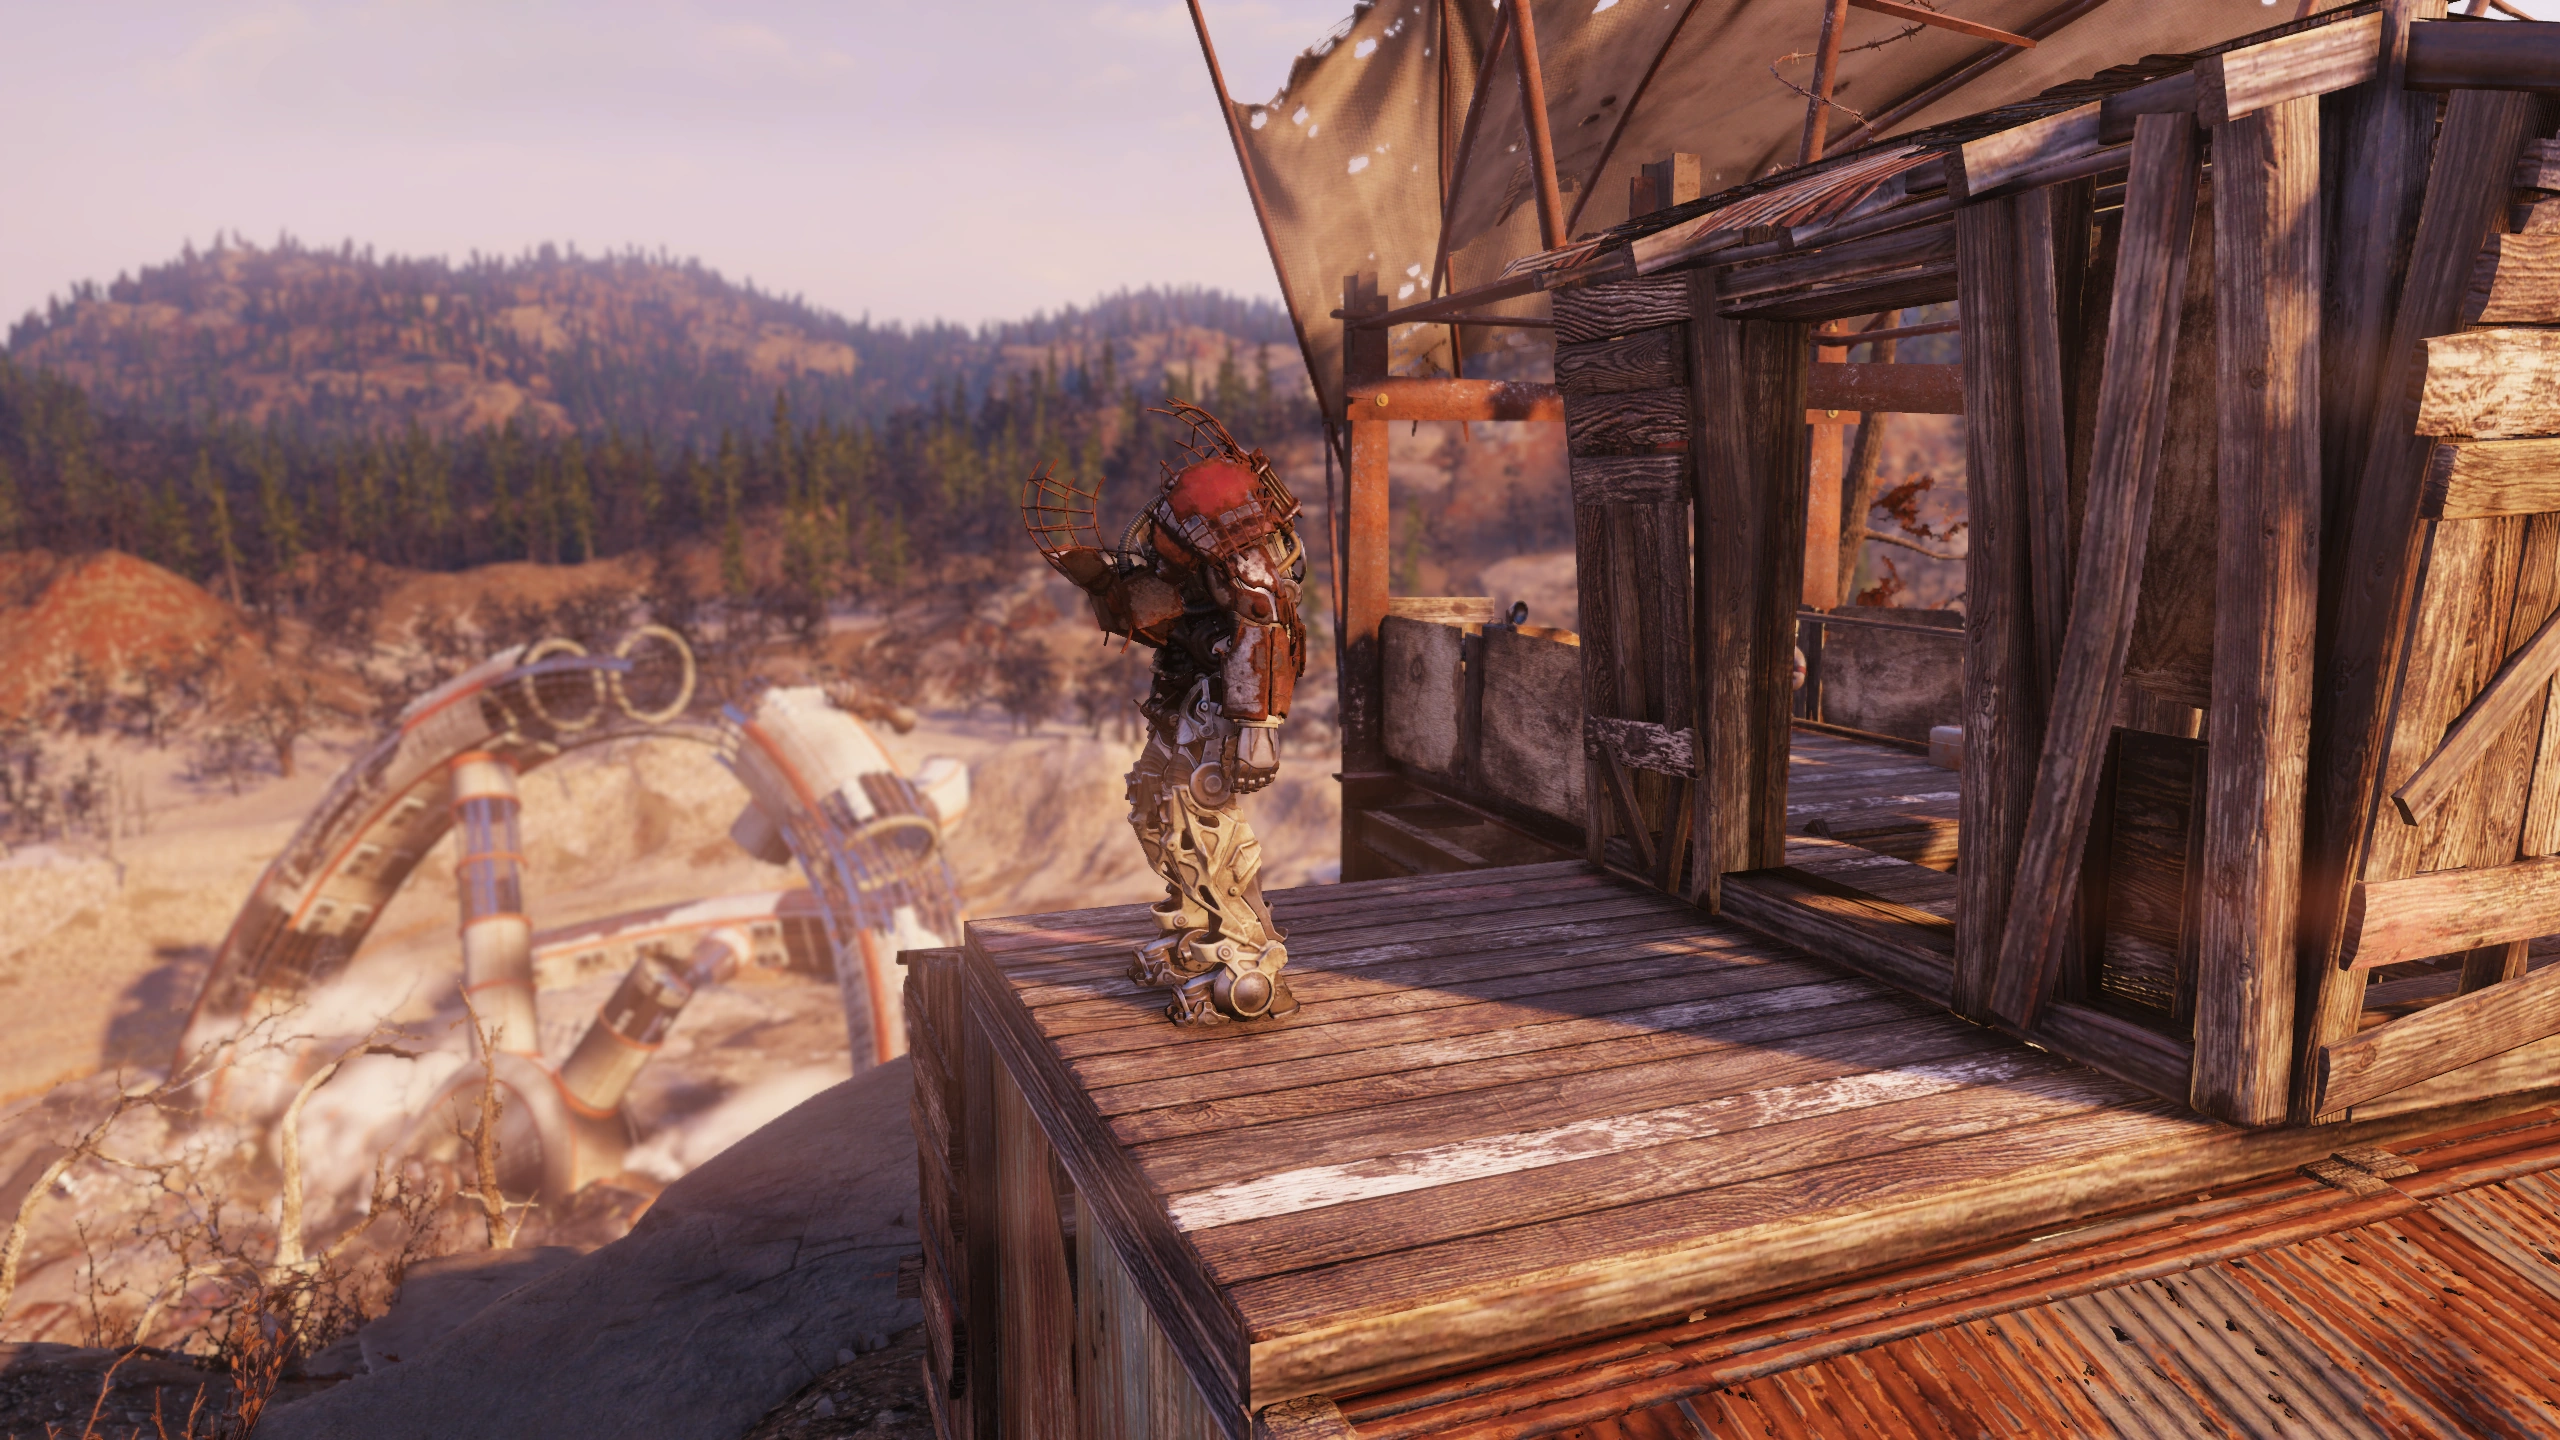
|
| Black Bear lodge | T-series | In the shed on the west side of the lodge. | 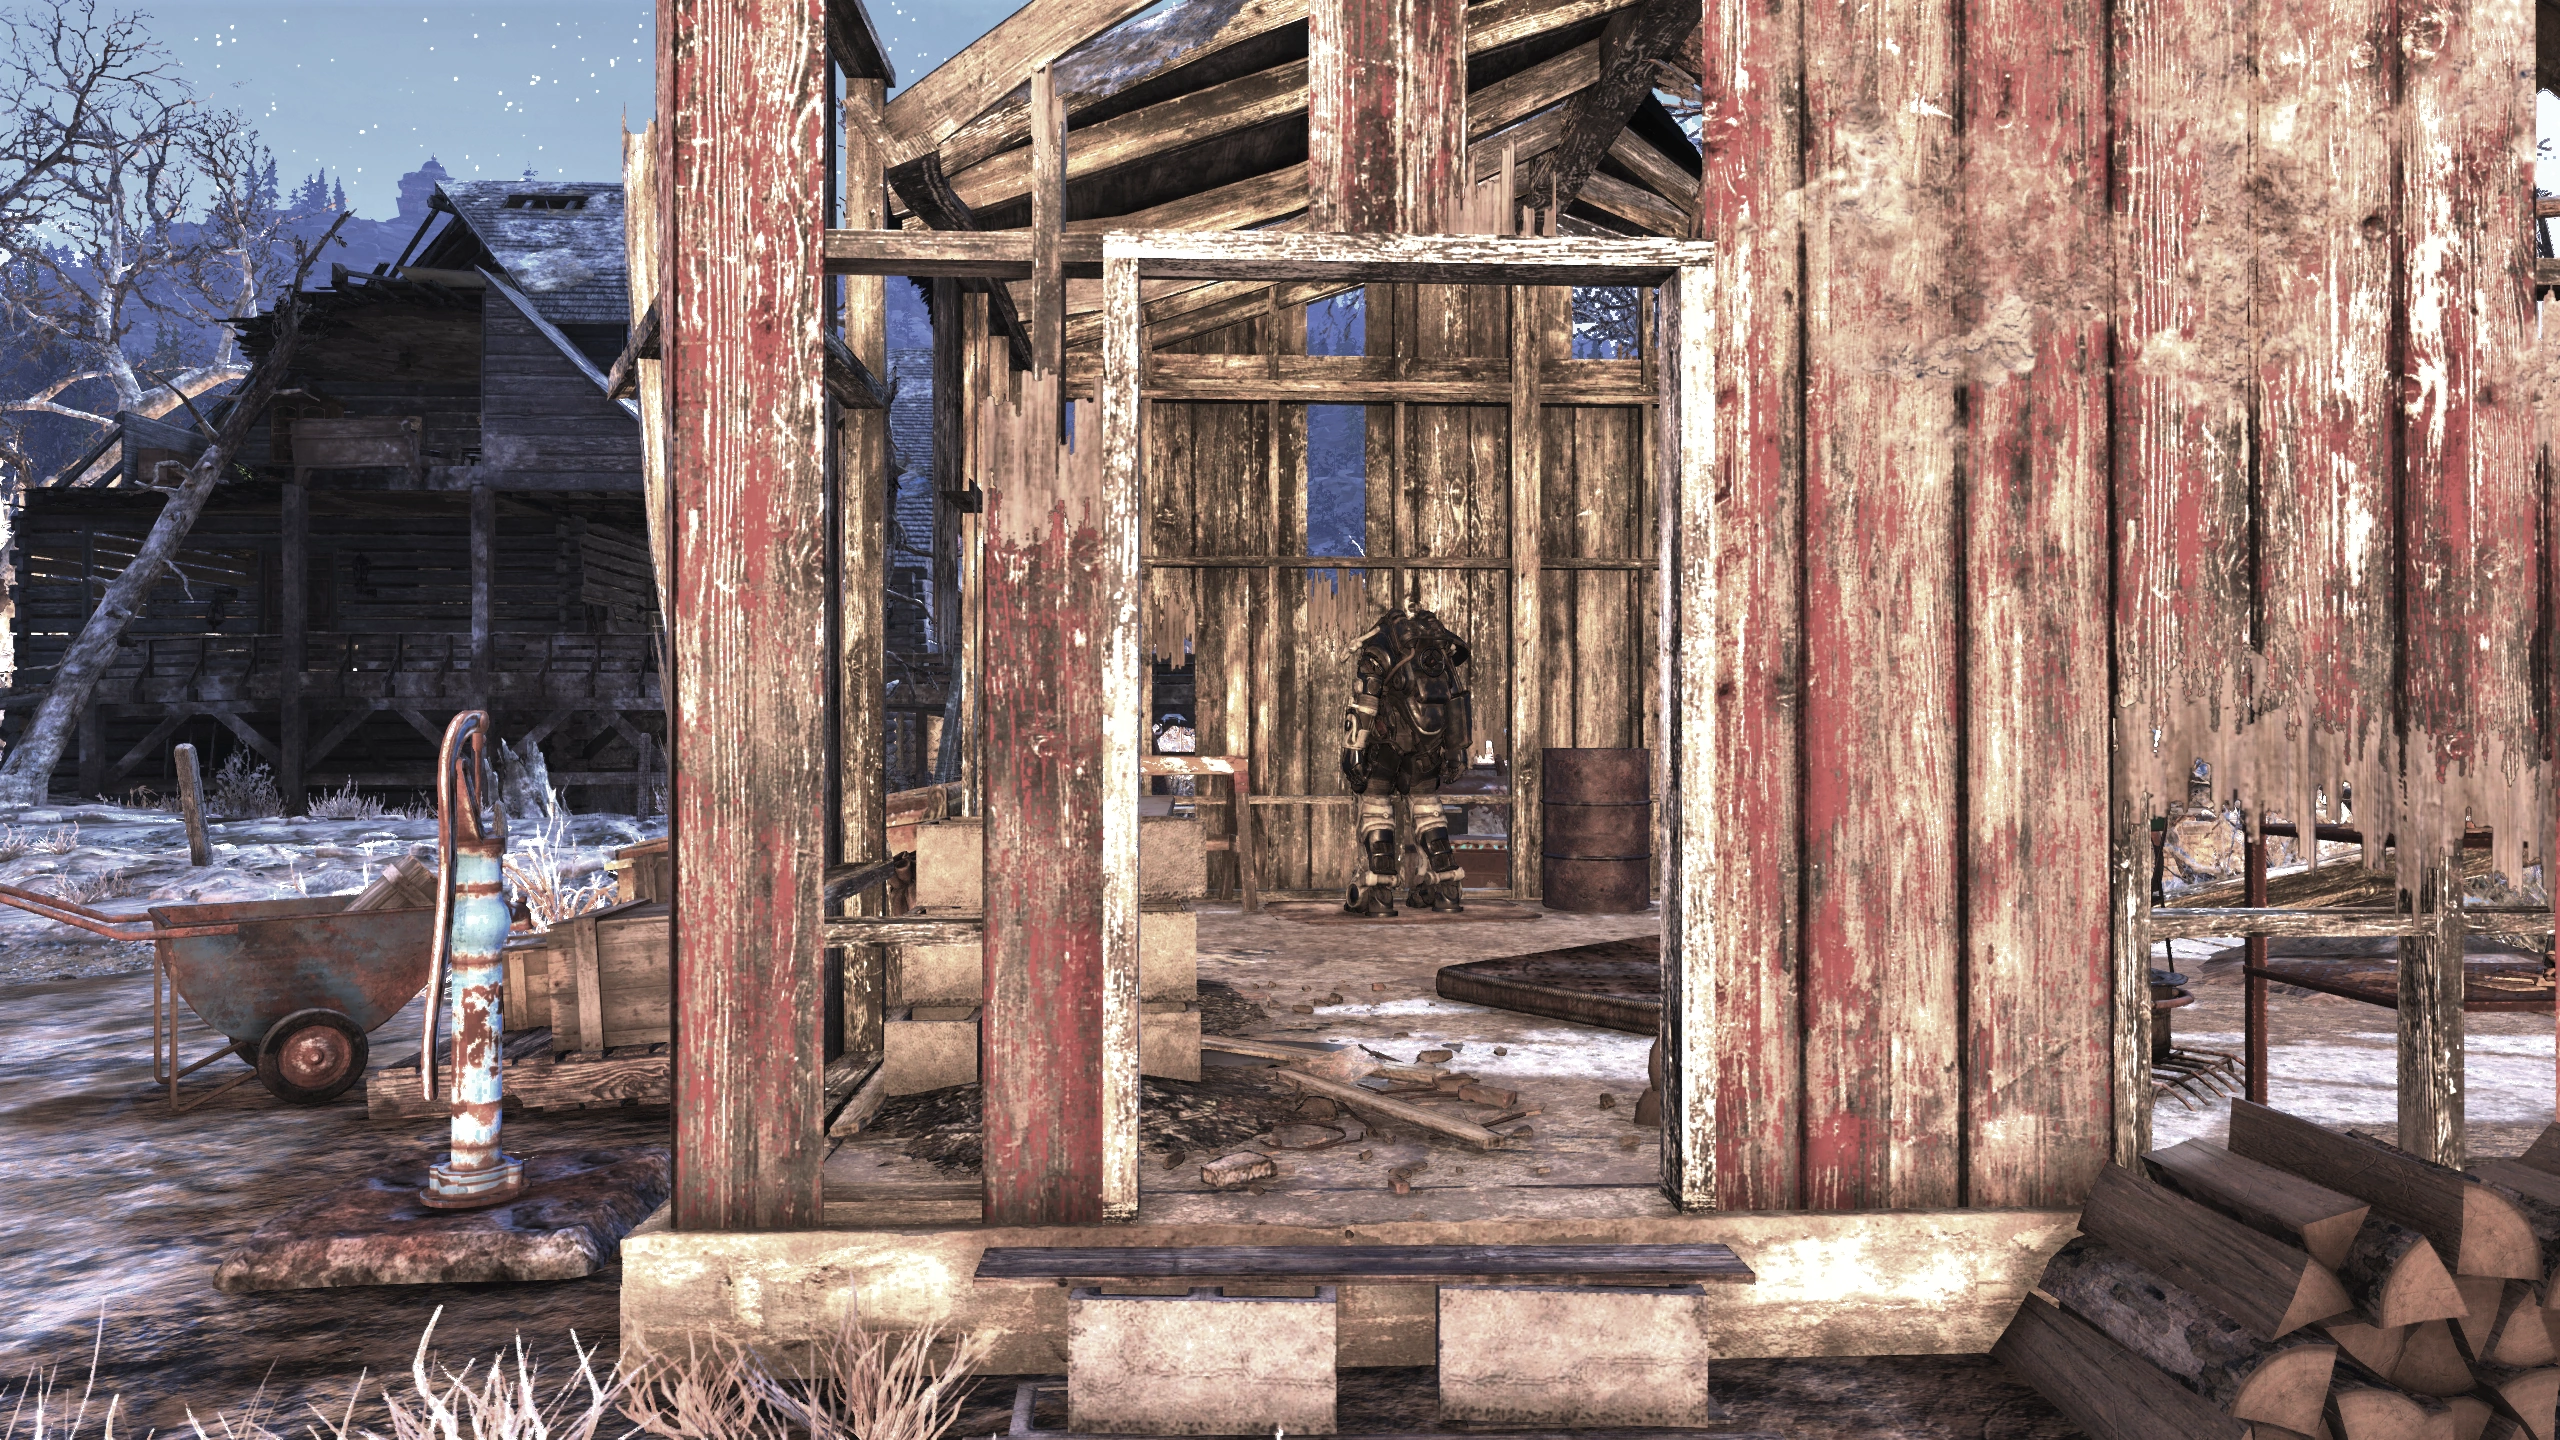
|
| Clarksburg | Raider | In the room on the top floor of the tallest building which is in the southeast corner of town. Access is across the rooftops. | 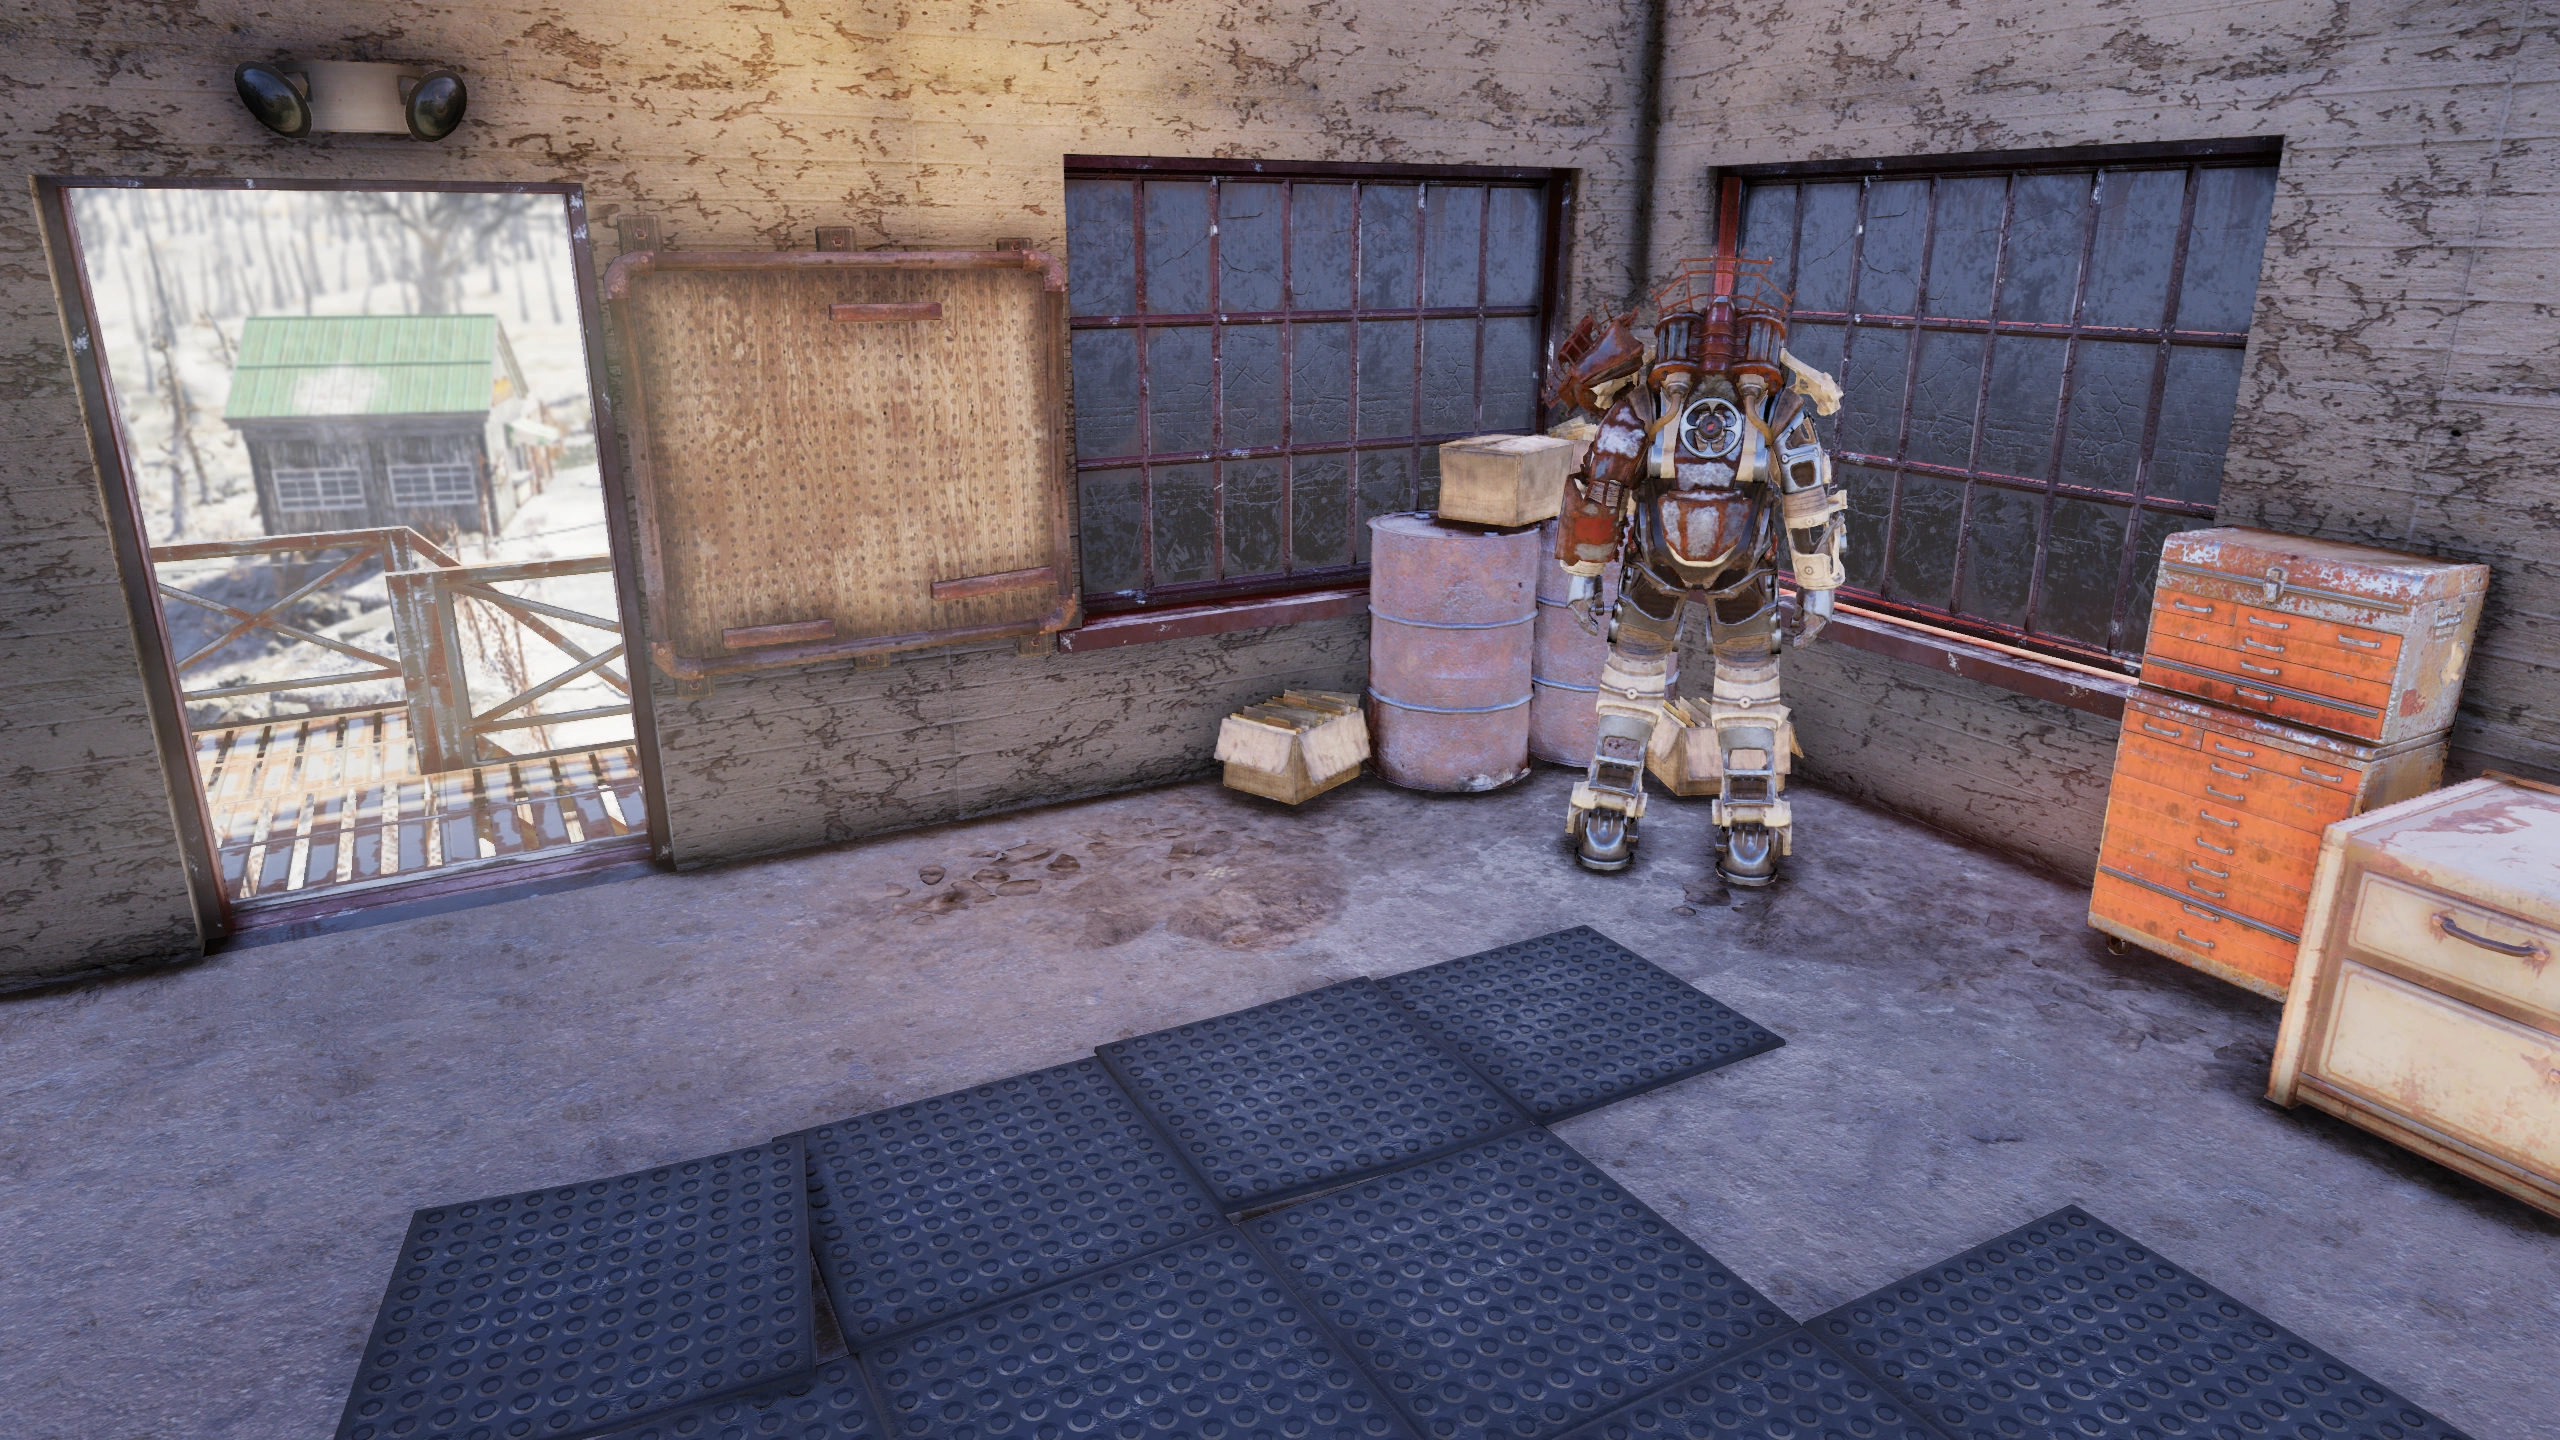
|
| Eastern Regional Penitentiary | T-series | In a shed in the prison yard. There are a quite a number of low level super mutants in this area. | 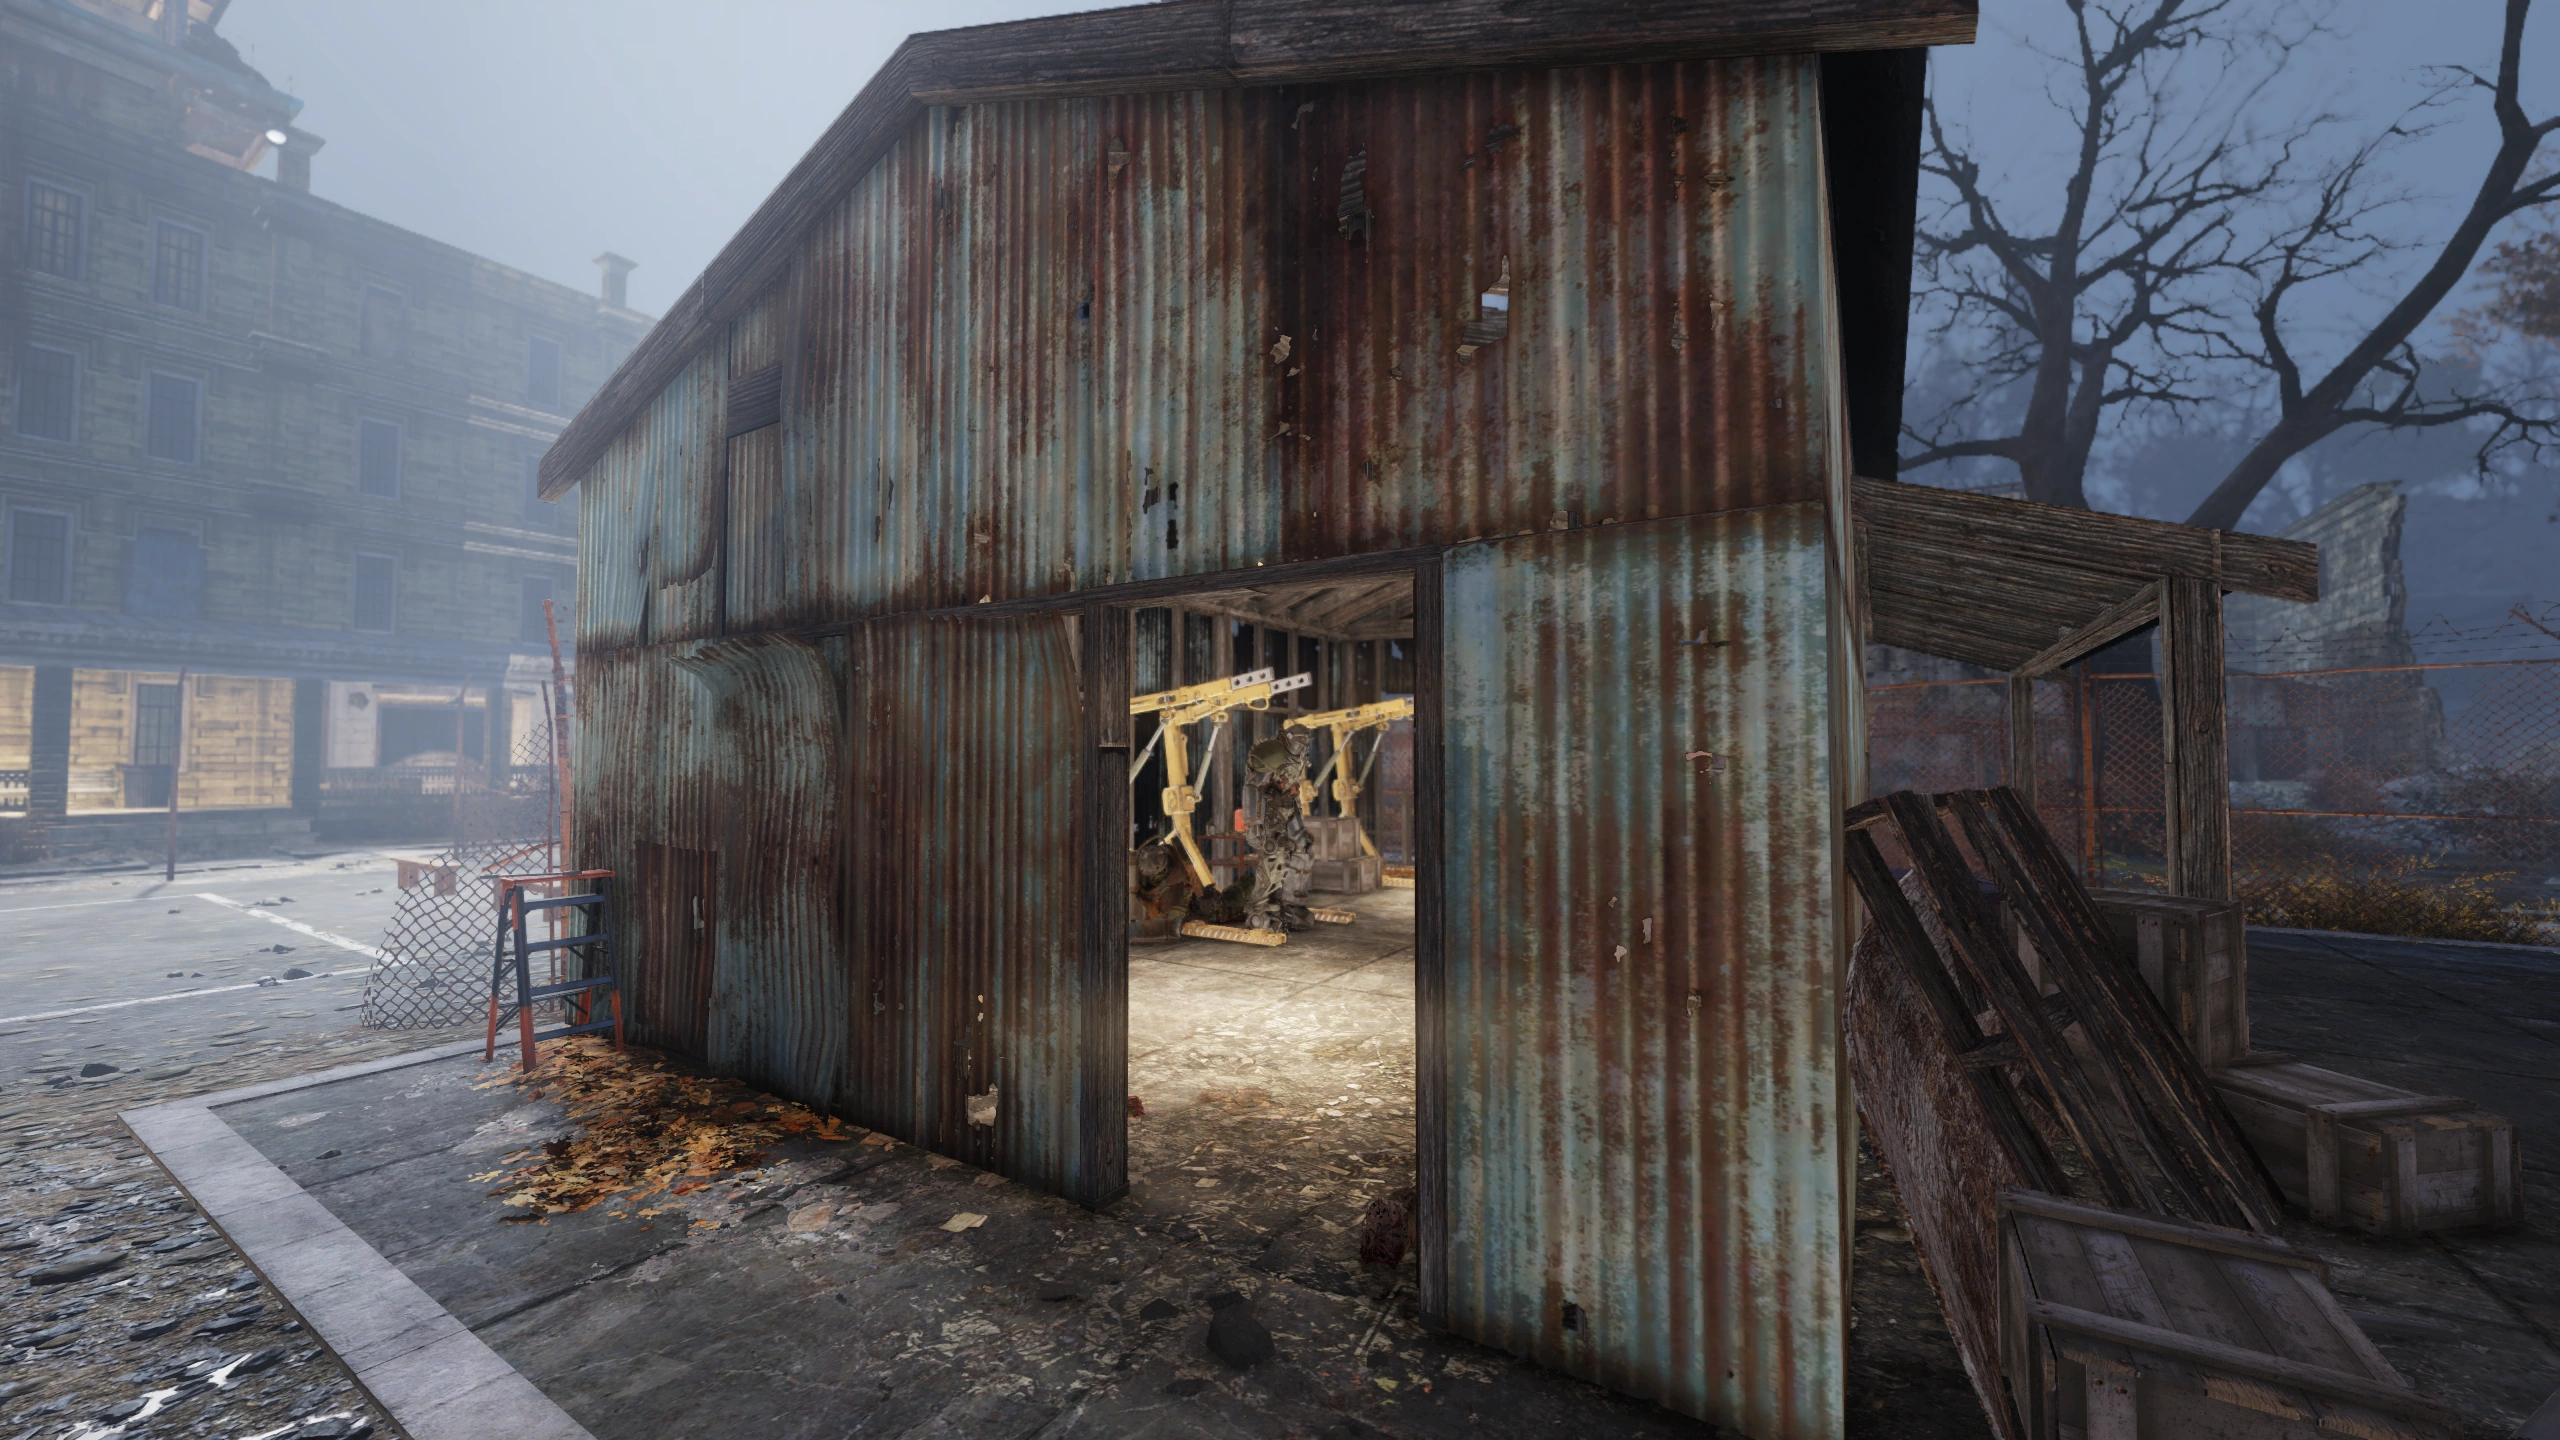
|
| Grafton Dam | T-series | In a shed in a fenced area on the west side of the dam. There are a half dozen super mutants in this area. | 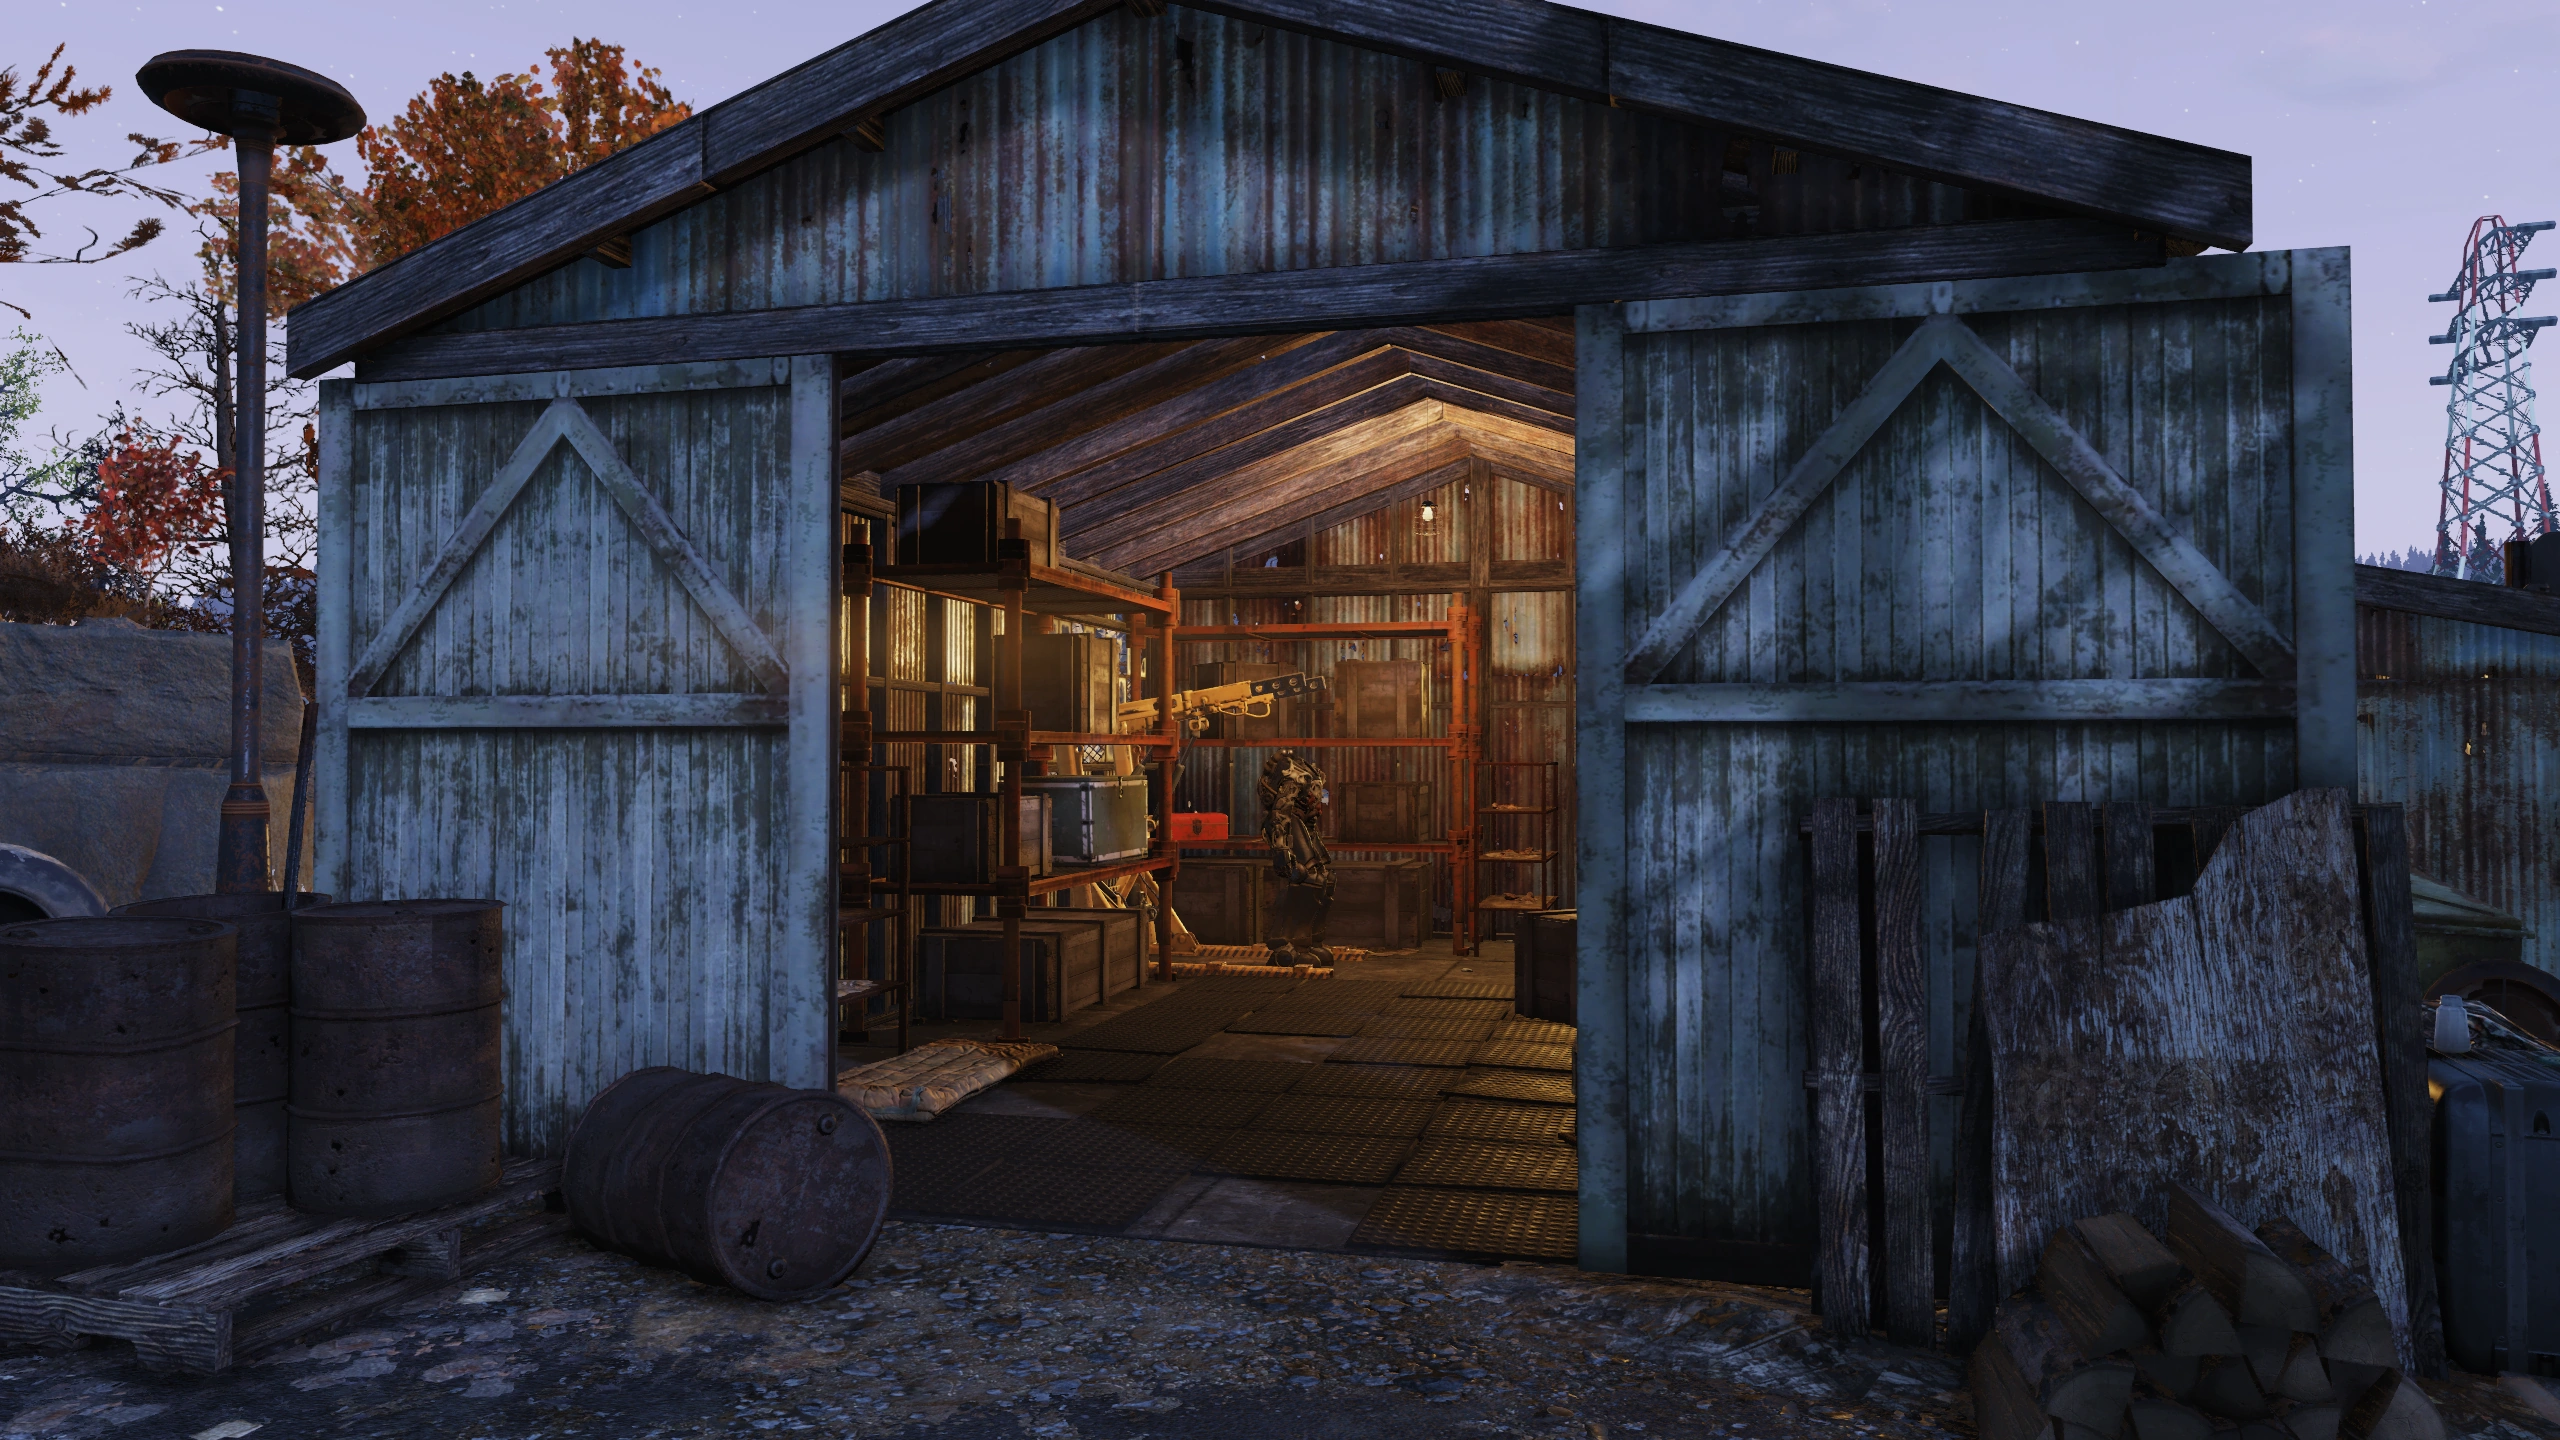
|
Savage Divide
North Savage Divide

| Location | Type | Description | Image |
|---|---|---|---|
| Converted munitions factory | T-Series | Behind a skill 1 locked door inside the building. The room is accessible from a catwalk that overlooks the workshop. Note that if the workshop is claimed by another player, picking this lock results in a bounty. This has been reported to Bethesda. | 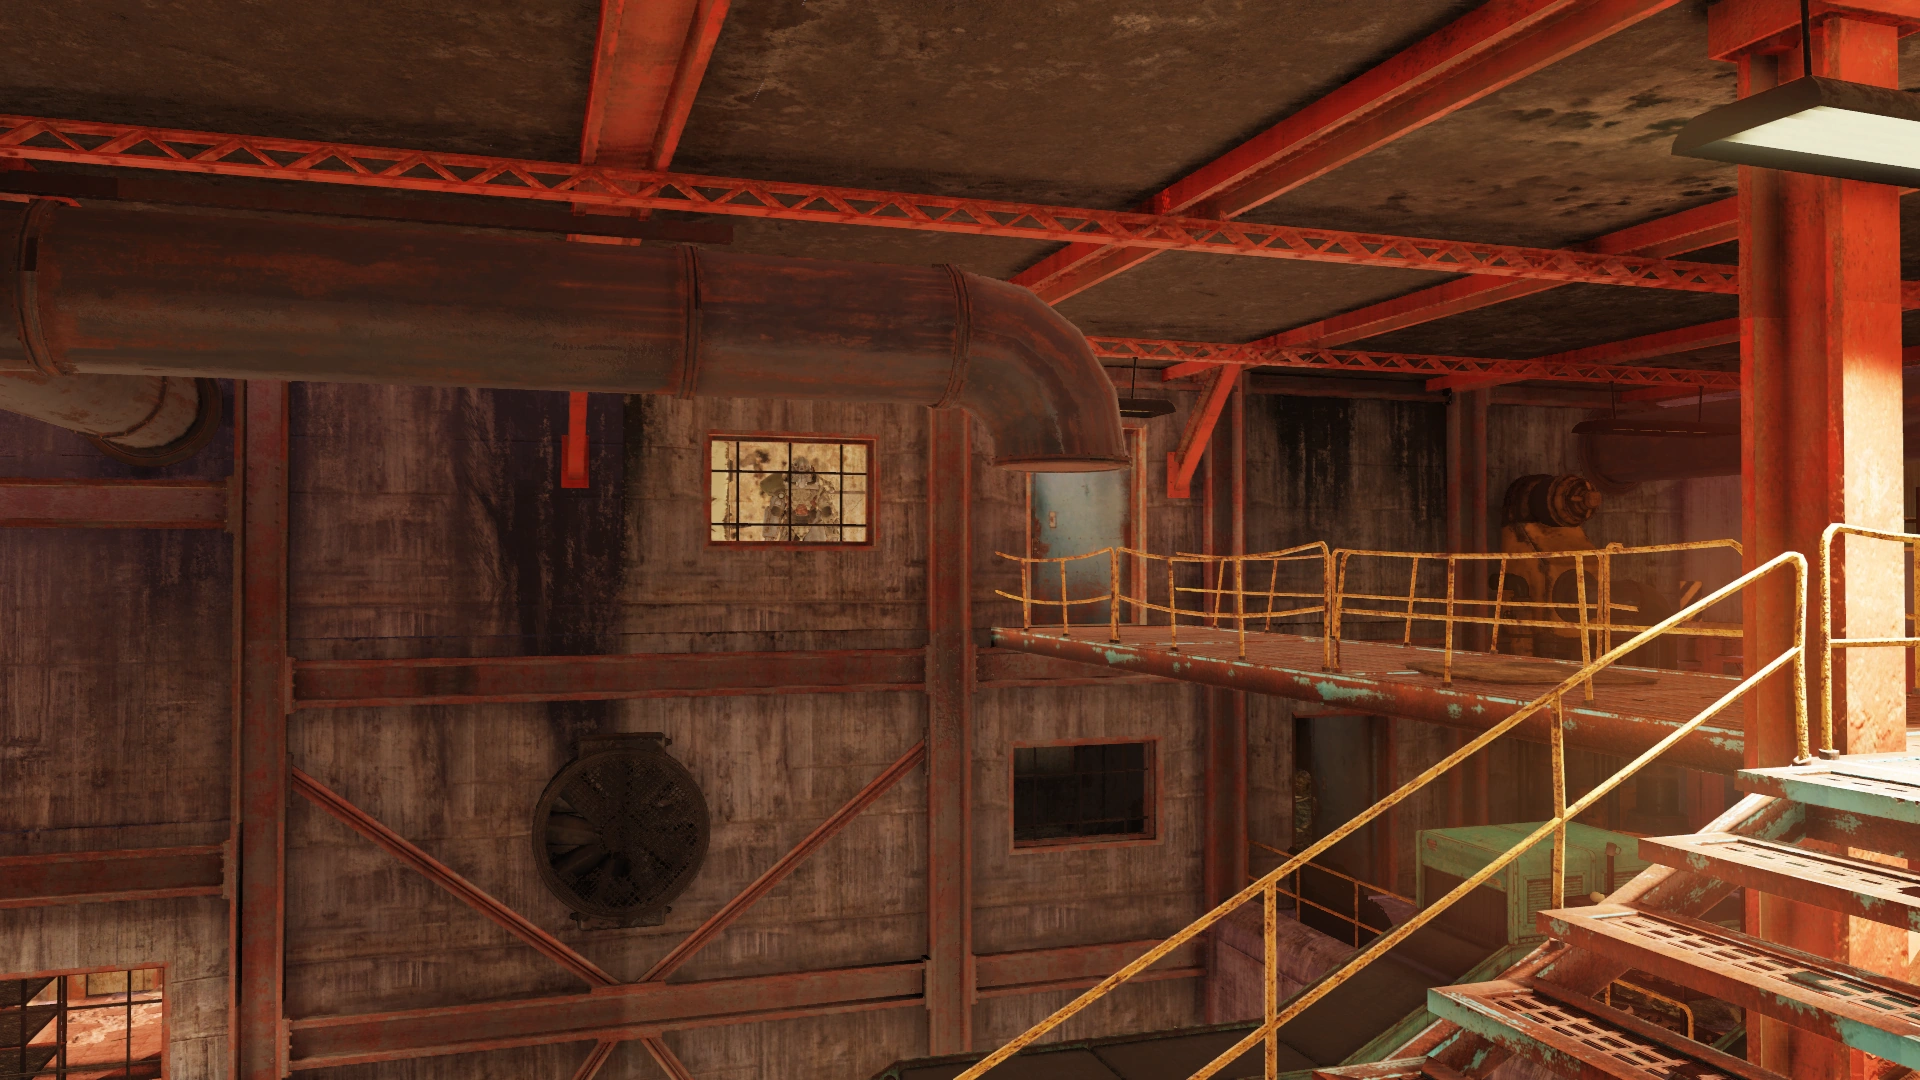
|
| Sunnytop Ski Lanes | Raider | On the lower floor next to the stairs to the lobby at a power armor station. | 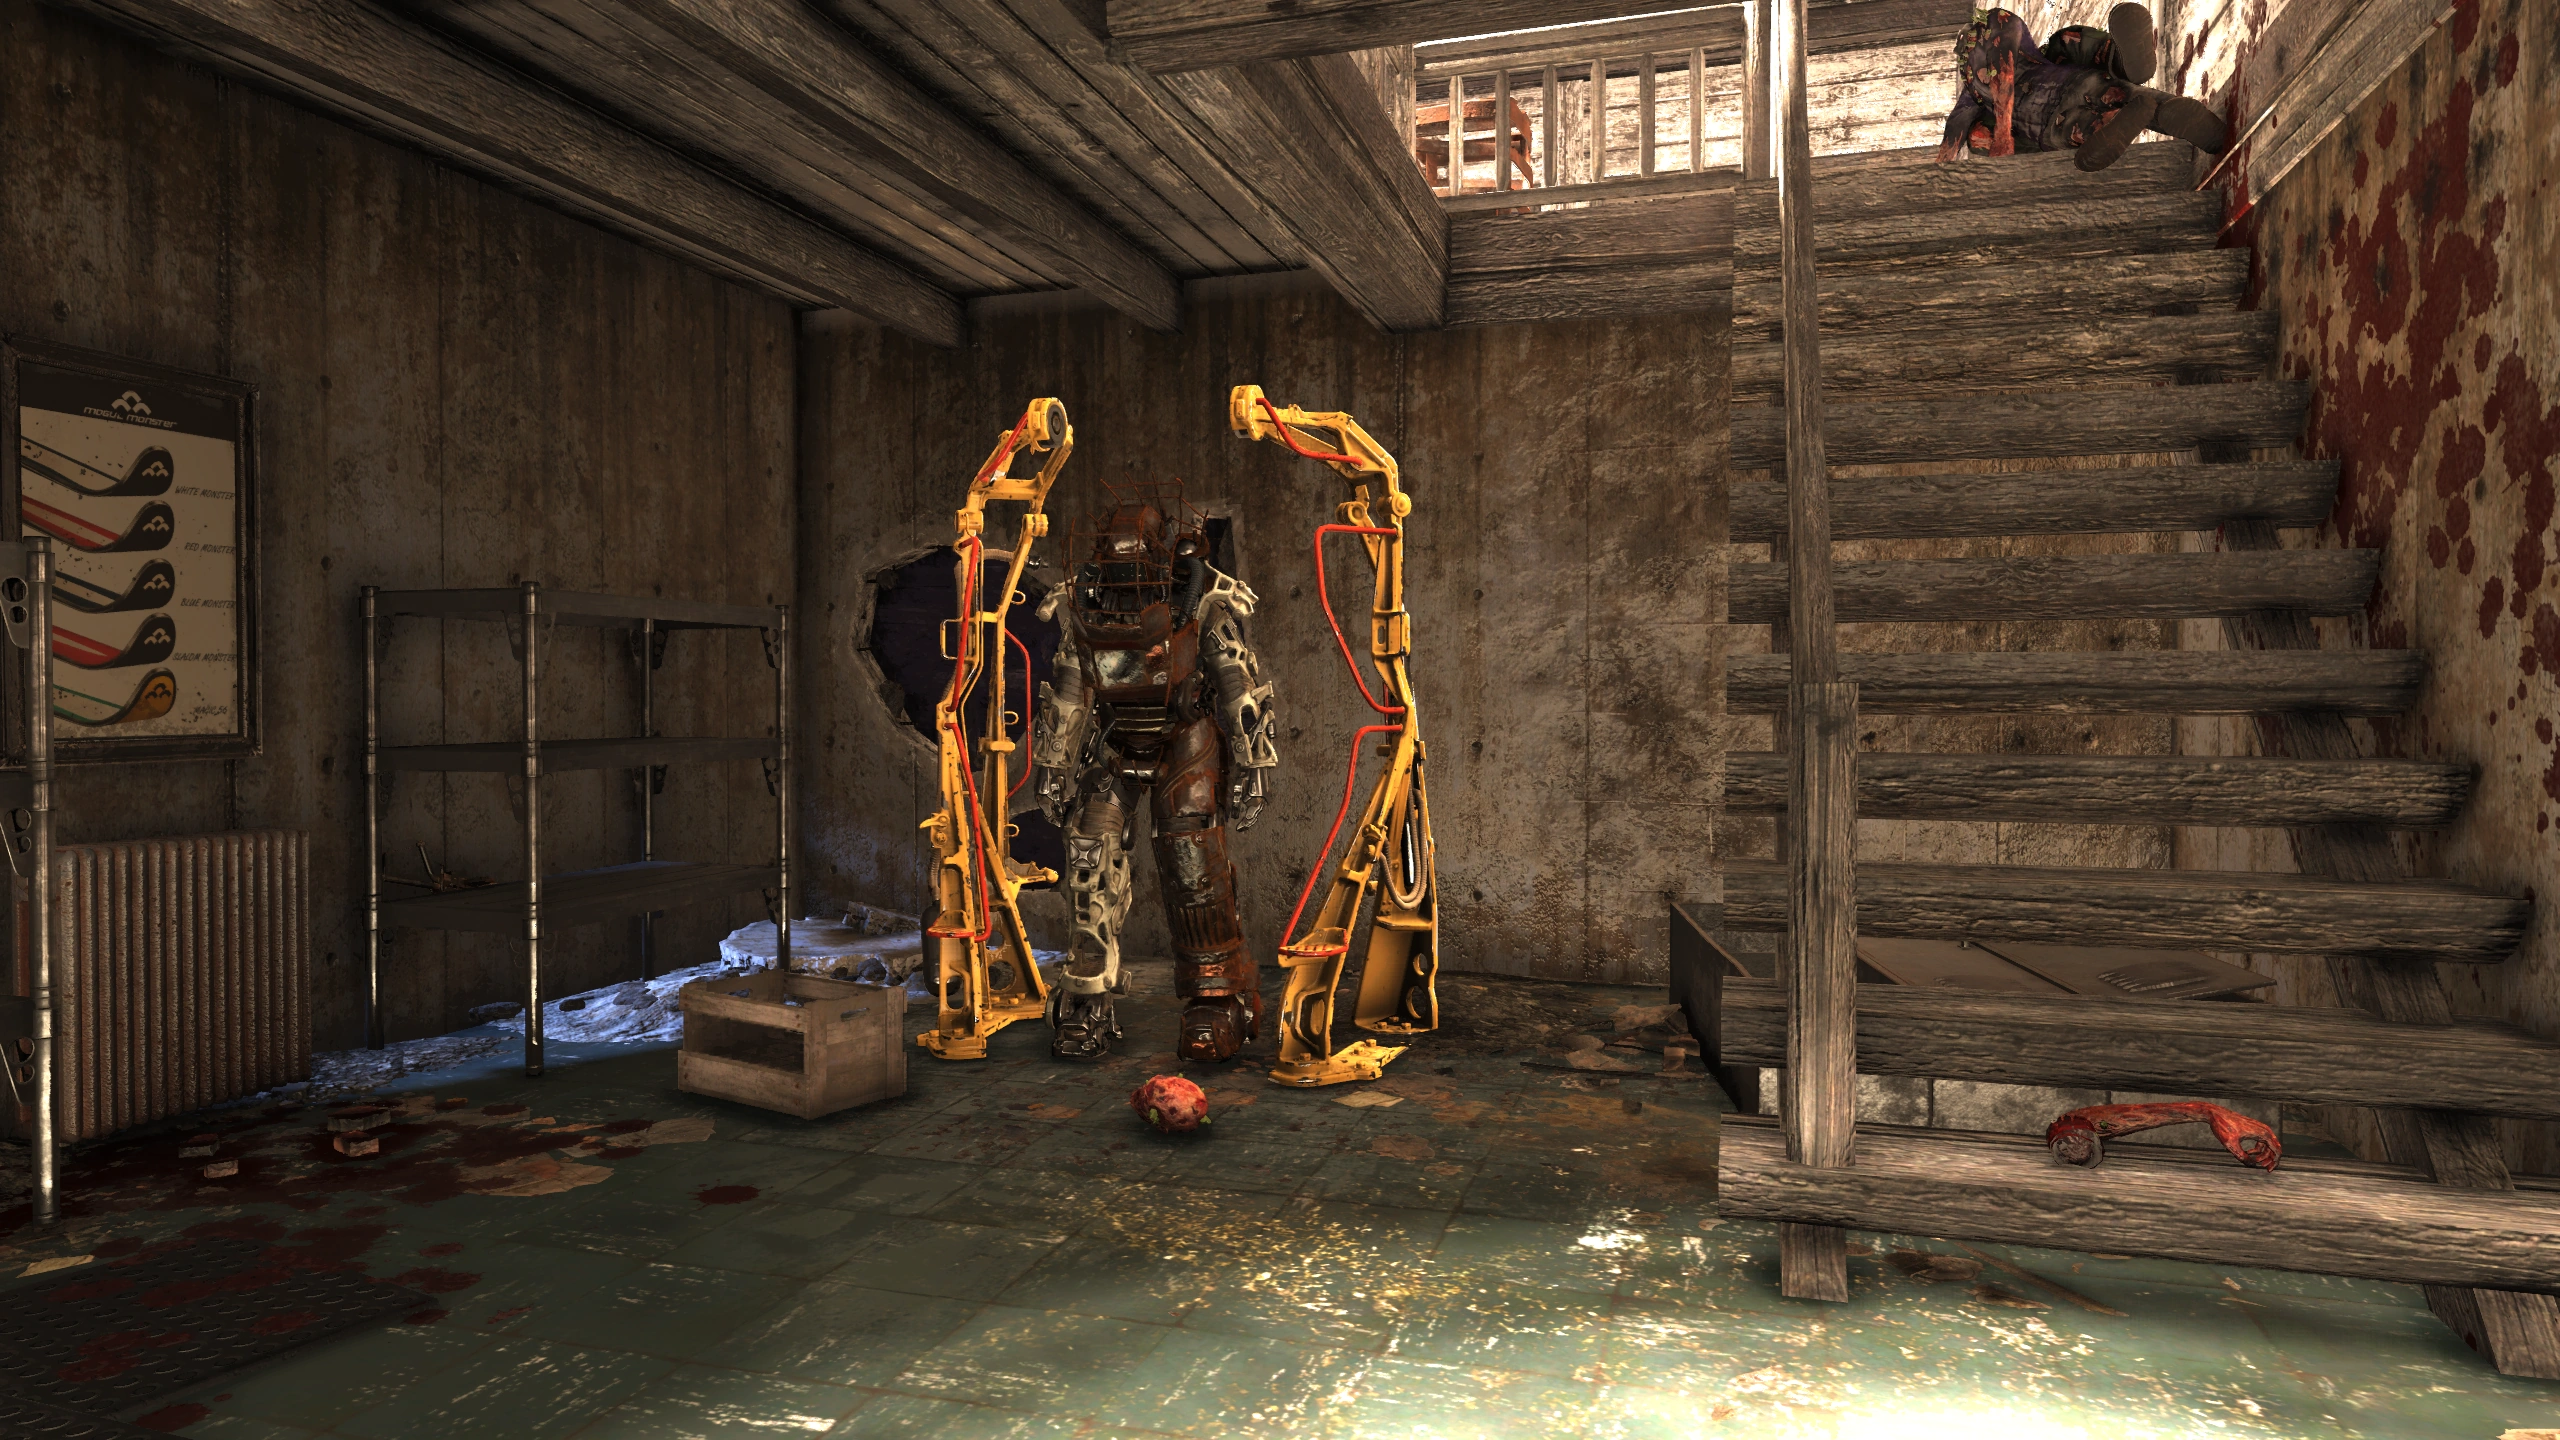
|
| Ammo dump | T-Series | In plain sight at a power armor station | 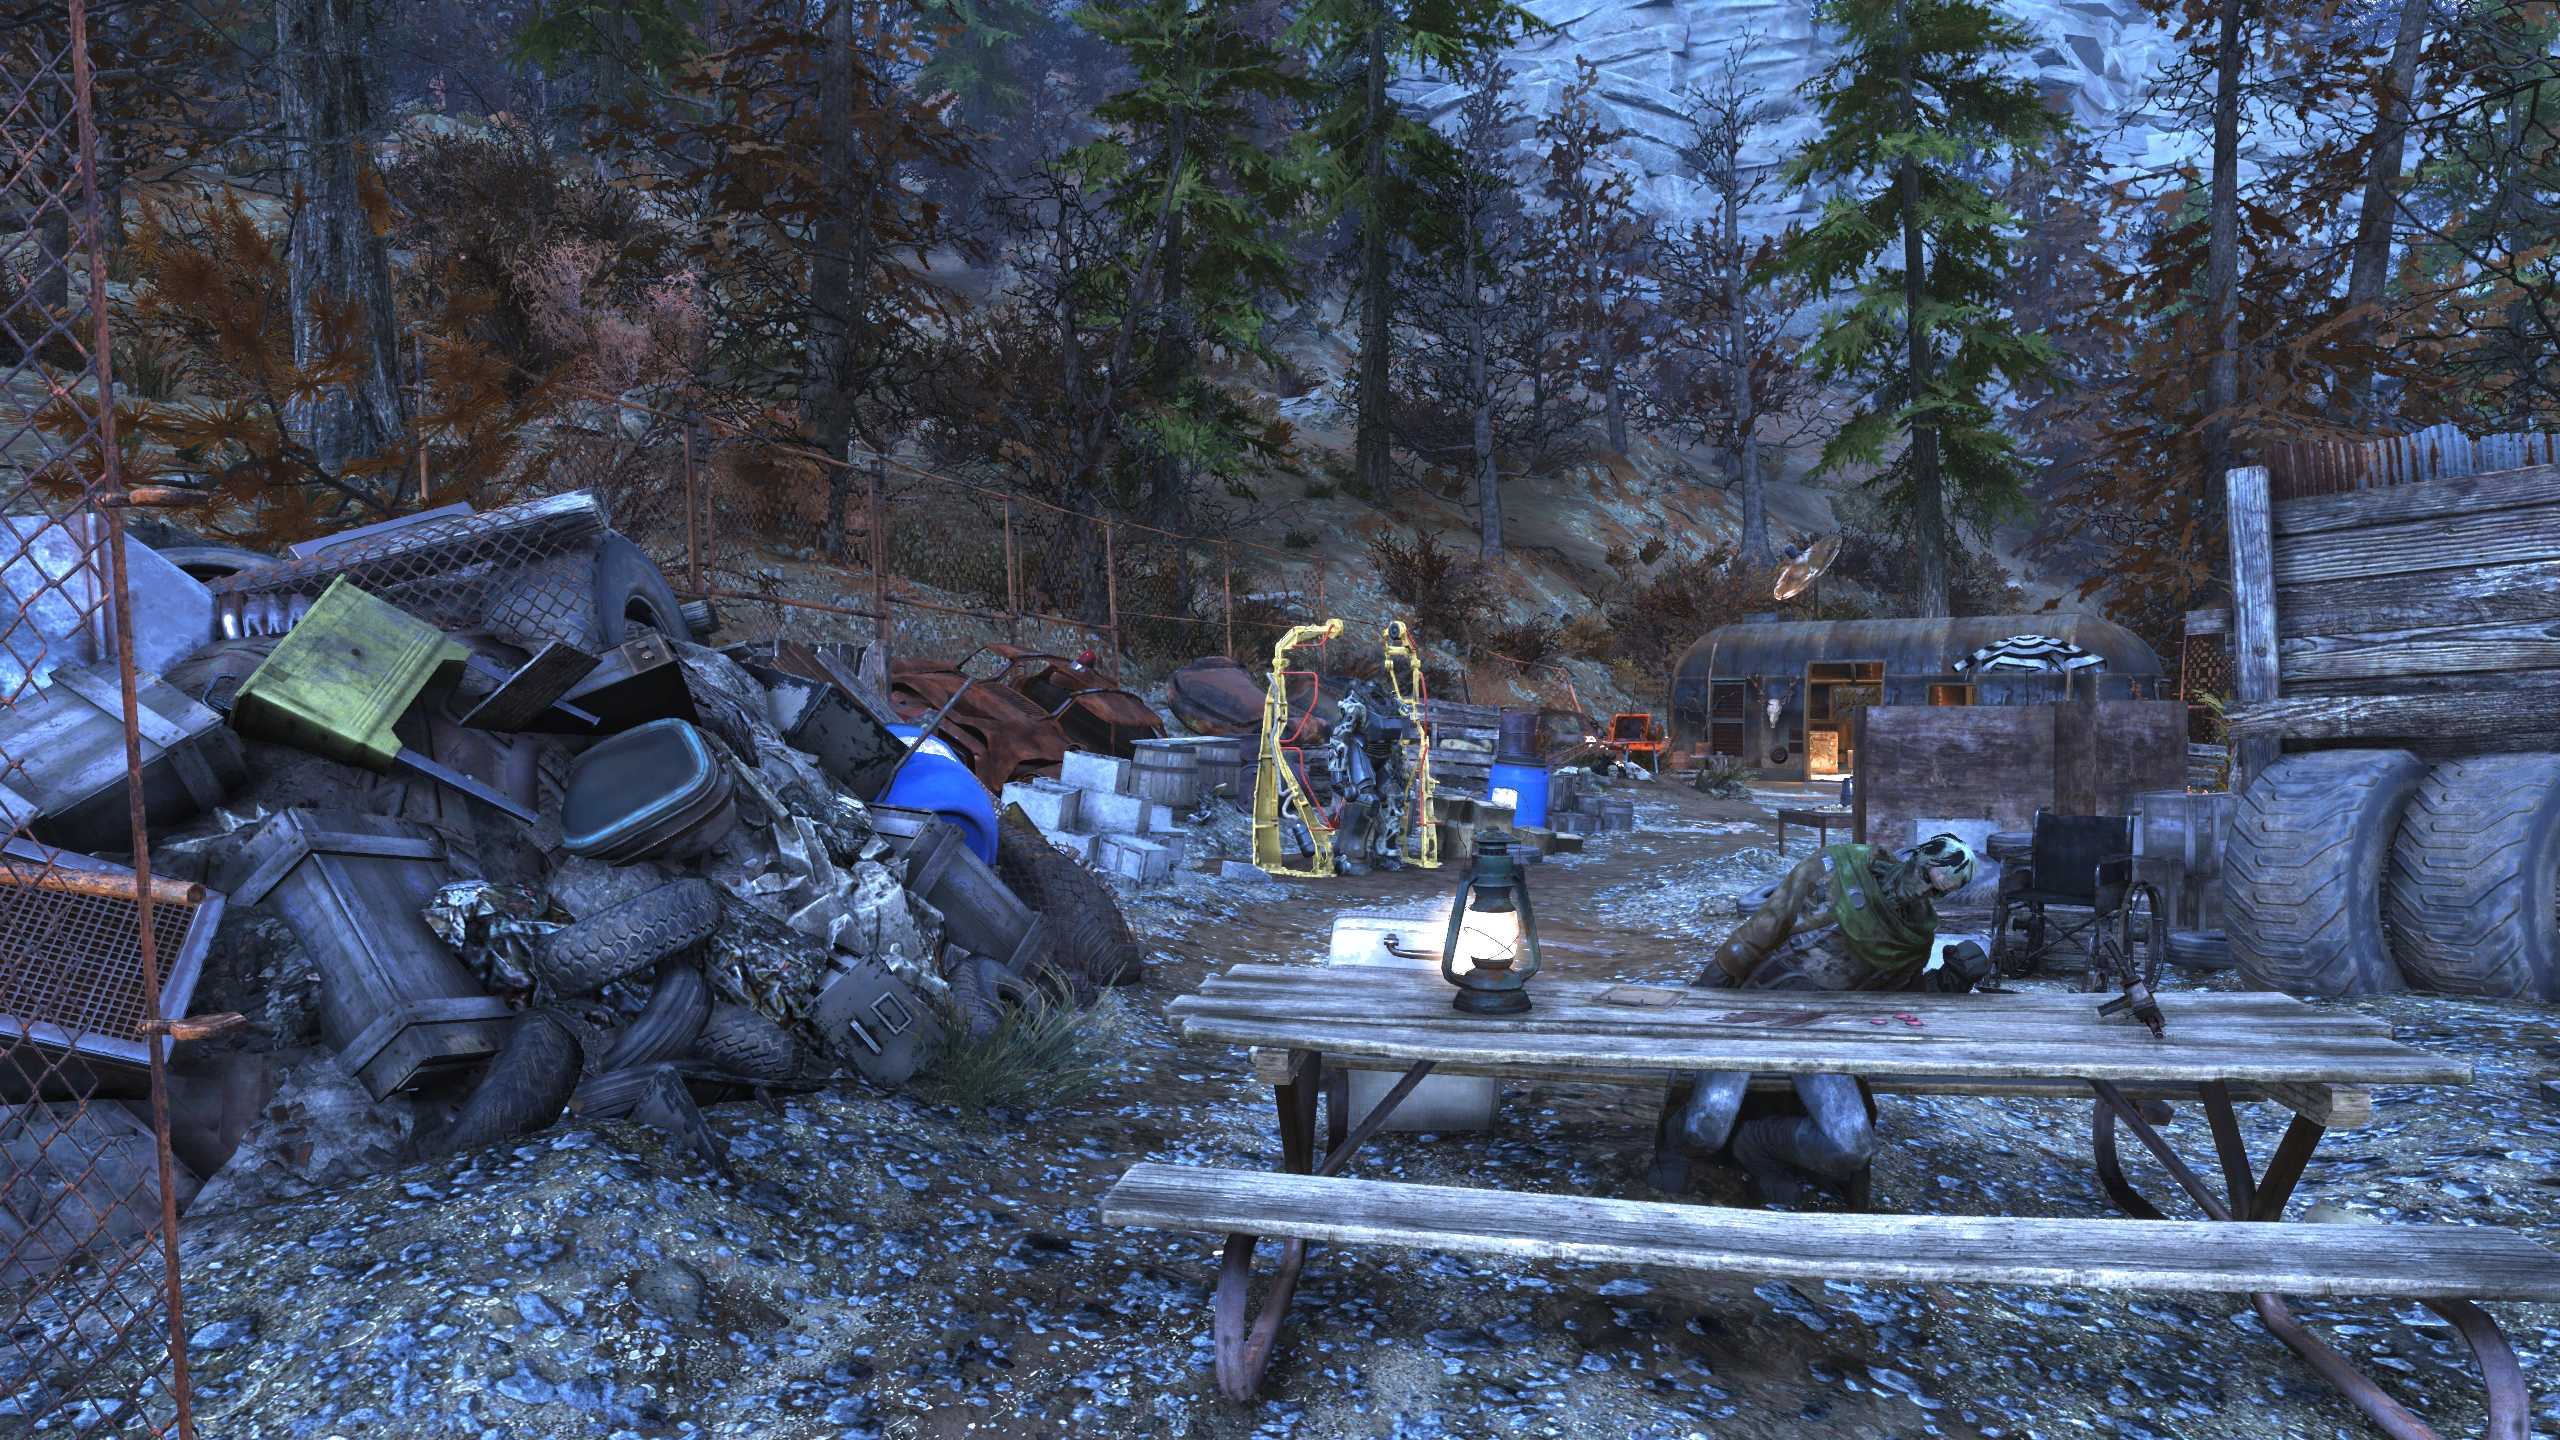
|
| Sons of Dane compound | T-Series | In the basement of the house west of the main building behind a skill 3 locked security gate. | 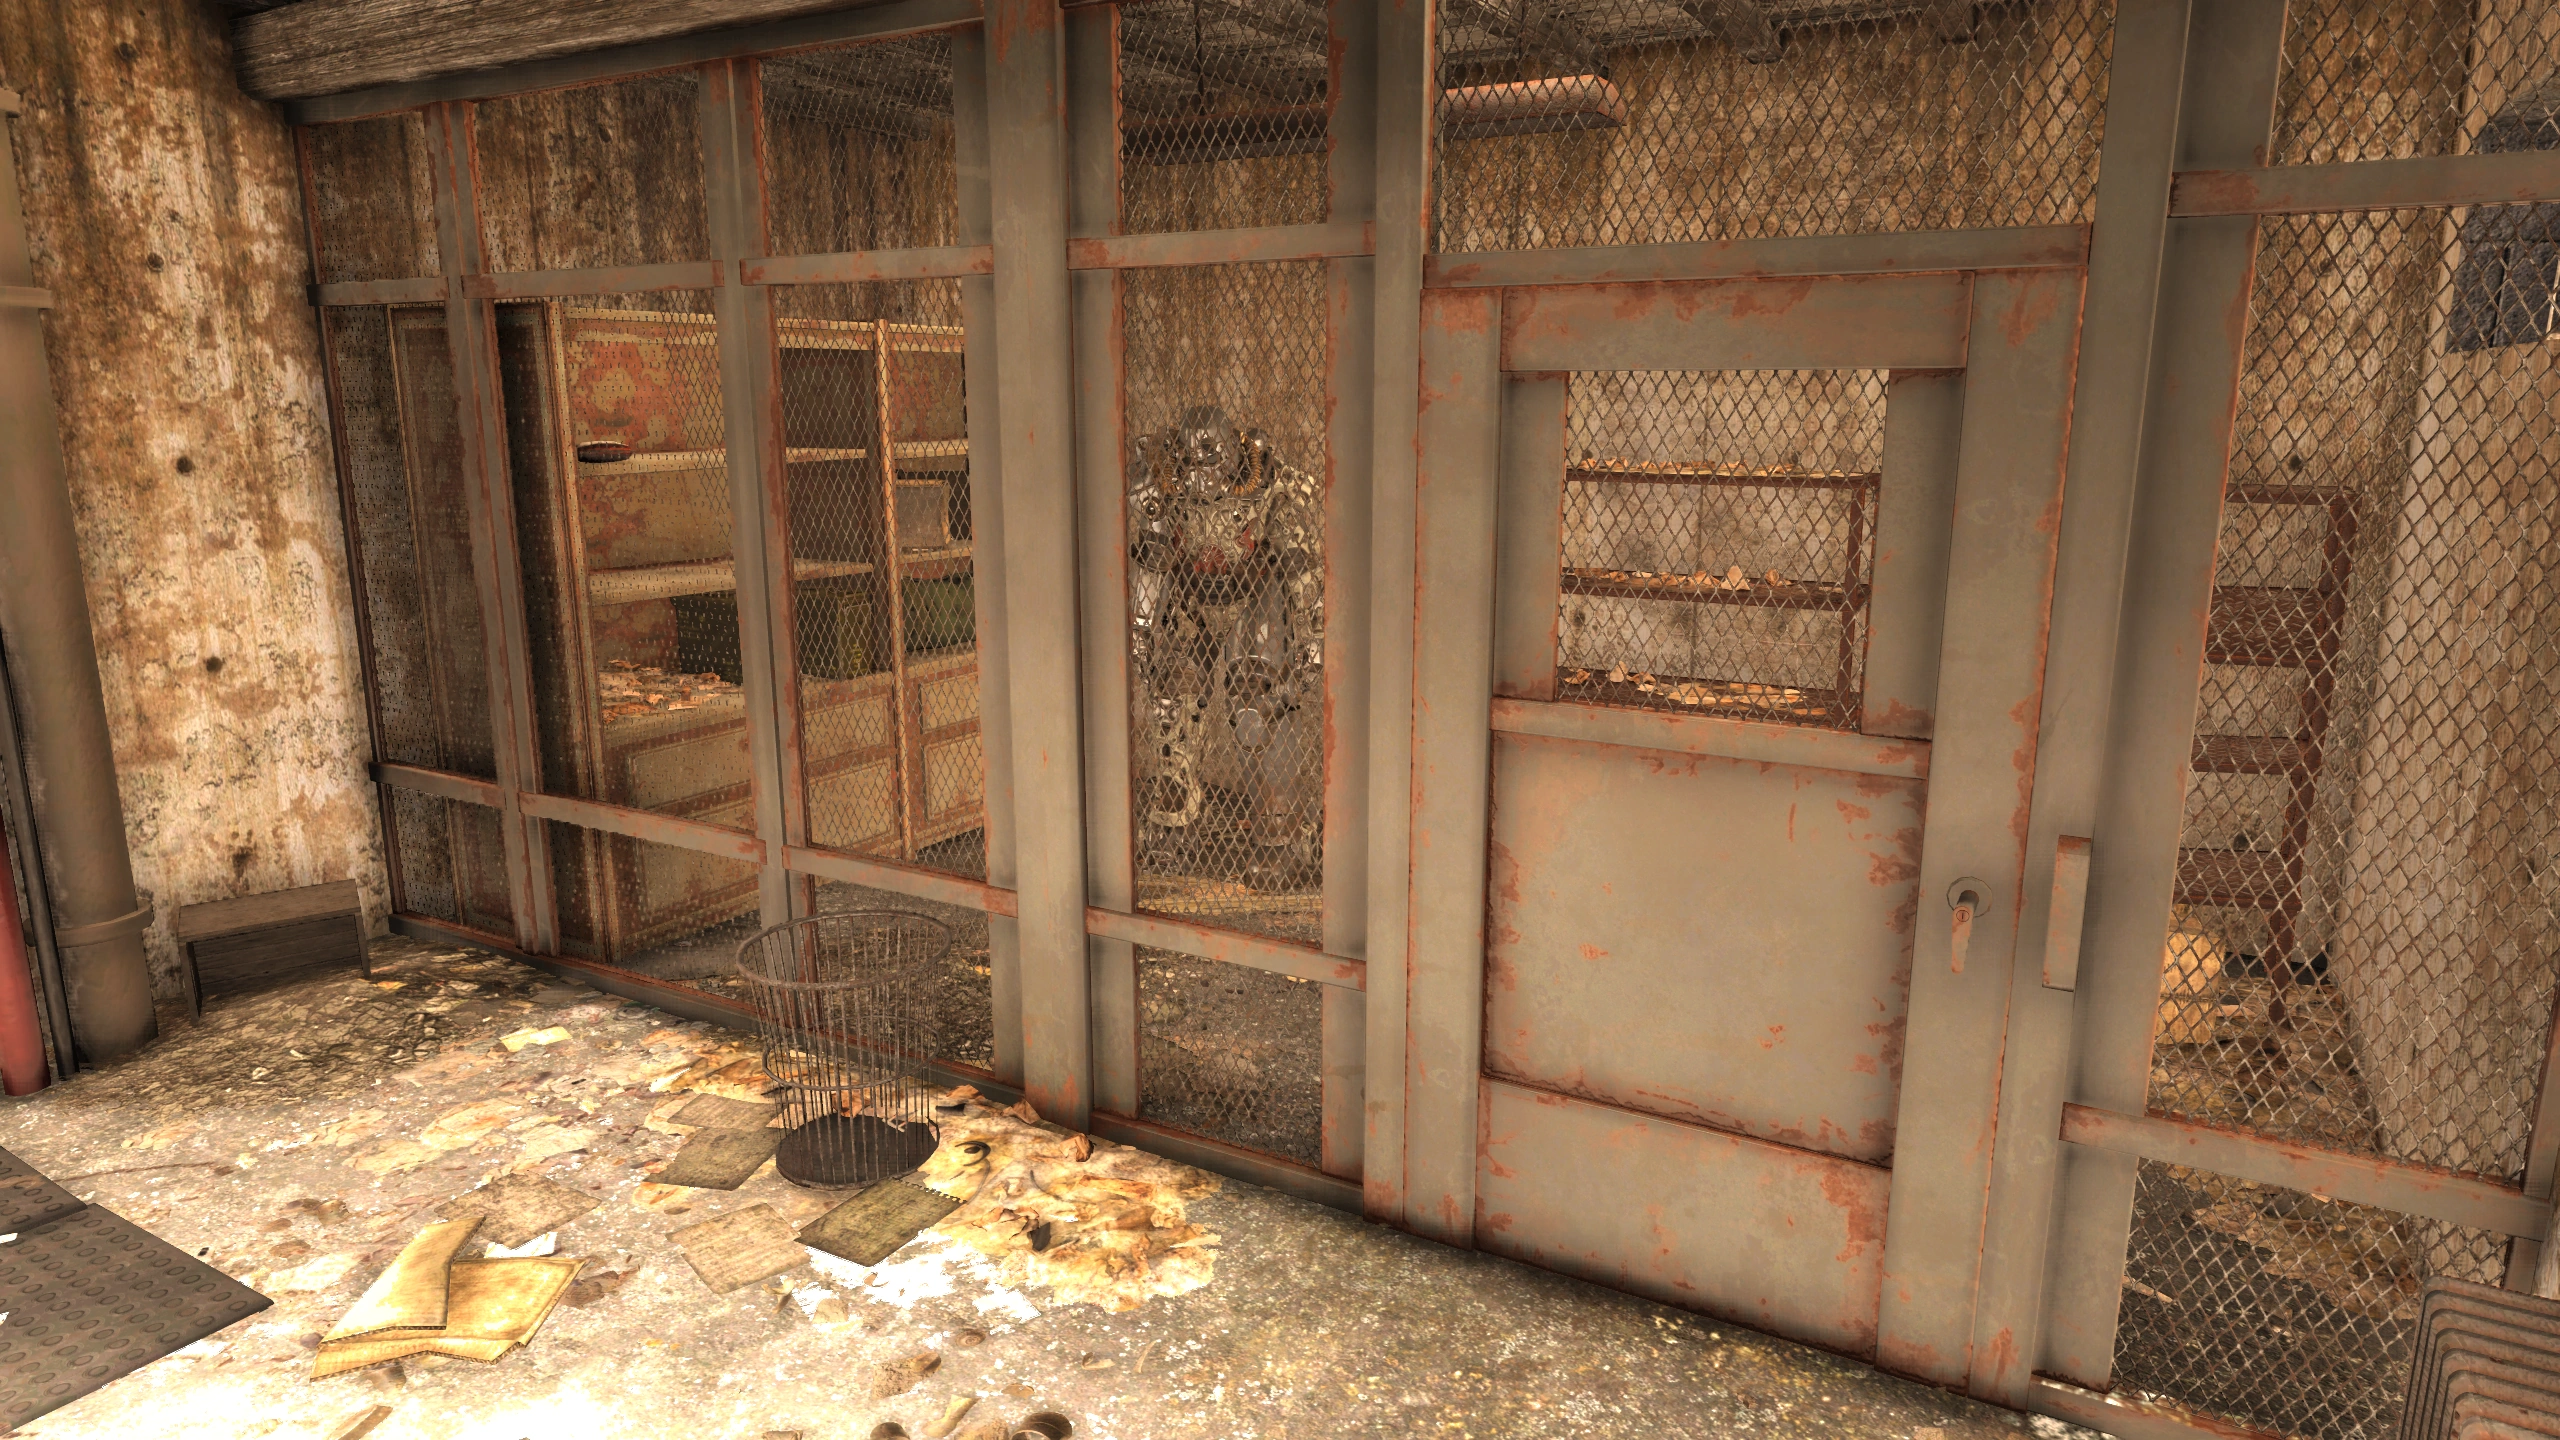
|
Central Savage Divide

| Location | Type | Description | Image |
|---|---|---|---|
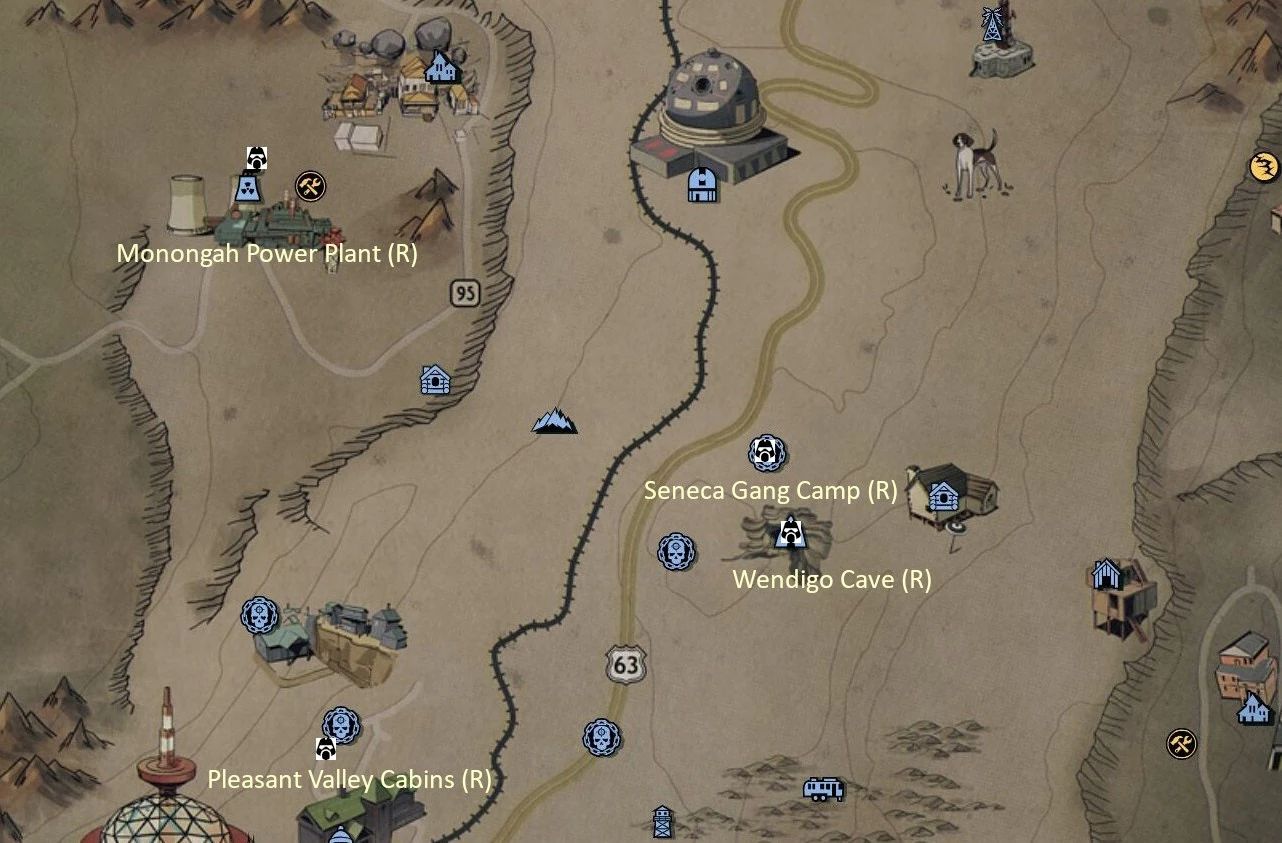
| Monongah power plant | Raider | Inside the door labeled "Loading Dock" in the main building. The armor is on the ground floor with two power armor stations straight ahead upon entering. When the plant is populated by super mutants, a player character can face as many as six in the confined space of the loading dock making this one of the tougher fights at a power armor location. | 
|
| Seneca Gang camp | Raider | By the steps to the lookout tower. | 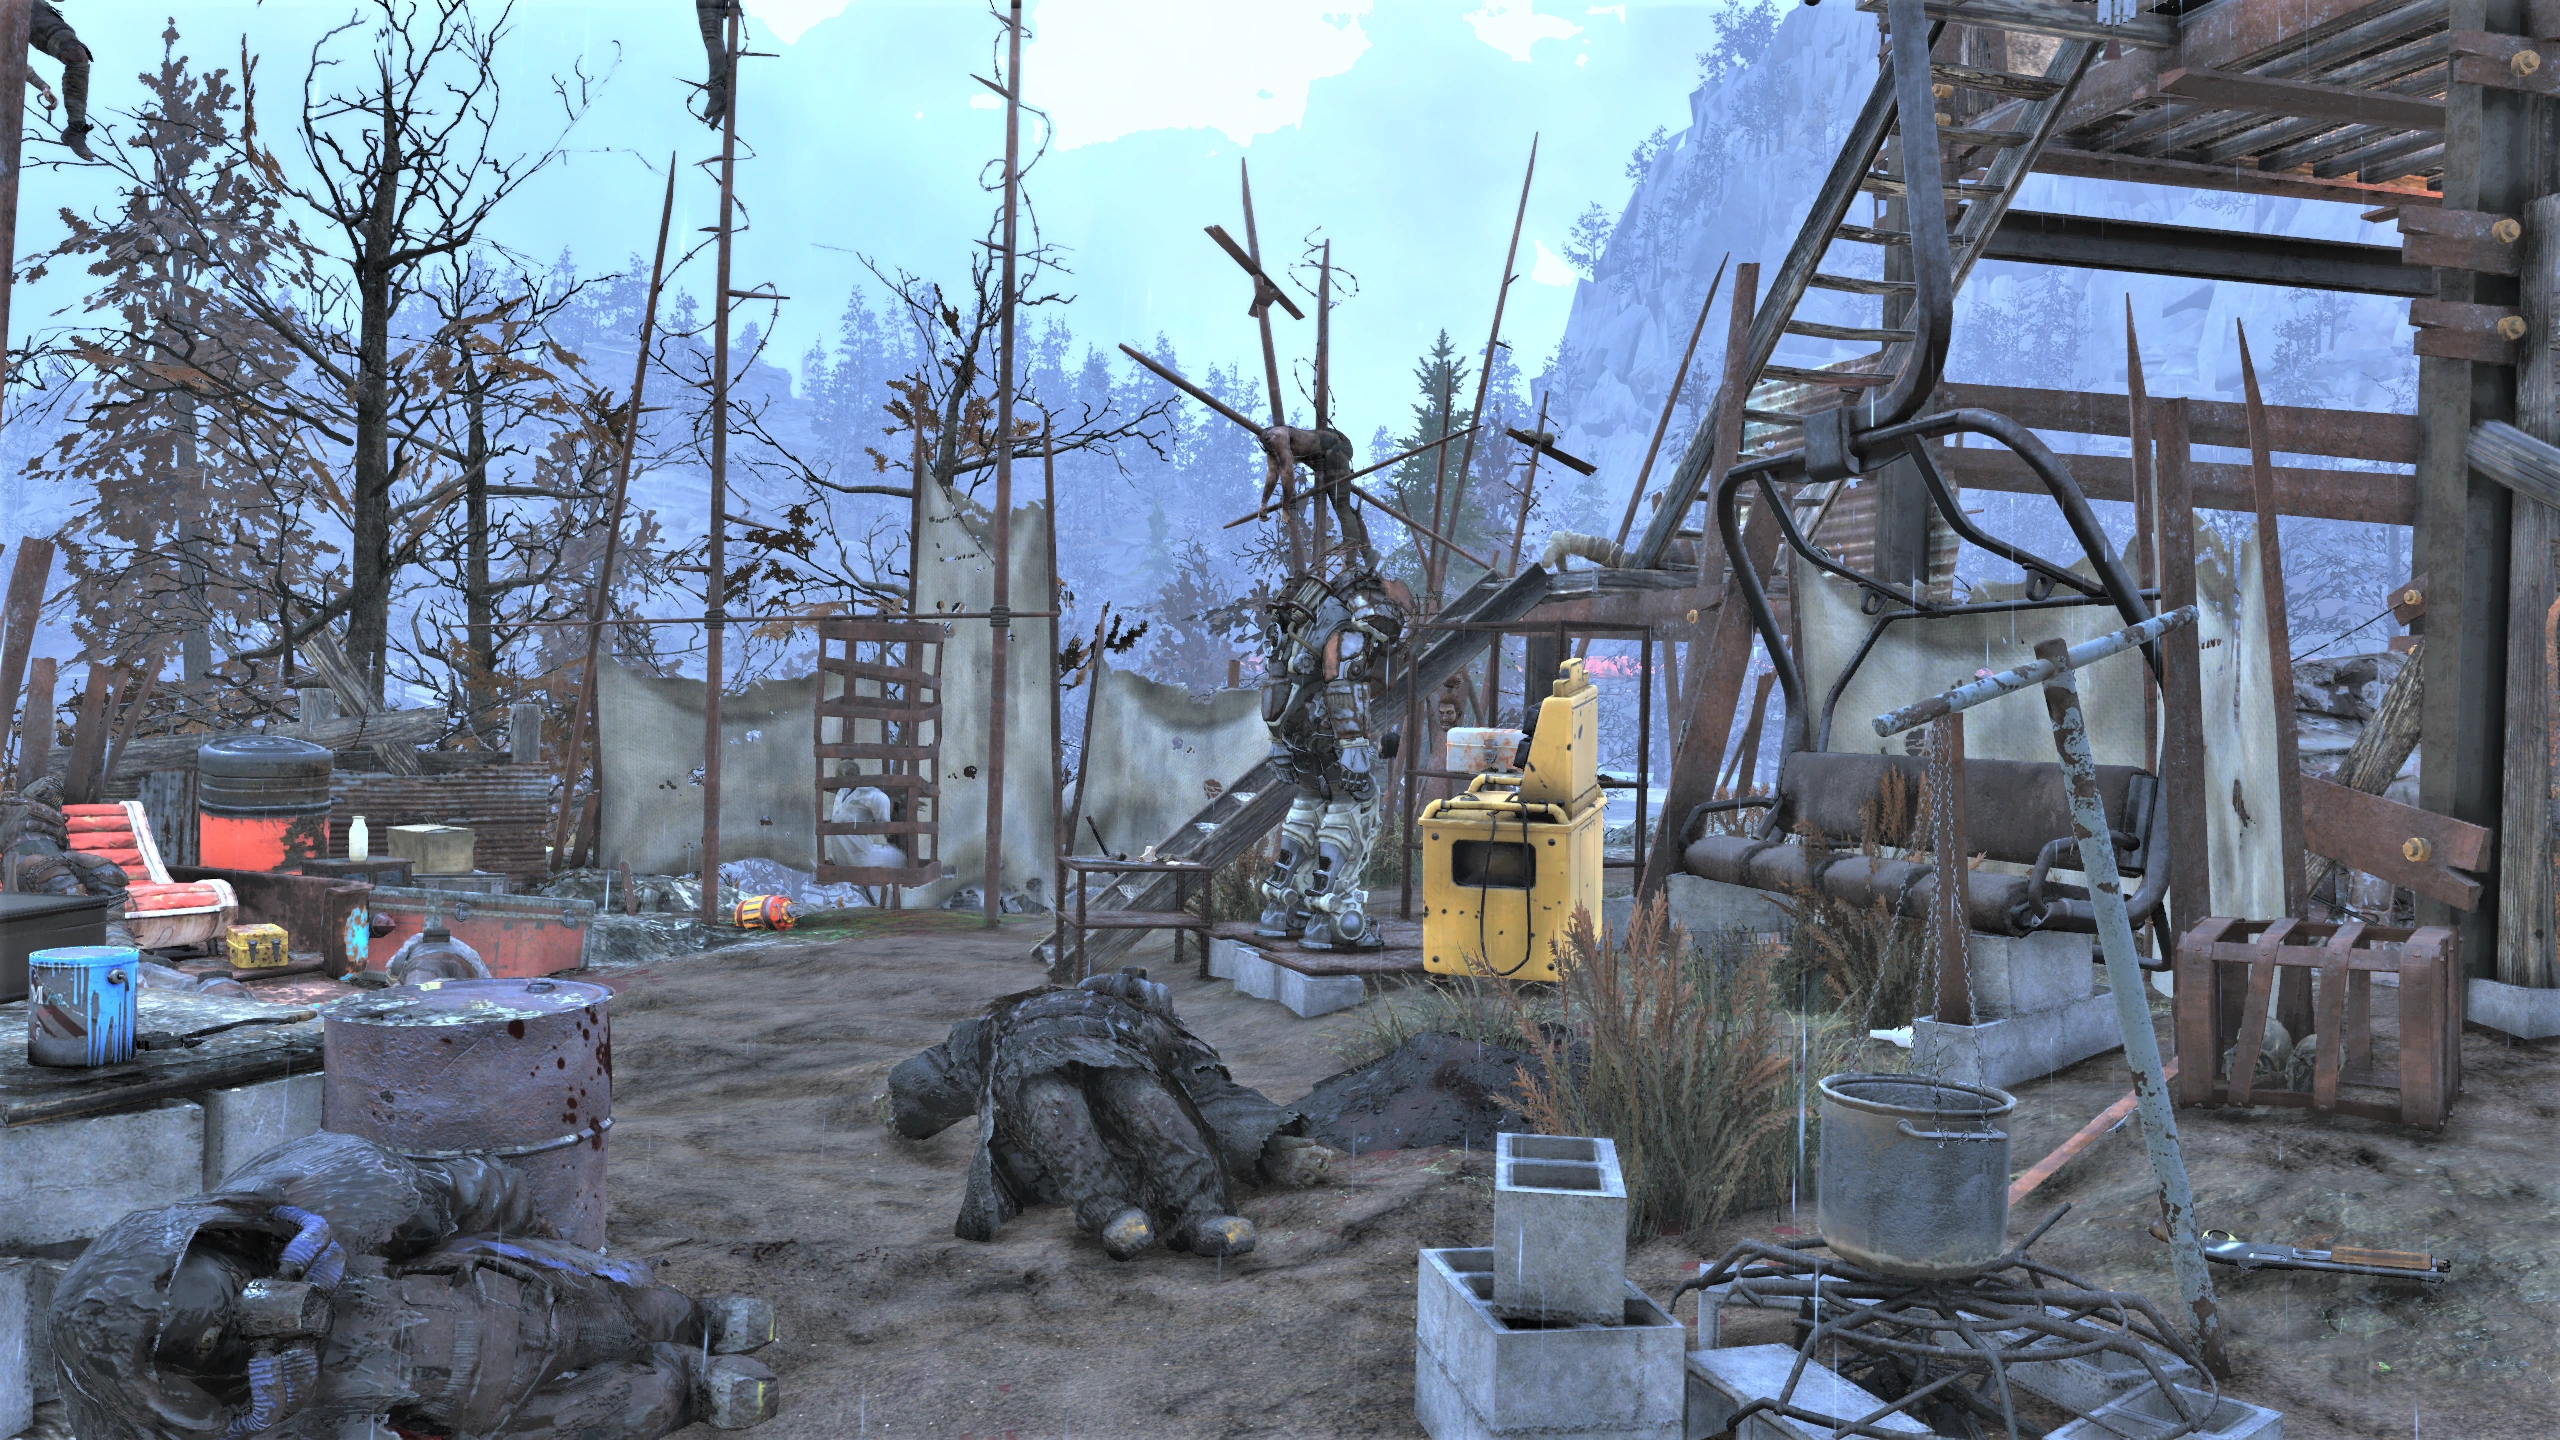
|
| Wendigo cave | Raider | This location is explored during the main quest Key to the Past. It is a difficult and dangerous area to navigate. For the armor, always go to the right. (There is one small dead end room on the right before finding the armor.) The armor is in plain sight in a short side tunnel that ends at the foot of a cliff. There are two bodies on the ground. | 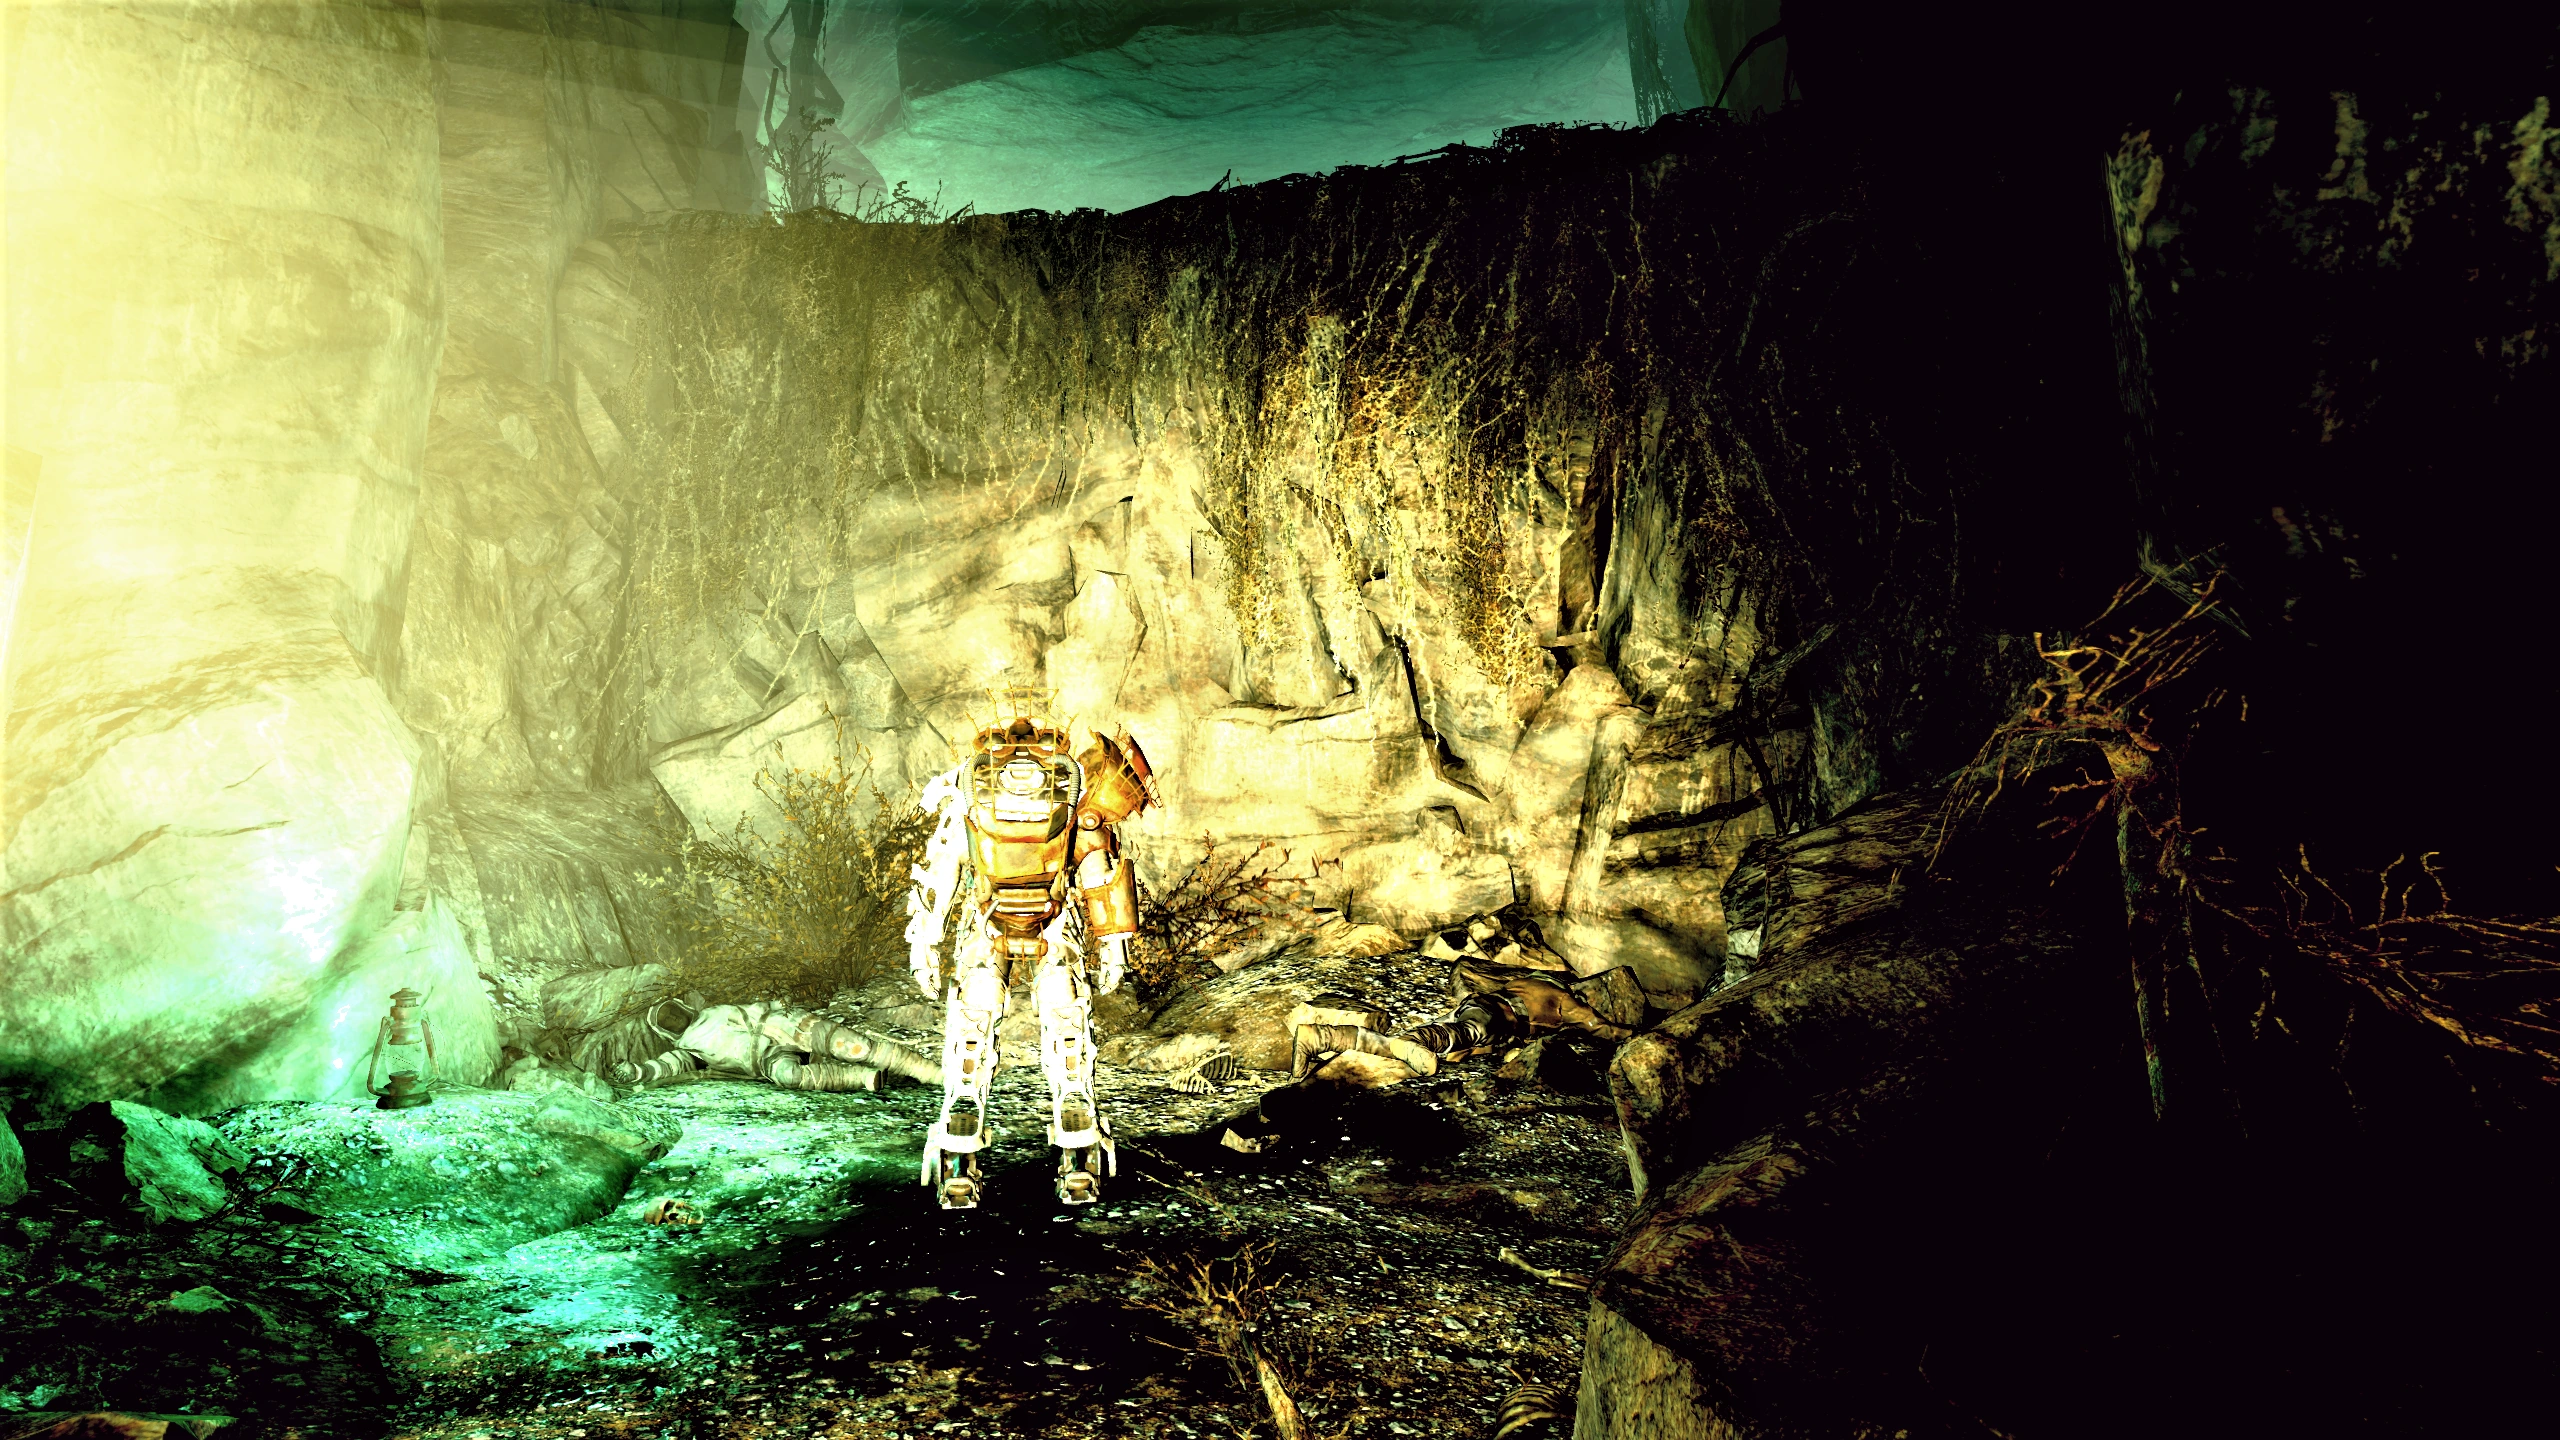
|
| Pleasant Valley cabins | Raider | In the center of an arena on a road with raider shacks which is between 2 roads with pre-war buildings. | 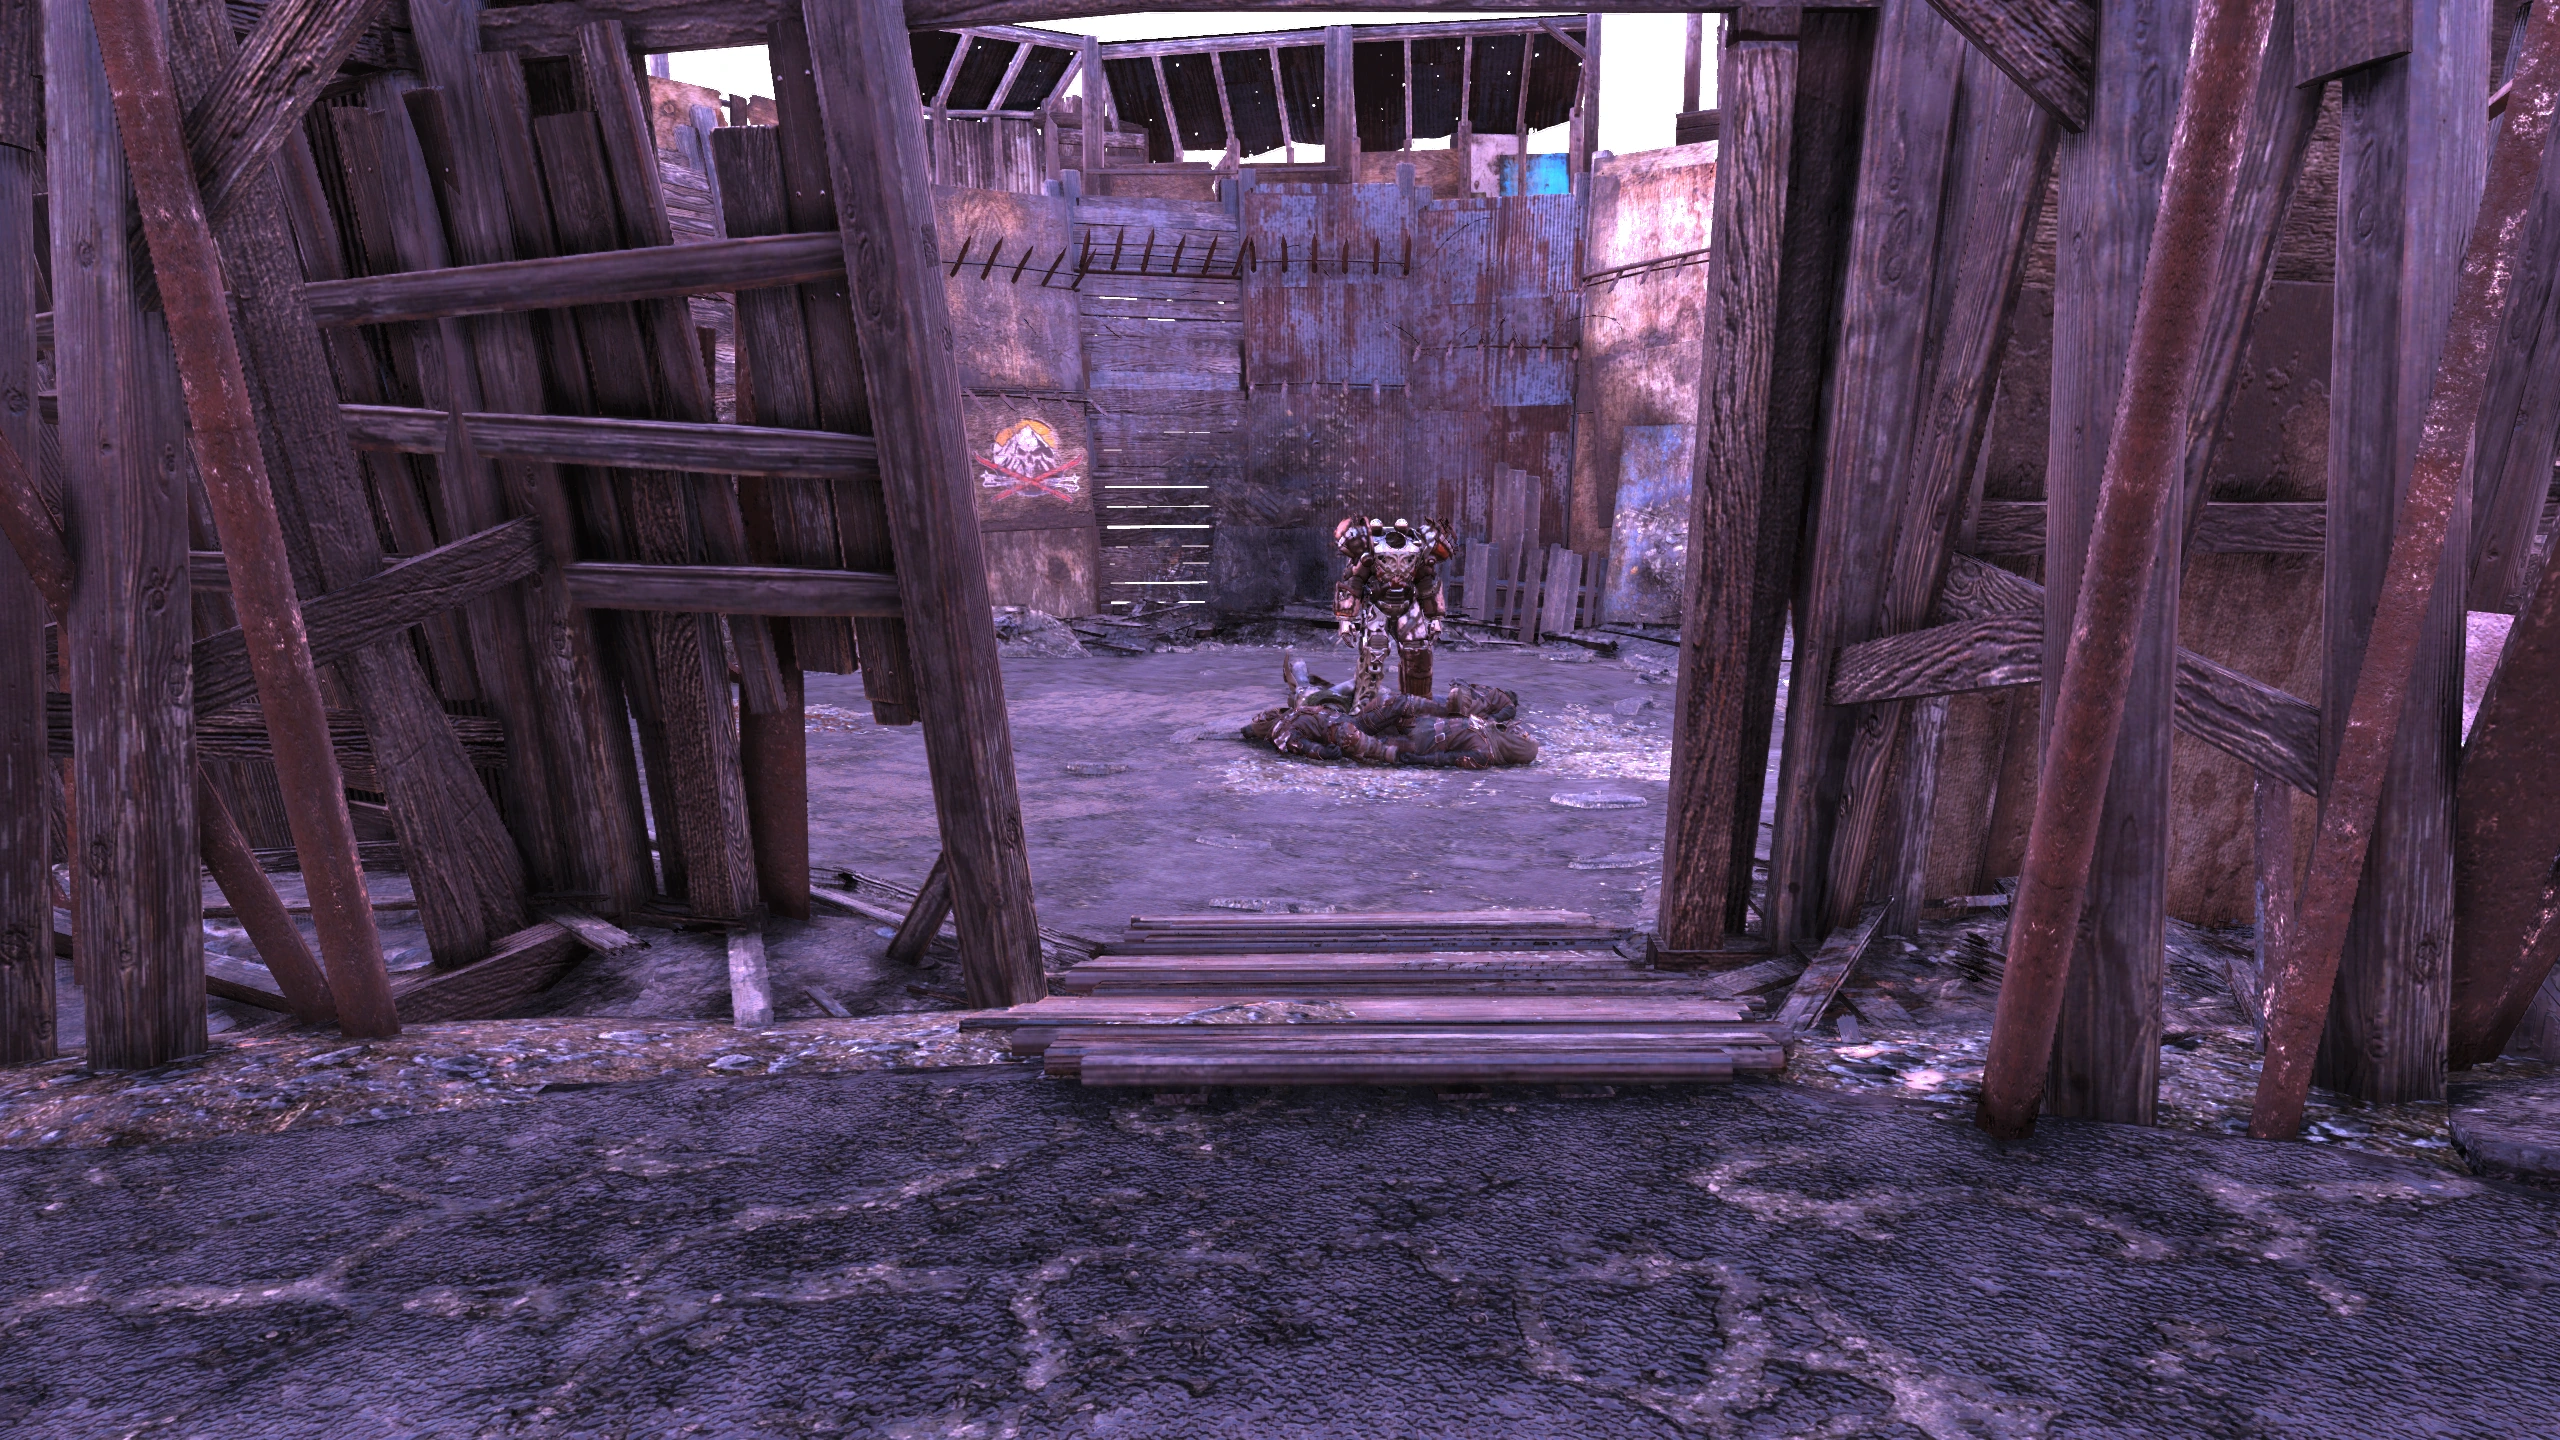
|
South Savage Divide

| Location | Type | Description | Image |
|---|---|---|---|
| New Appalachian central trainyard | T-series | Inside the main building beside a train car with "USA" written on it. | 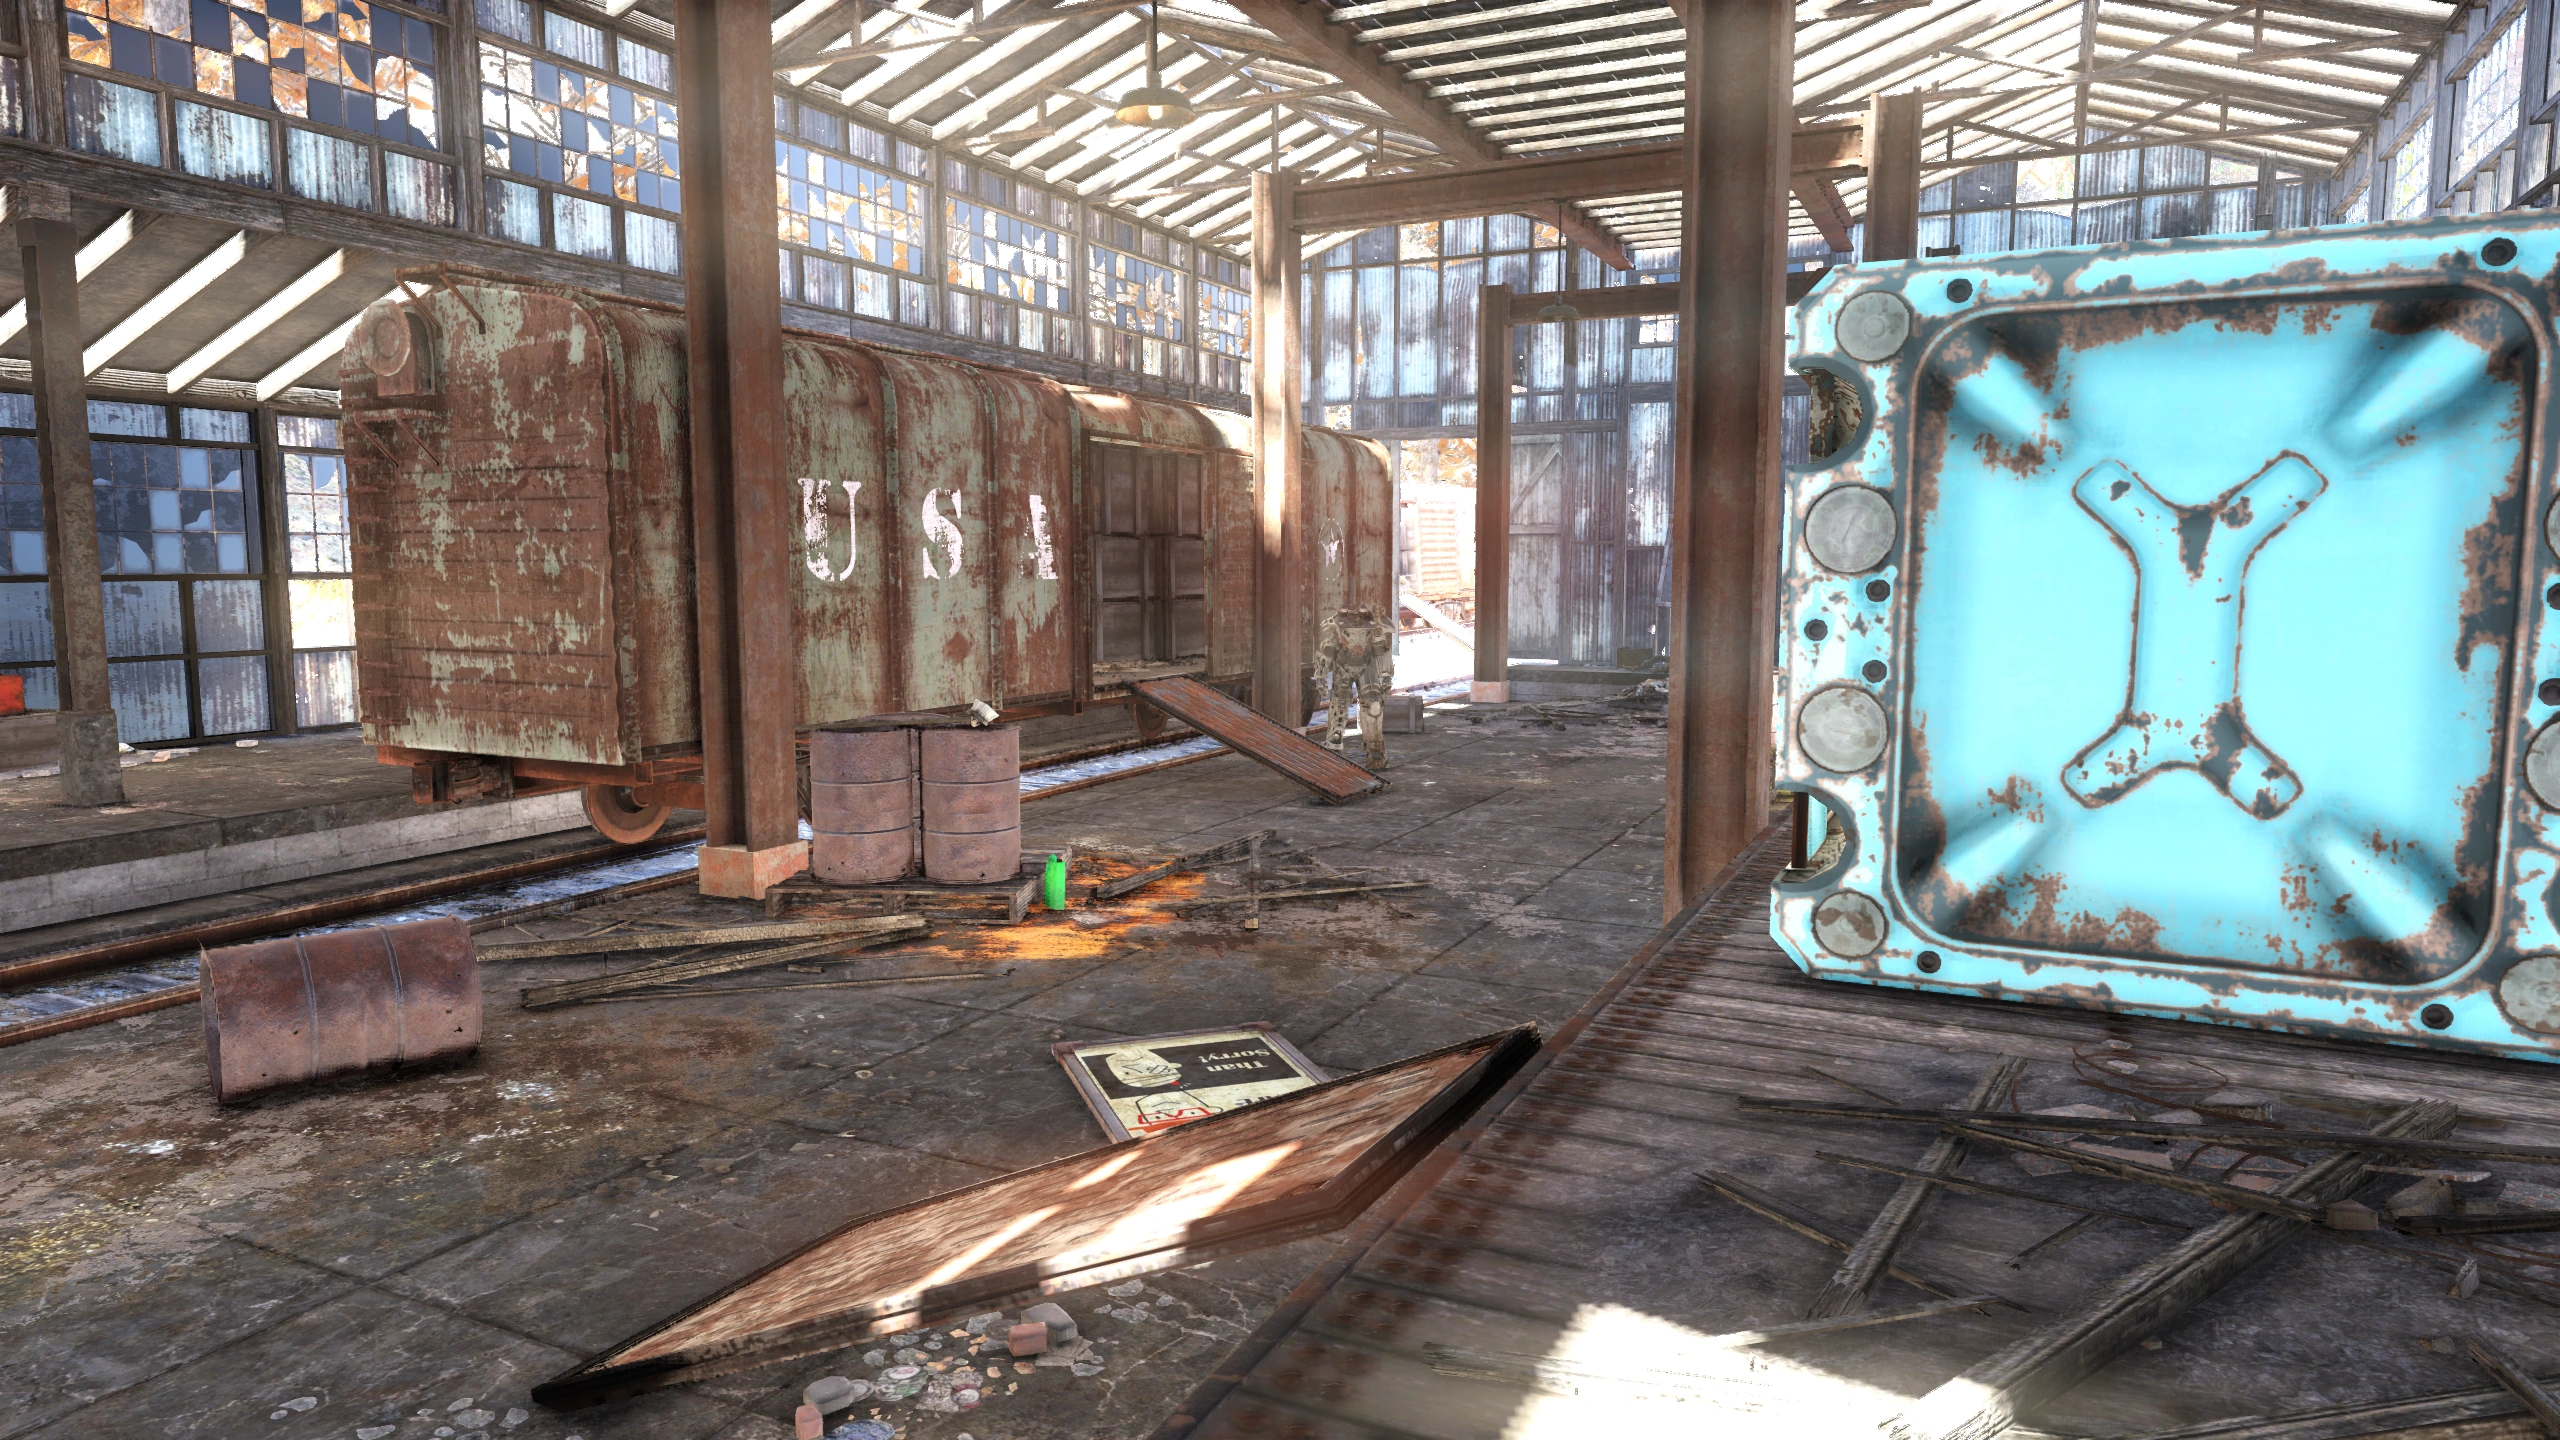
|
| Middle Mountain Cabins | Raider | In front of the middle cabin. | 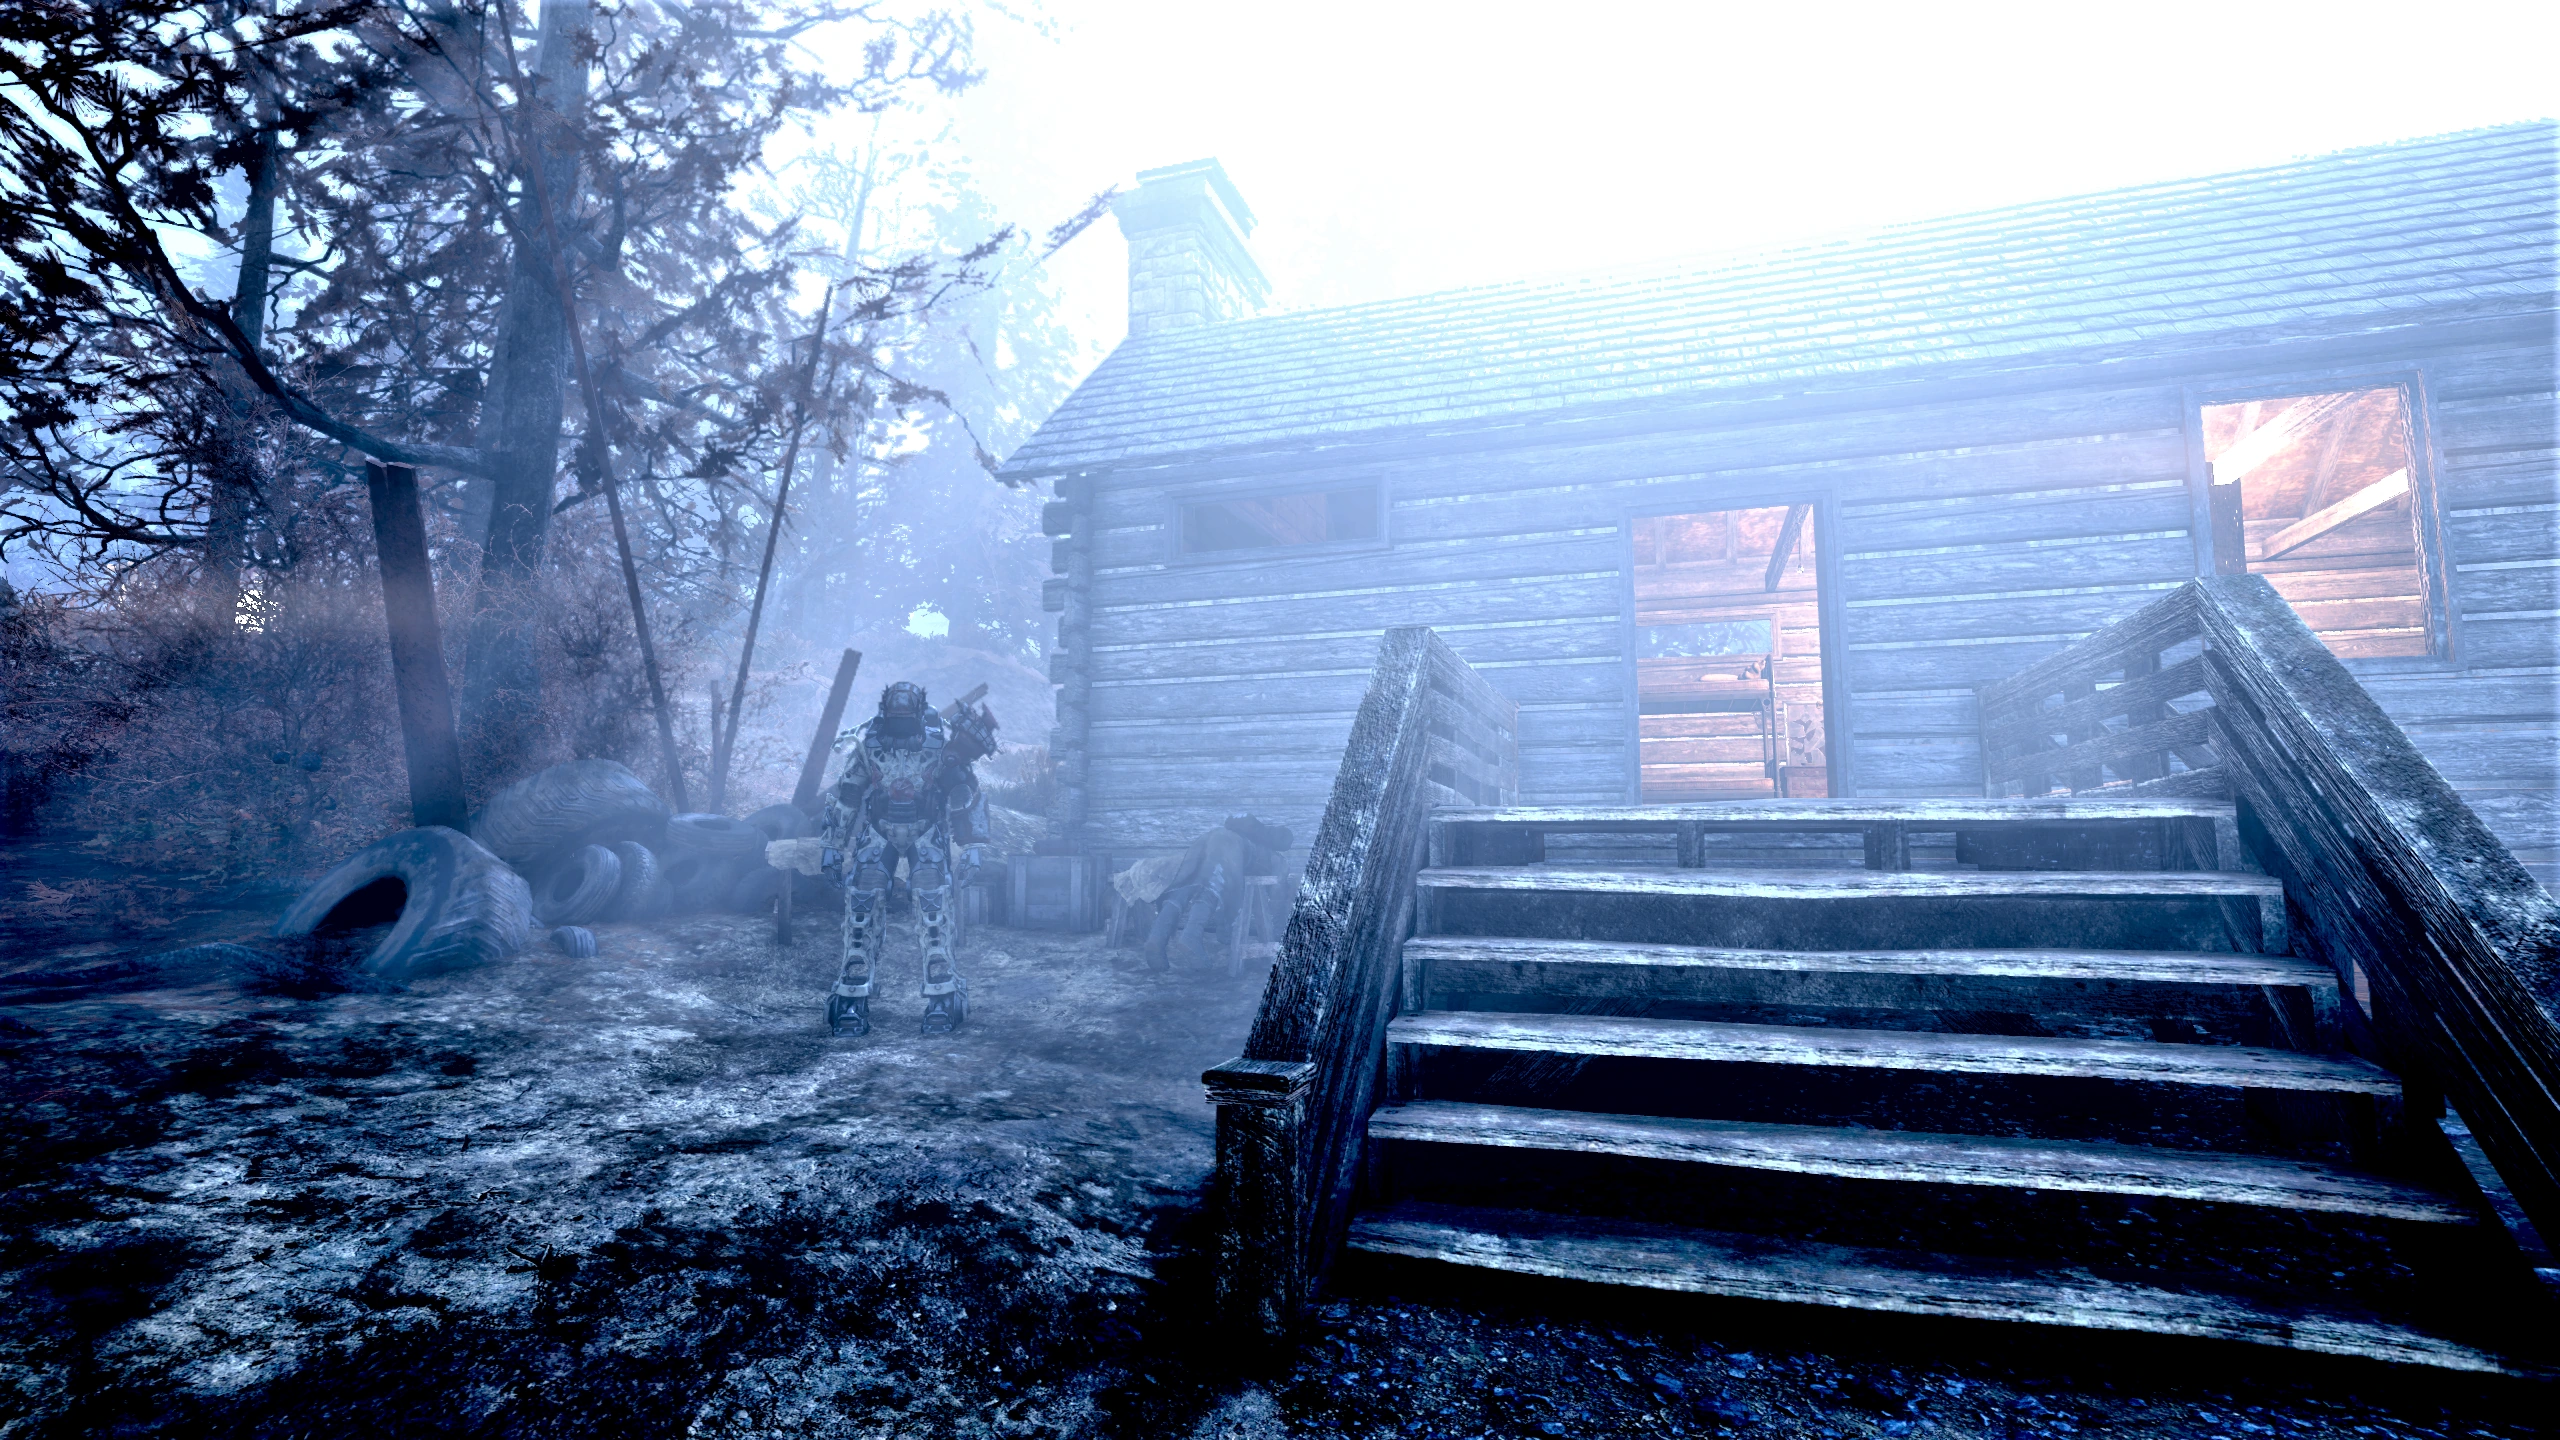
|
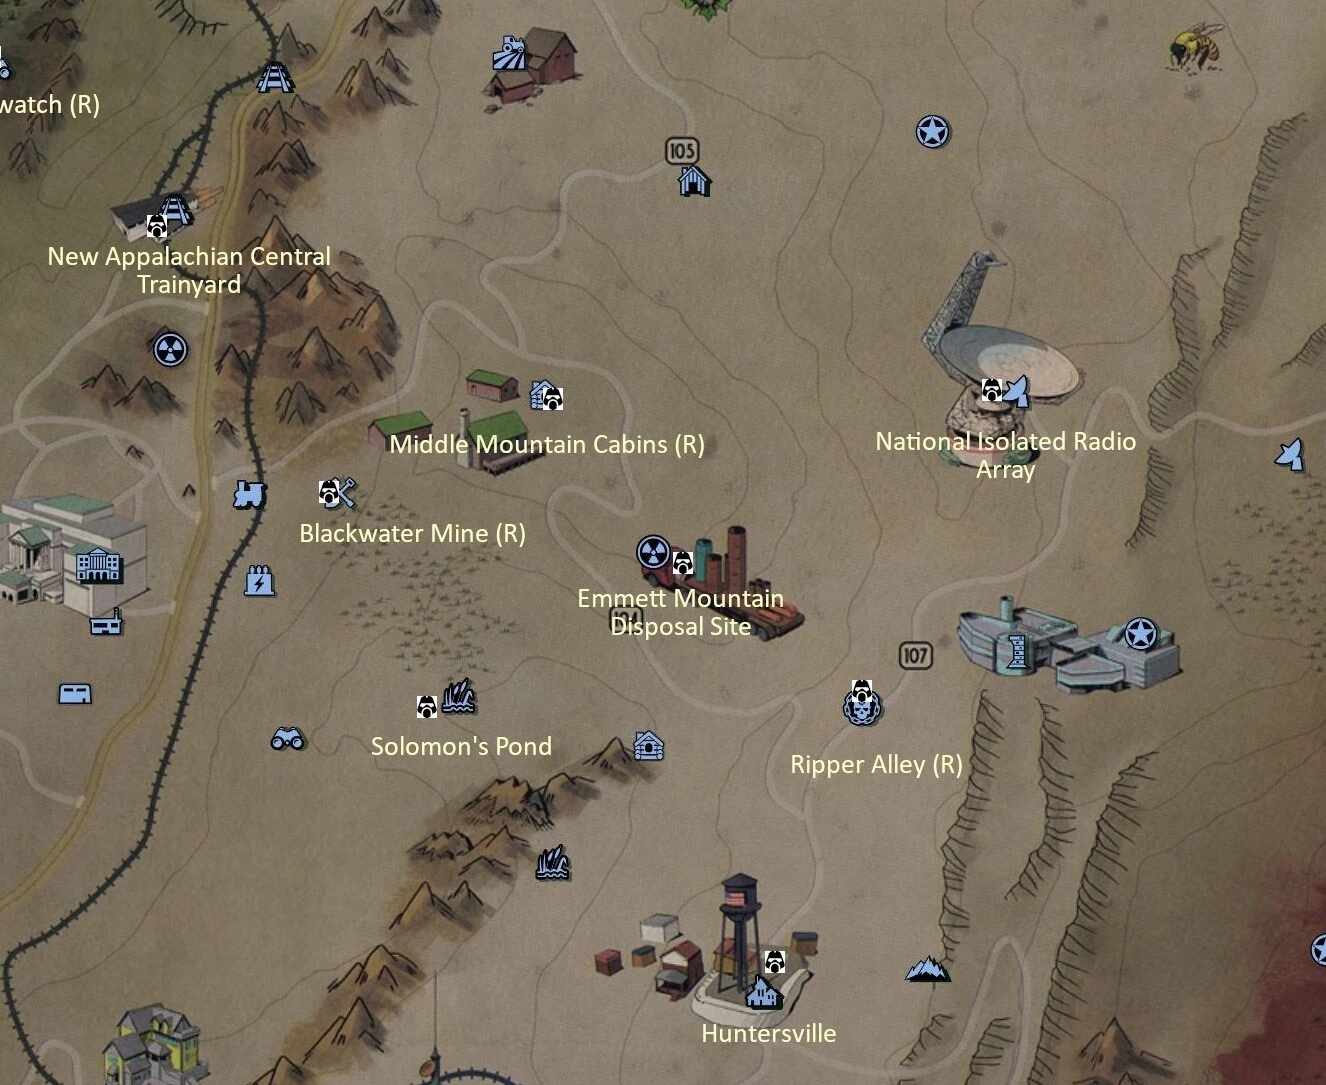
| National Isolated Radio Array | T-series | In a side room of the barn with a skill 2 lock in the northeast corner of the compound. | 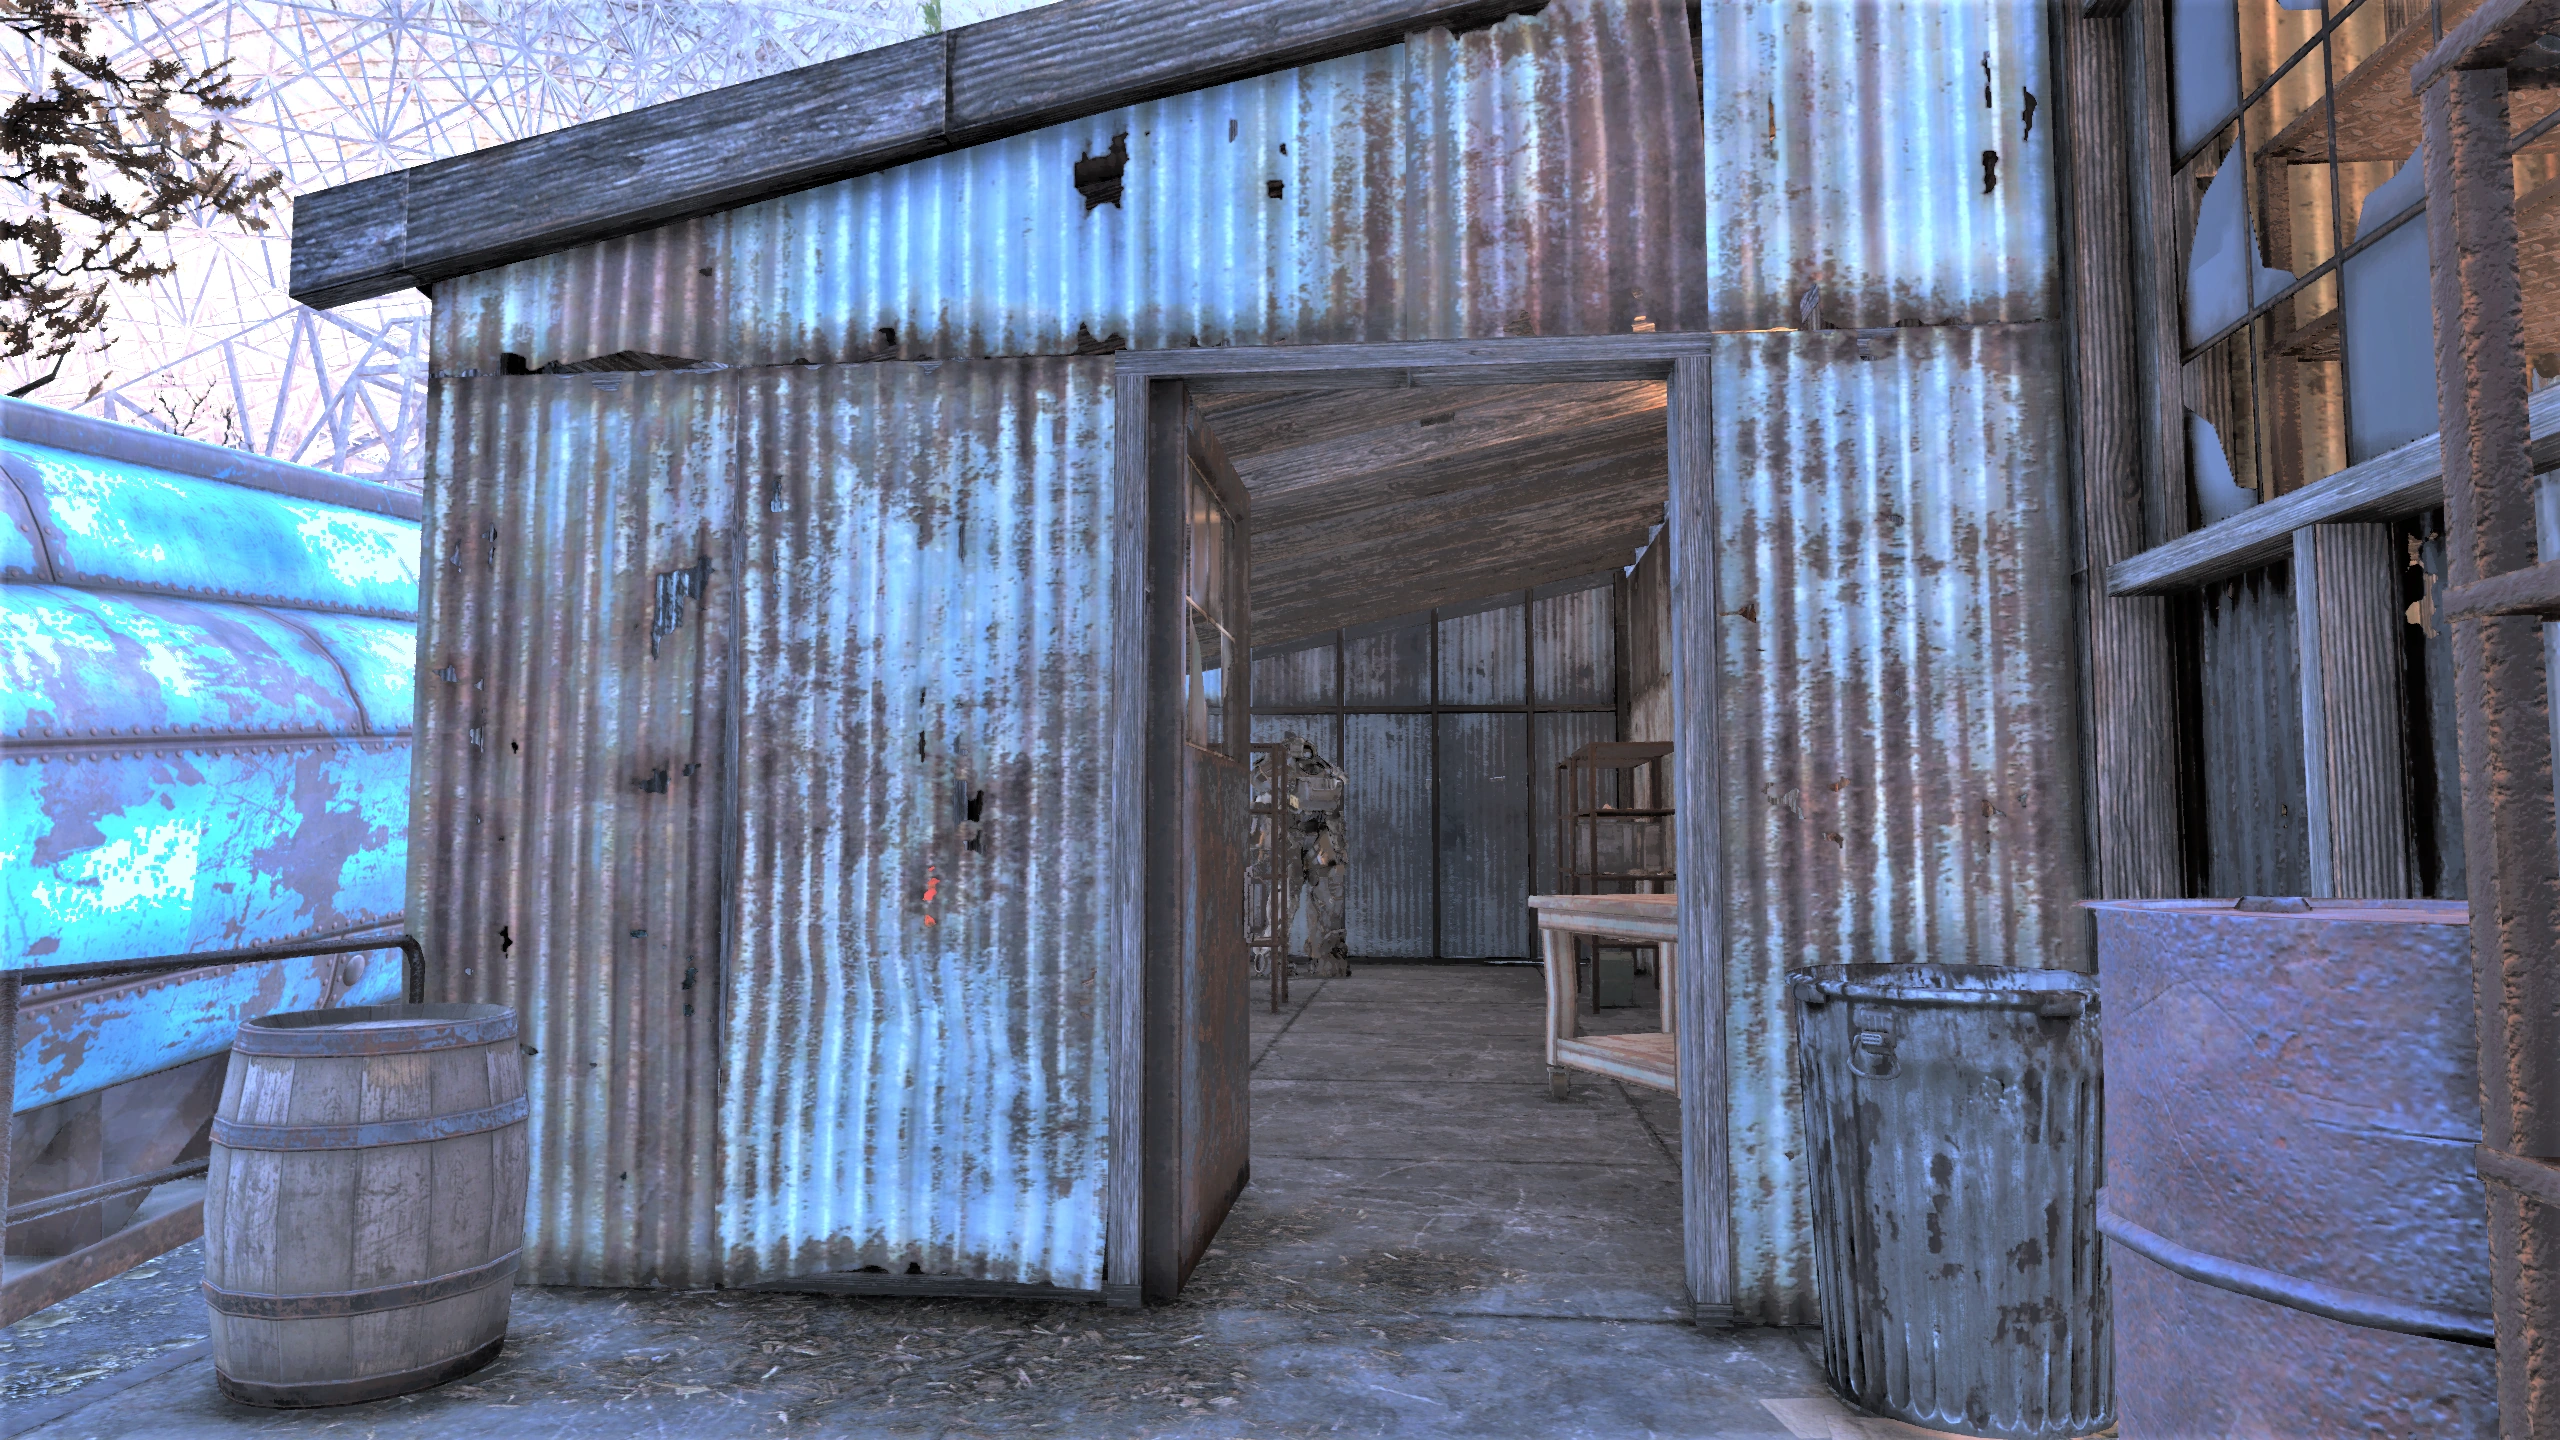
|
| Blackwater Mine | Raider | In the building on the right going to the entrance of the mine. It is at a power armor station. | 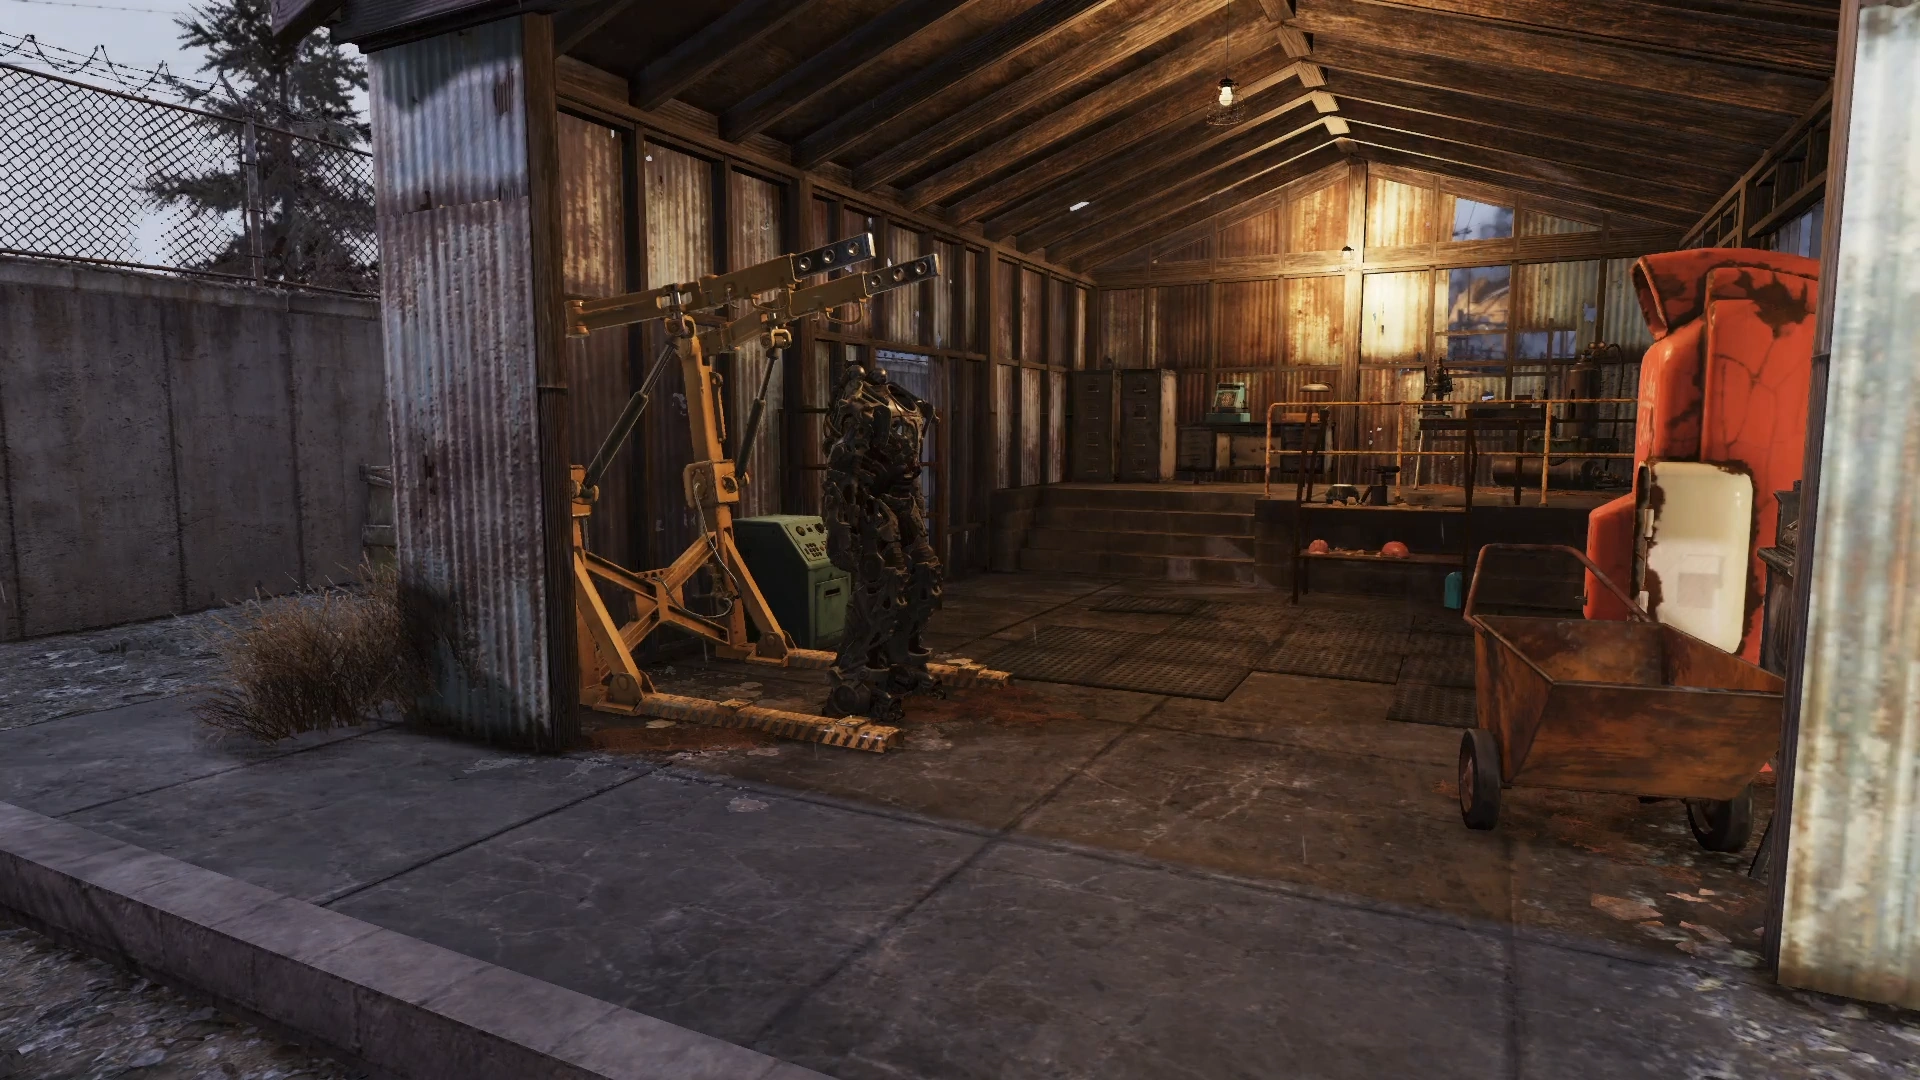
|
| Emmett Mountain disposal site | T-series | Enter the disposal tunnel. The power armor is in a security cage in the mechanical room on the right. Just outside the security cage is a generator with a fusion core. | 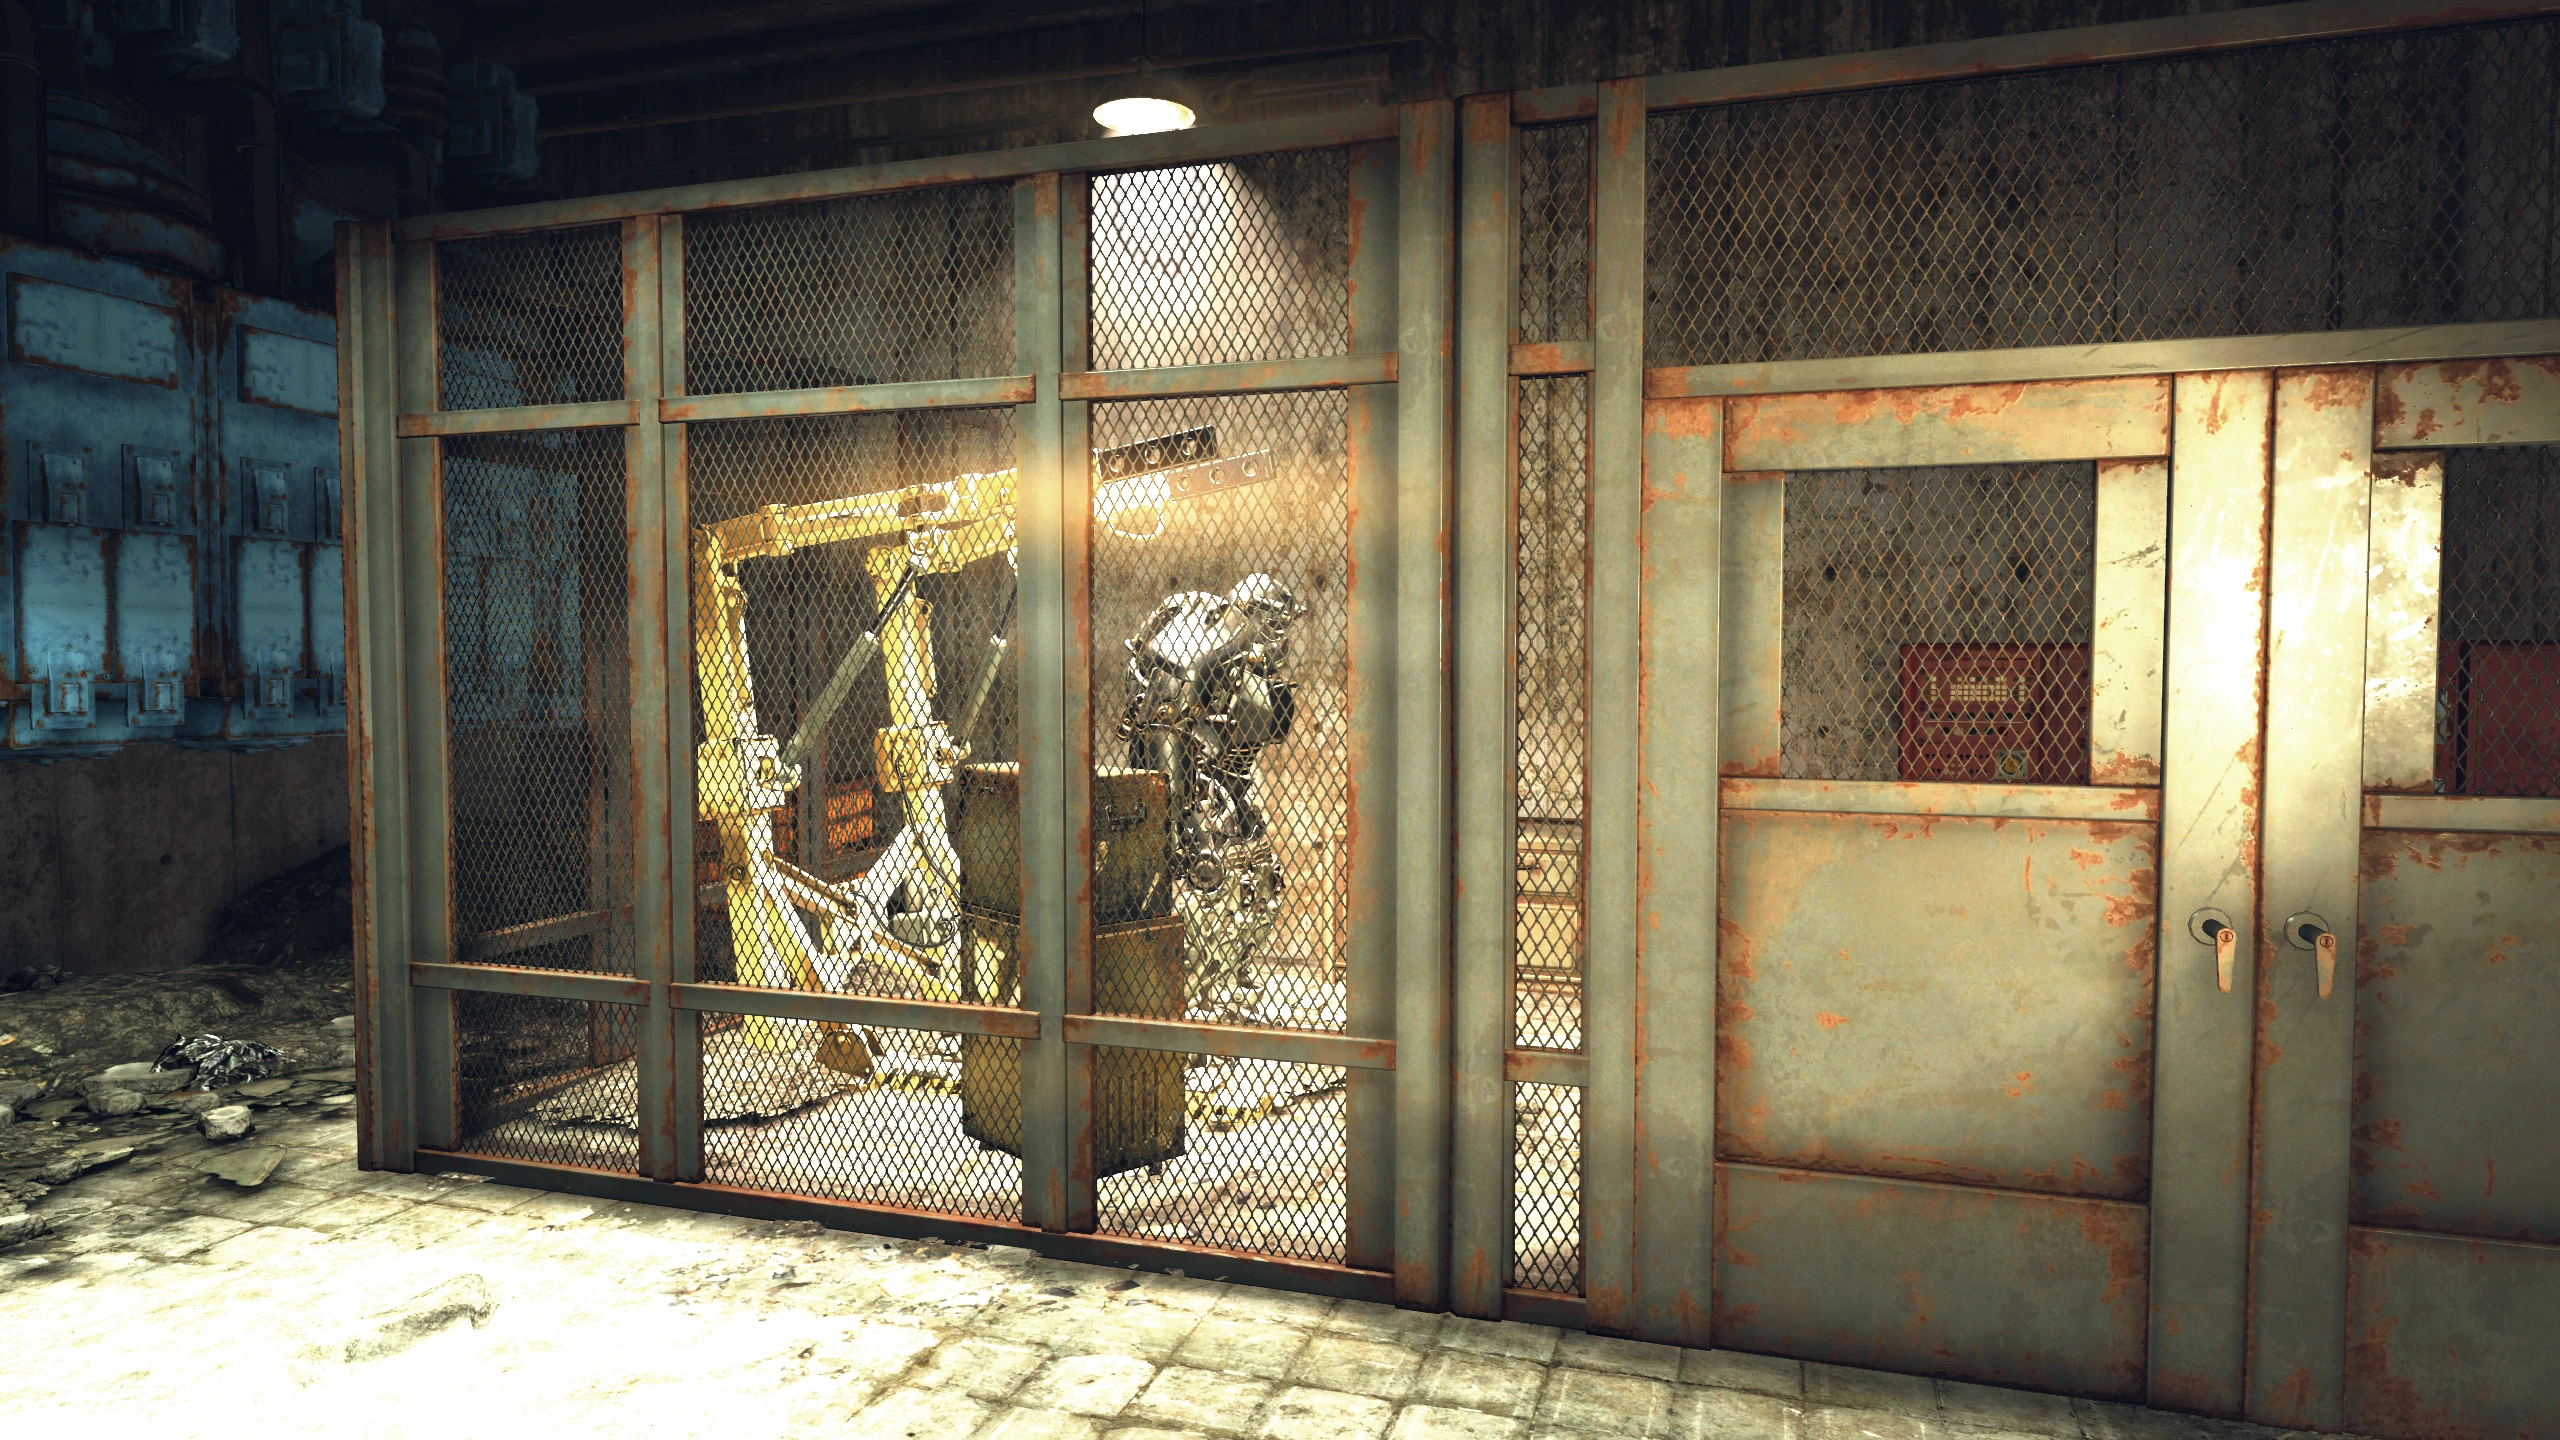
|
| Solomon's pond | T-series | At a power armor station on the platform with the blue water treatment equipment. | 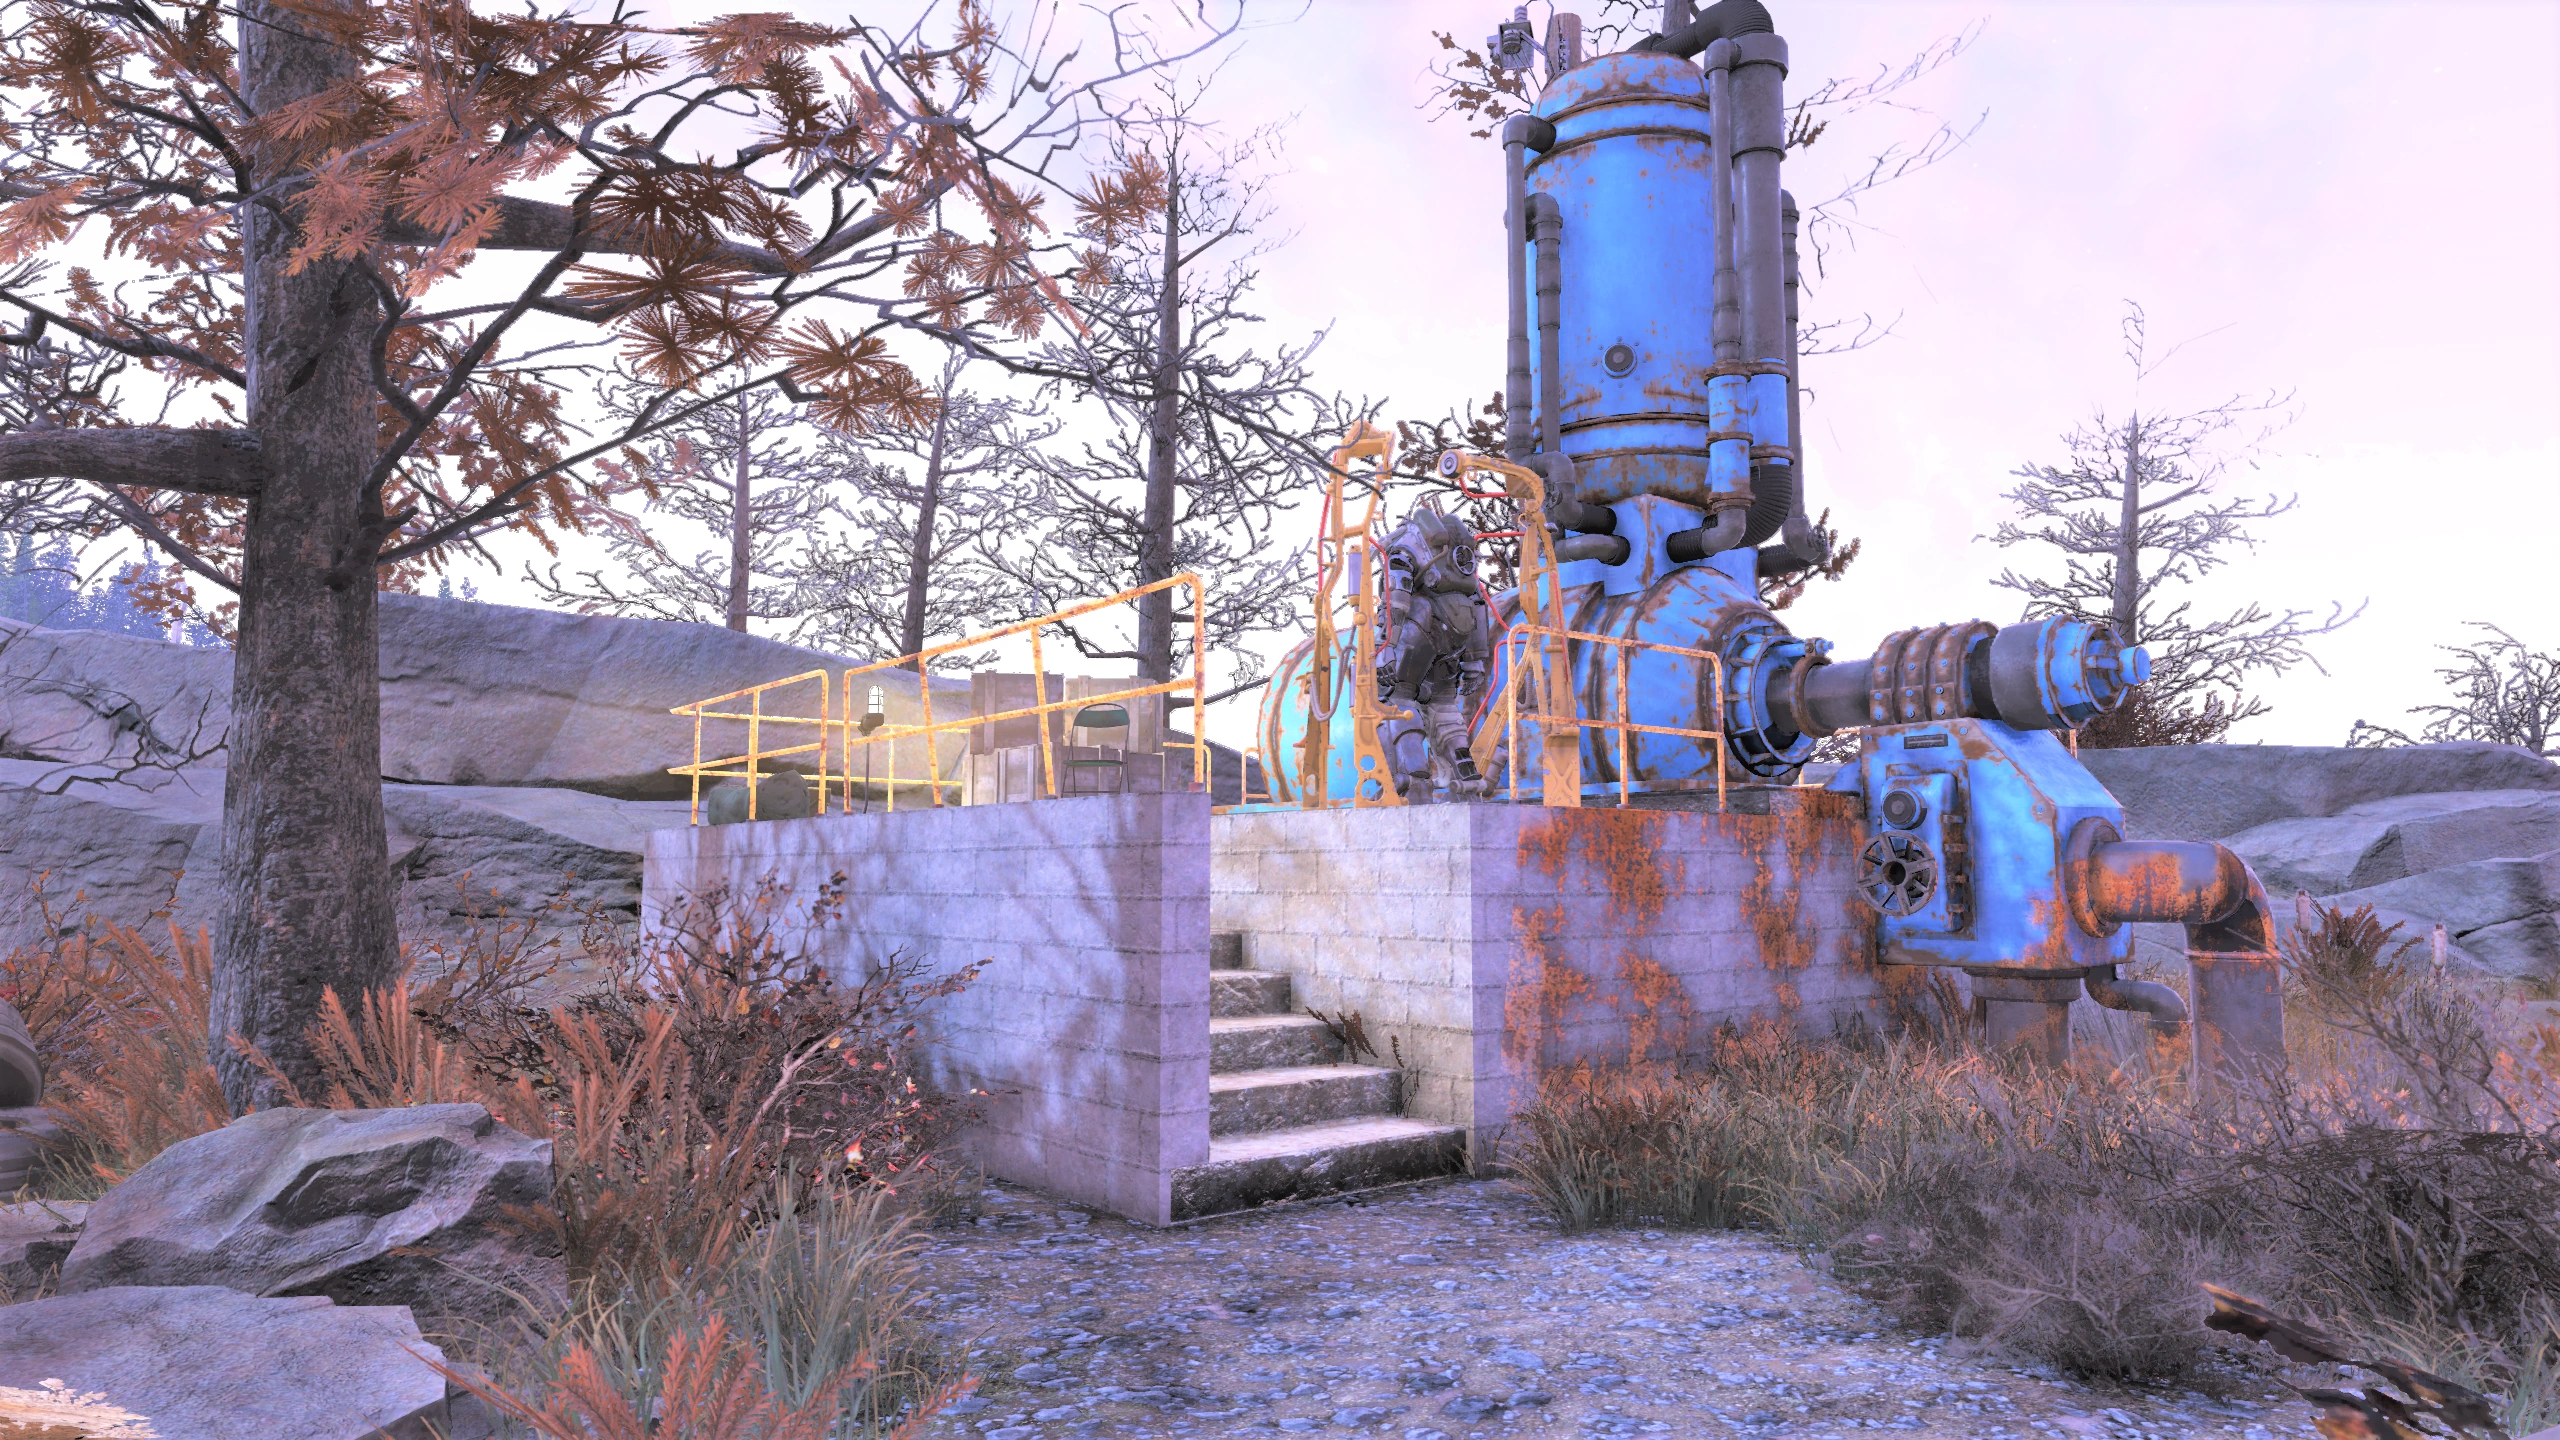
|
| Ripper Alley | Raider | In the back of the compound by the raised platform | 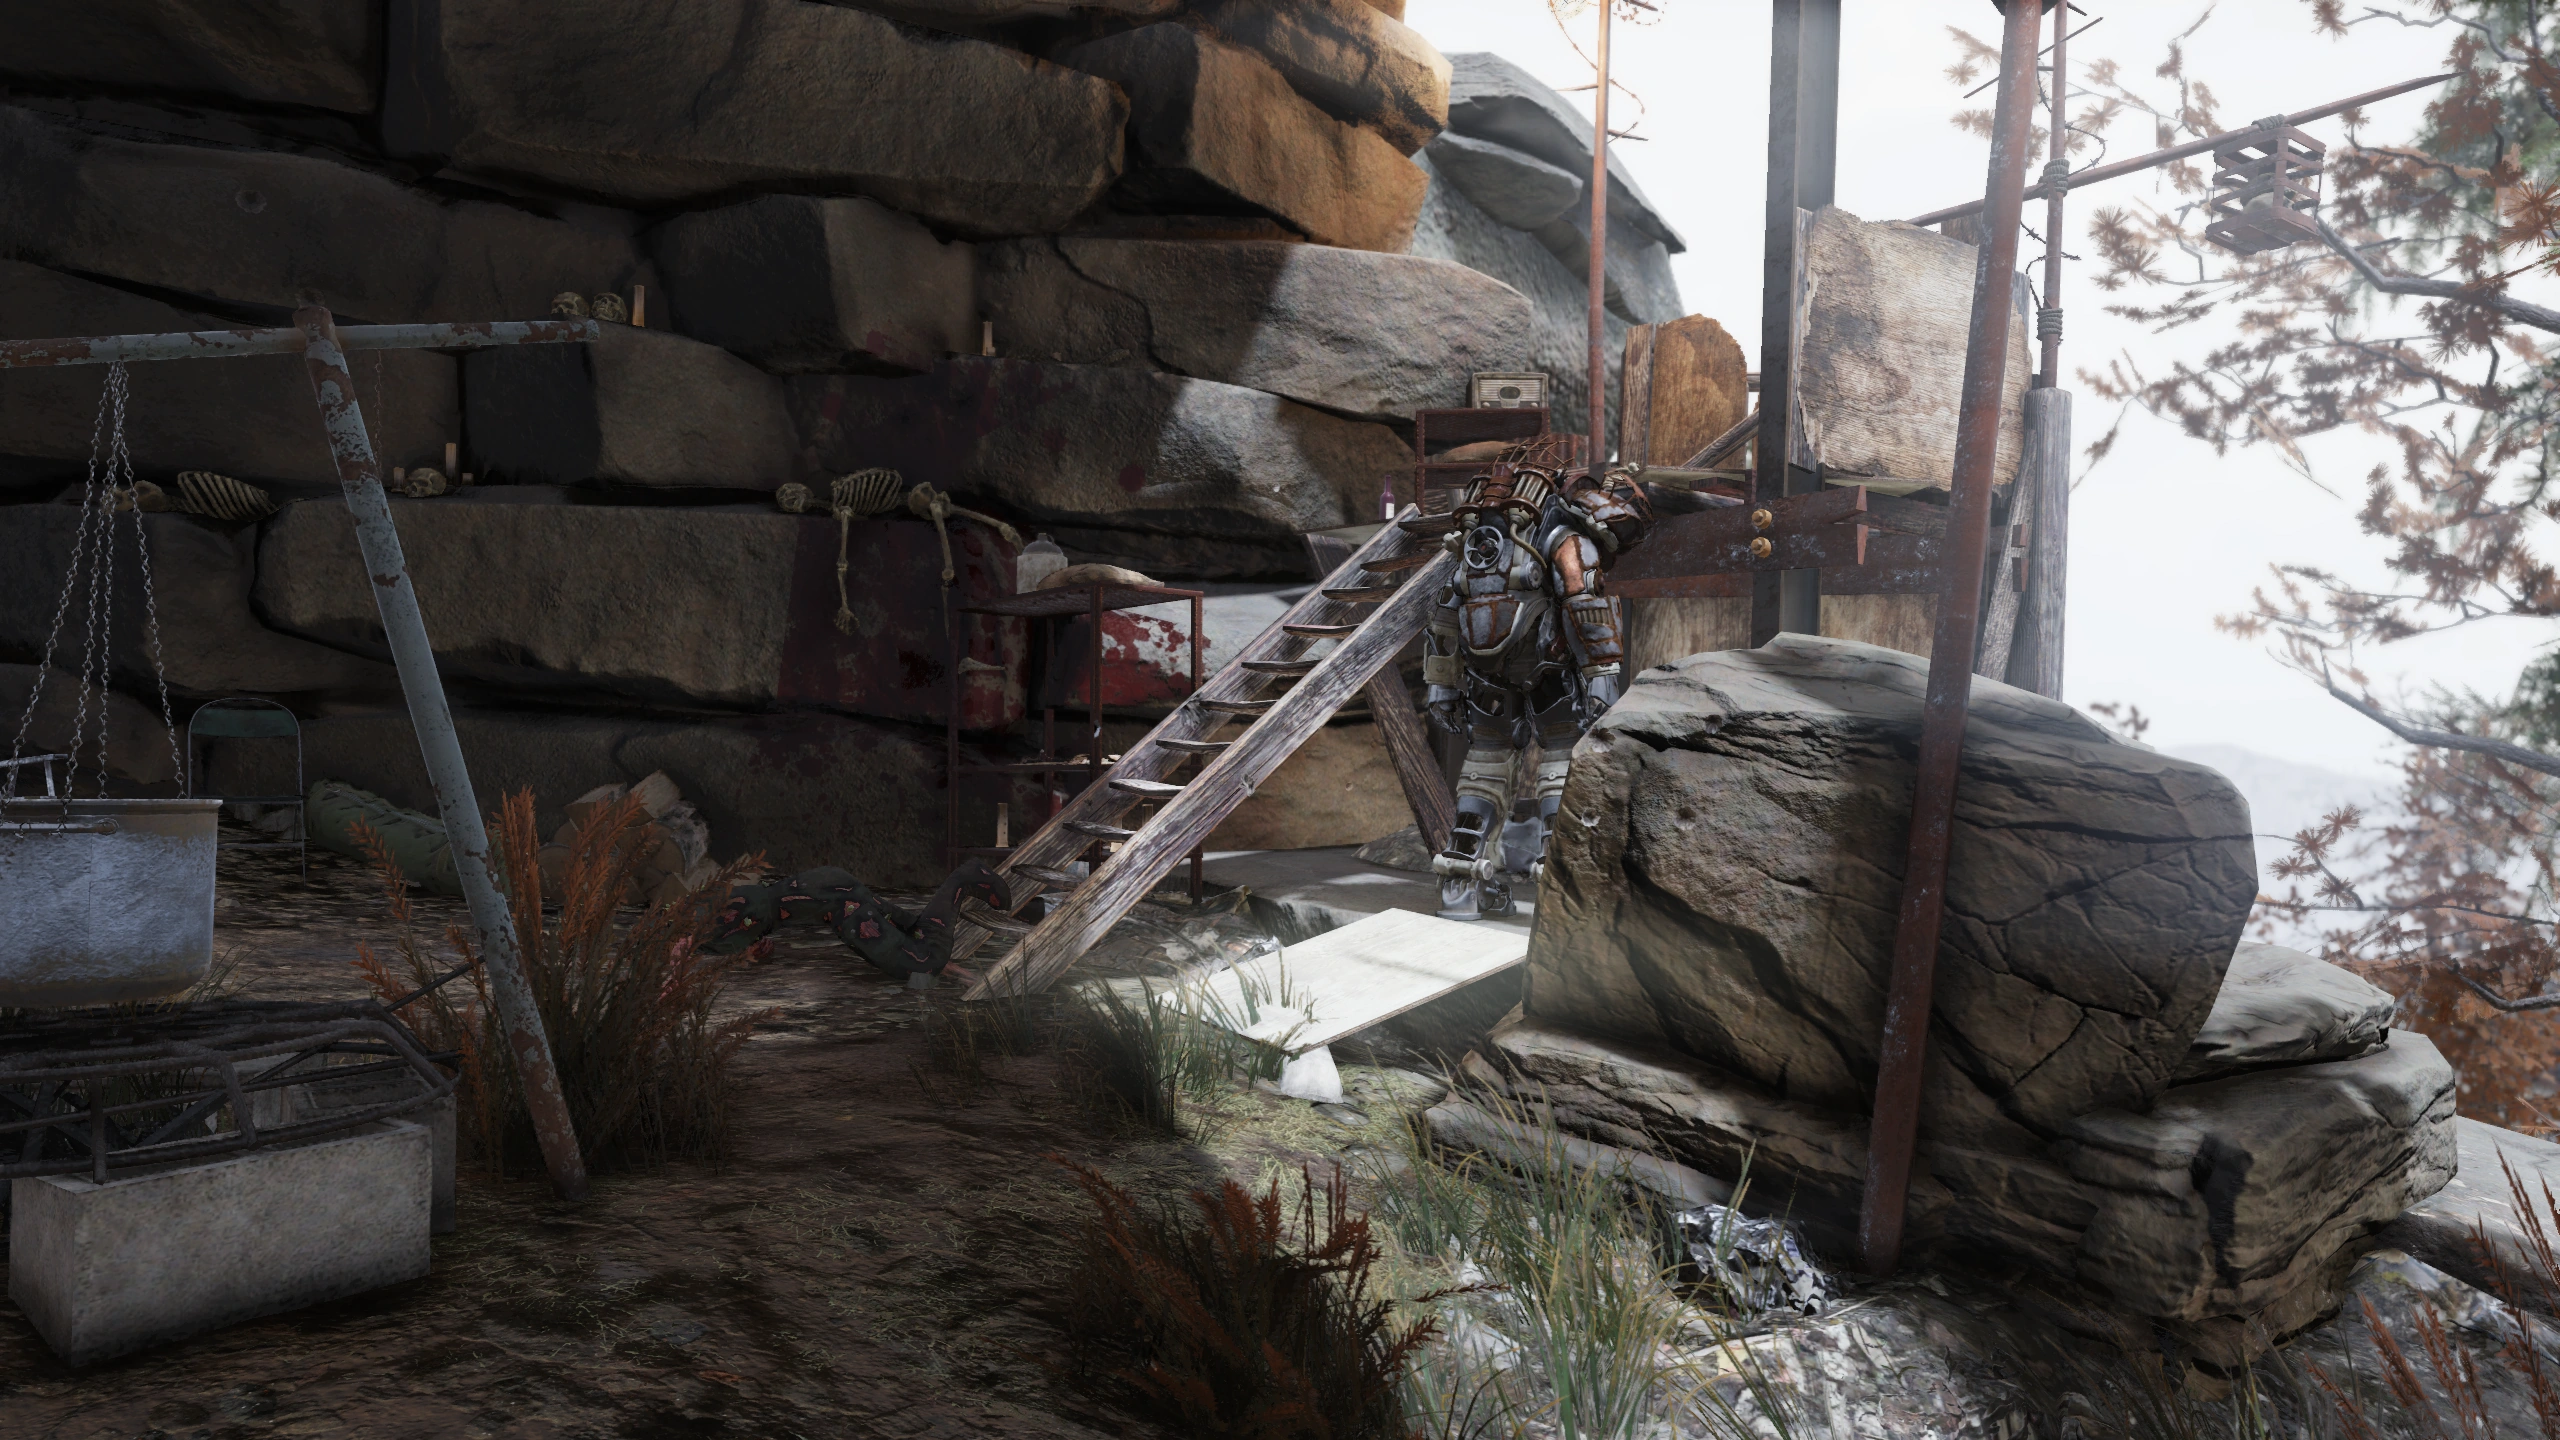
|
| Huntersville | T-Series | At a power armor station behind the barn with military tents in front of it in the north end of town on the east side of the road, outside the raider walls. | 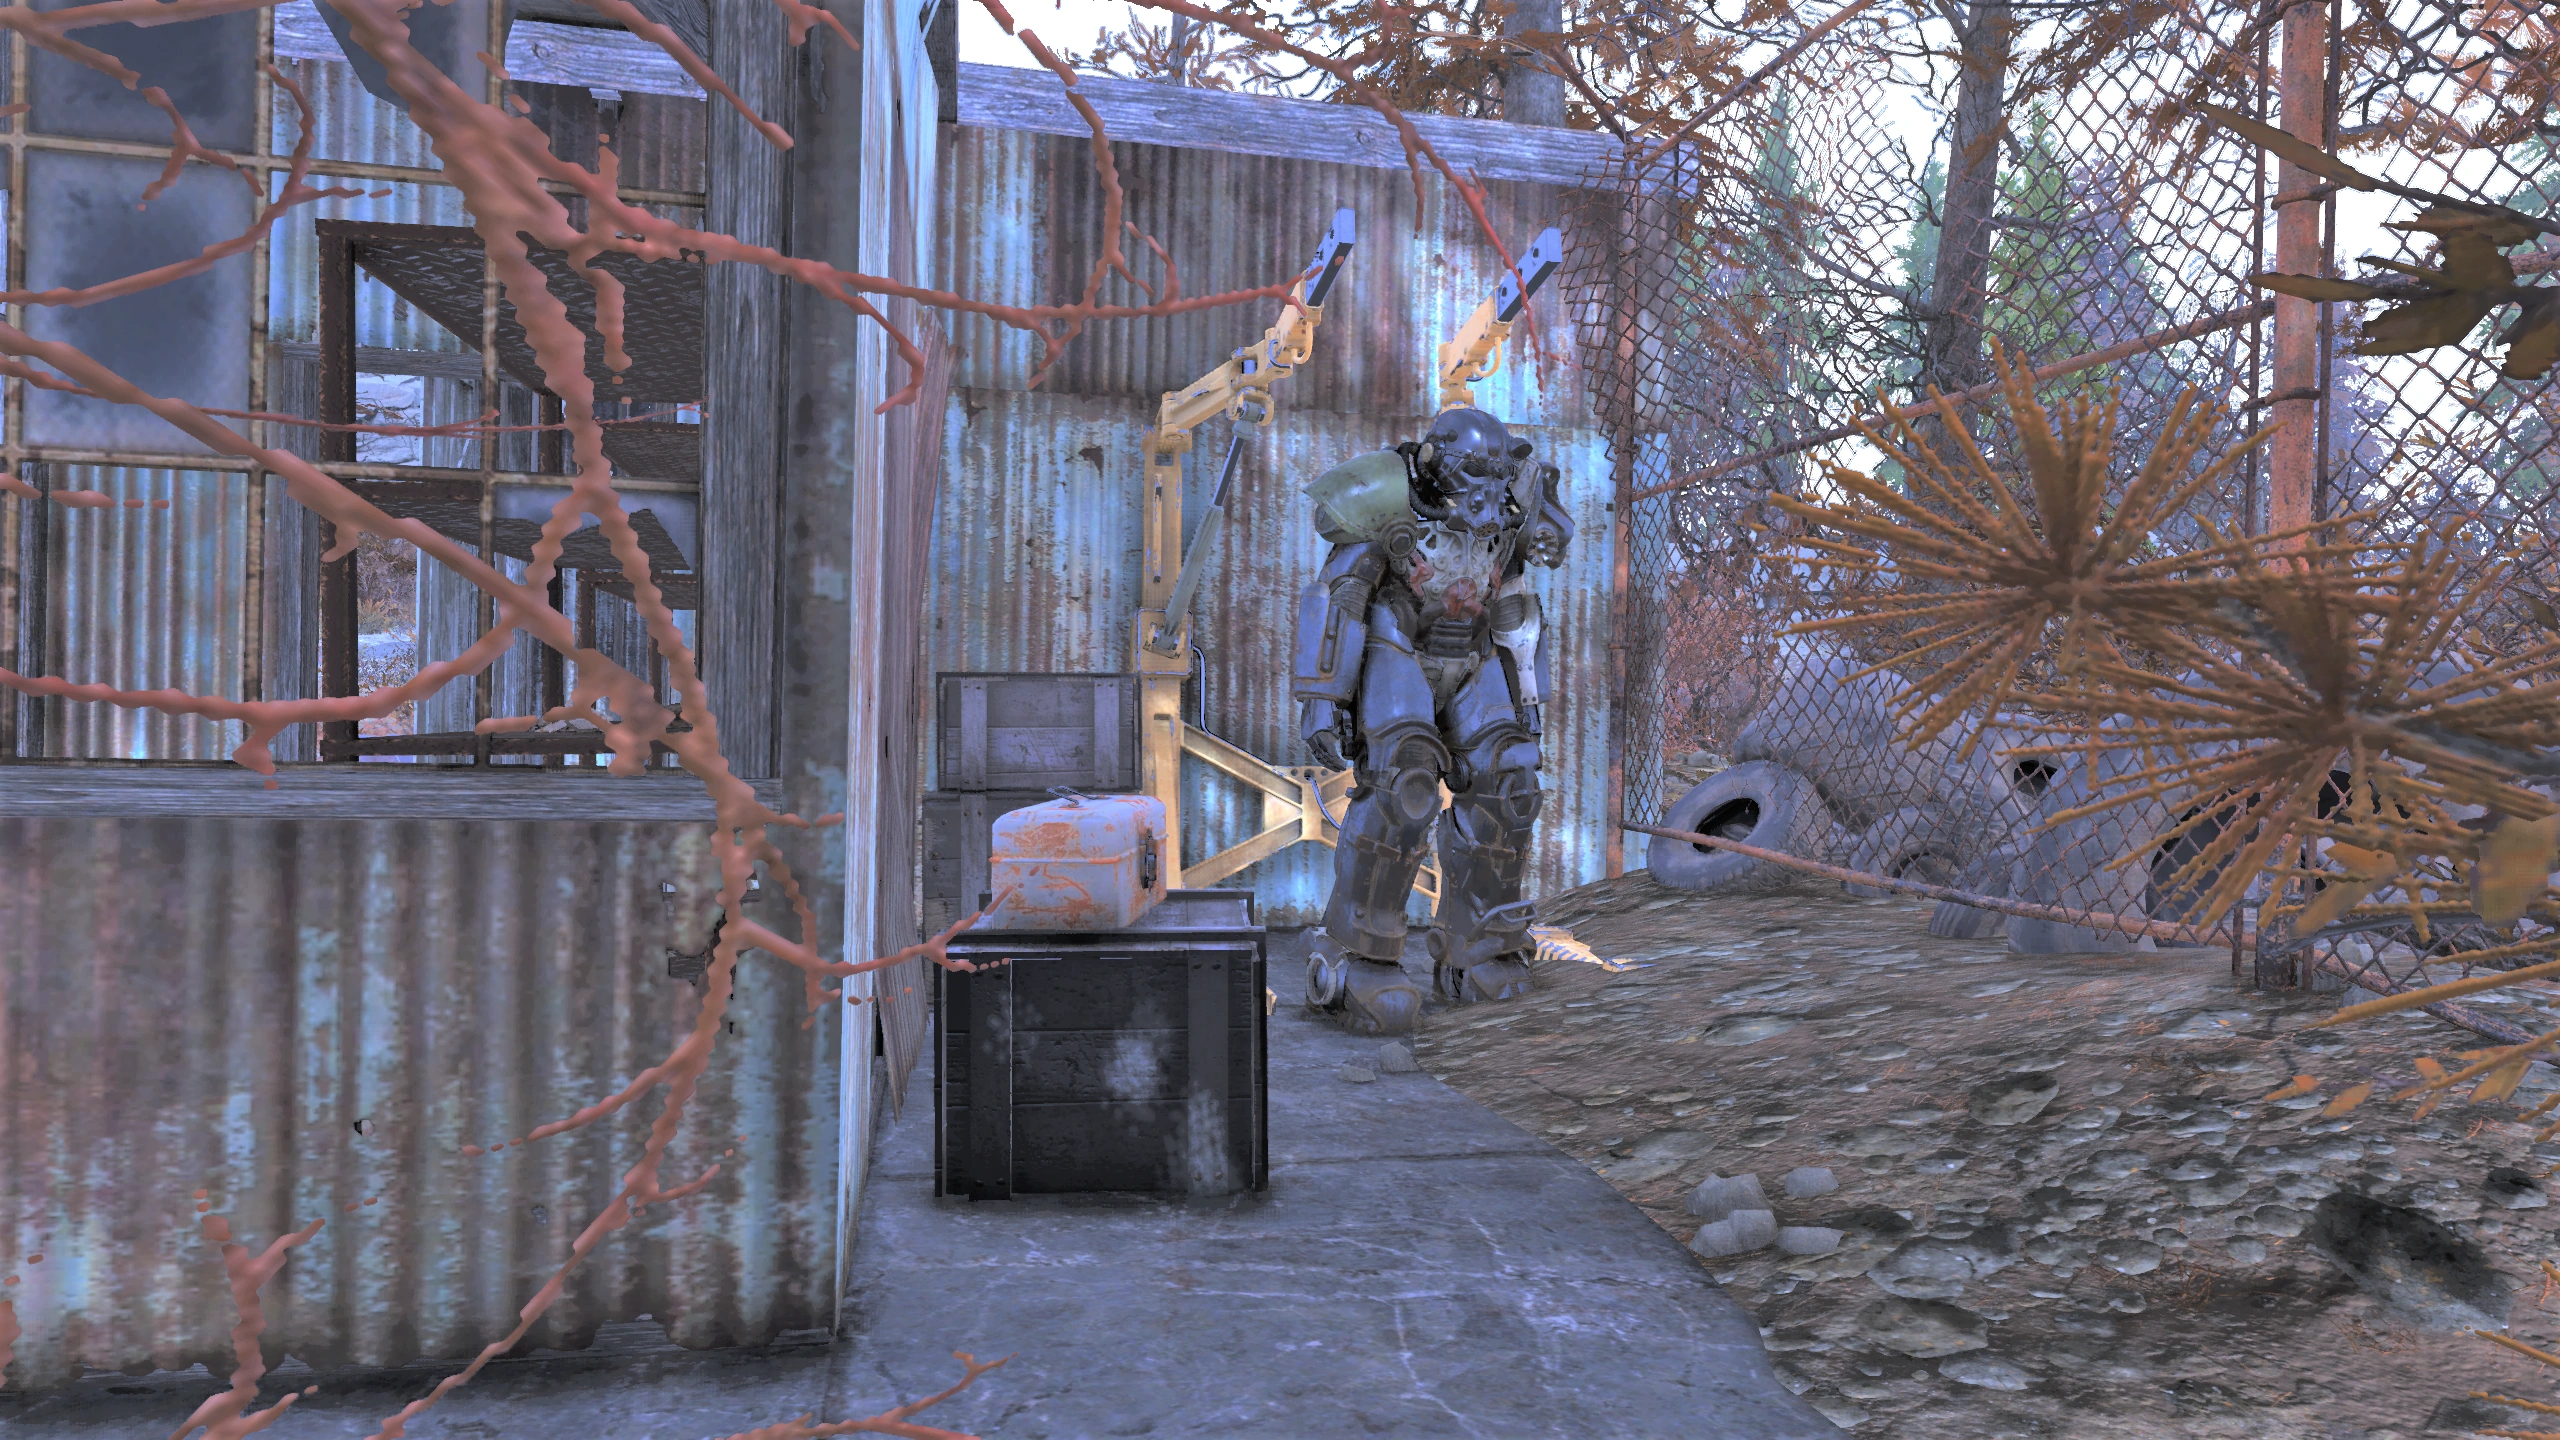
|
Far South Savage Divide

| Location | Type | Description | Image |
|---|---|---|---|
| Lucky Hole mine | Raider | Just inside, behind a chained door that can be accessed by going upstairs and dropping down. | 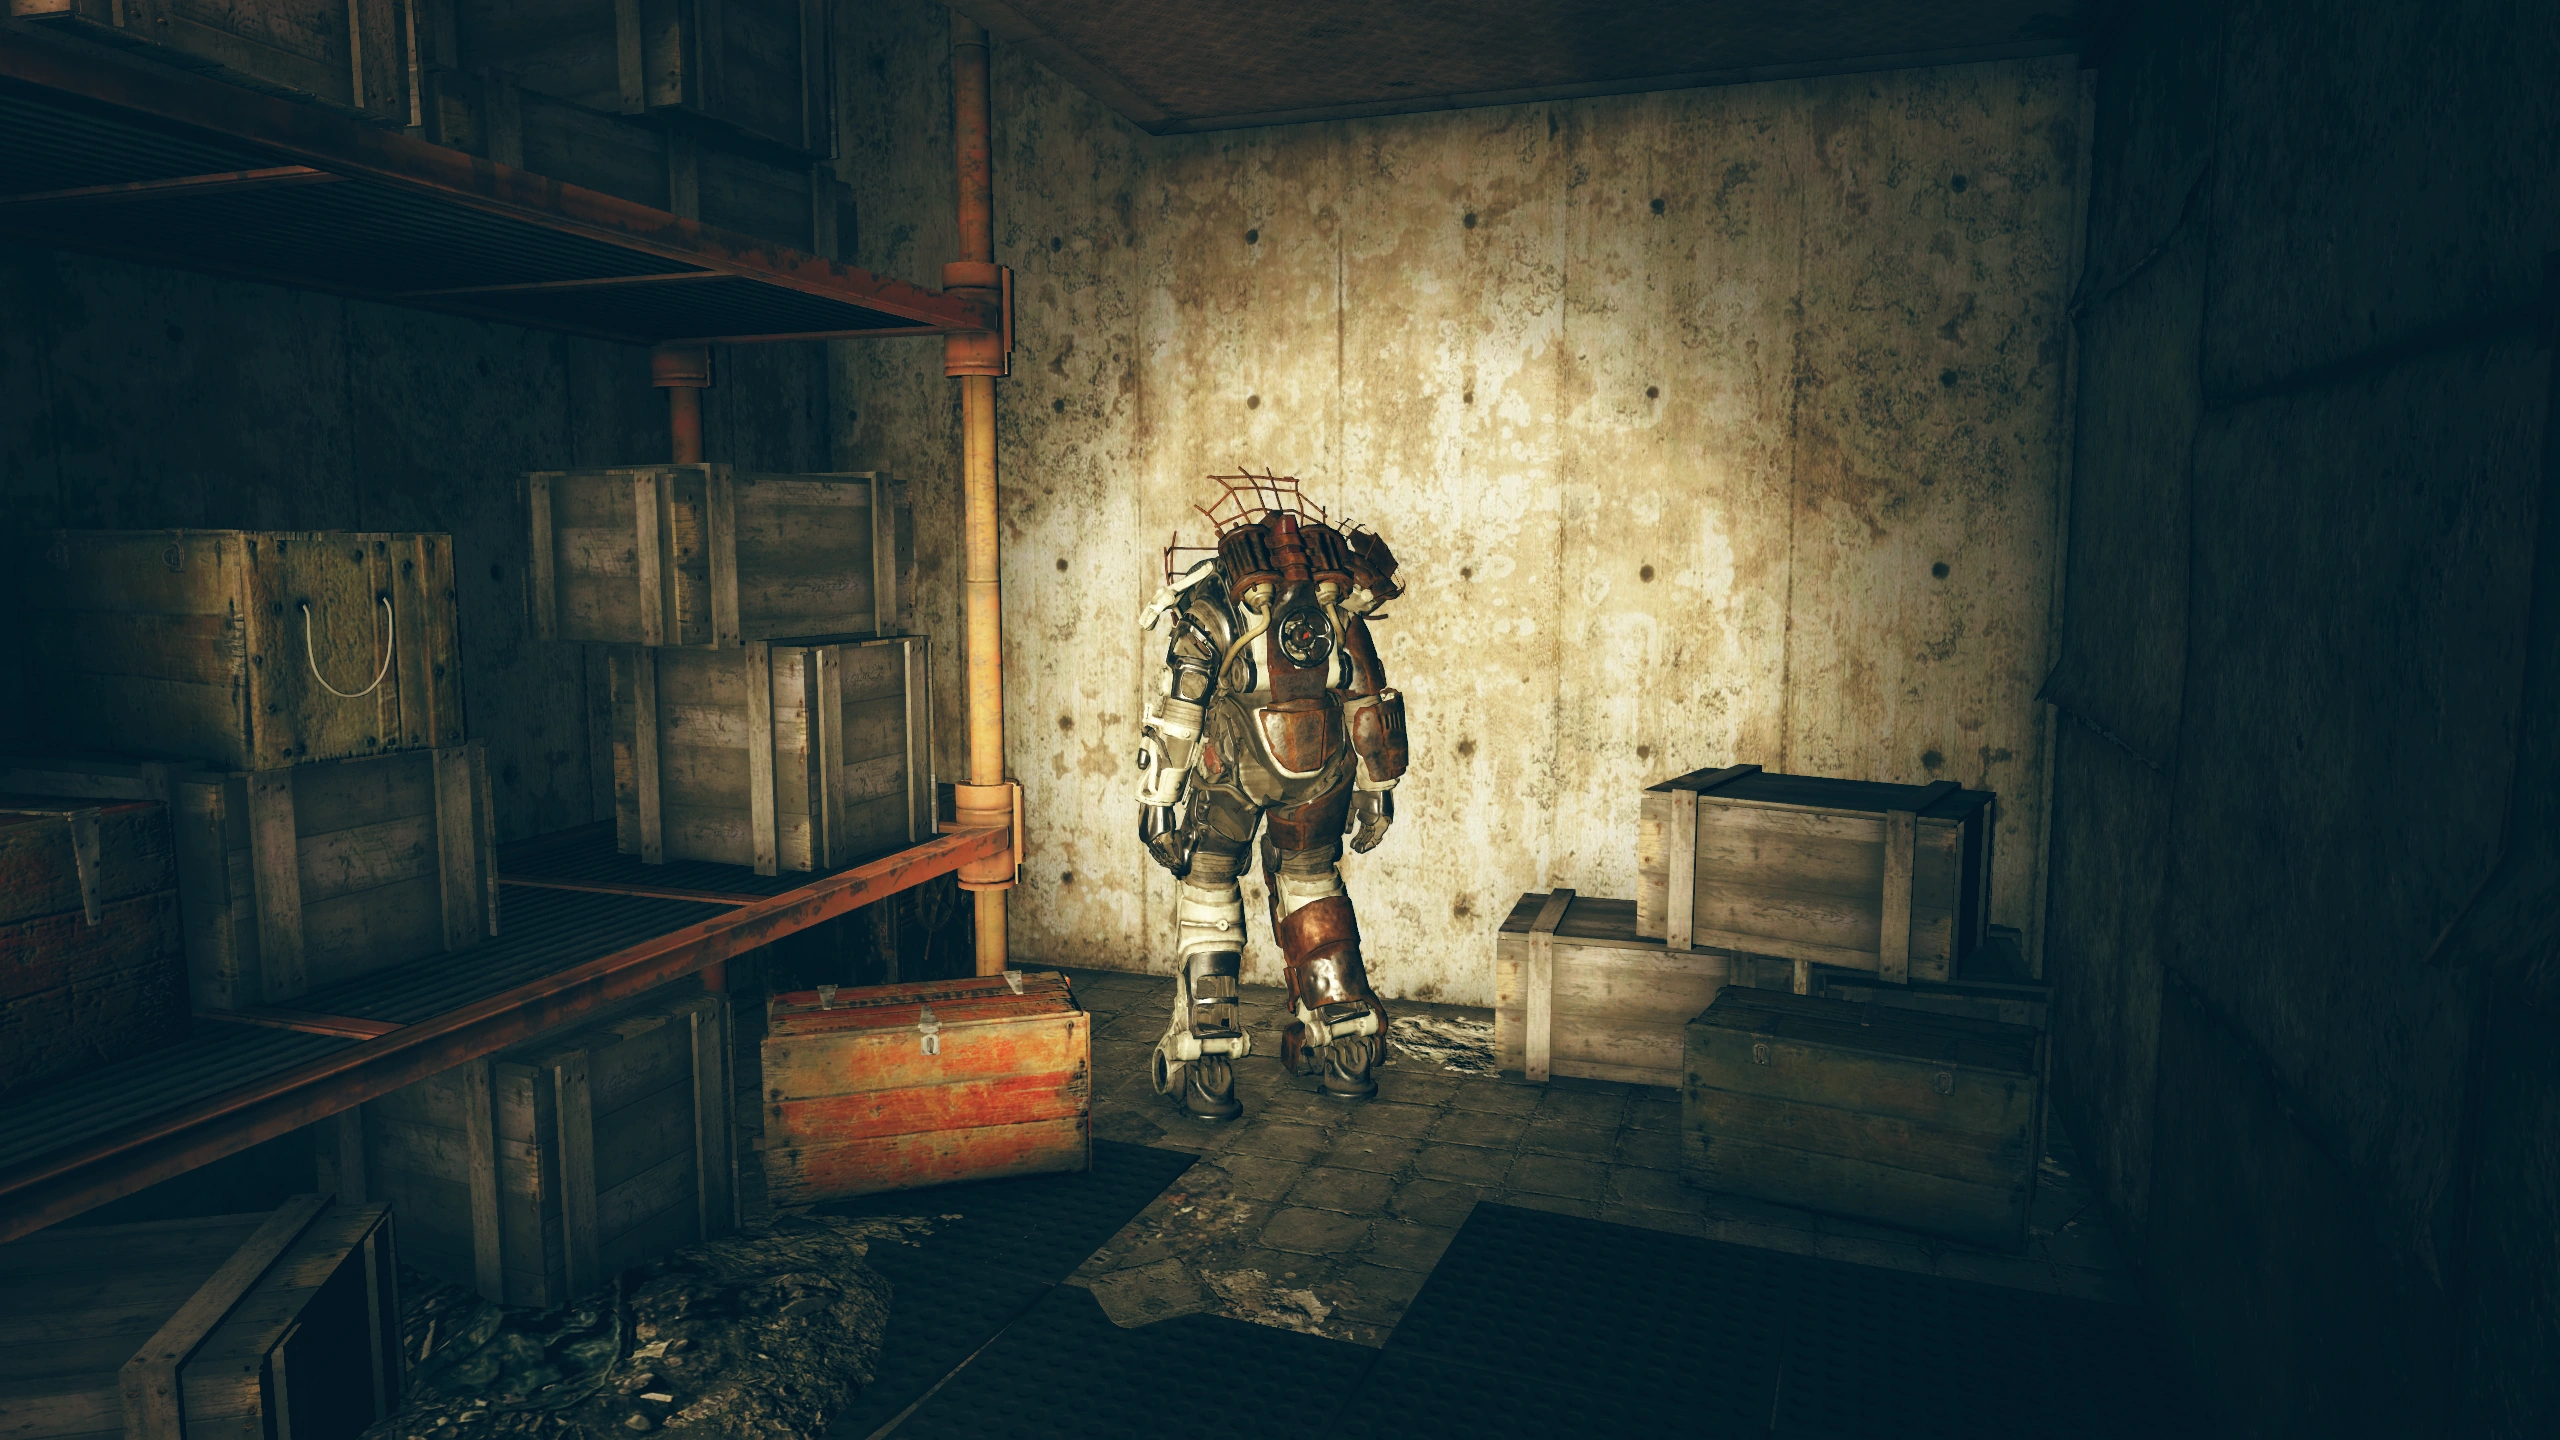
|
| Johnson's Acre | Raider | On the high rocks at the edge of the cliff. There is a trail to the top. | 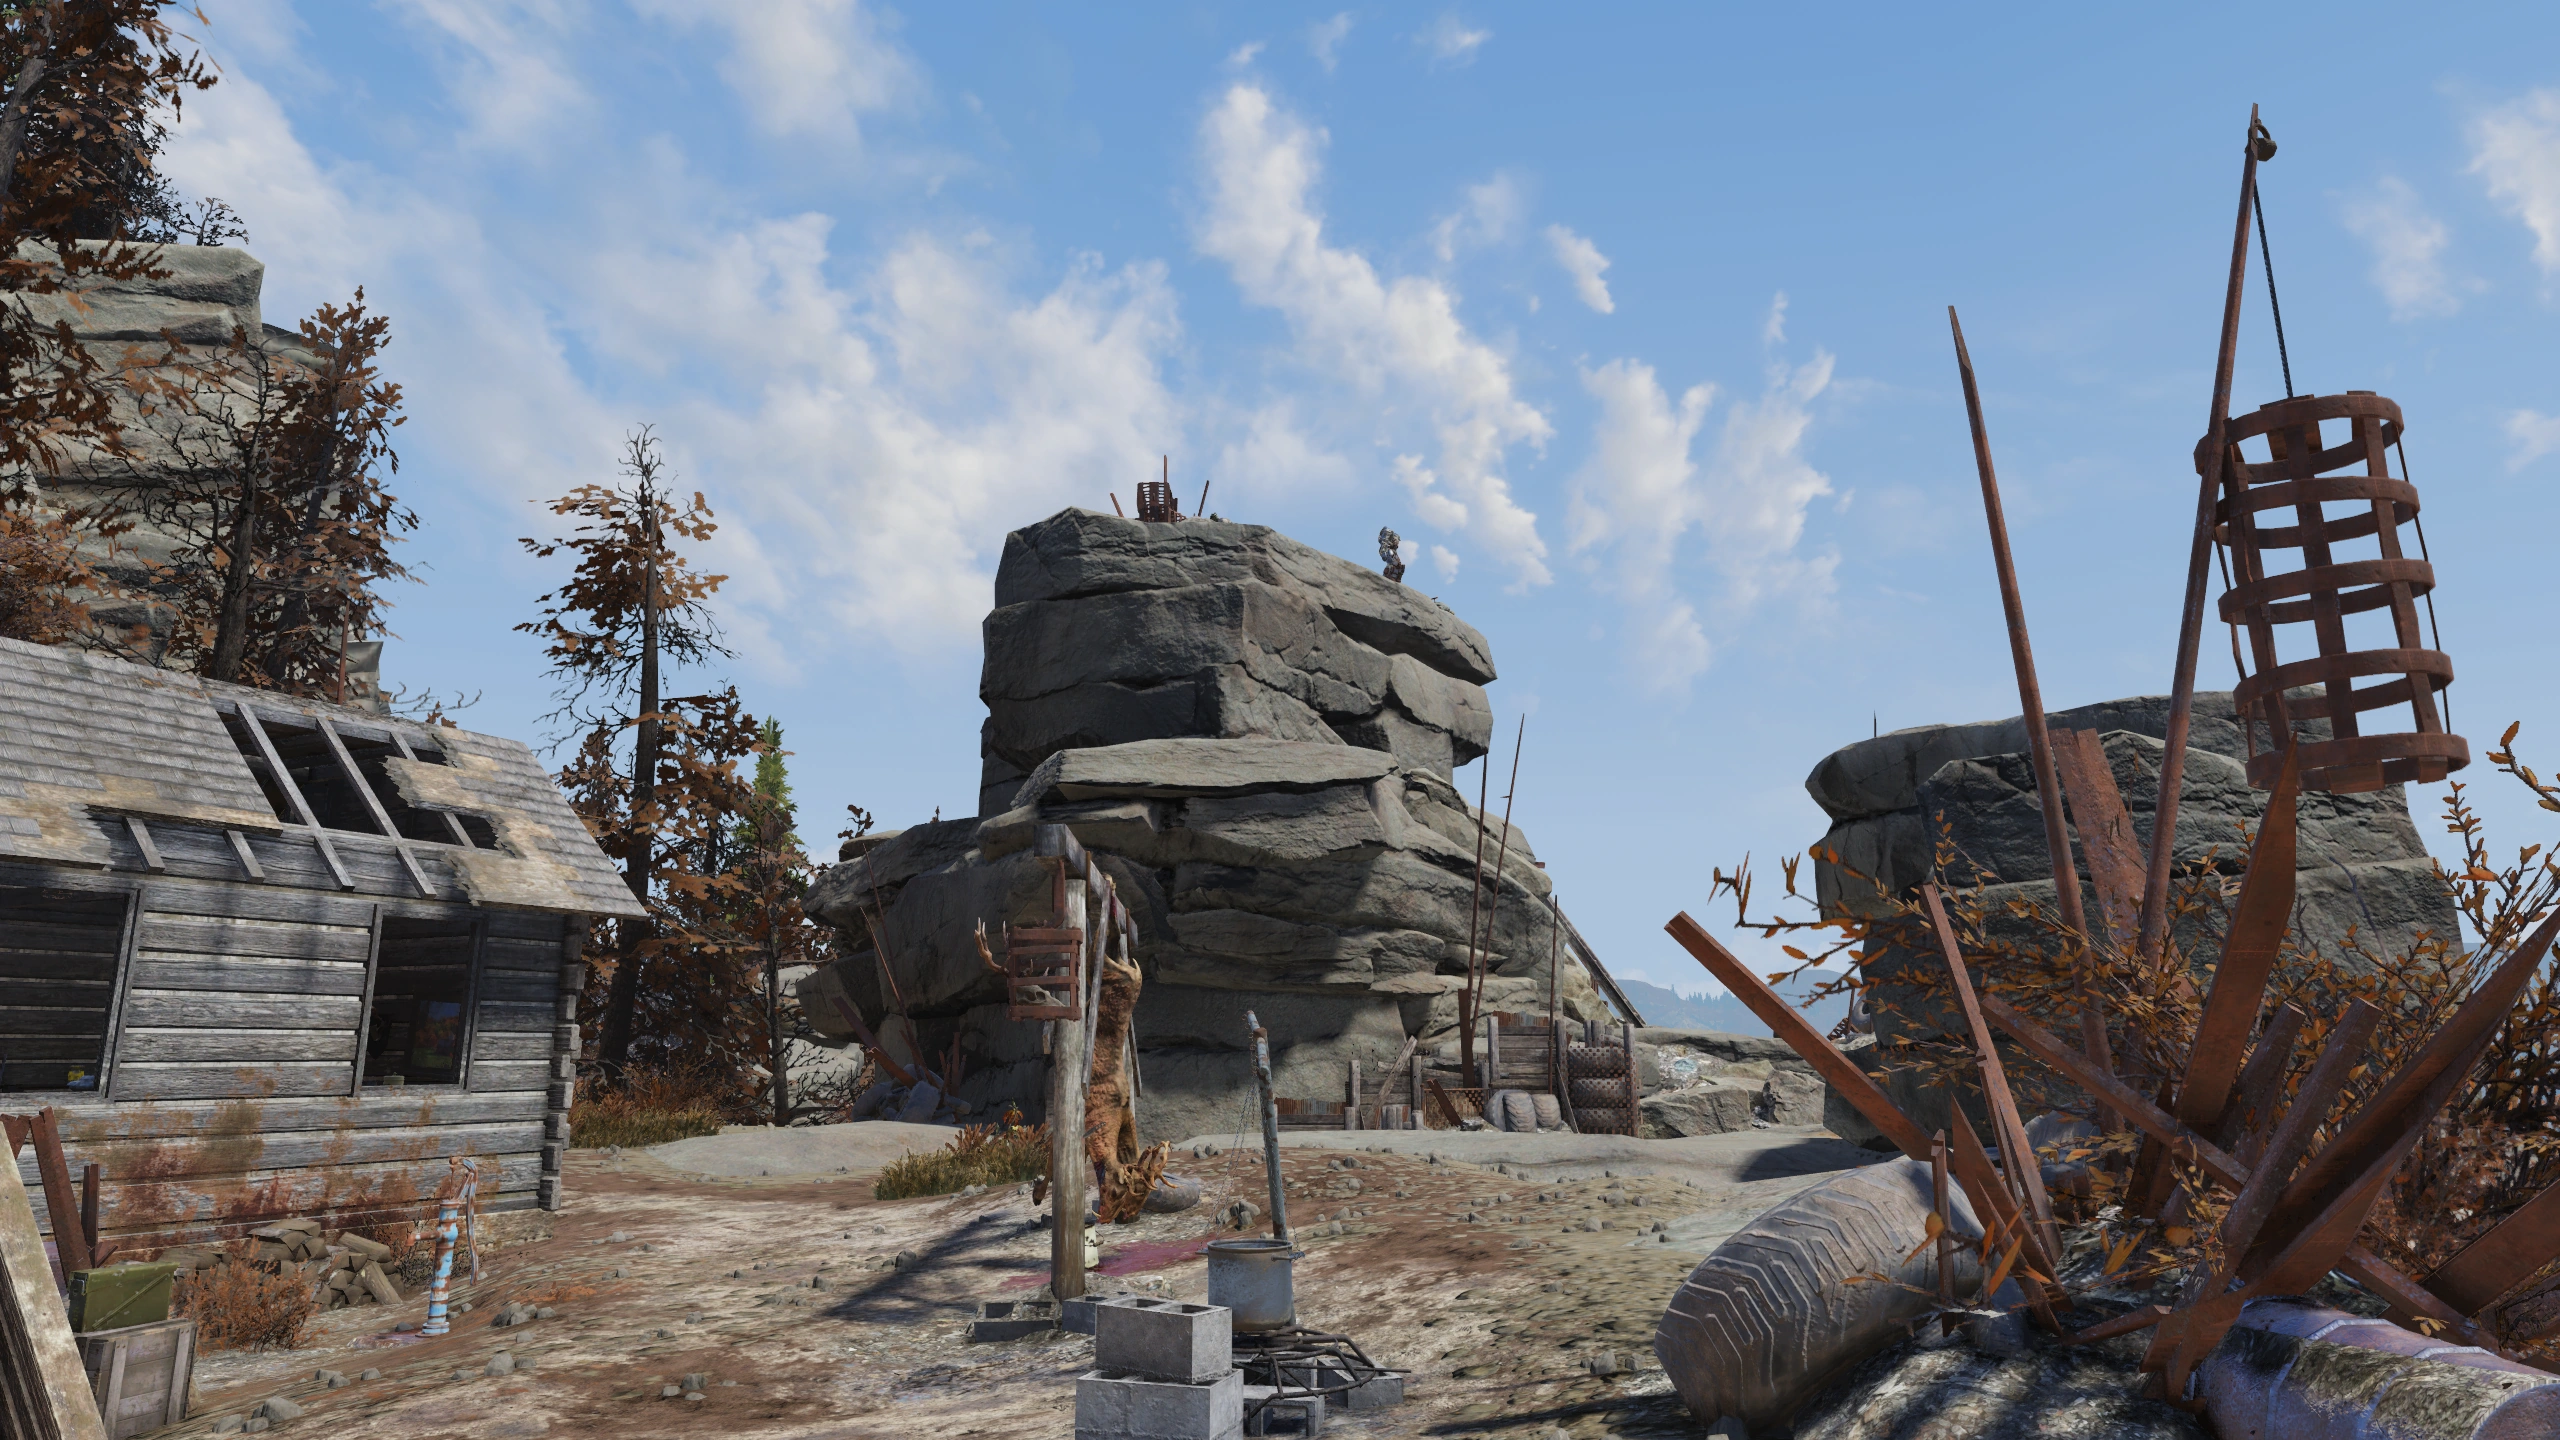
|
Ash Heap
East Ash Heap
| Location | Type | Description | Image |
|---|---|---|---|
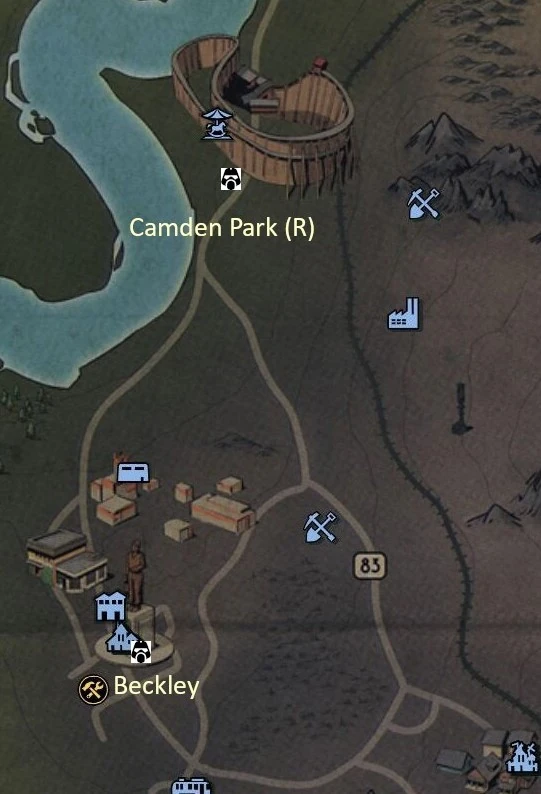
| Camden Park | Raider | In the Raider compound in the south end, enclosed by the frame of the roller coaster, at a power armor station. | 
|
| Beckley | T-series | Outside the south Raider wall next to an Armored personnel carrier | 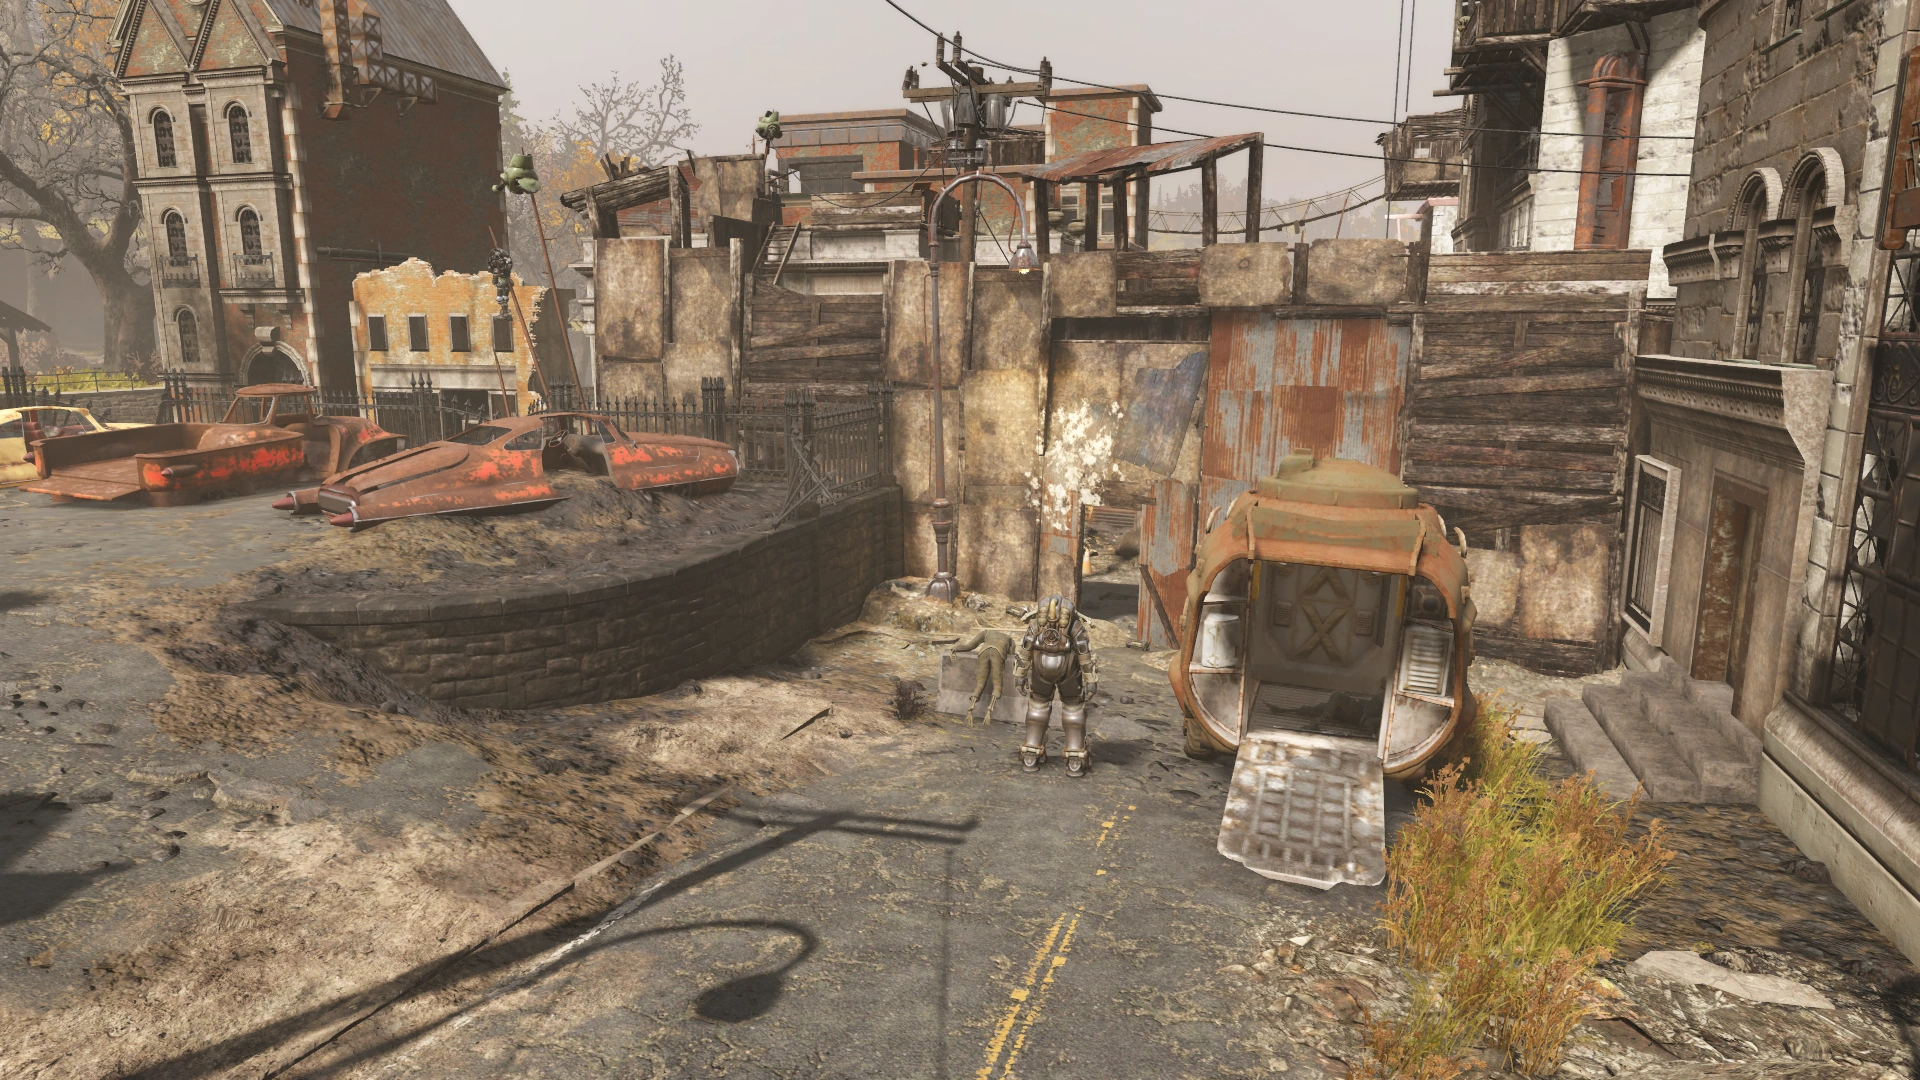
|
Central Ash Heap

| Location | Type | Description | Image |
|---|---|---|---|
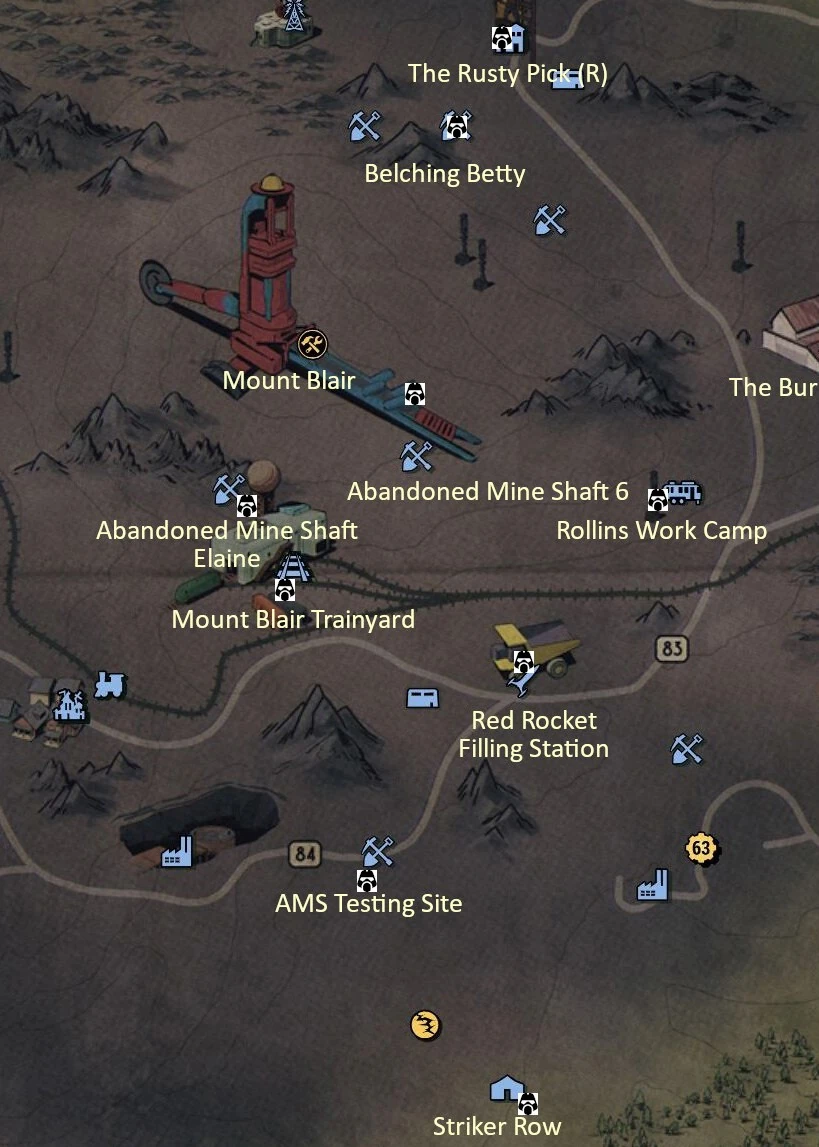
| The Rusty Pick | Raider | At the entrance to the tunnel in the basement the building in a security cage. | 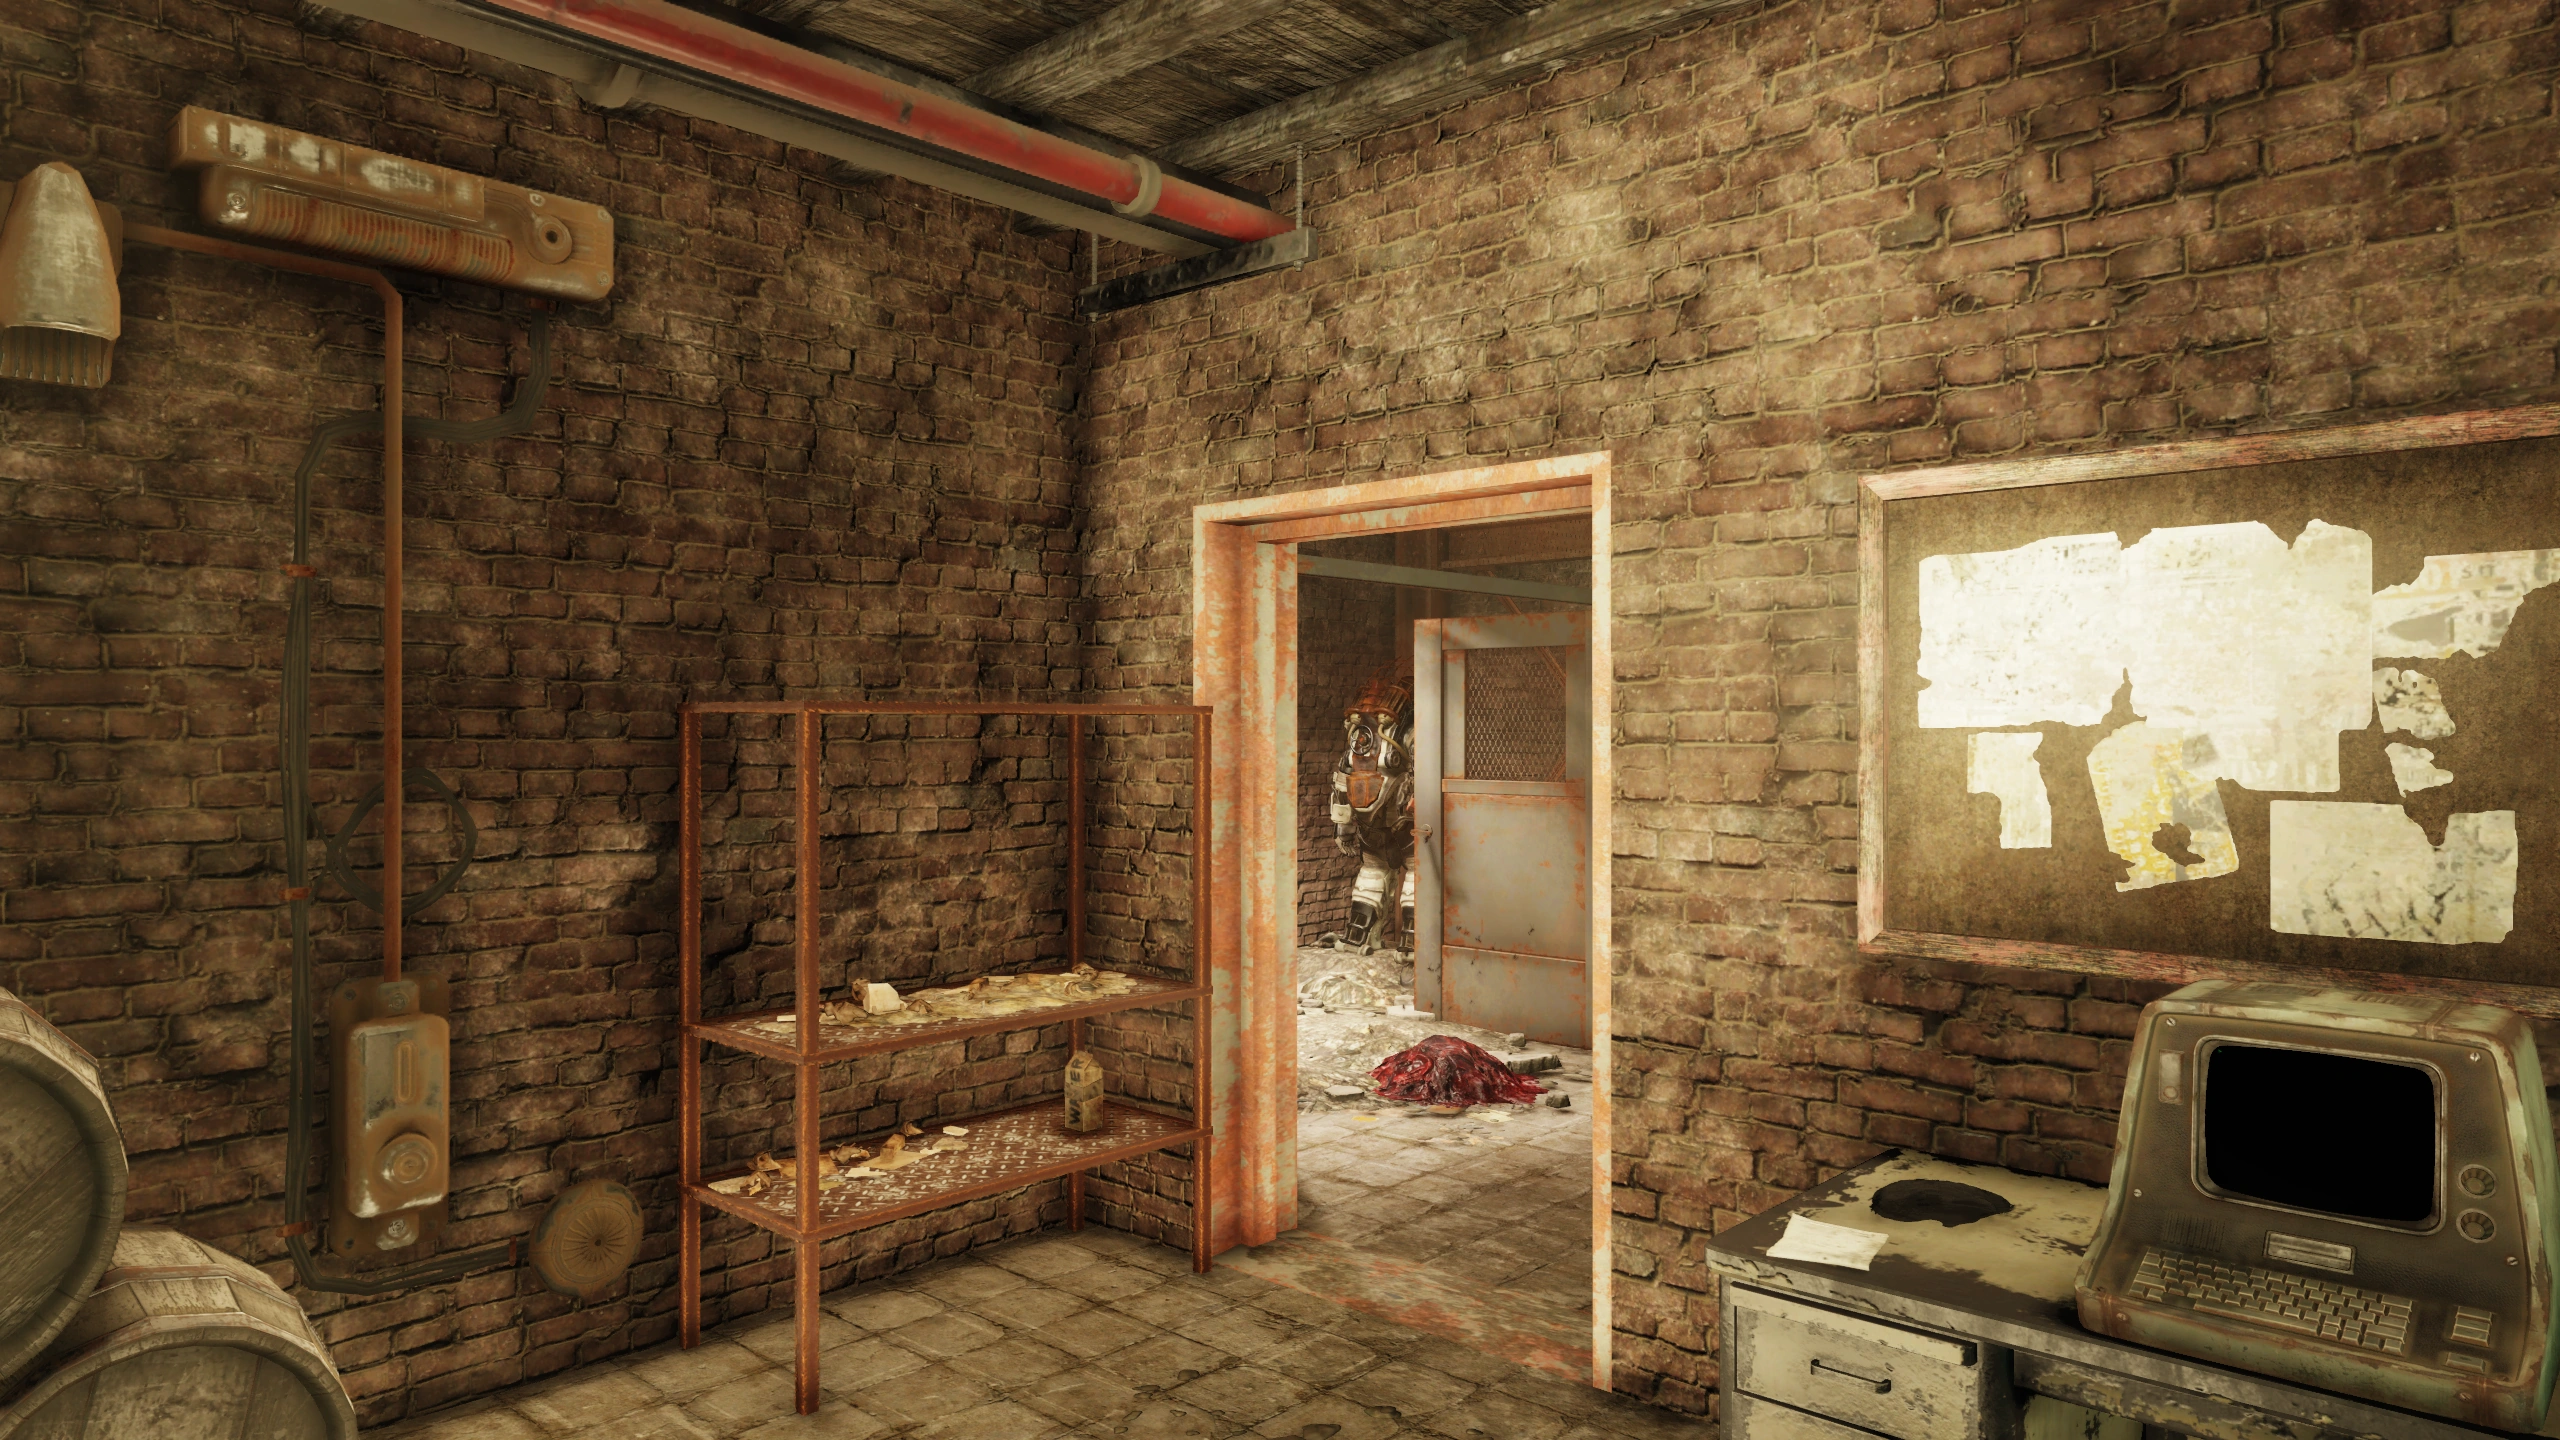
|
| Belching Betty | T-series | Outside the mine in the Fire Breathers shack with Bernie, after completion of Into the Fire. | 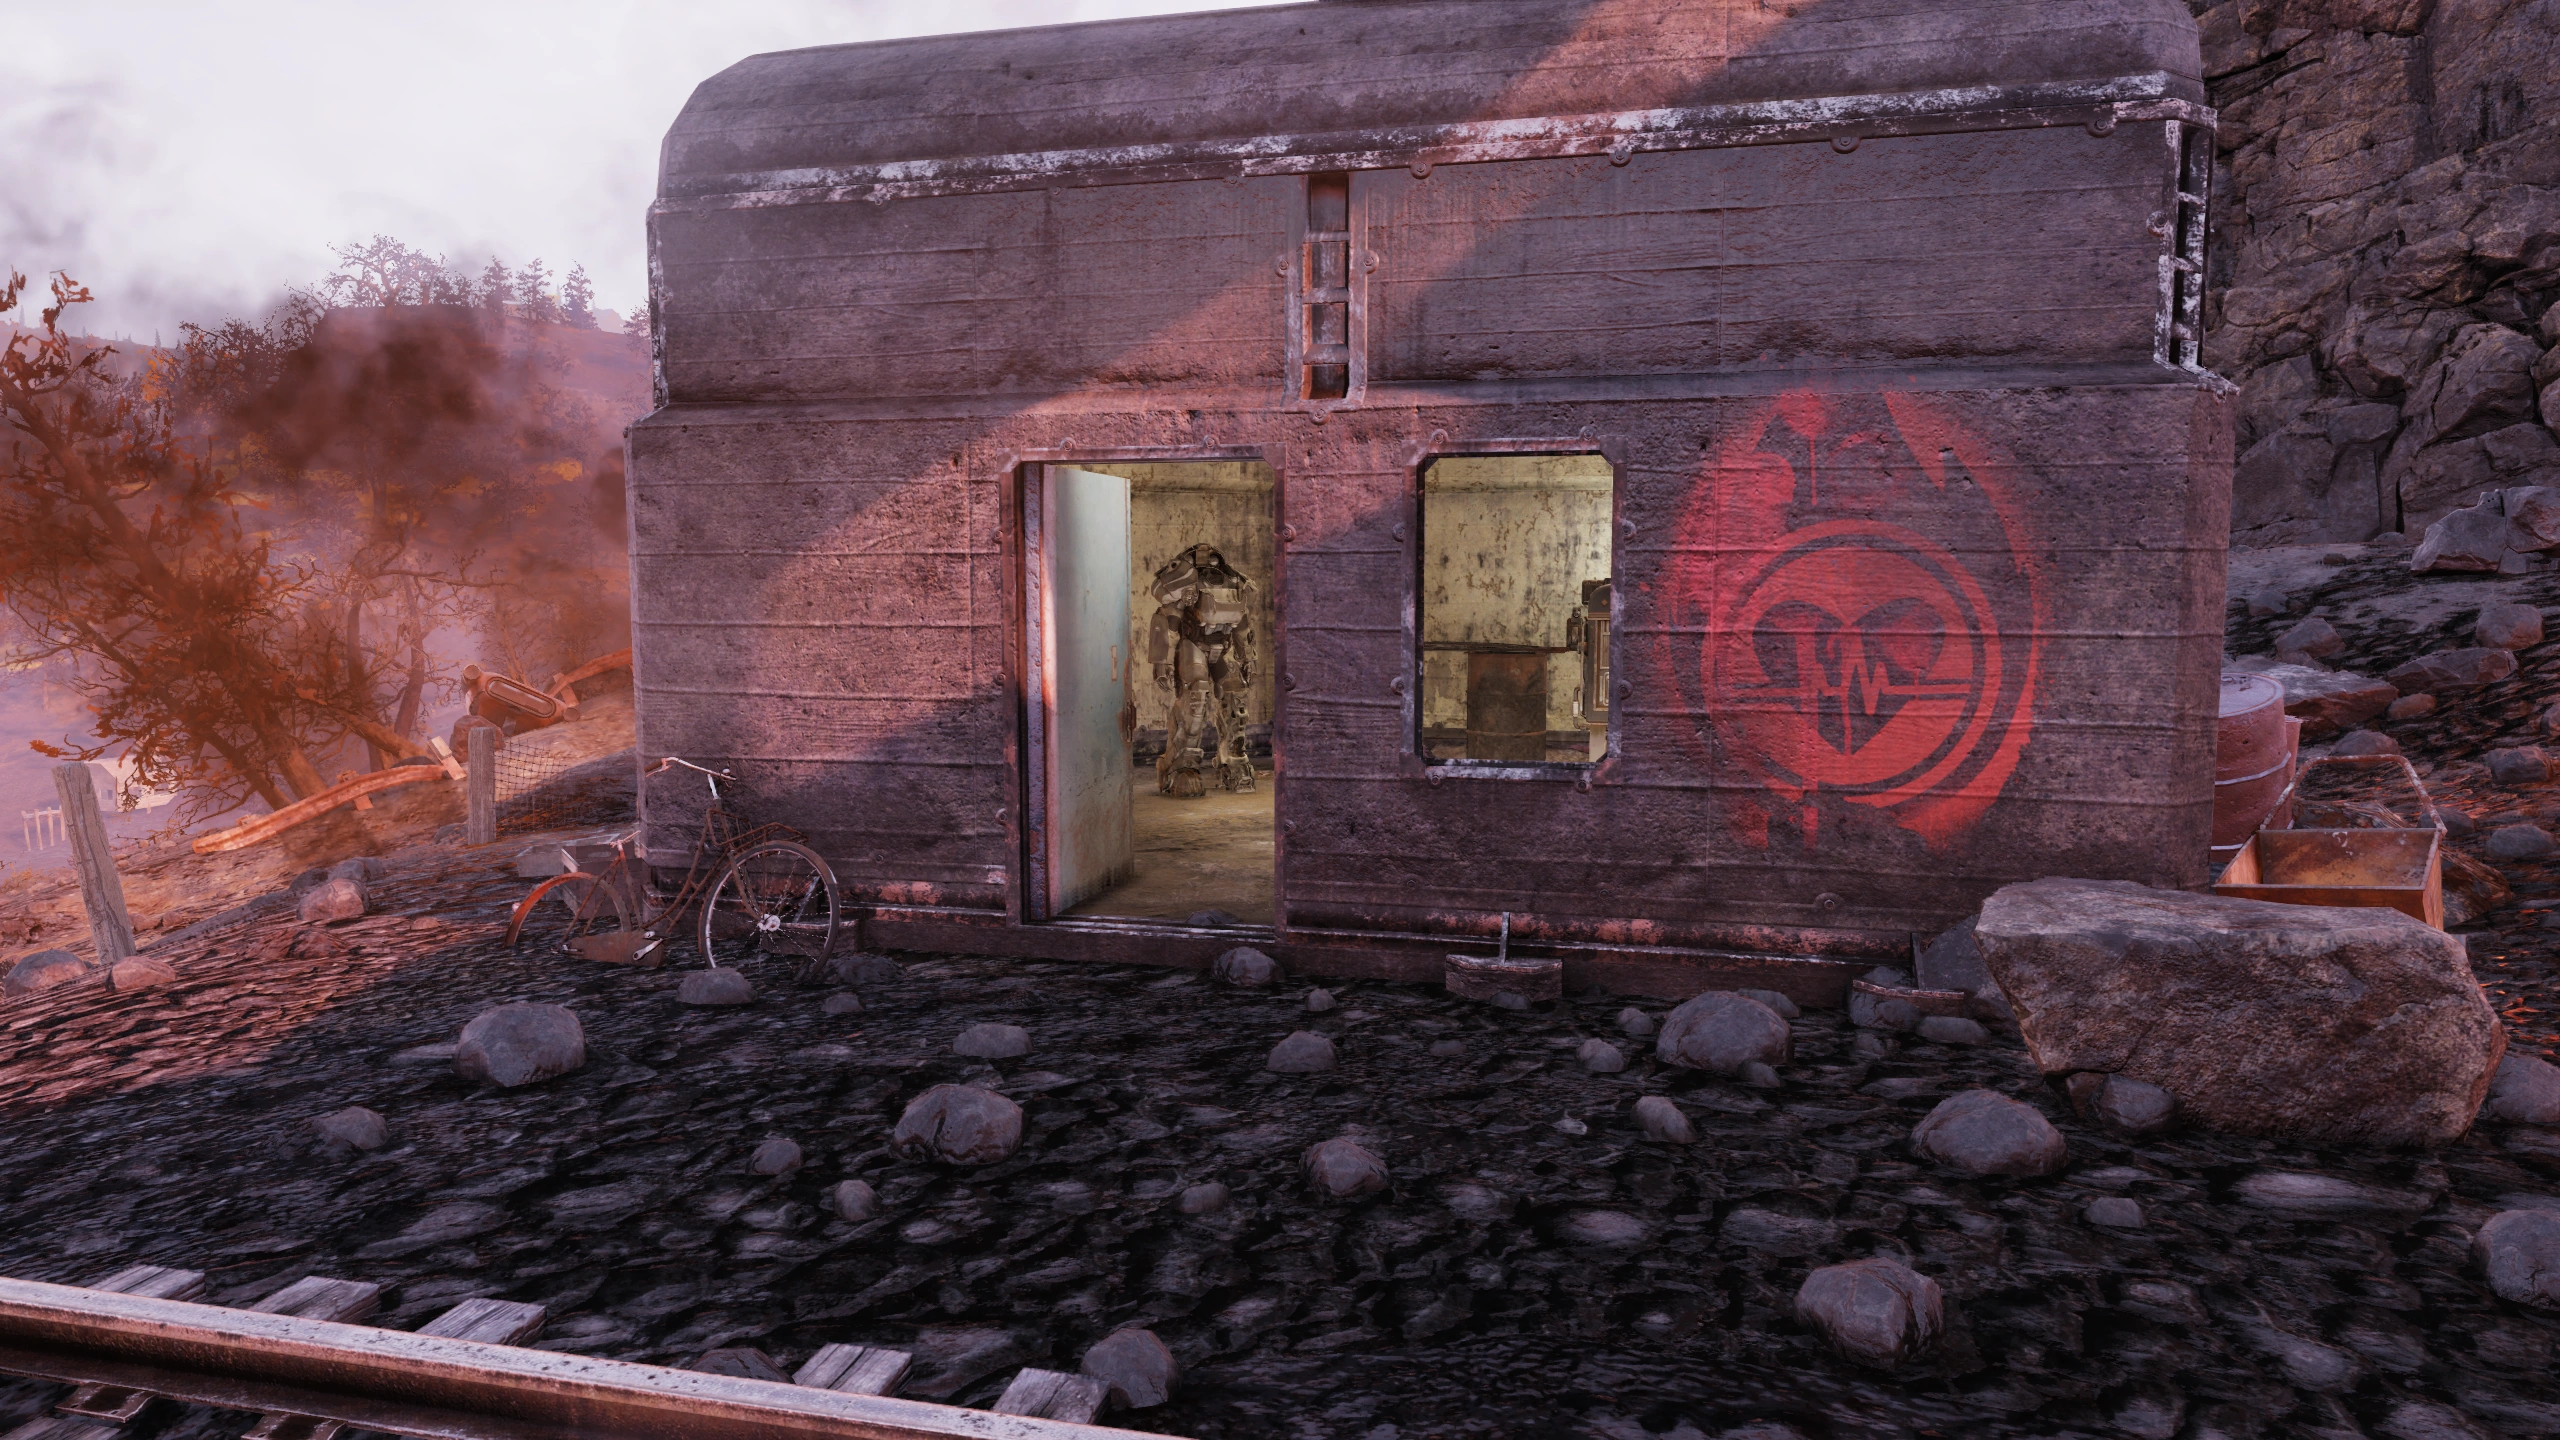
|
| Mount Blair | T-Series | In a warehouse beside a green pickup truck east of the tower of the huge mining machine. It is due north of Abandoned mine shaft 6 and is actually closer to that location. | 
|
| Abandoned mine shaft Elaine | T-series | Outside with a power armor station, between the locker room building and a bus. | 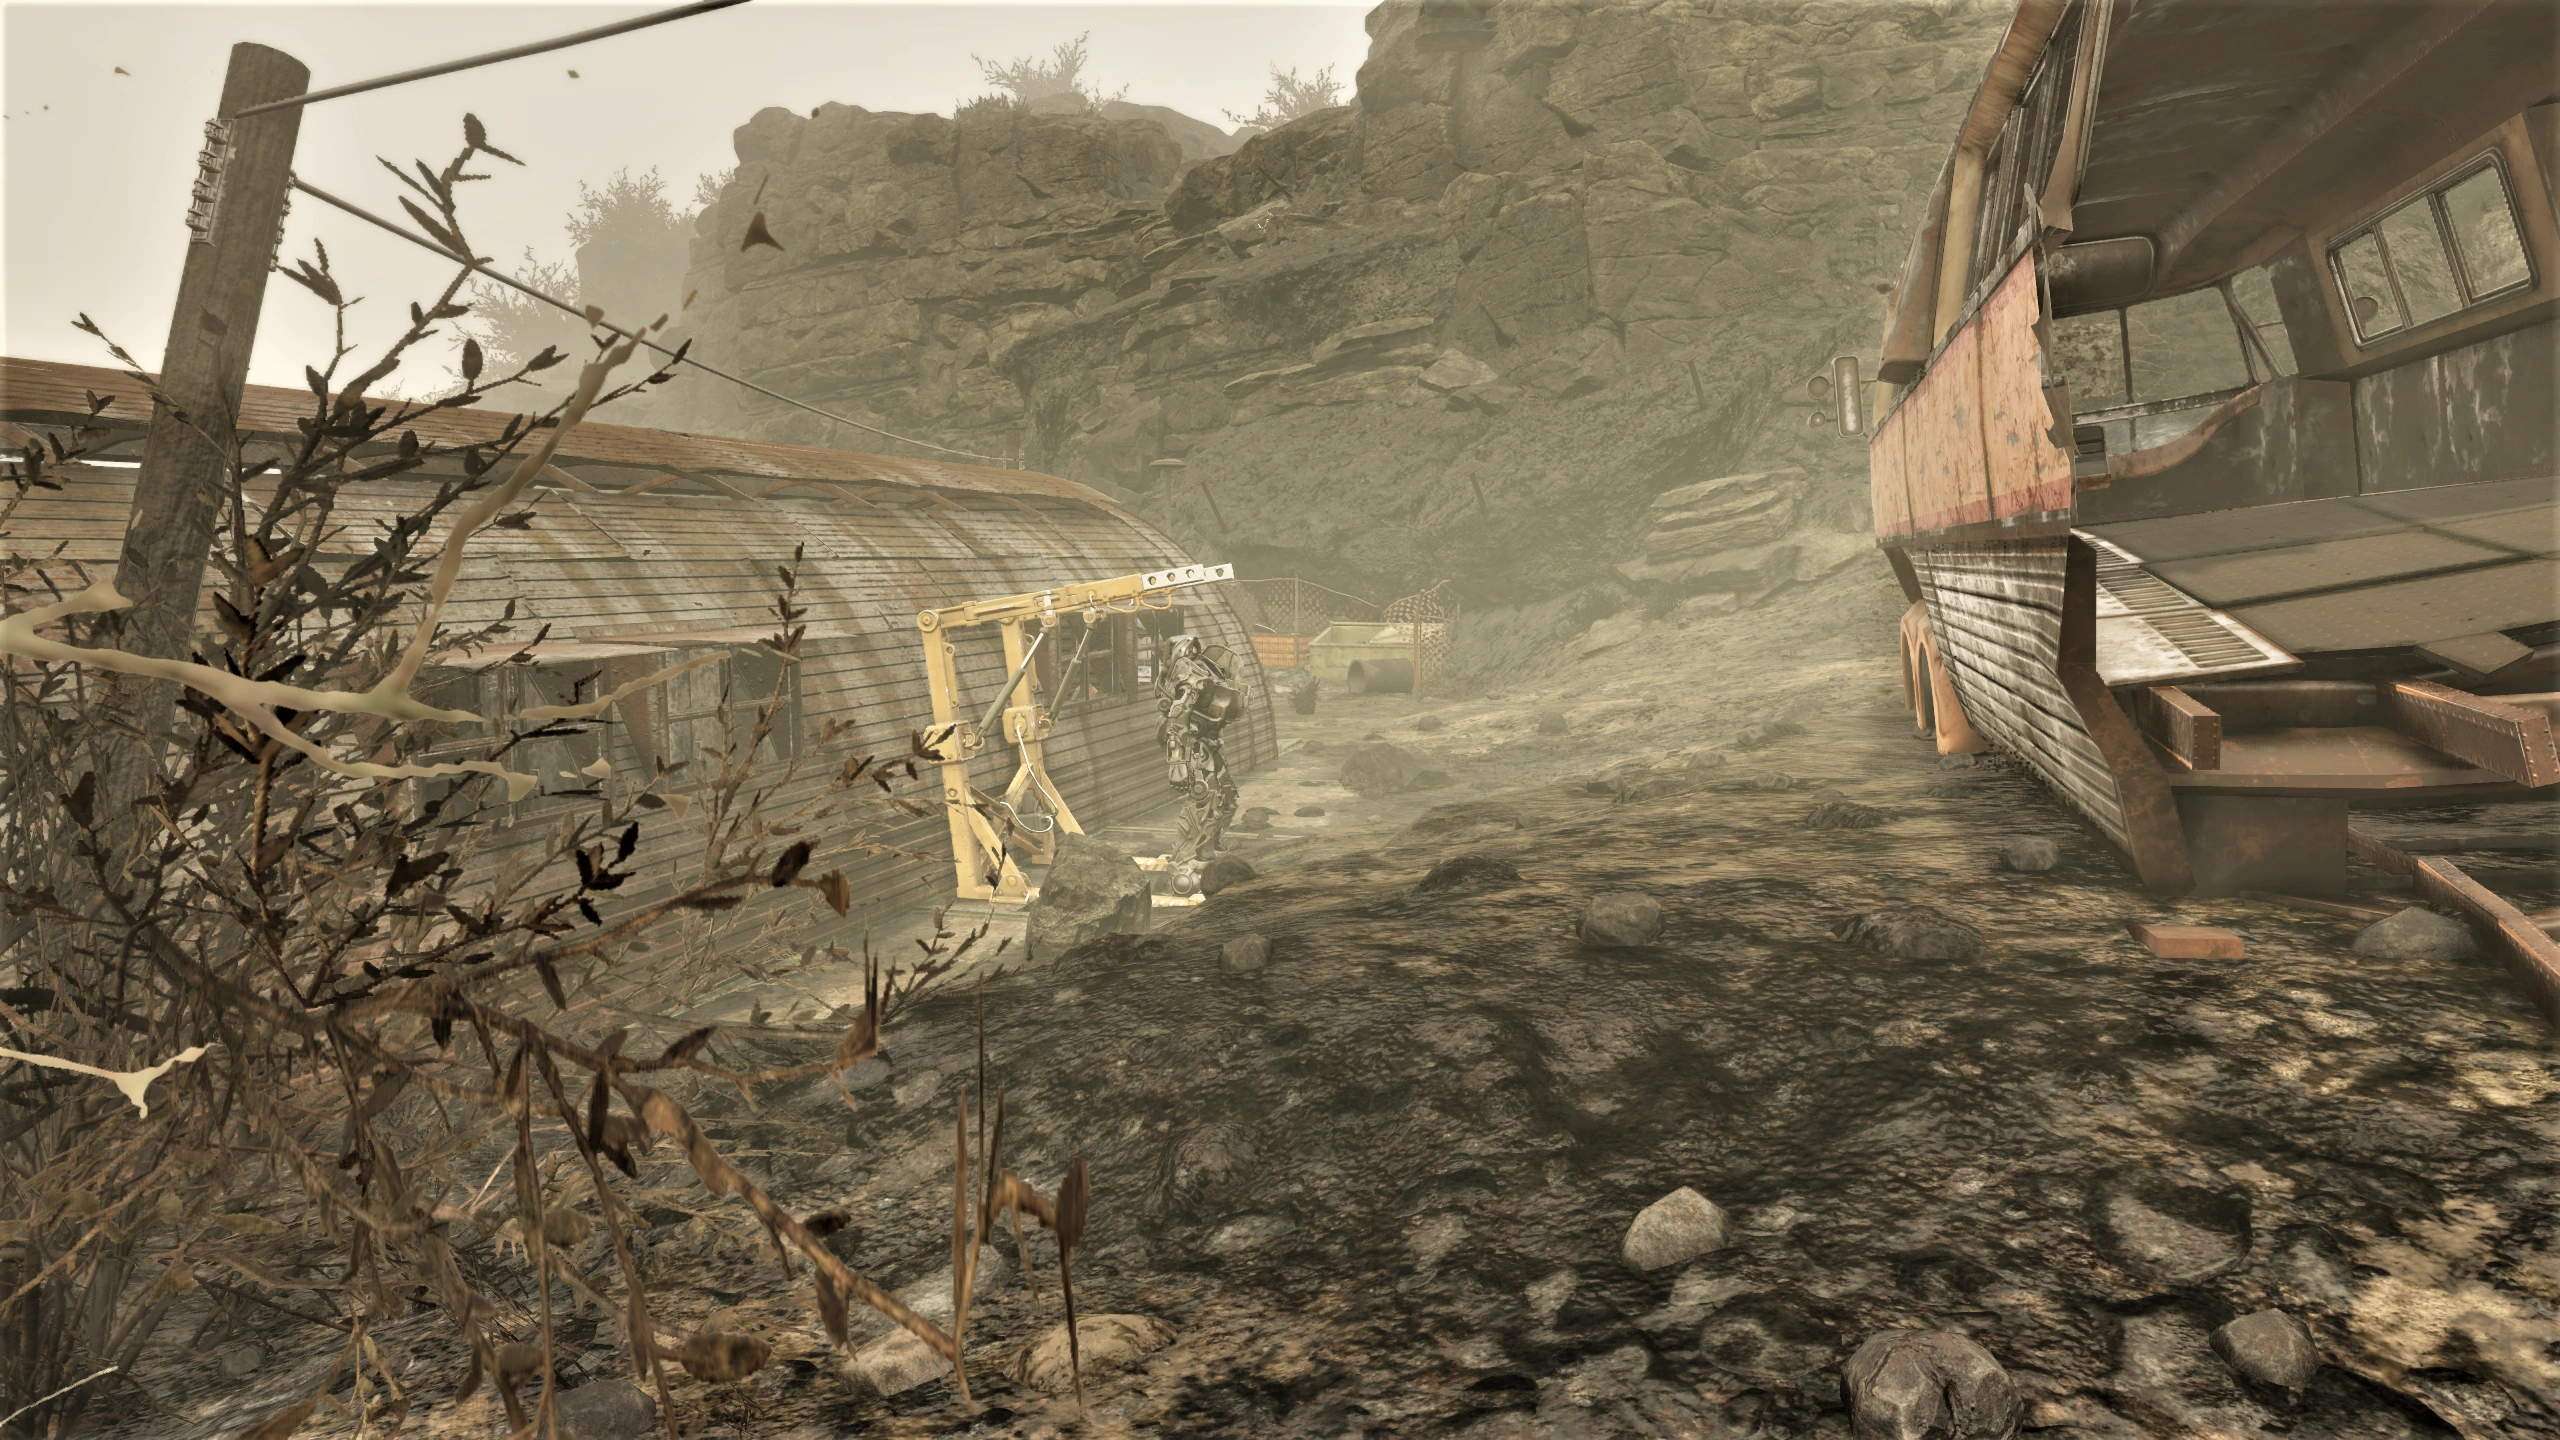
|
| Rollins work camp | T-series | On the west side of the three orange and white modular buildings at a power armor station. | 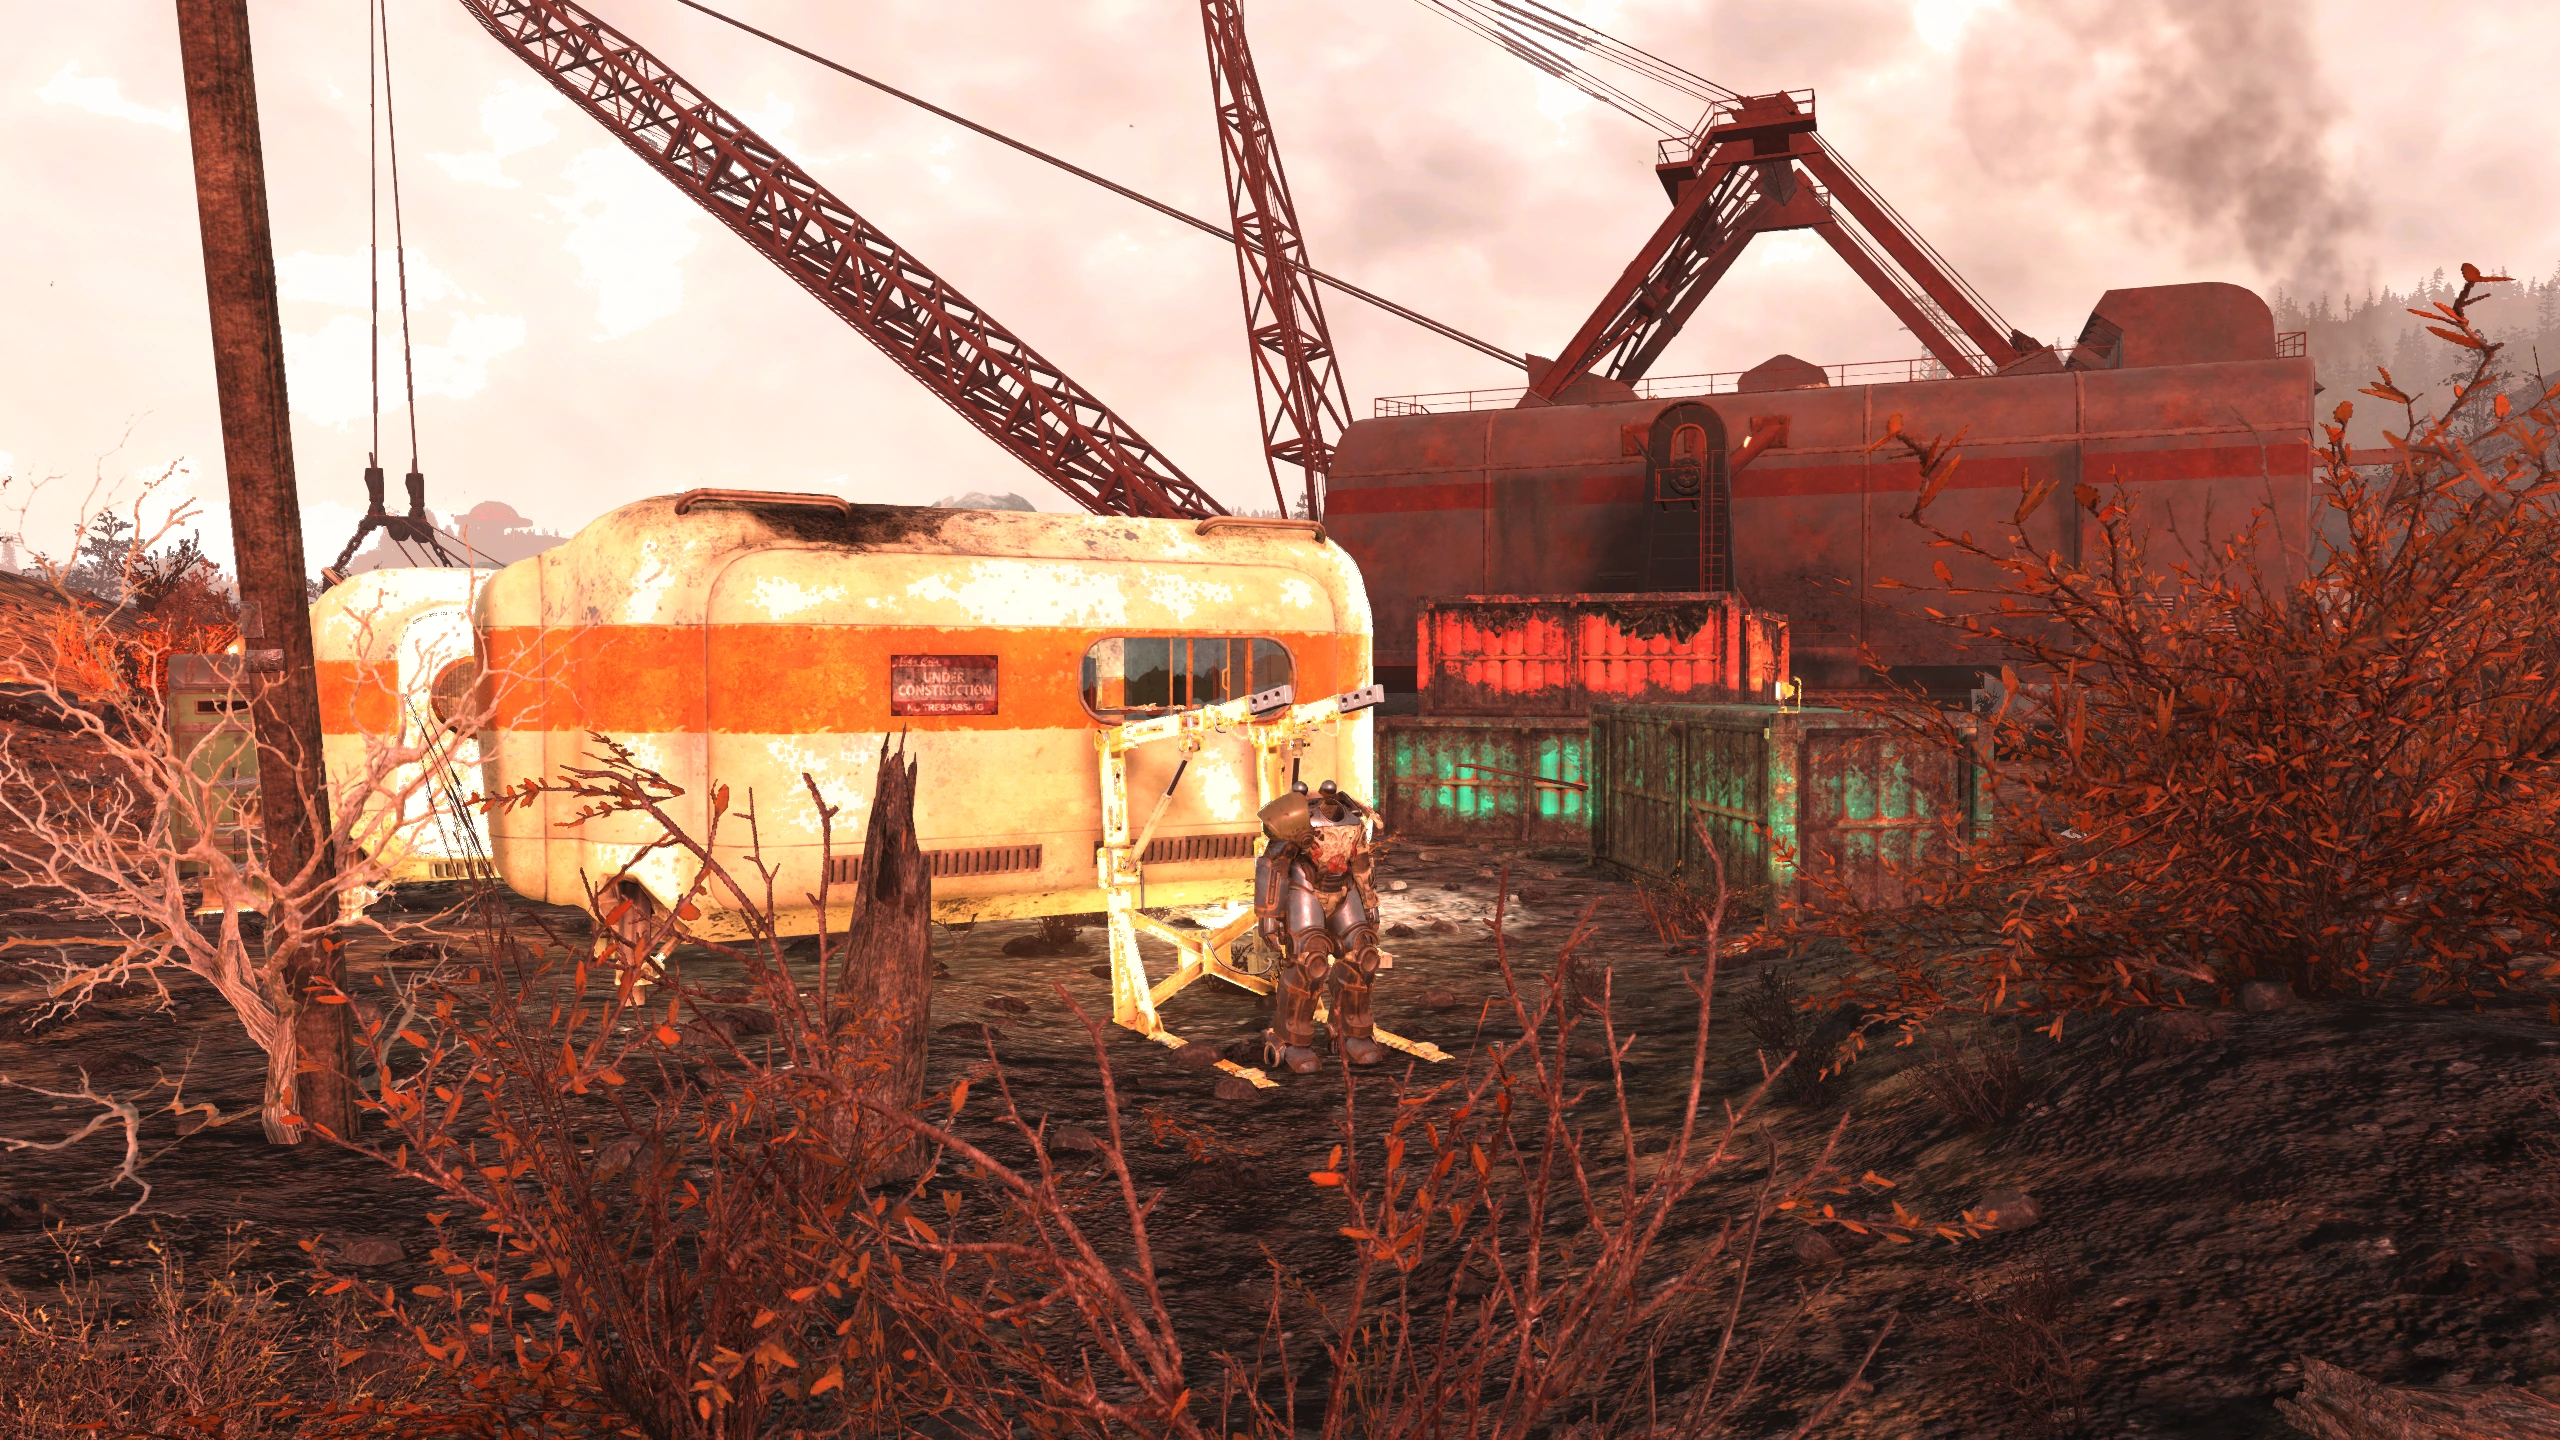
|
| Mount Blair trainyard | T-series | At a power armor station on the ground floor in the west end of the large building with rail cars on the tracks running through it. There can be a large number of robots, scorched, or mole miners in this area. | File:PowerArmor Mout Blair Trainyard.png |
| Red Rocket filling station | T-series | Behind the boarded-up brick filling station and the orange fuel tanks (north side) at a power armor station. | 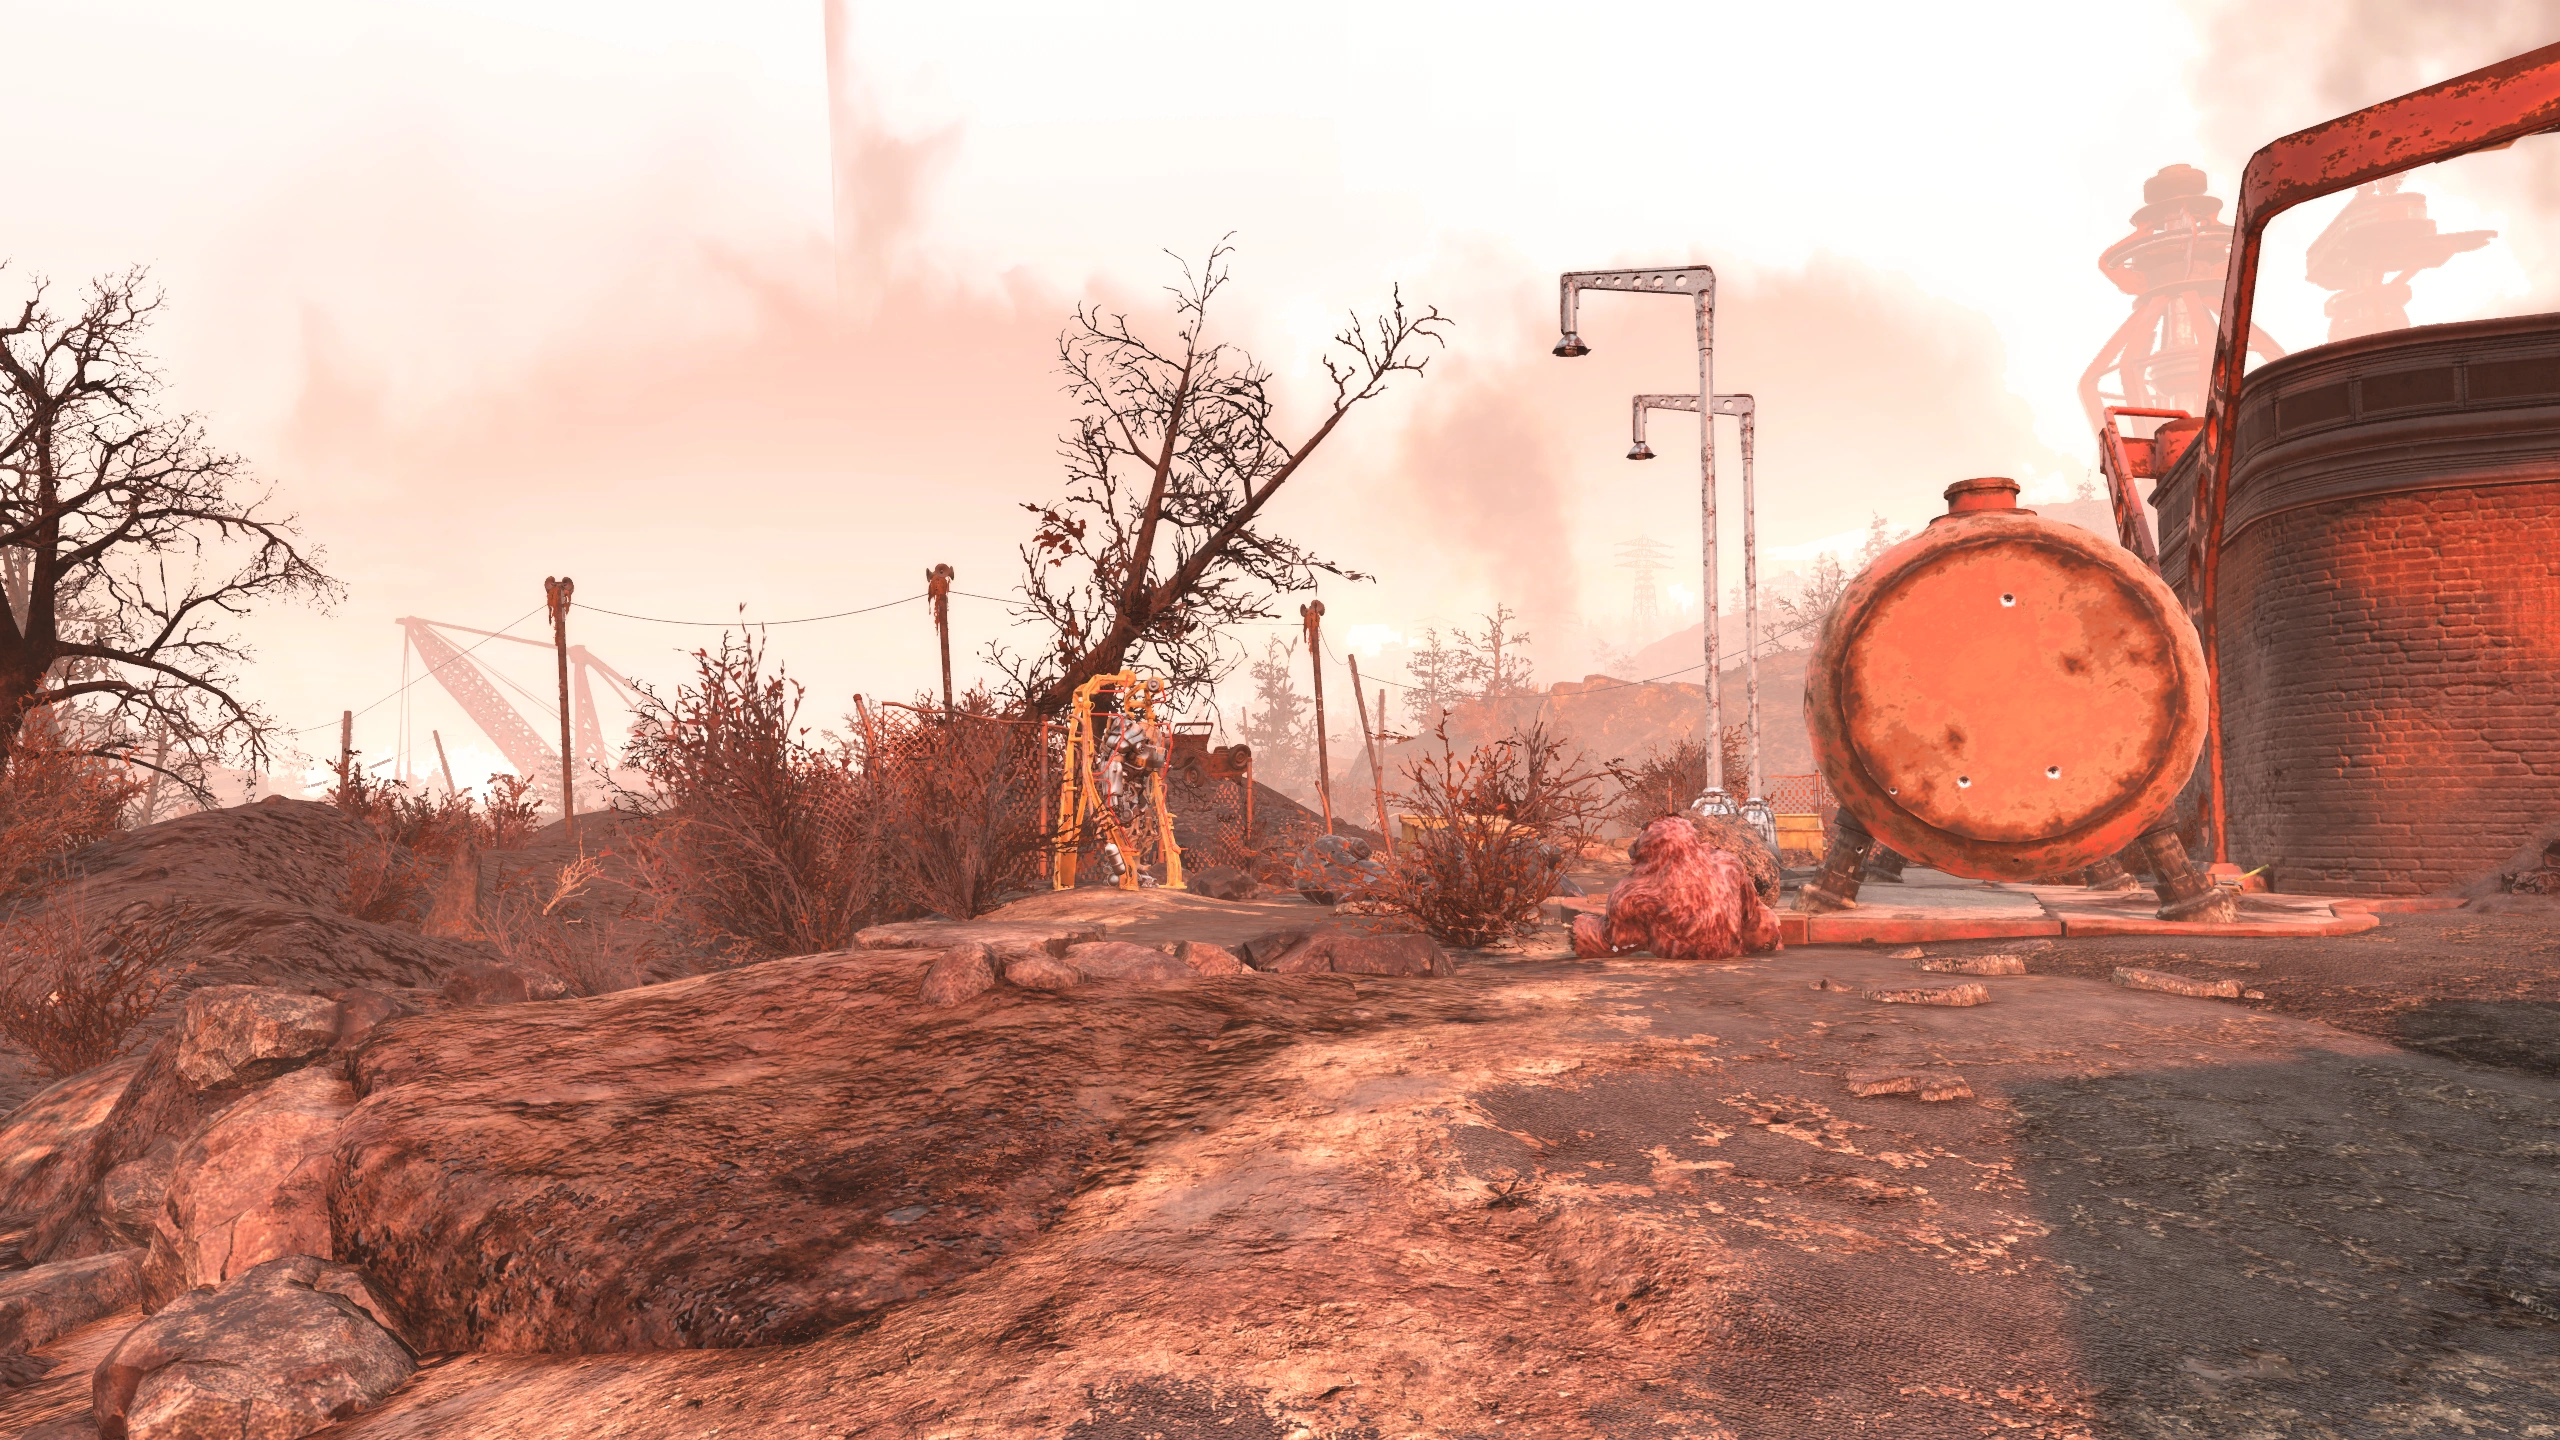
|
| AMS testing site | T-Series | In the back of the rounded metal building at one of two power armor stations. | 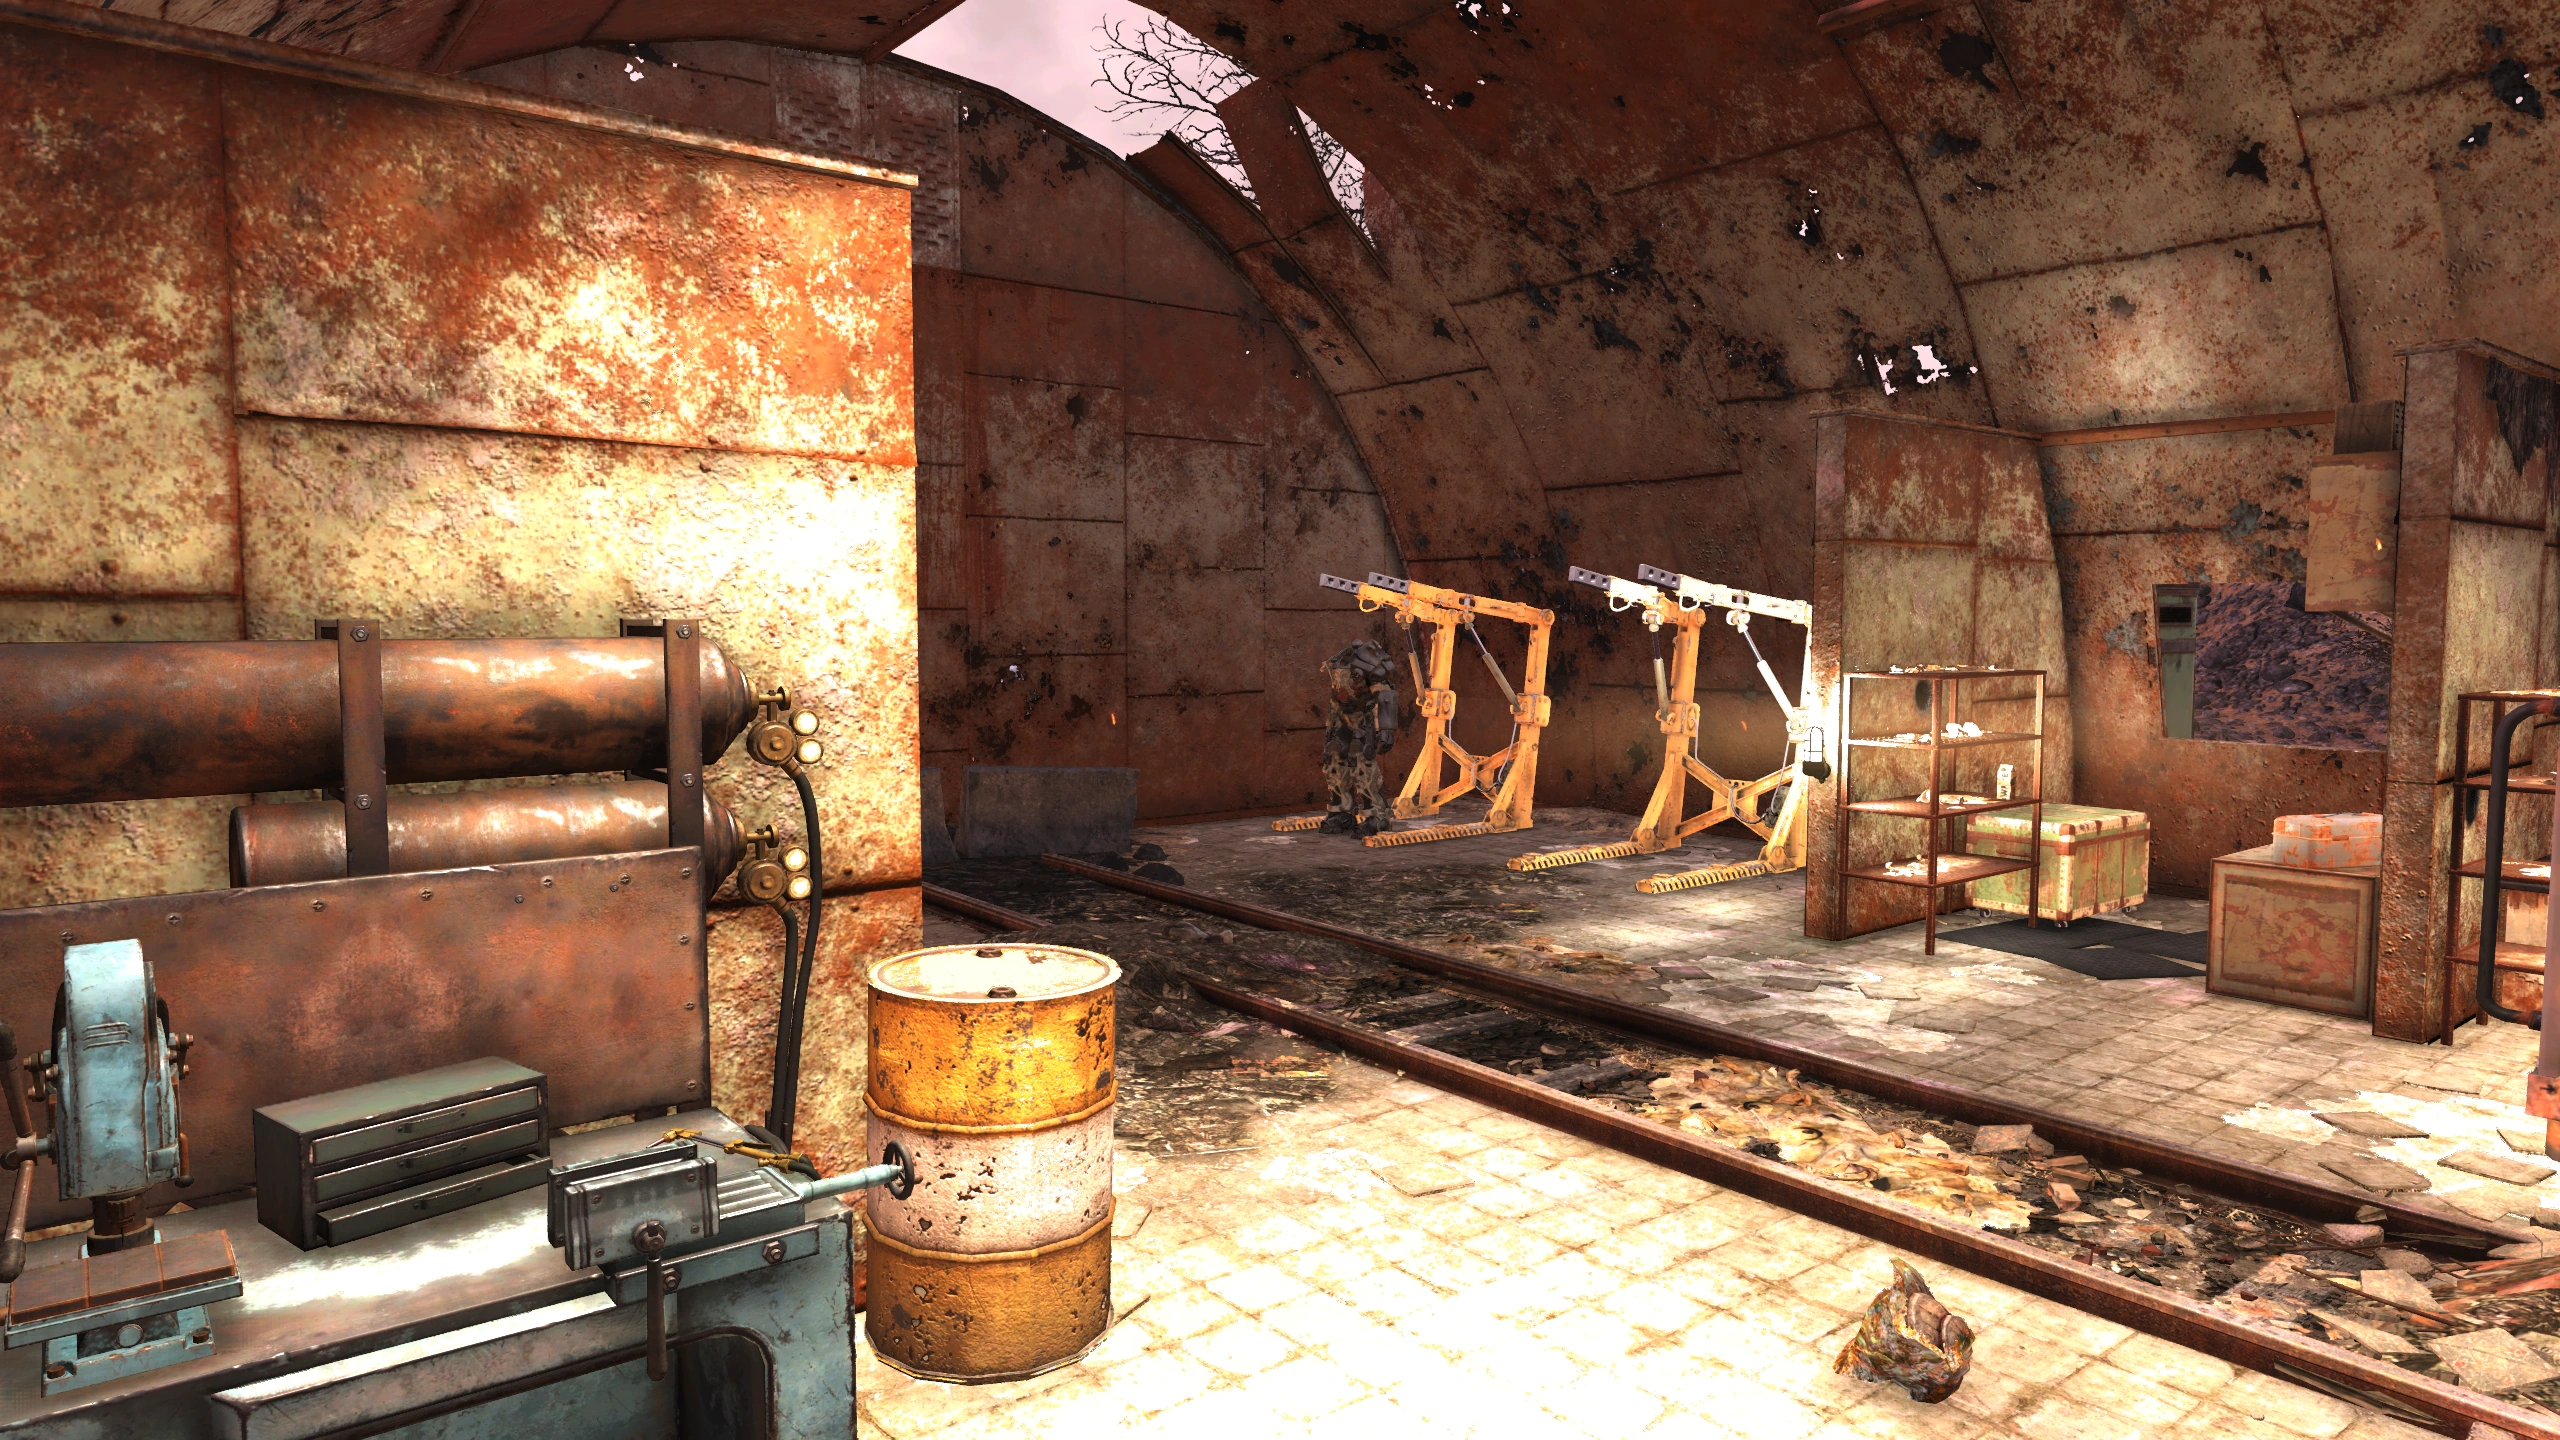
|
| Striker Row | T-series | In the southeast corner, up the hill from the tents. There are a fair number of scorched. Did I mention the scorchbeast from the fissure site next door? | 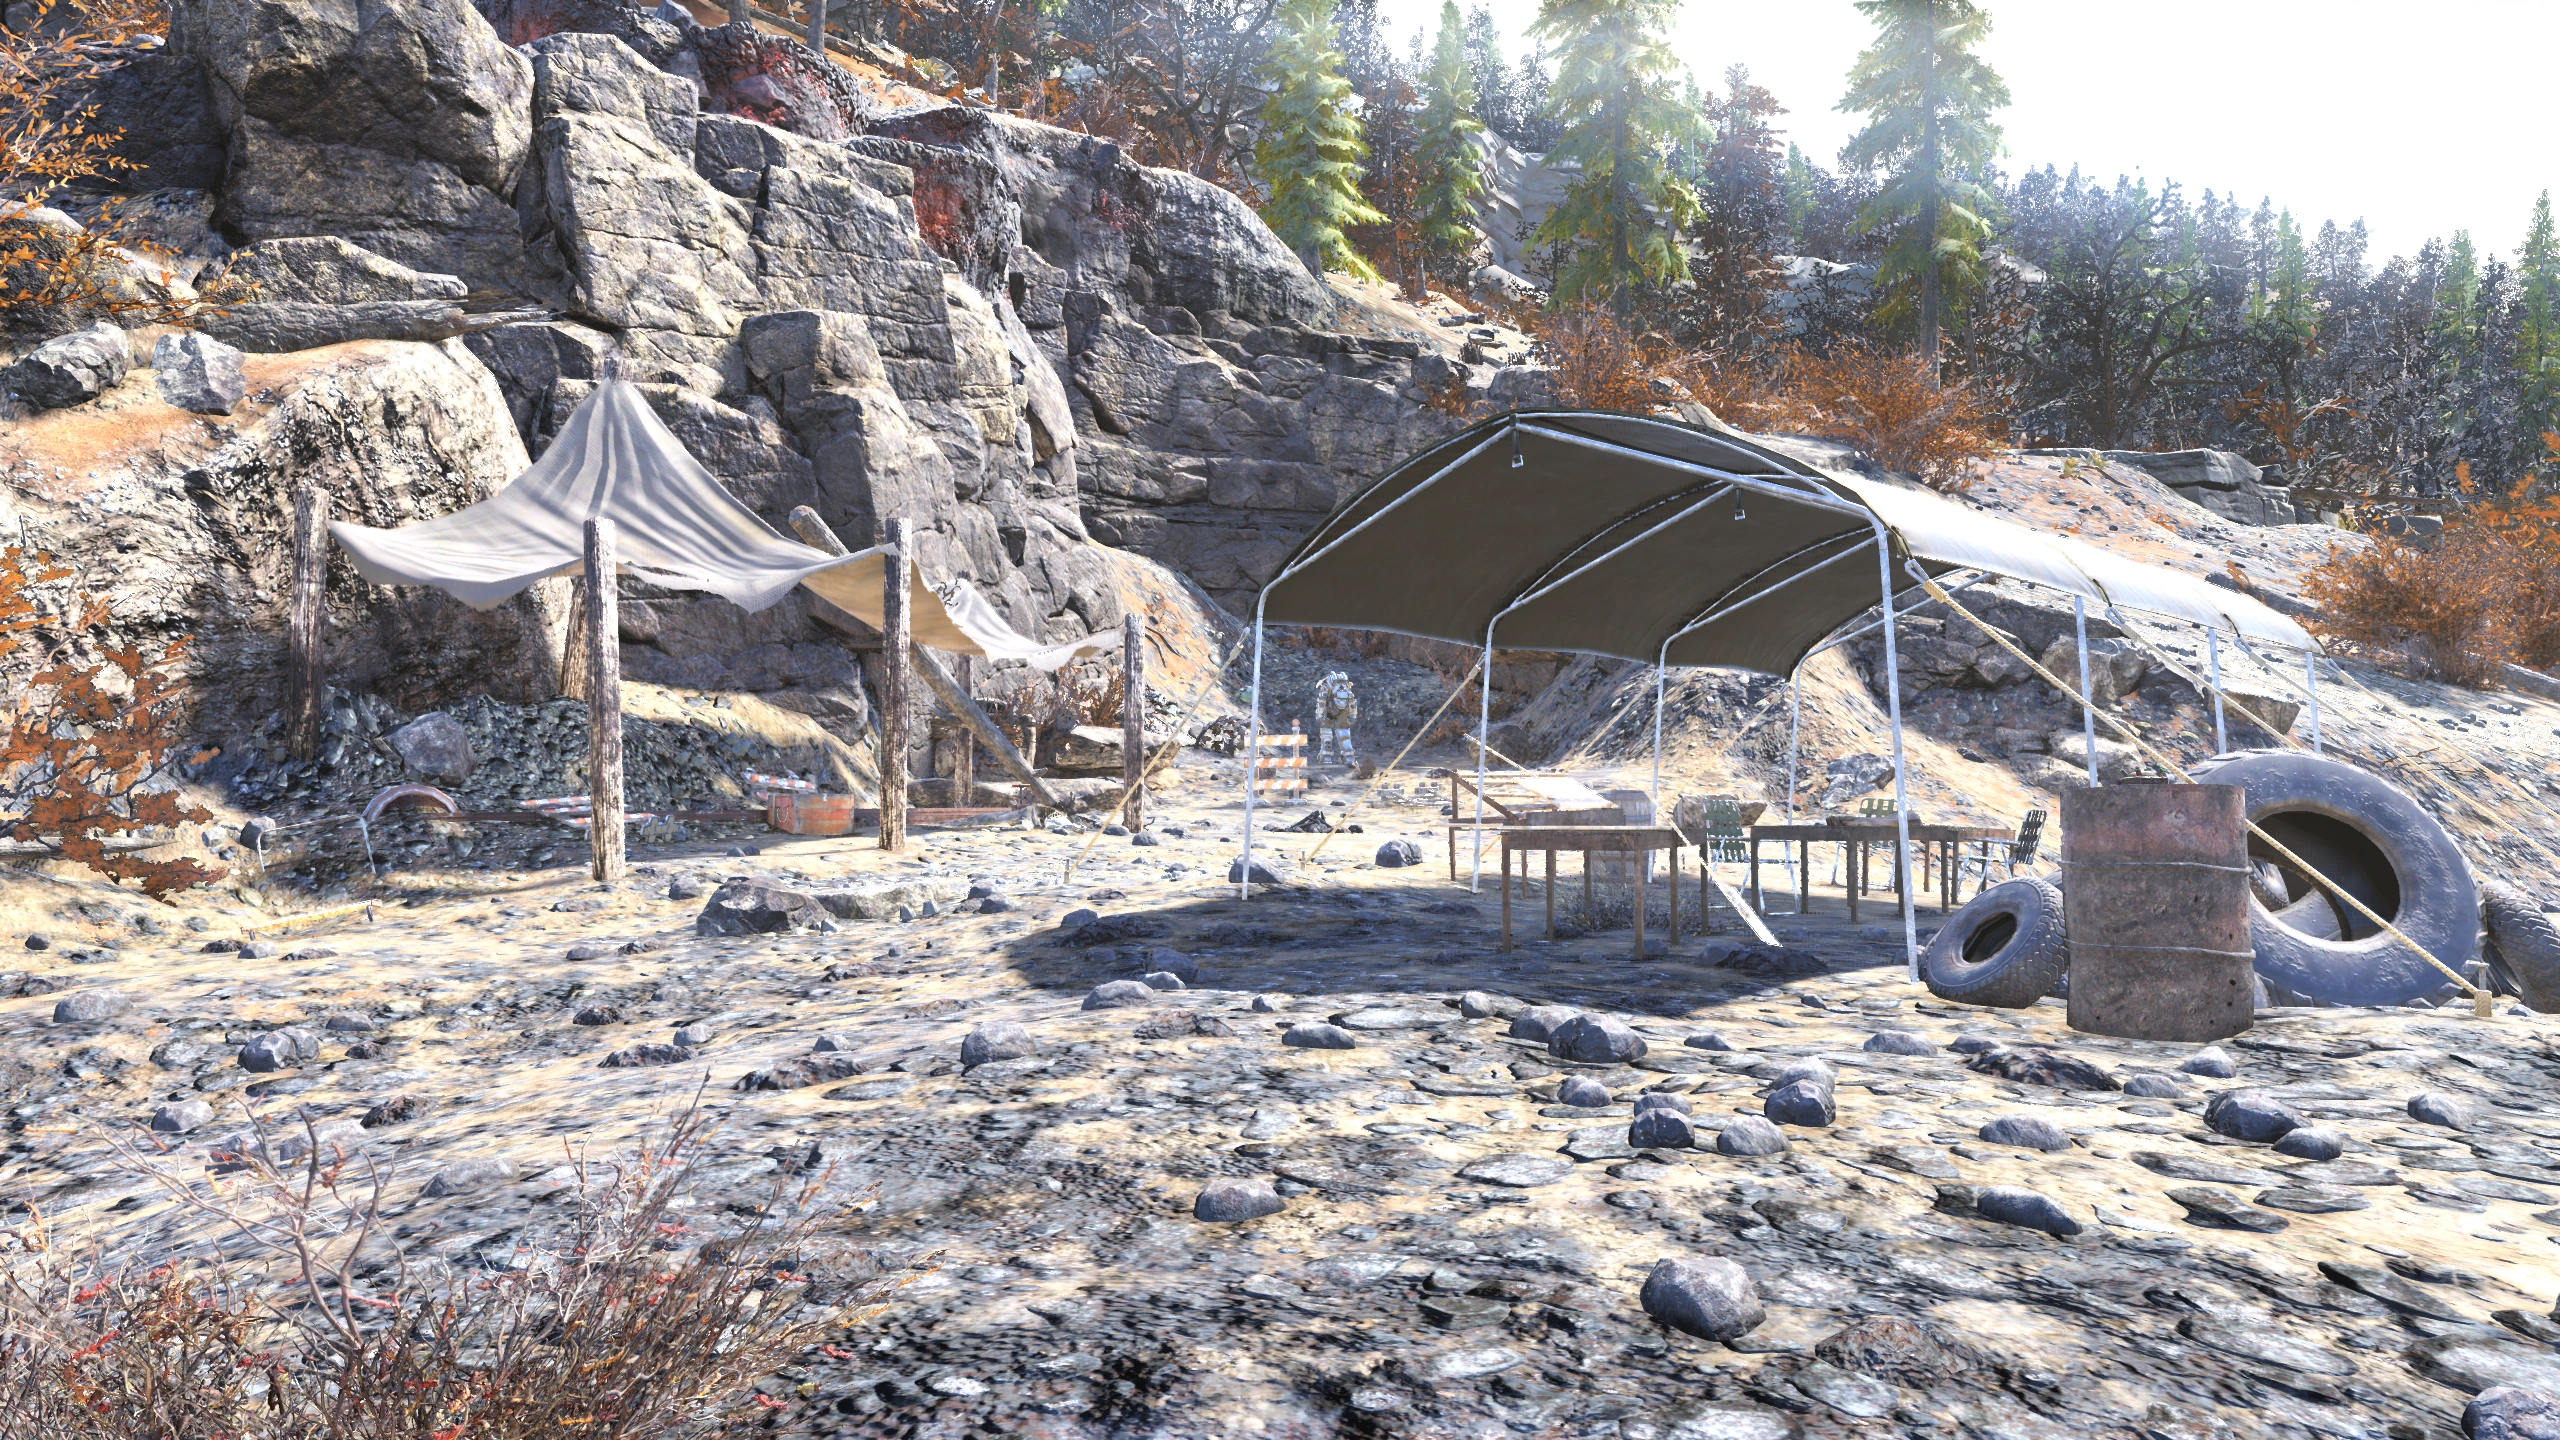
|
West Ash Heap
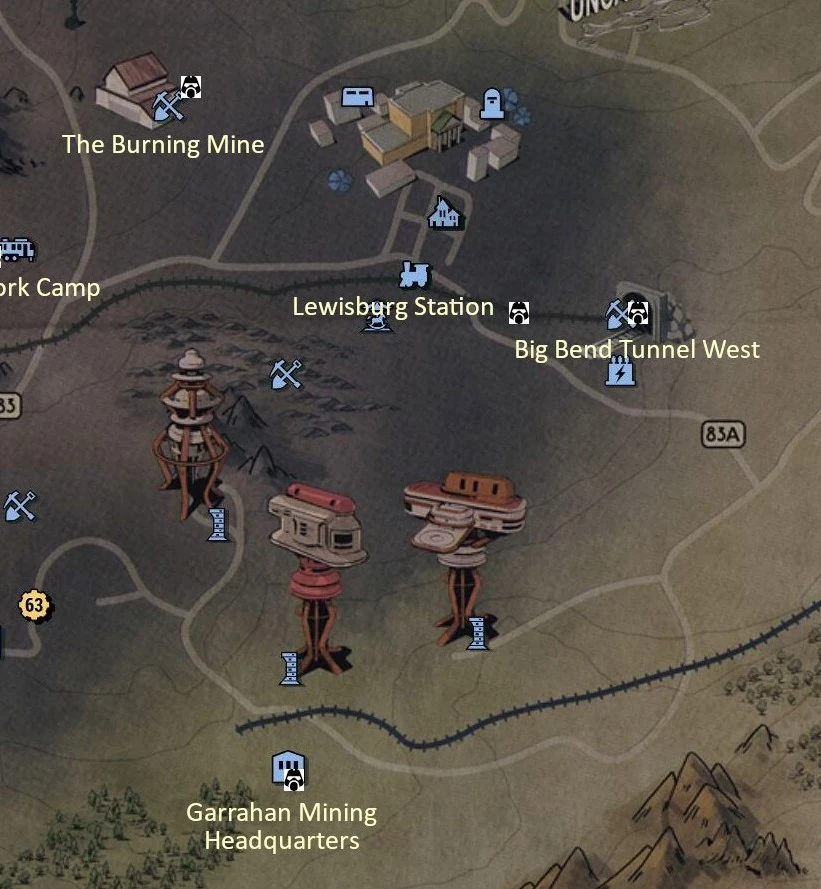

| Location | Type | Description | Image |
|---|---|---|---|
| Burning mine | T-series | In the brick building on the top of the hill above the mine at a power armor station. | 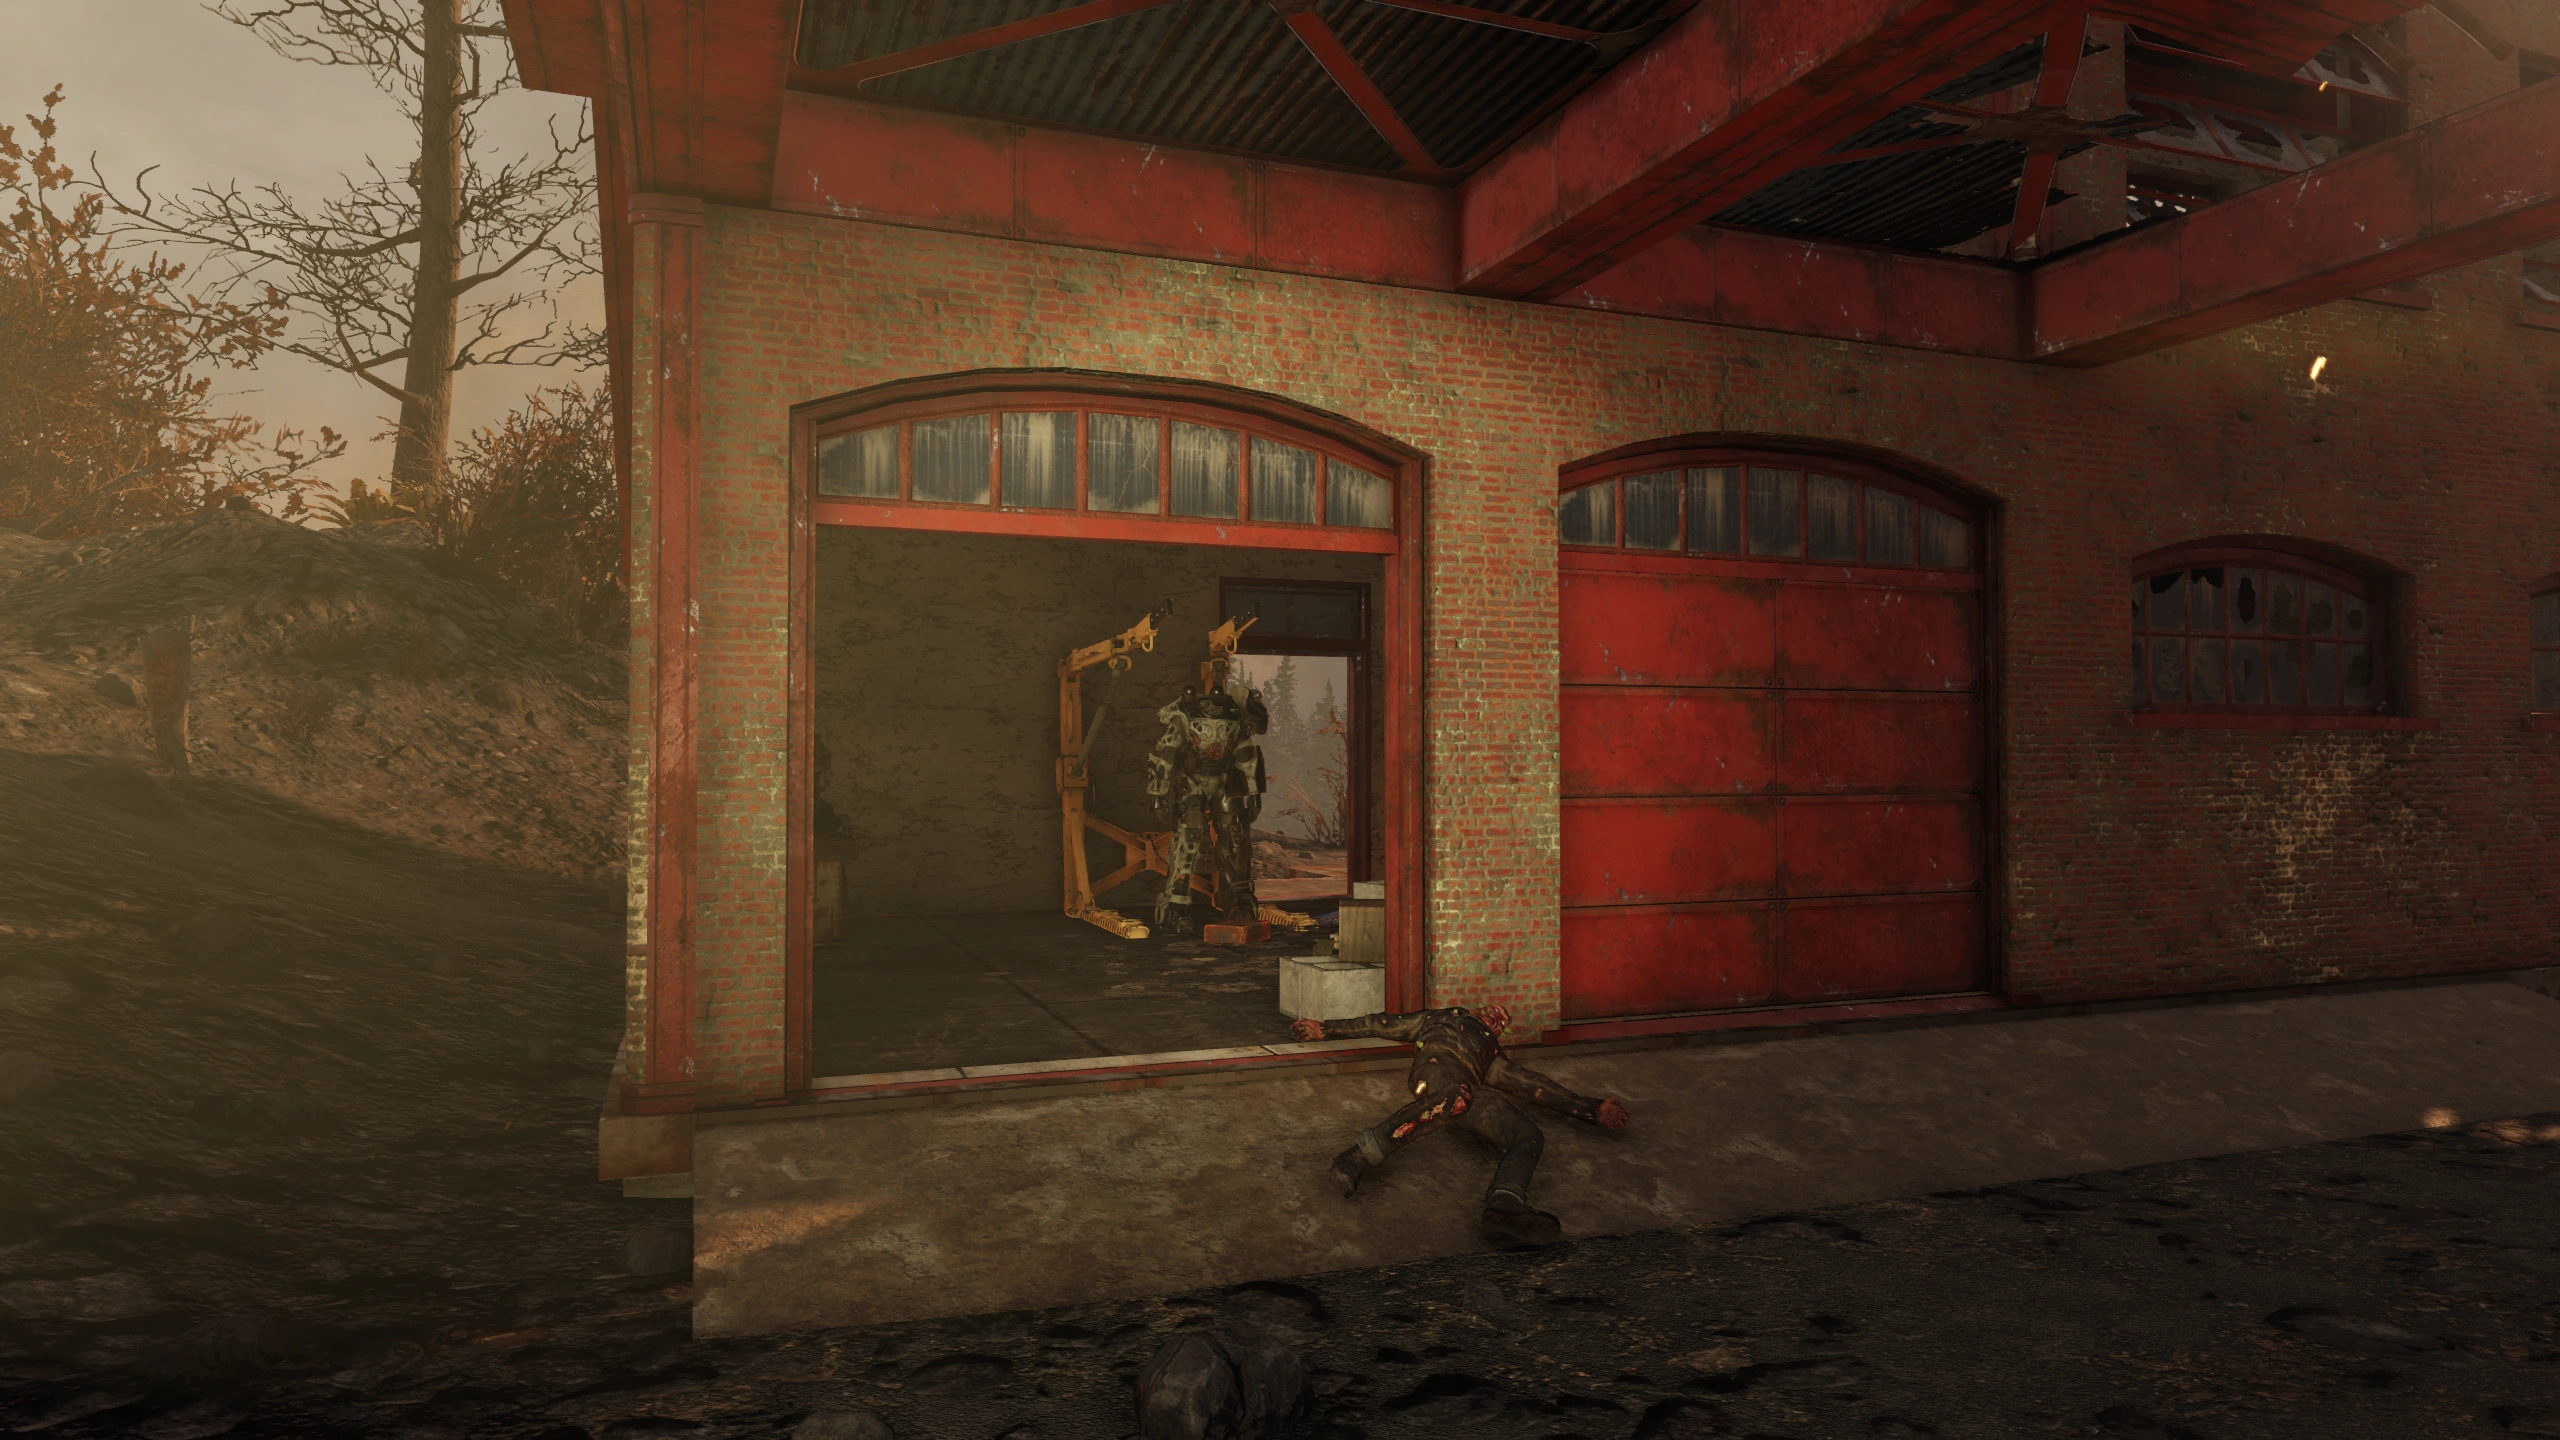
|
| Lewisburg station | T-series | East on the train tracks beside a derailed boxcar with "Jobs now or else!" written on it. halfway to the Big Bend Tunnel West. | 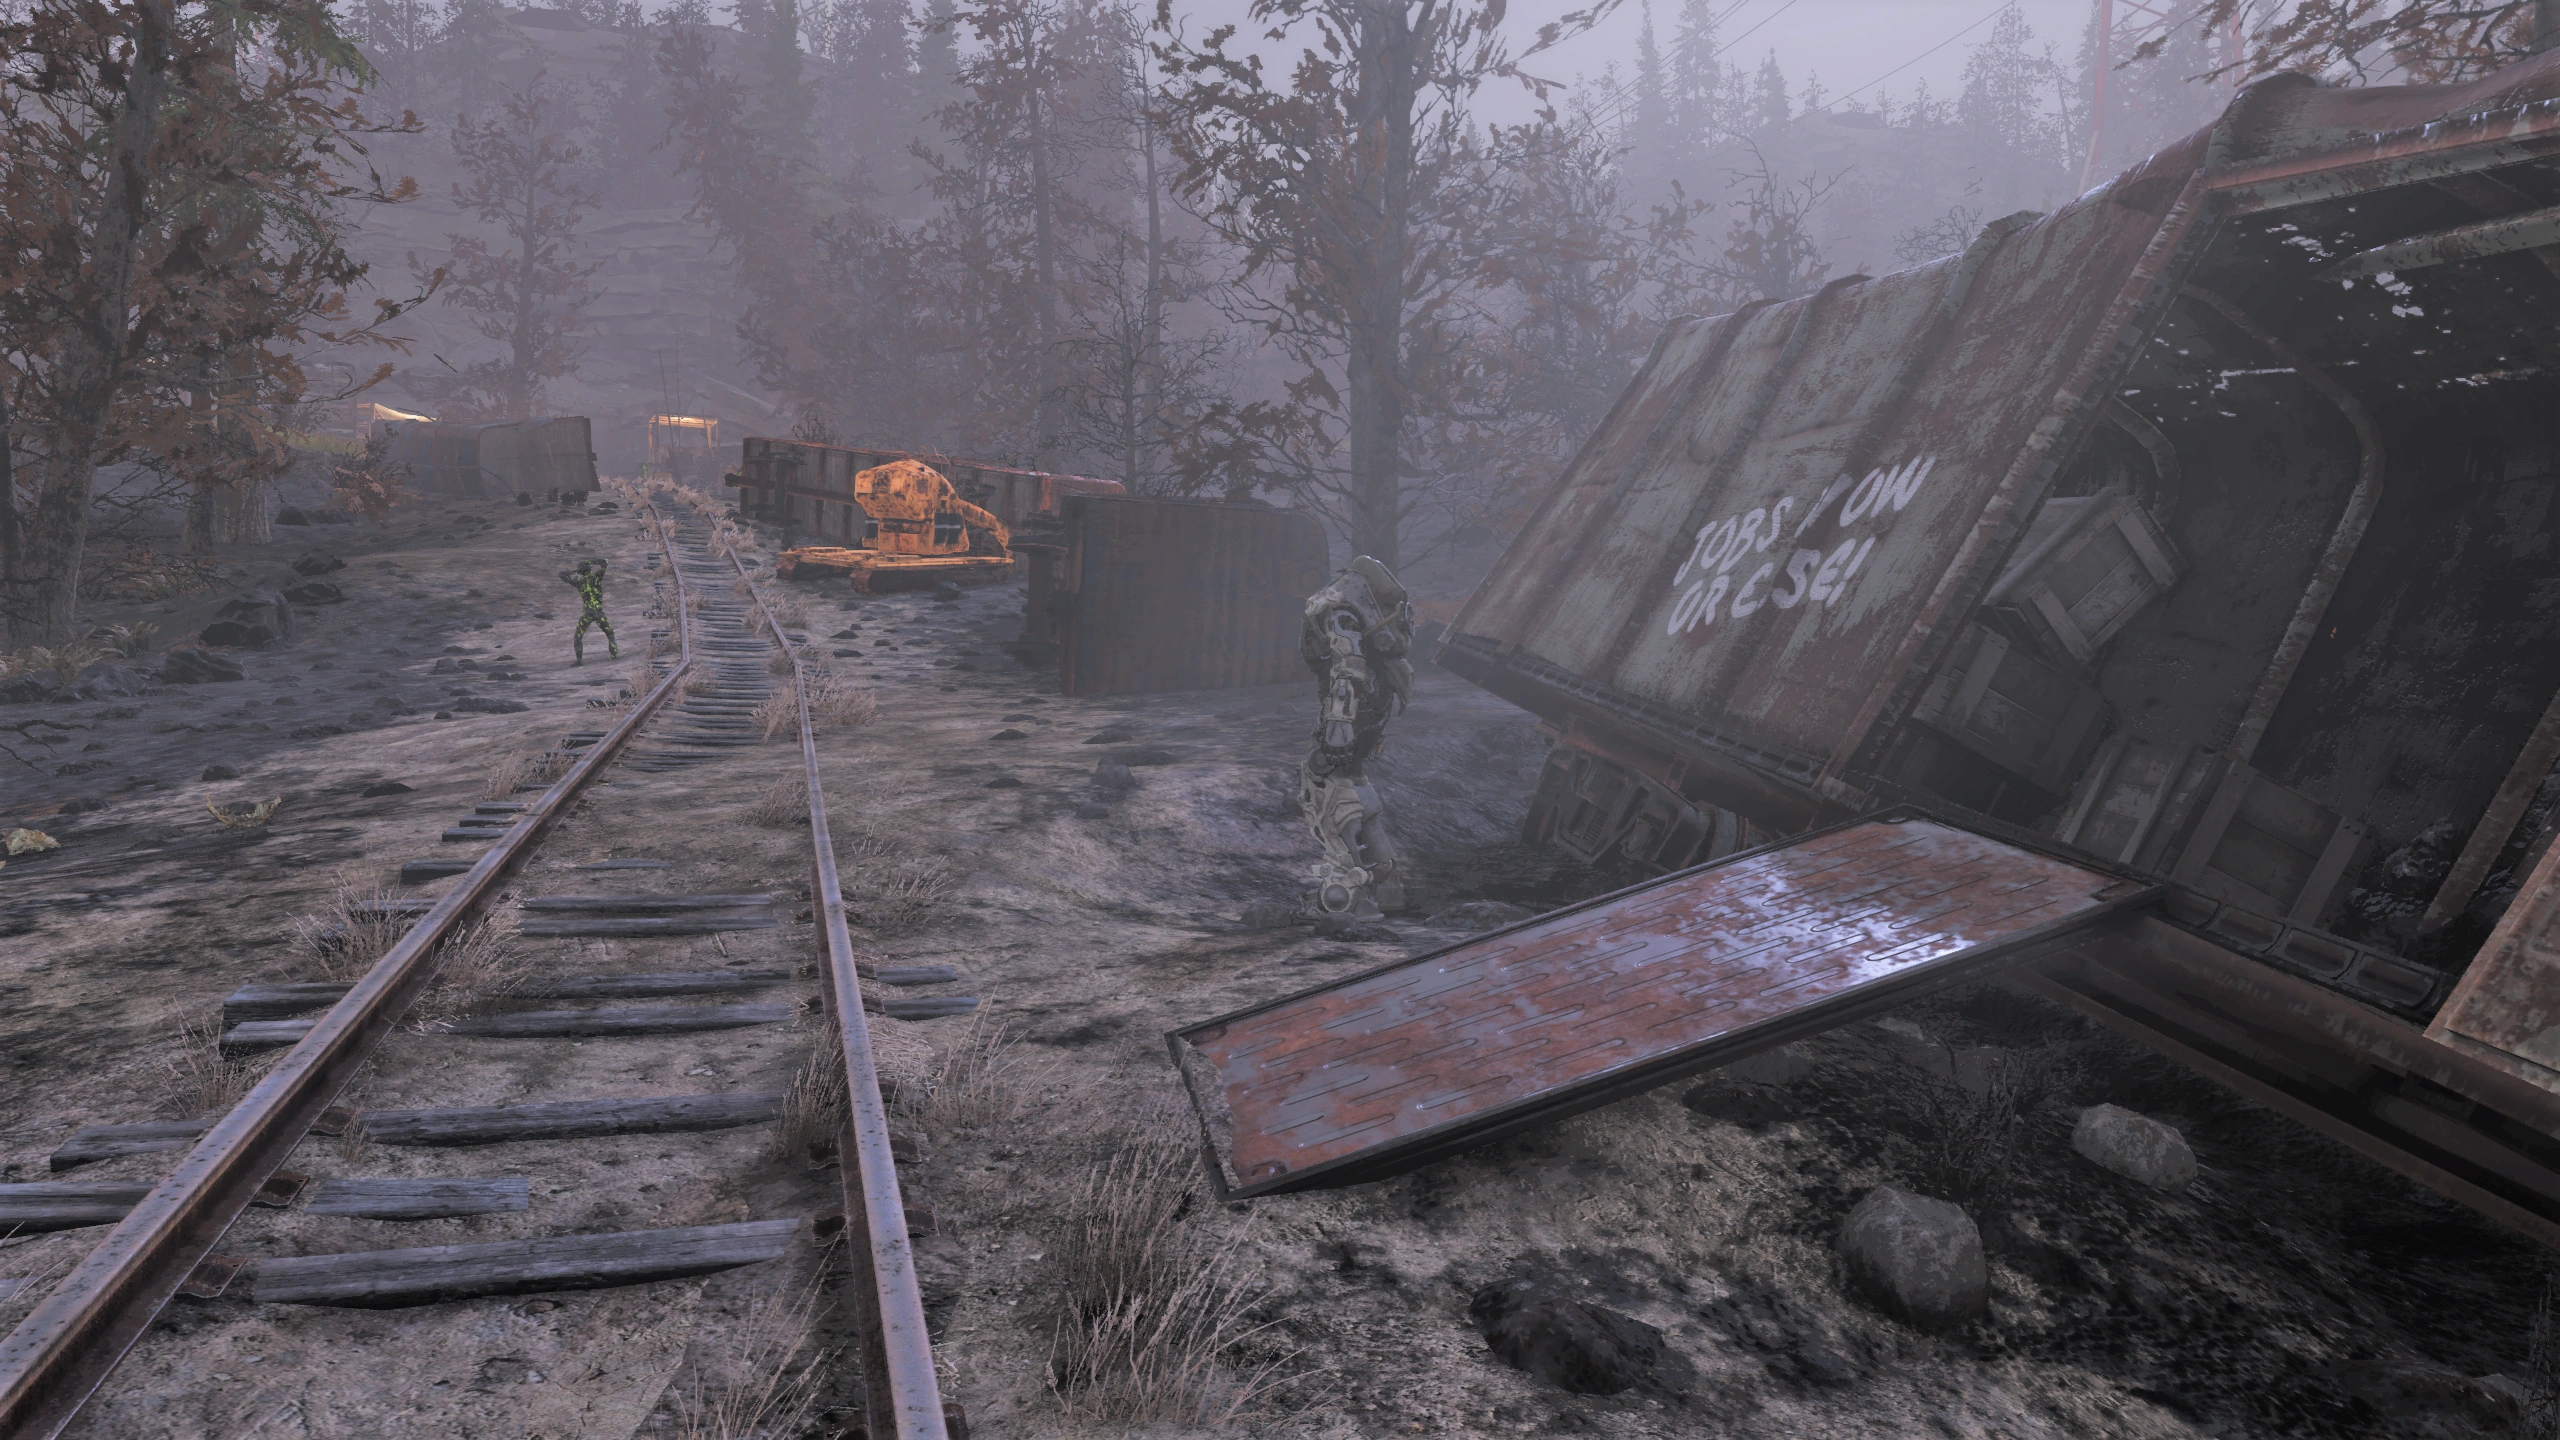
|
| Big Bend Tunnel | T-series | Located behind a locked door halfway down the tunnel that can only be opened with the door key. It is possible to access the locked area without the key by jumping on containers and then onto the catwalk over the tracks. The map image shows the west entrance in the Ash Heap. The tunnel can also be entered from the east in the Cranberry Bog. The two routes have about the same number of scorched. | 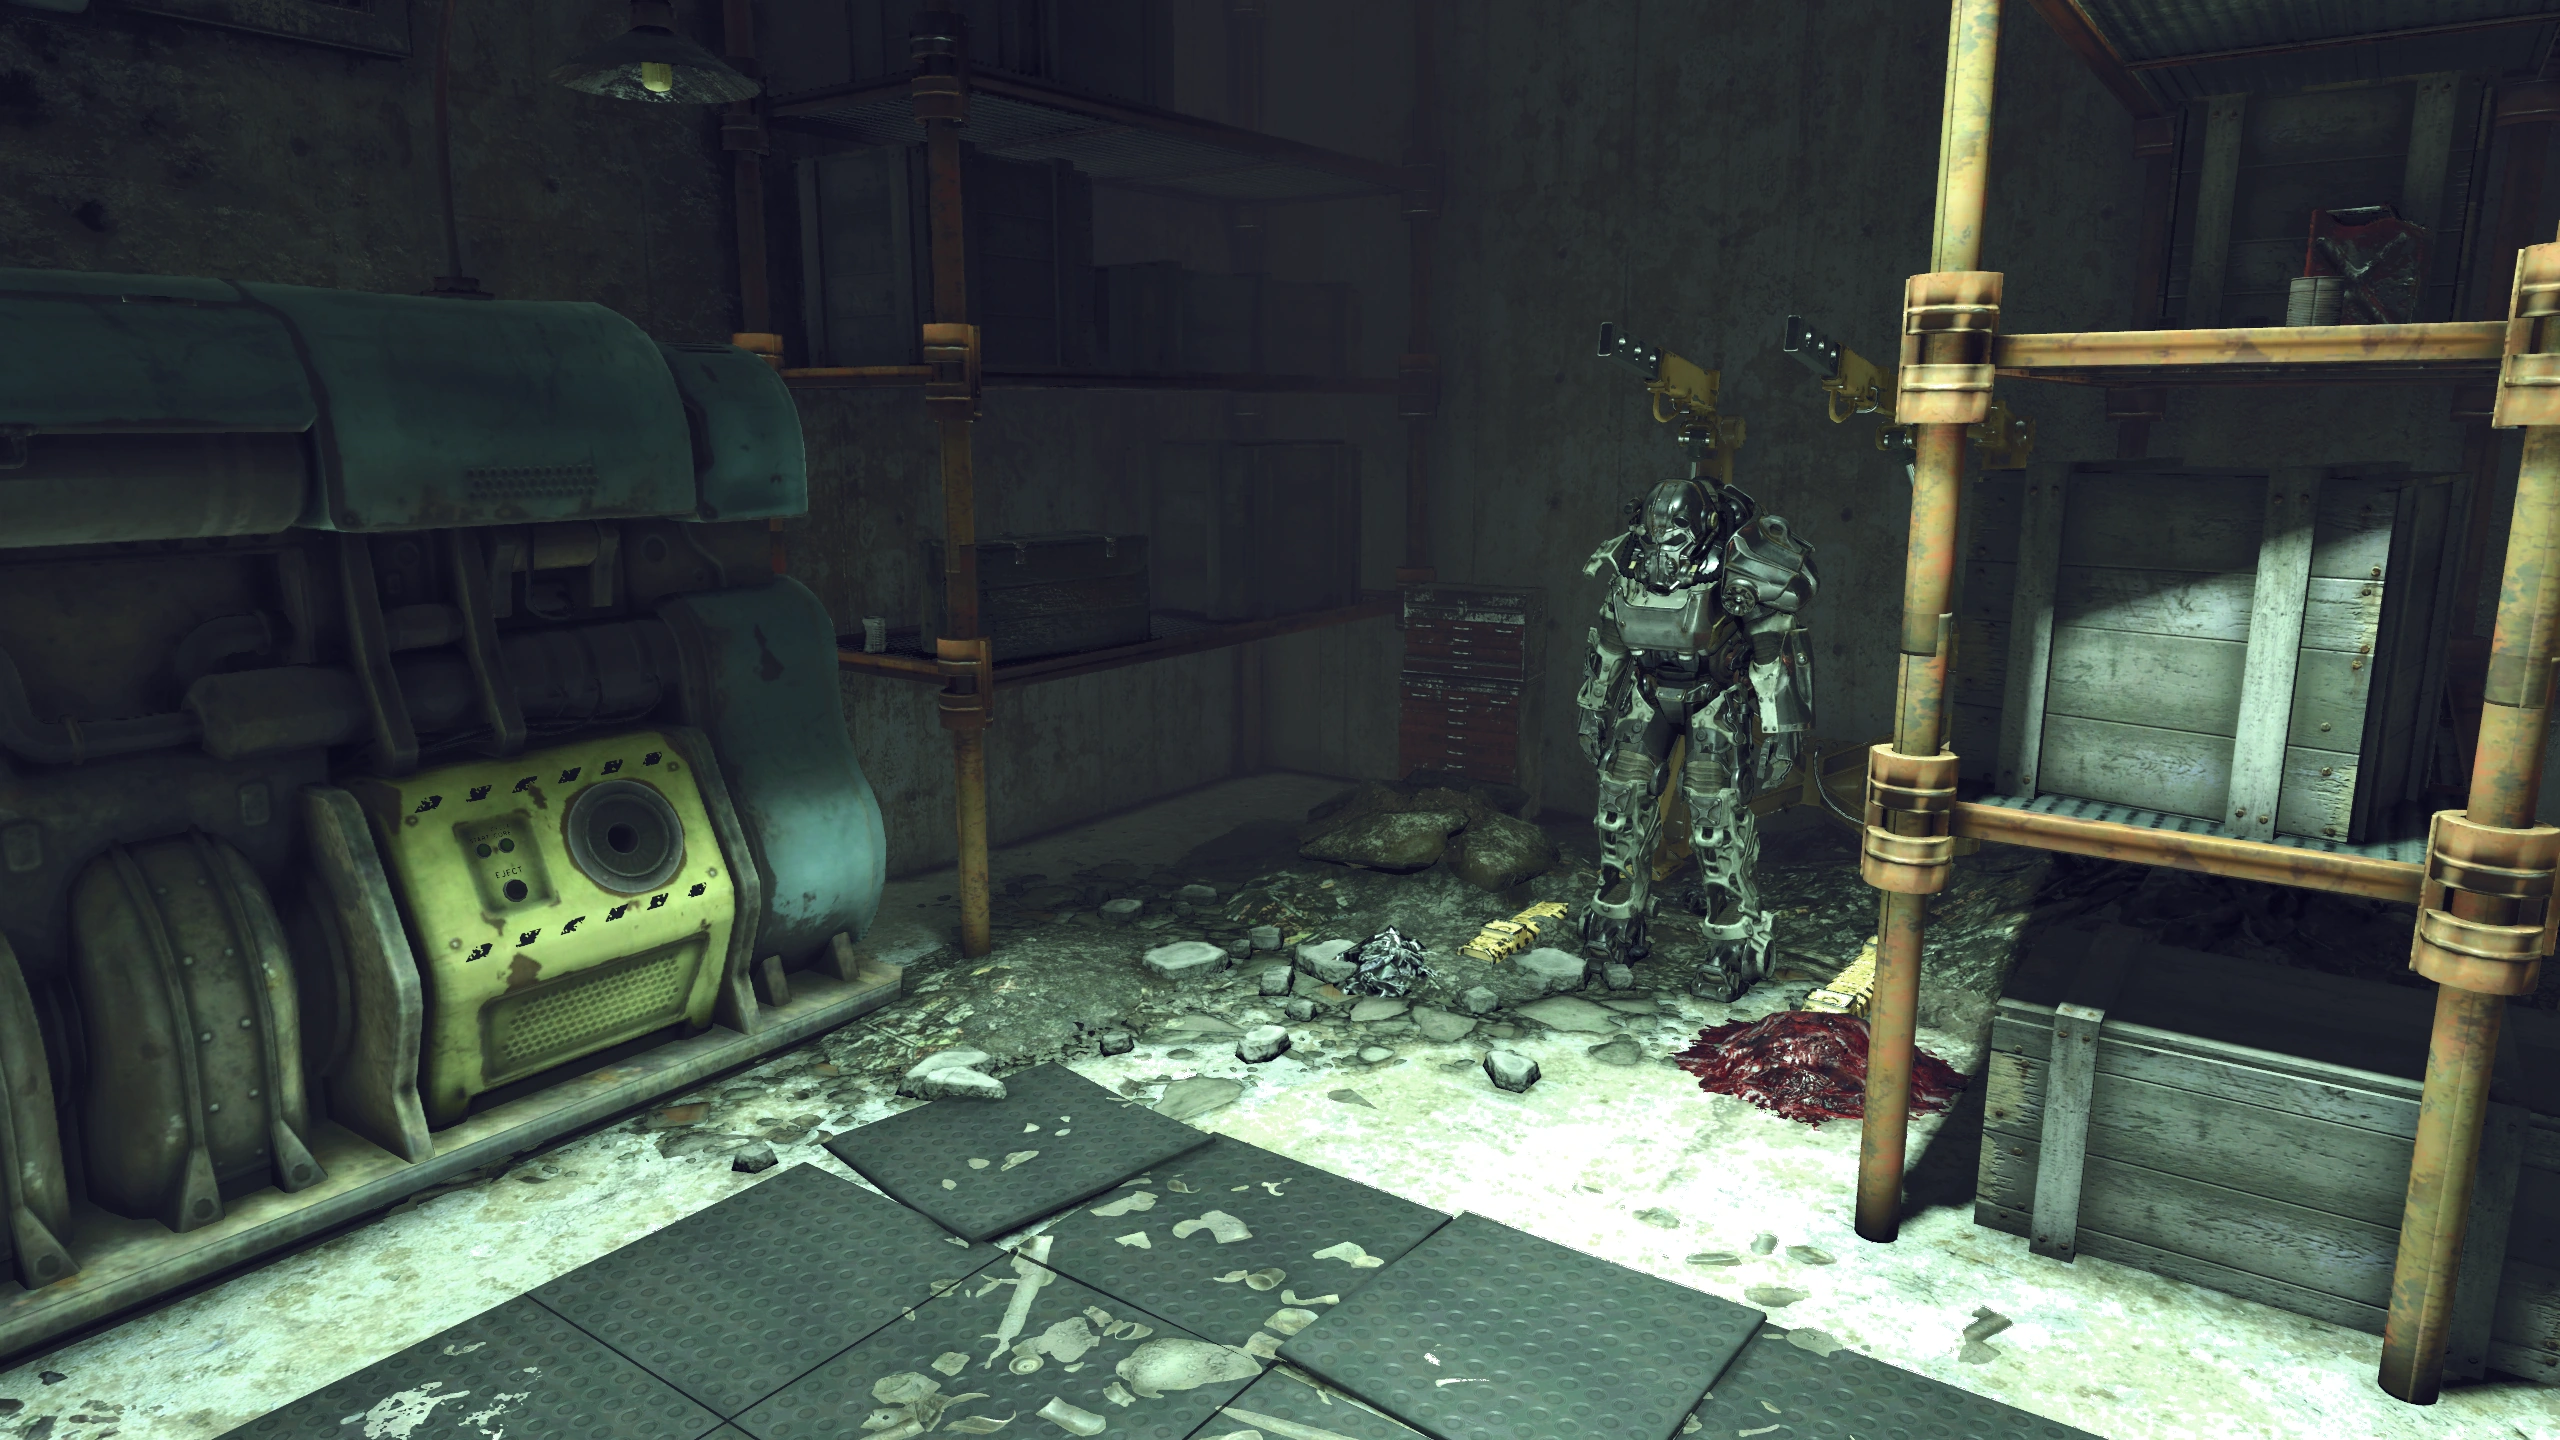
|
| Garrahan Mining HQ | T-series | Once inside, down the stairs, take the hall to the left, down more stairs. It is in the R&D Department at a power armor station. Two power armor pieces can also spawn on the counters in the middle of the room, one is shown in the image. This is also the location for the side quest Miner Miracles which gives plans for Excavator power armor. | 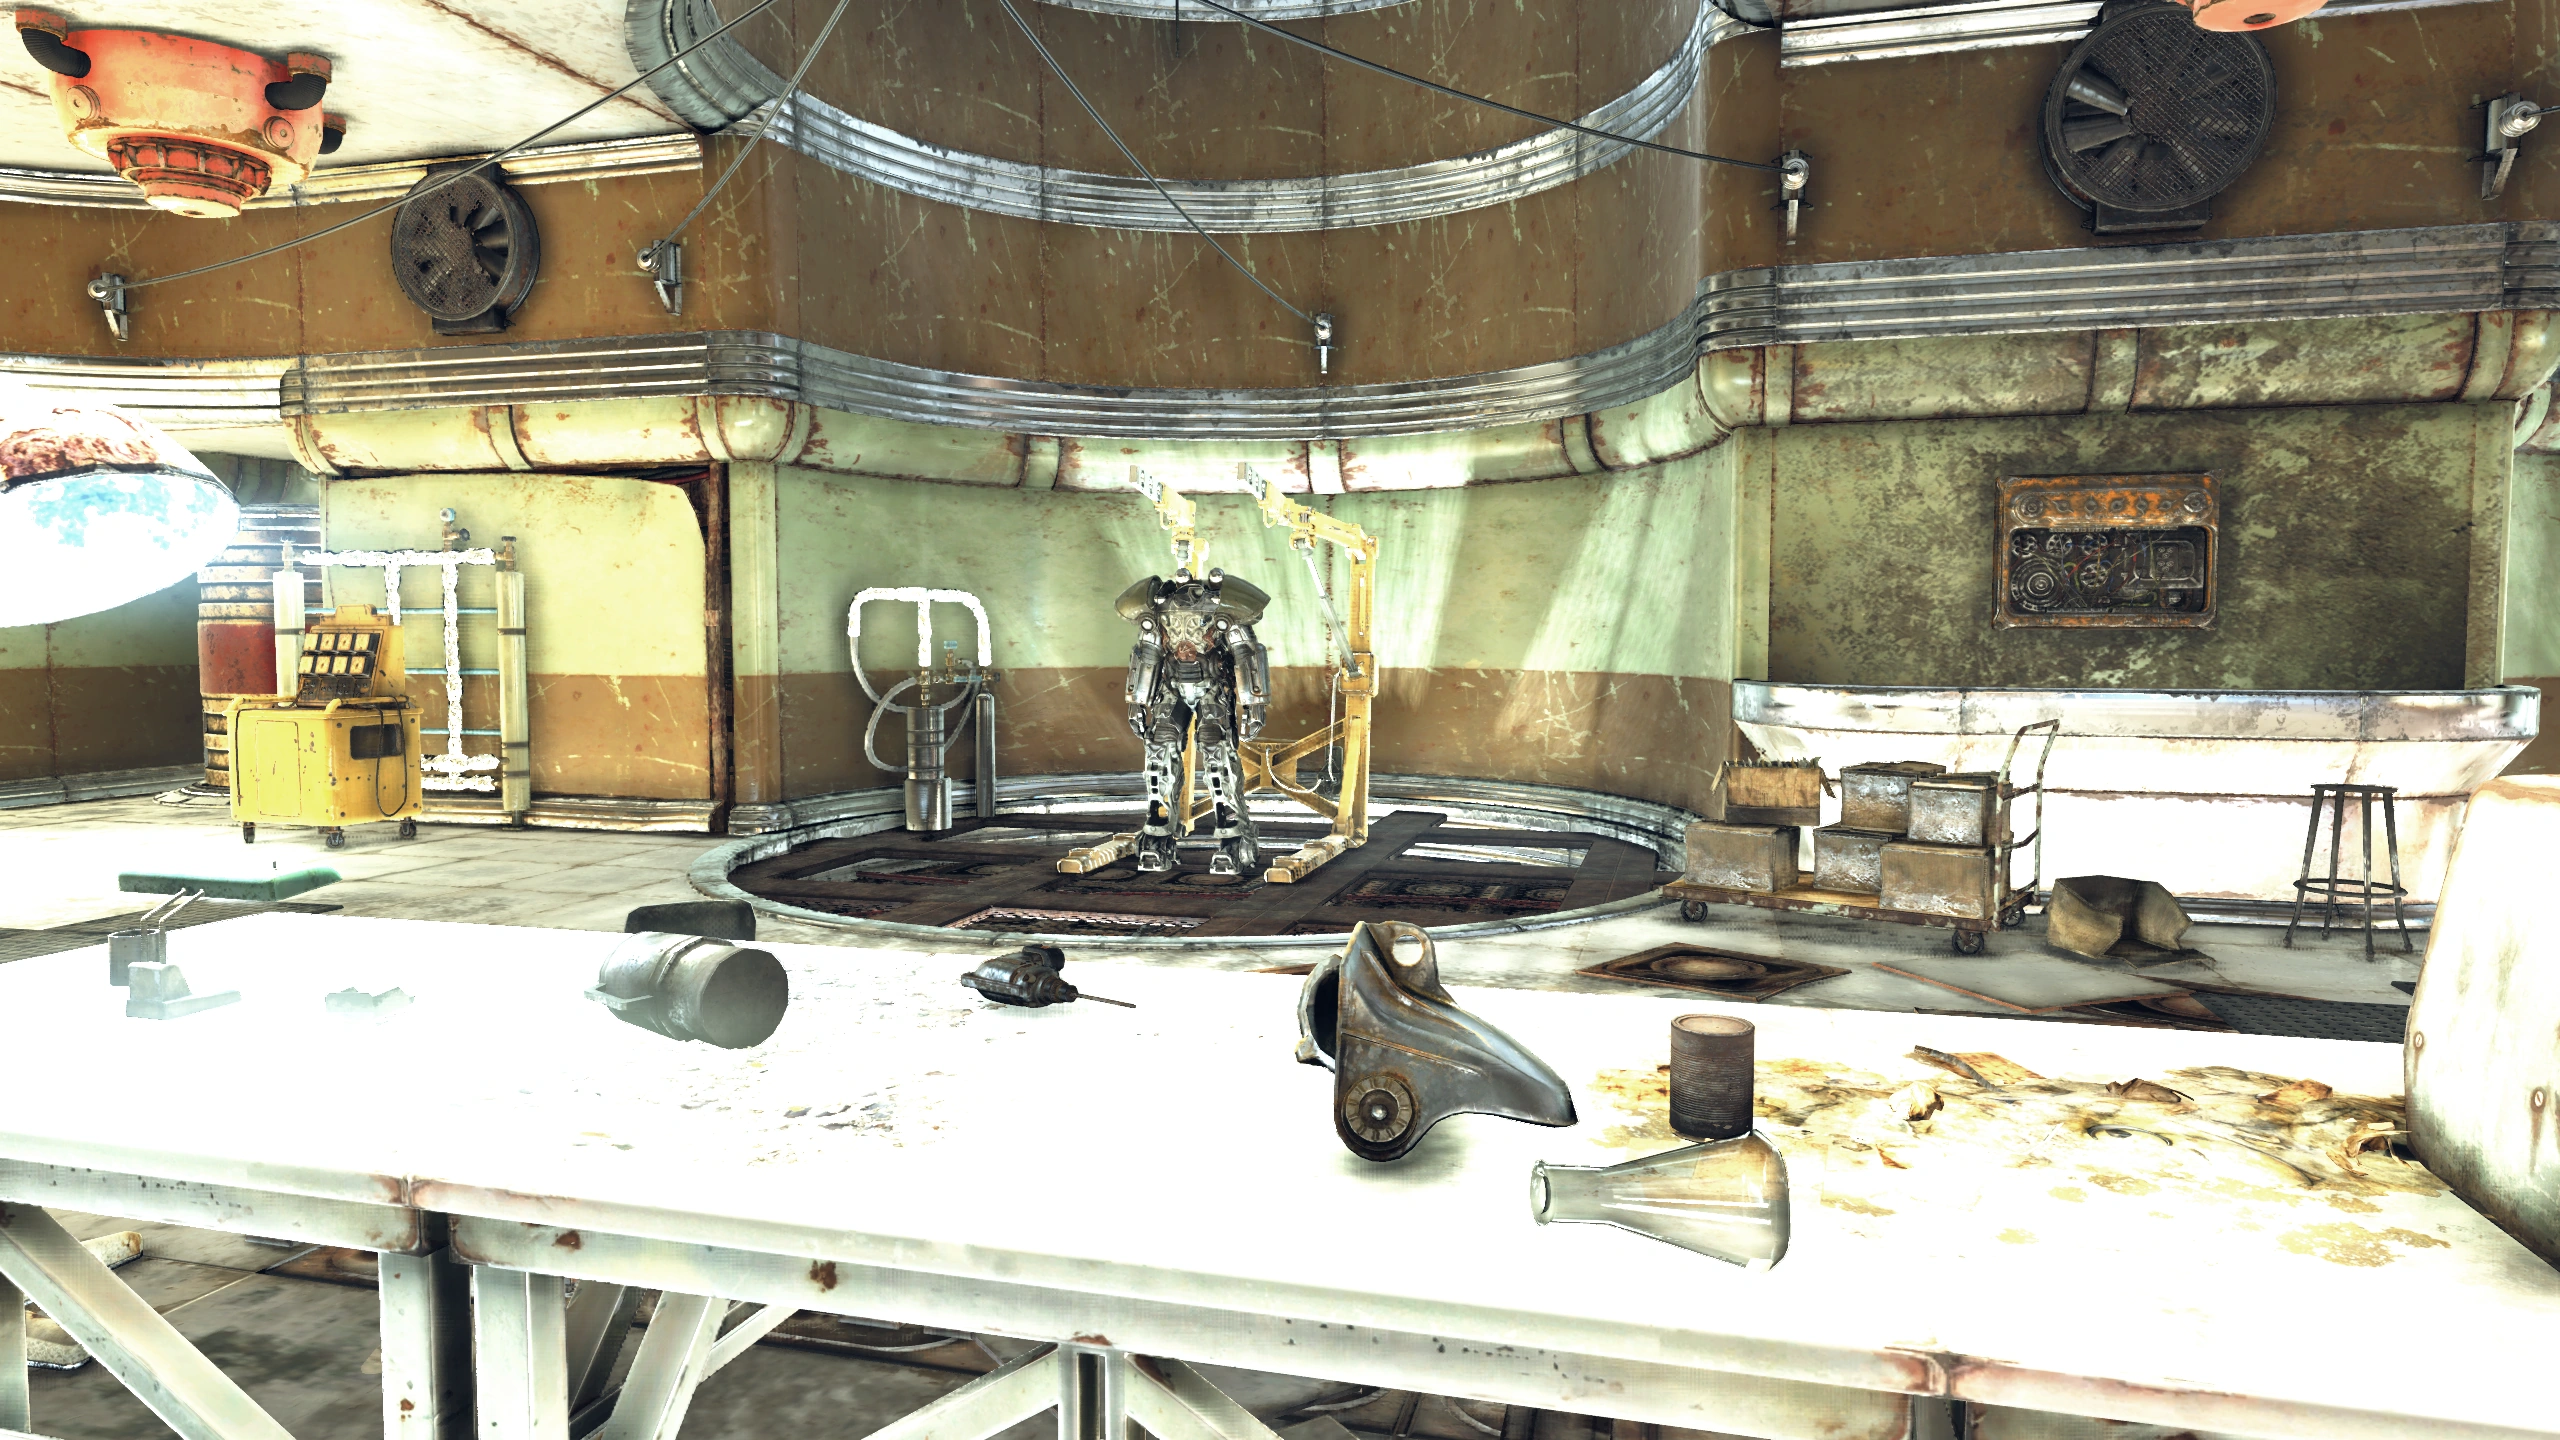
|
The Mire
North Mire
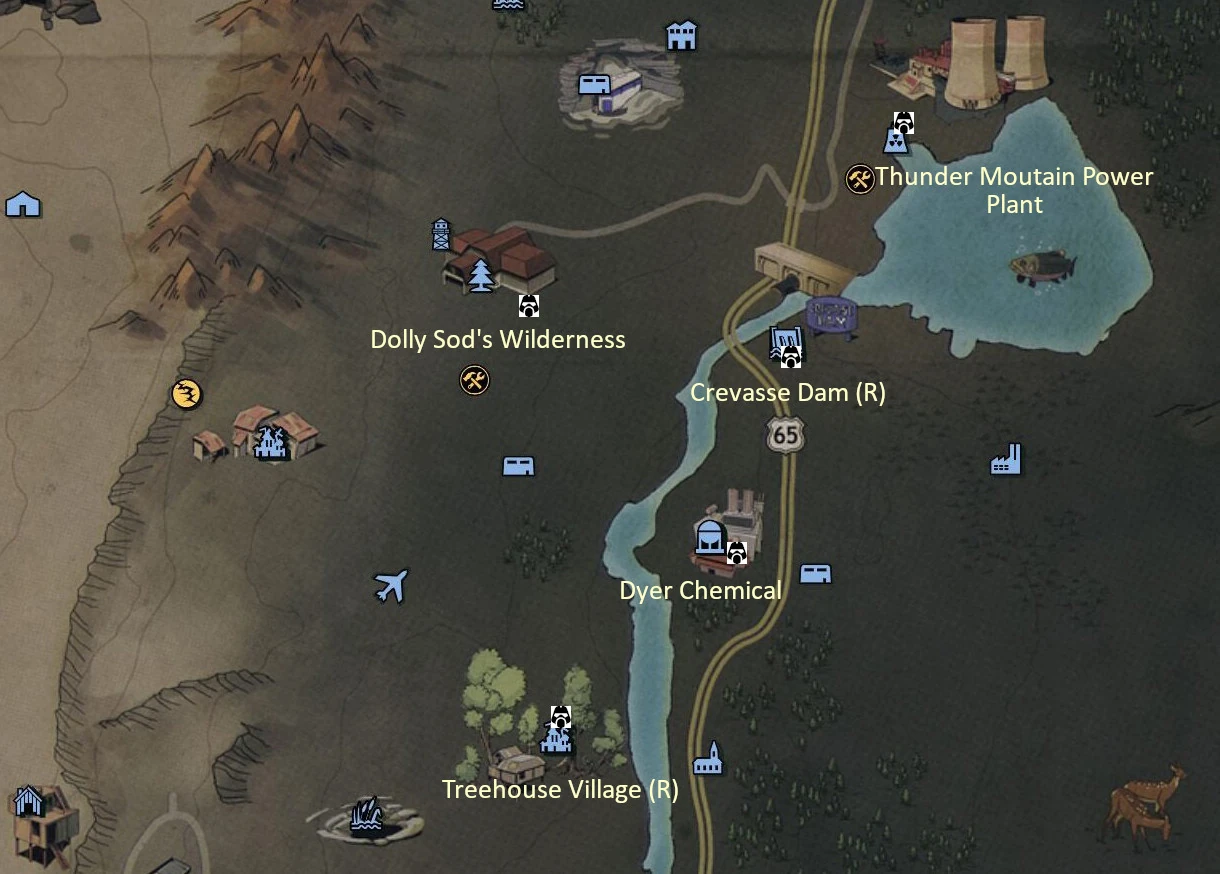

| Location | Type | Description | Image |
|---|---|---|---|
| Thunder Mountain power plant | T-series | Enter the door labeled "Loading Dock" on the southeast side of the main building, go to the left. Armor is at one of the two power armor stations. Another single piece of power armor can spawn on a table in one of the tents in the south part of the power plant yard. | 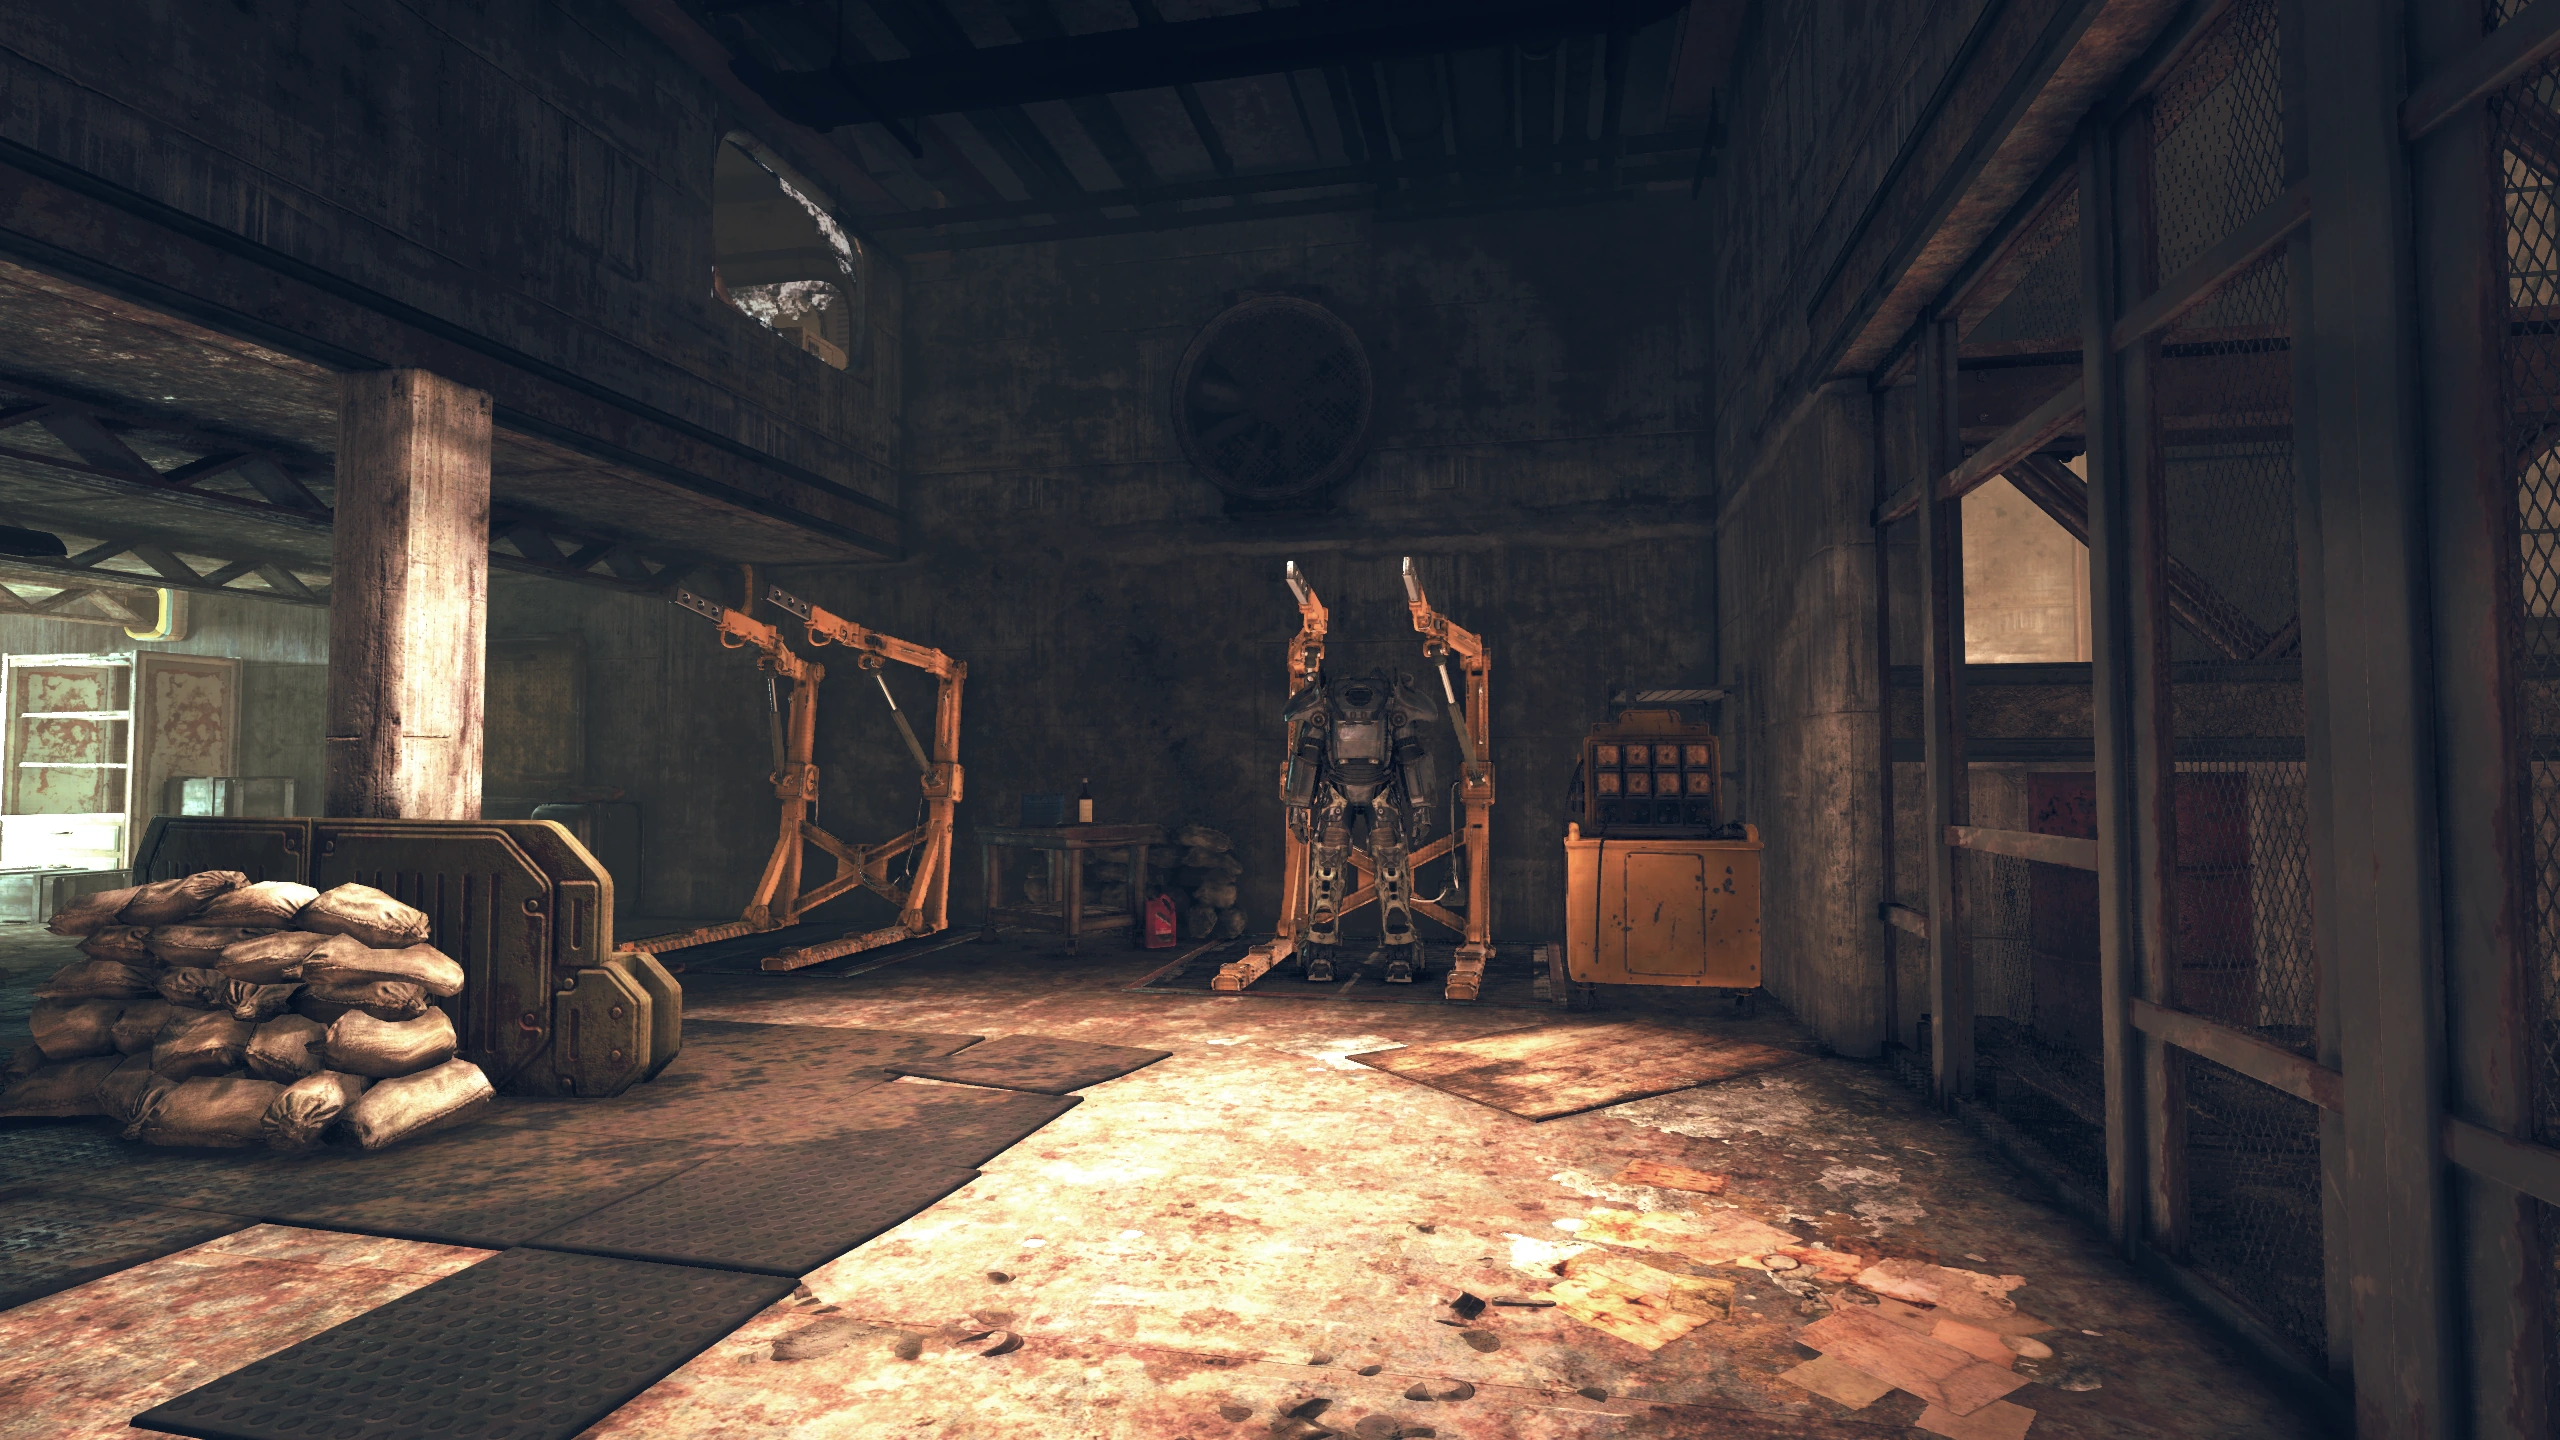
|
| Dolly Sods wilderness | T-series | From the back porch of the east-most cabin, look to the southeast. You should see a pickup truck immediately beside the porch and a stump about 18 steps away. Go southeast past the stump and then past the firepit partially hidden in the grass. The armor is just a bit farther down the hill, about 16 steps from the stump. | 
|
| Crevasse Dam | Raider | In the truck trailer beside the buildings with a skill 2 lock. The key can be found on a body on the roof of the building closest to the road. | 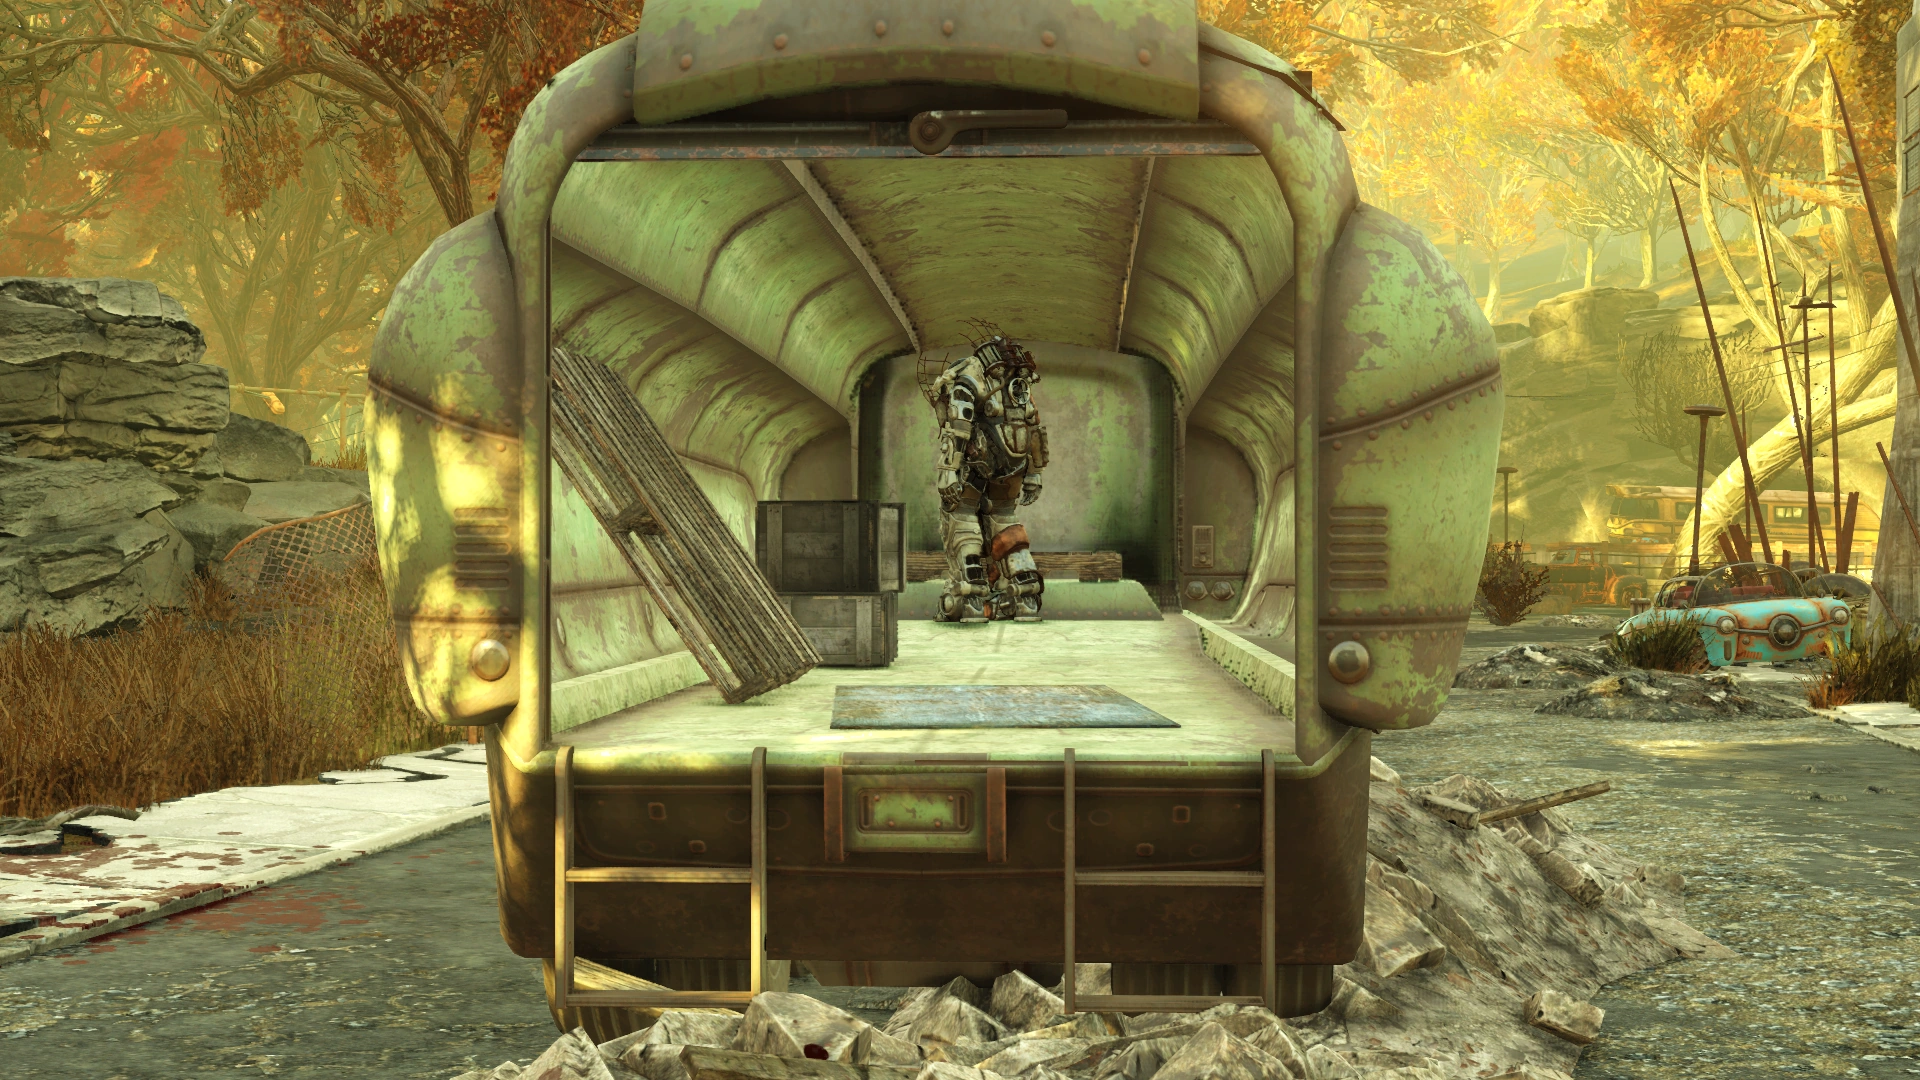
|
| Dyer Chemical Sewers | T-Series | Entrance to the sewers requires a key card found in the side quest Tracking Unknowns. There are three entrances to the sewers. Any of them can be used but the most convenient is in the building in the southeast corner of the complex. There is a generator with a fusion core further down in the sewers and another between buildings in the middle of the Dyer Chemical complex. | 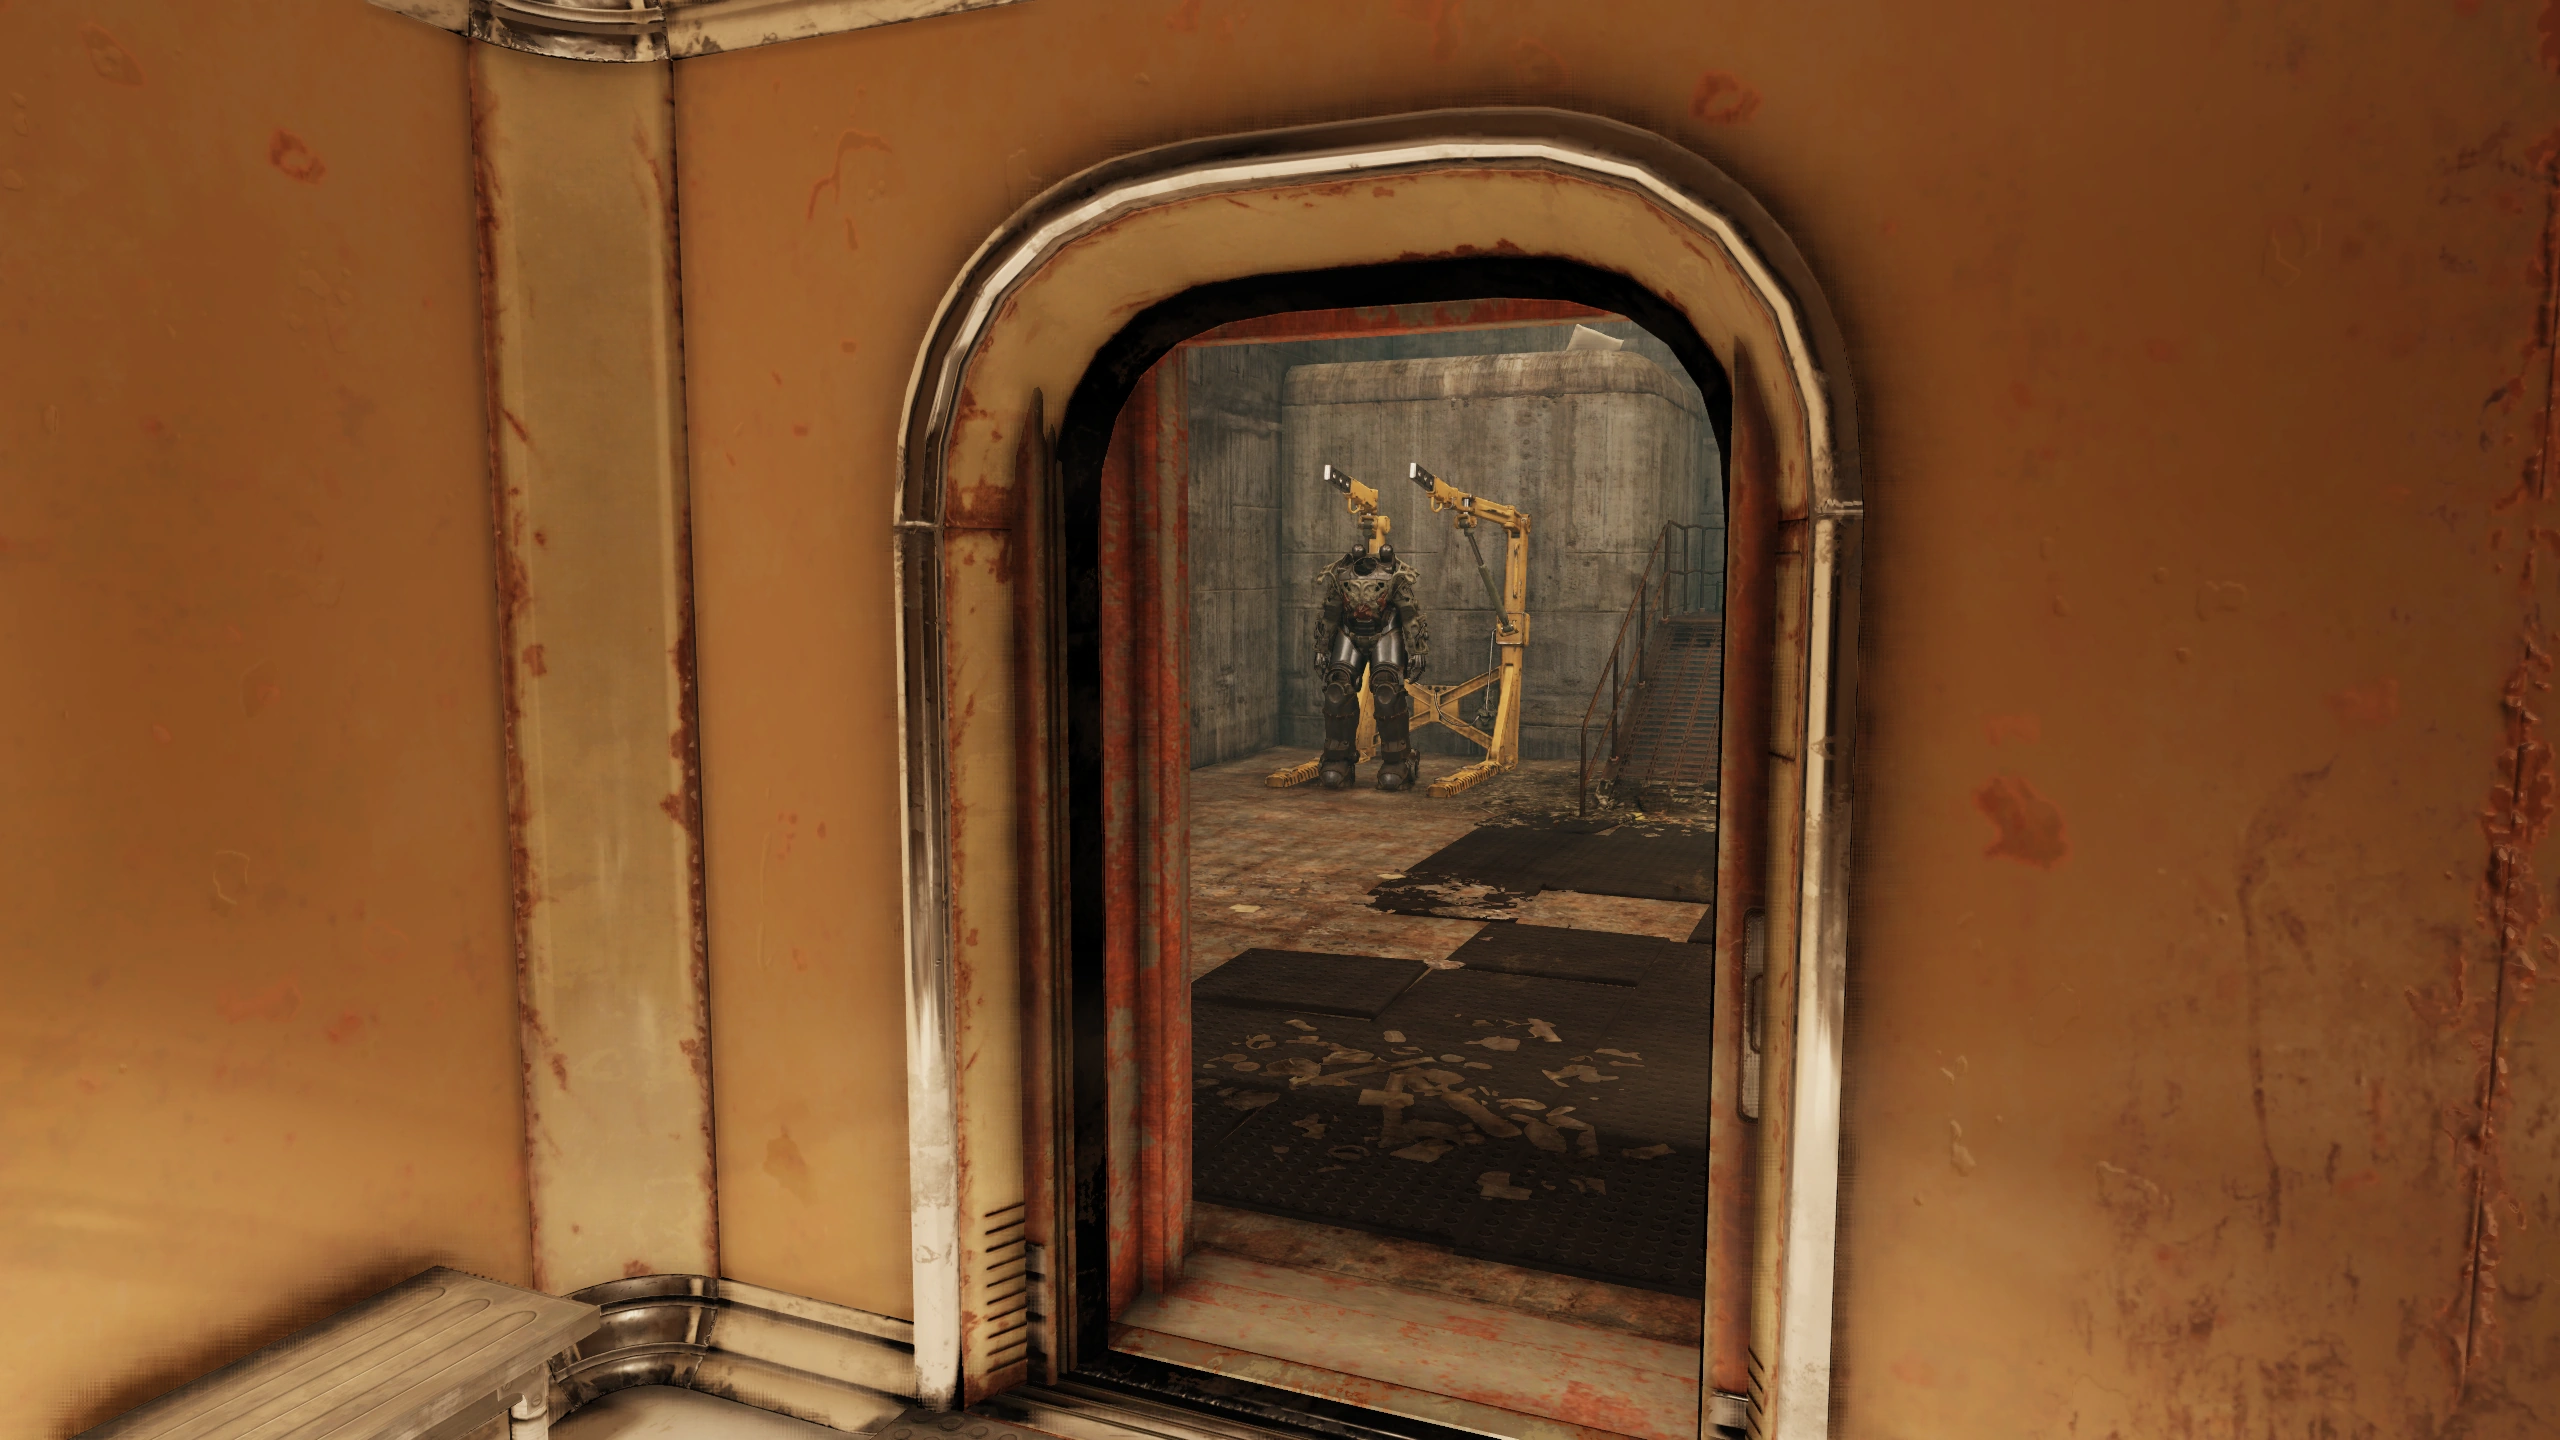
|
| Treehouse village | Raider | In the treehouse that has the red dump truck used as a platform in the stairs. A fusion core can spawn on a shelf in another of the treehouses. | 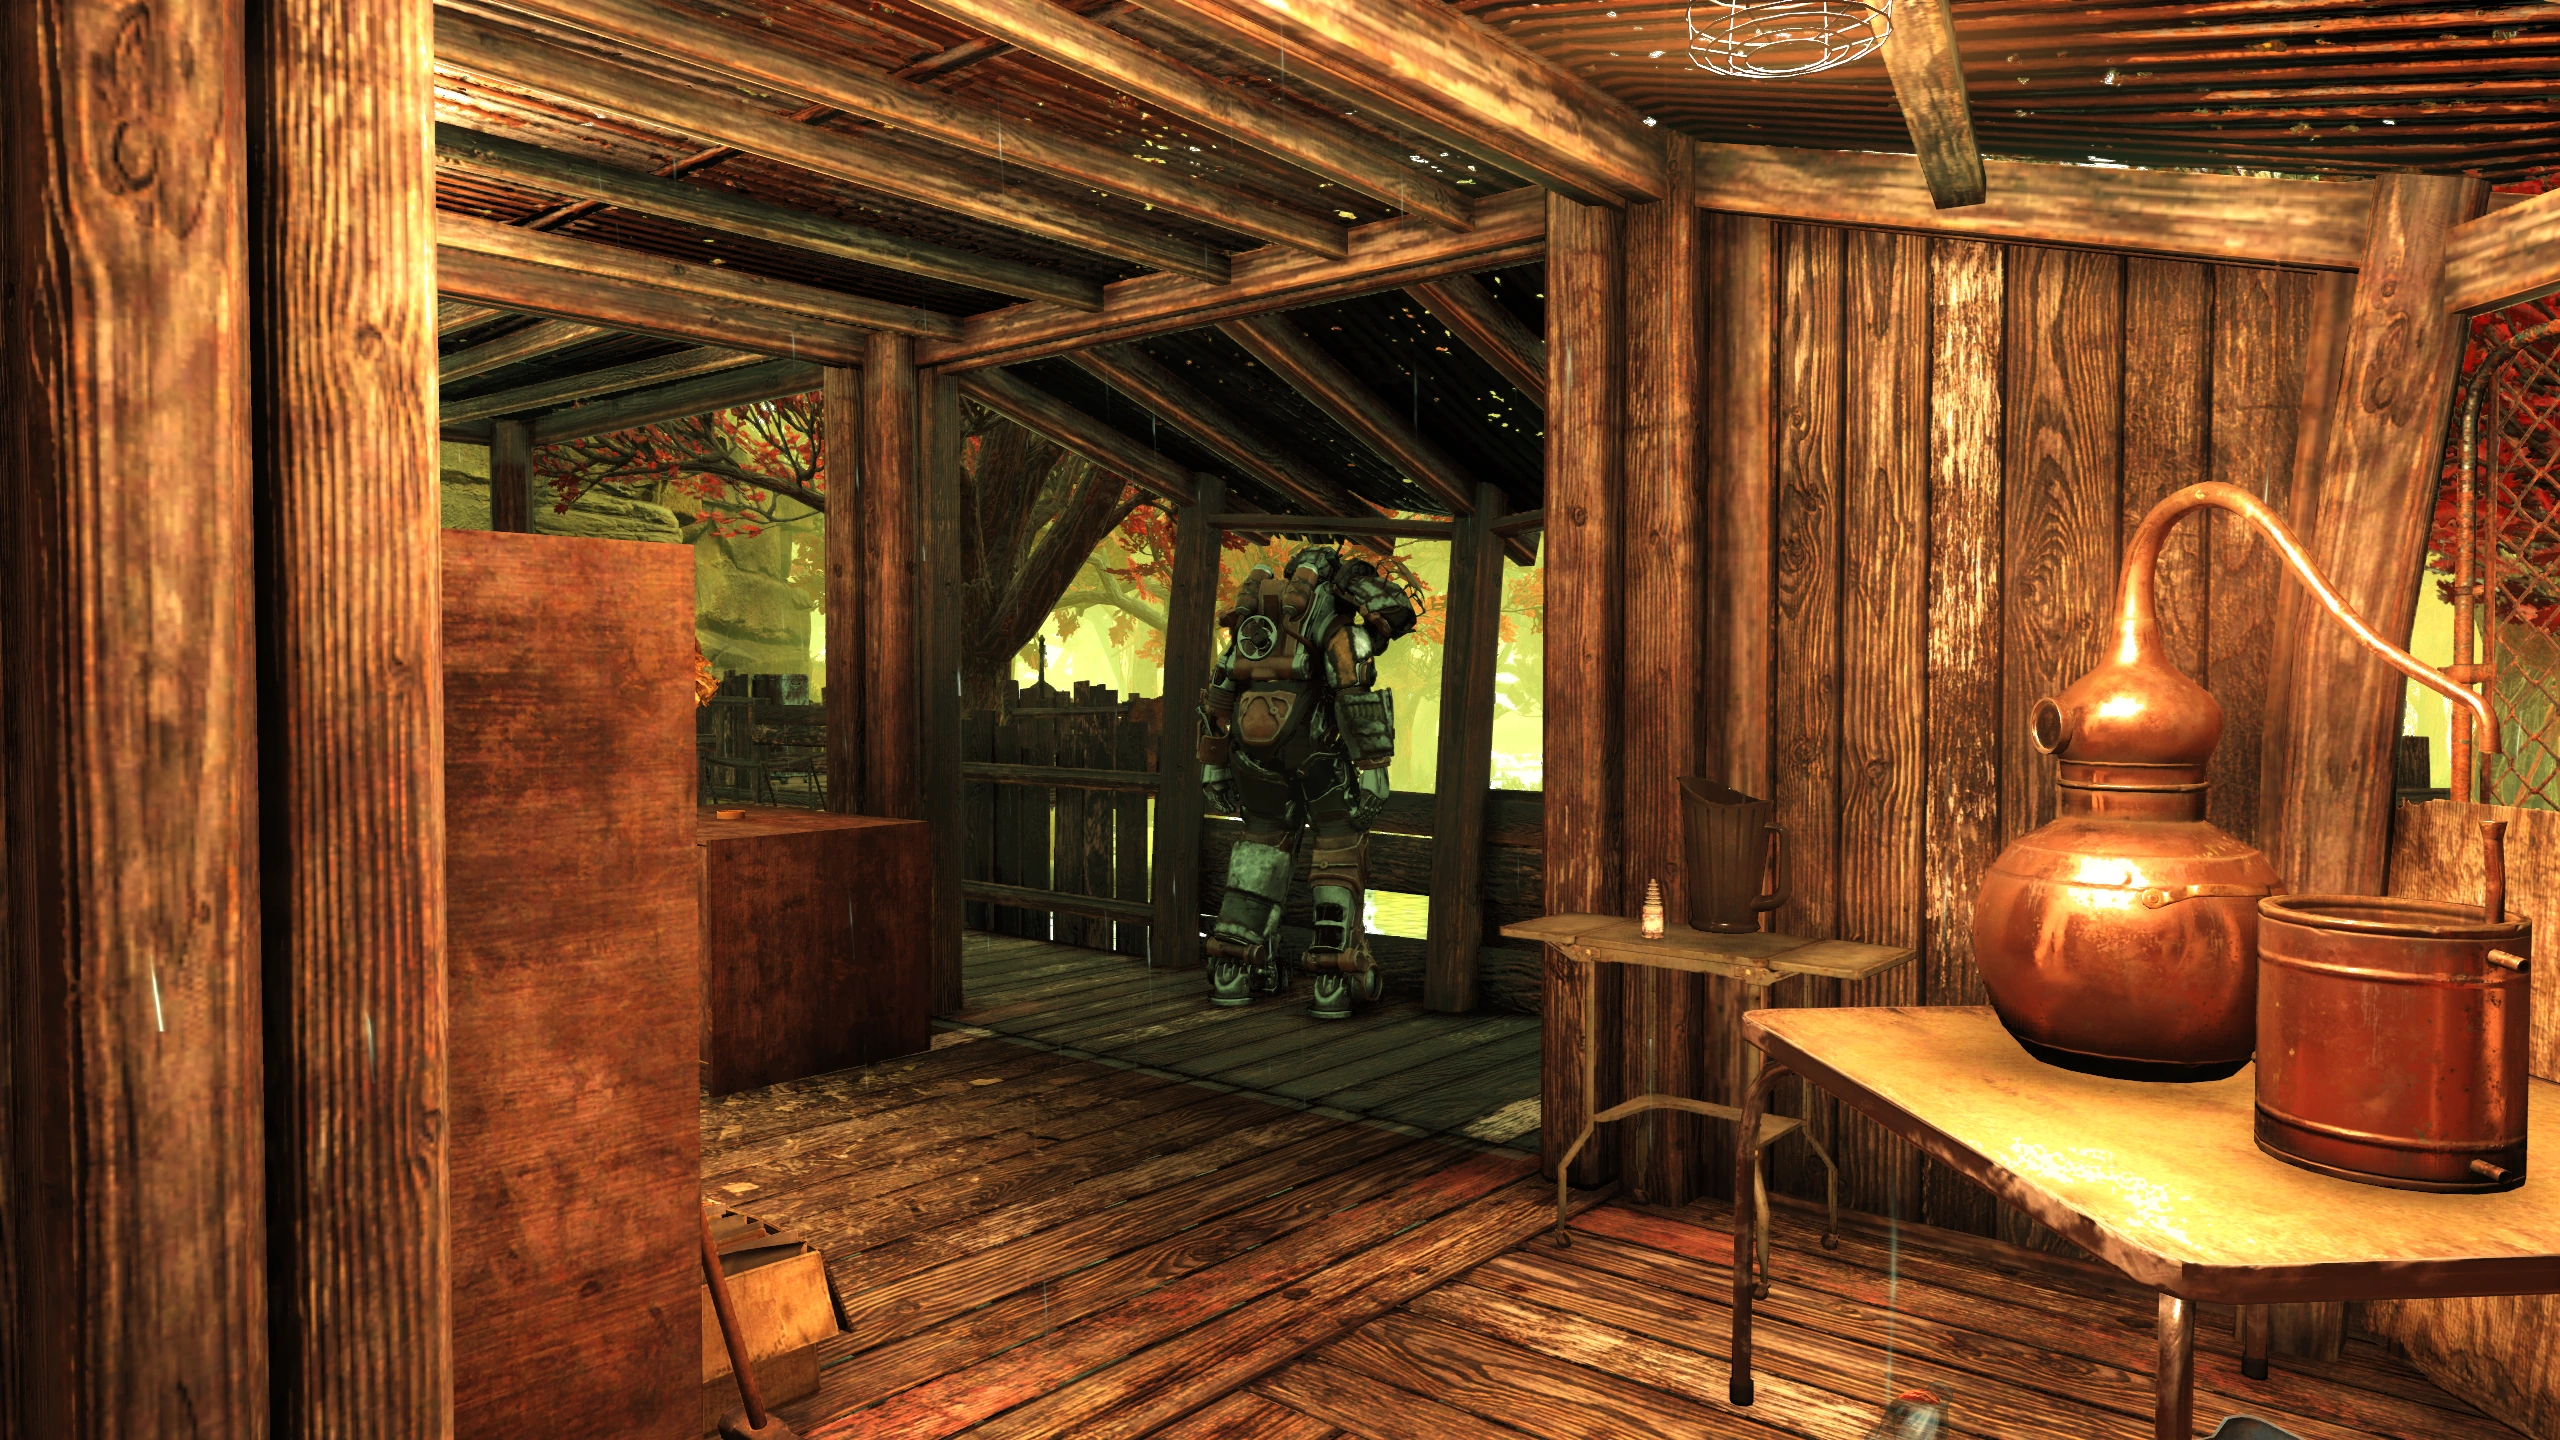
|
South Mire
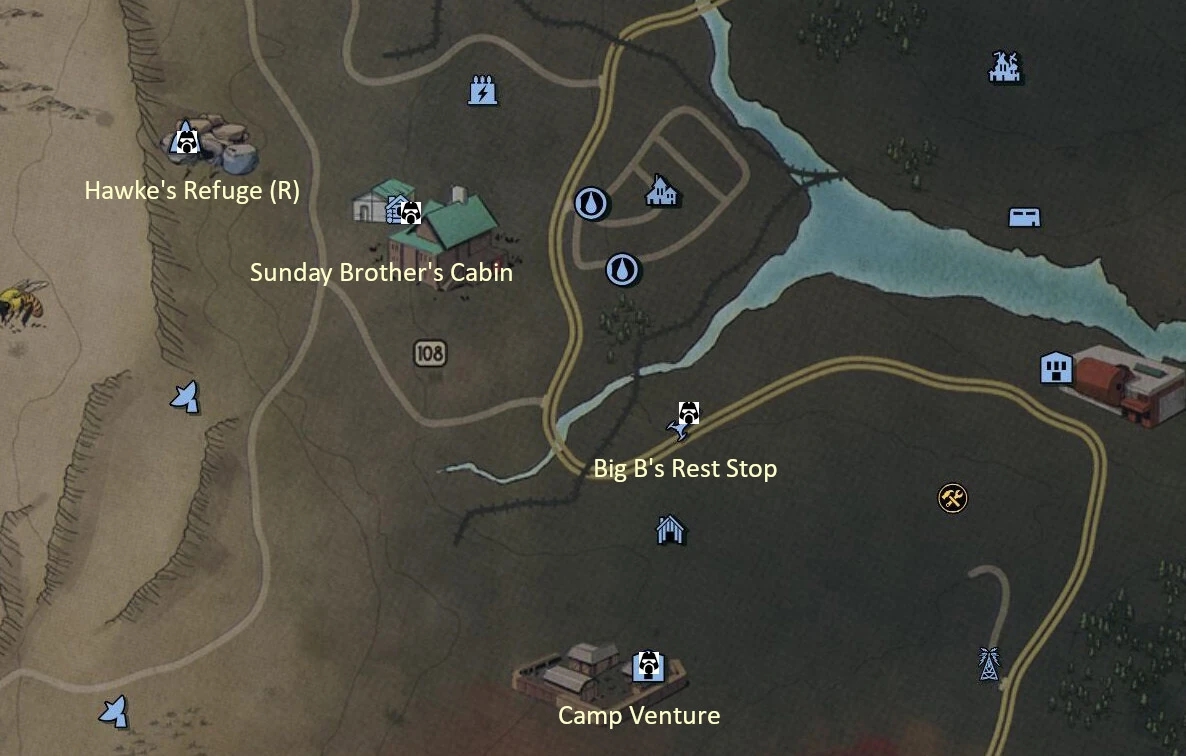

| Location | Type | Description | Image |
|---|---|---|---|
| Hawke's Refuge | Raider | On a raised walkway in the large well lit room. A fusion core can spawn on a box on the same walkway; another can spawn on a table down the stairs to the right from the raider shack in the image. | 
|
| Sunday Brothers' cabin | T-Series | In the barn next to the house | 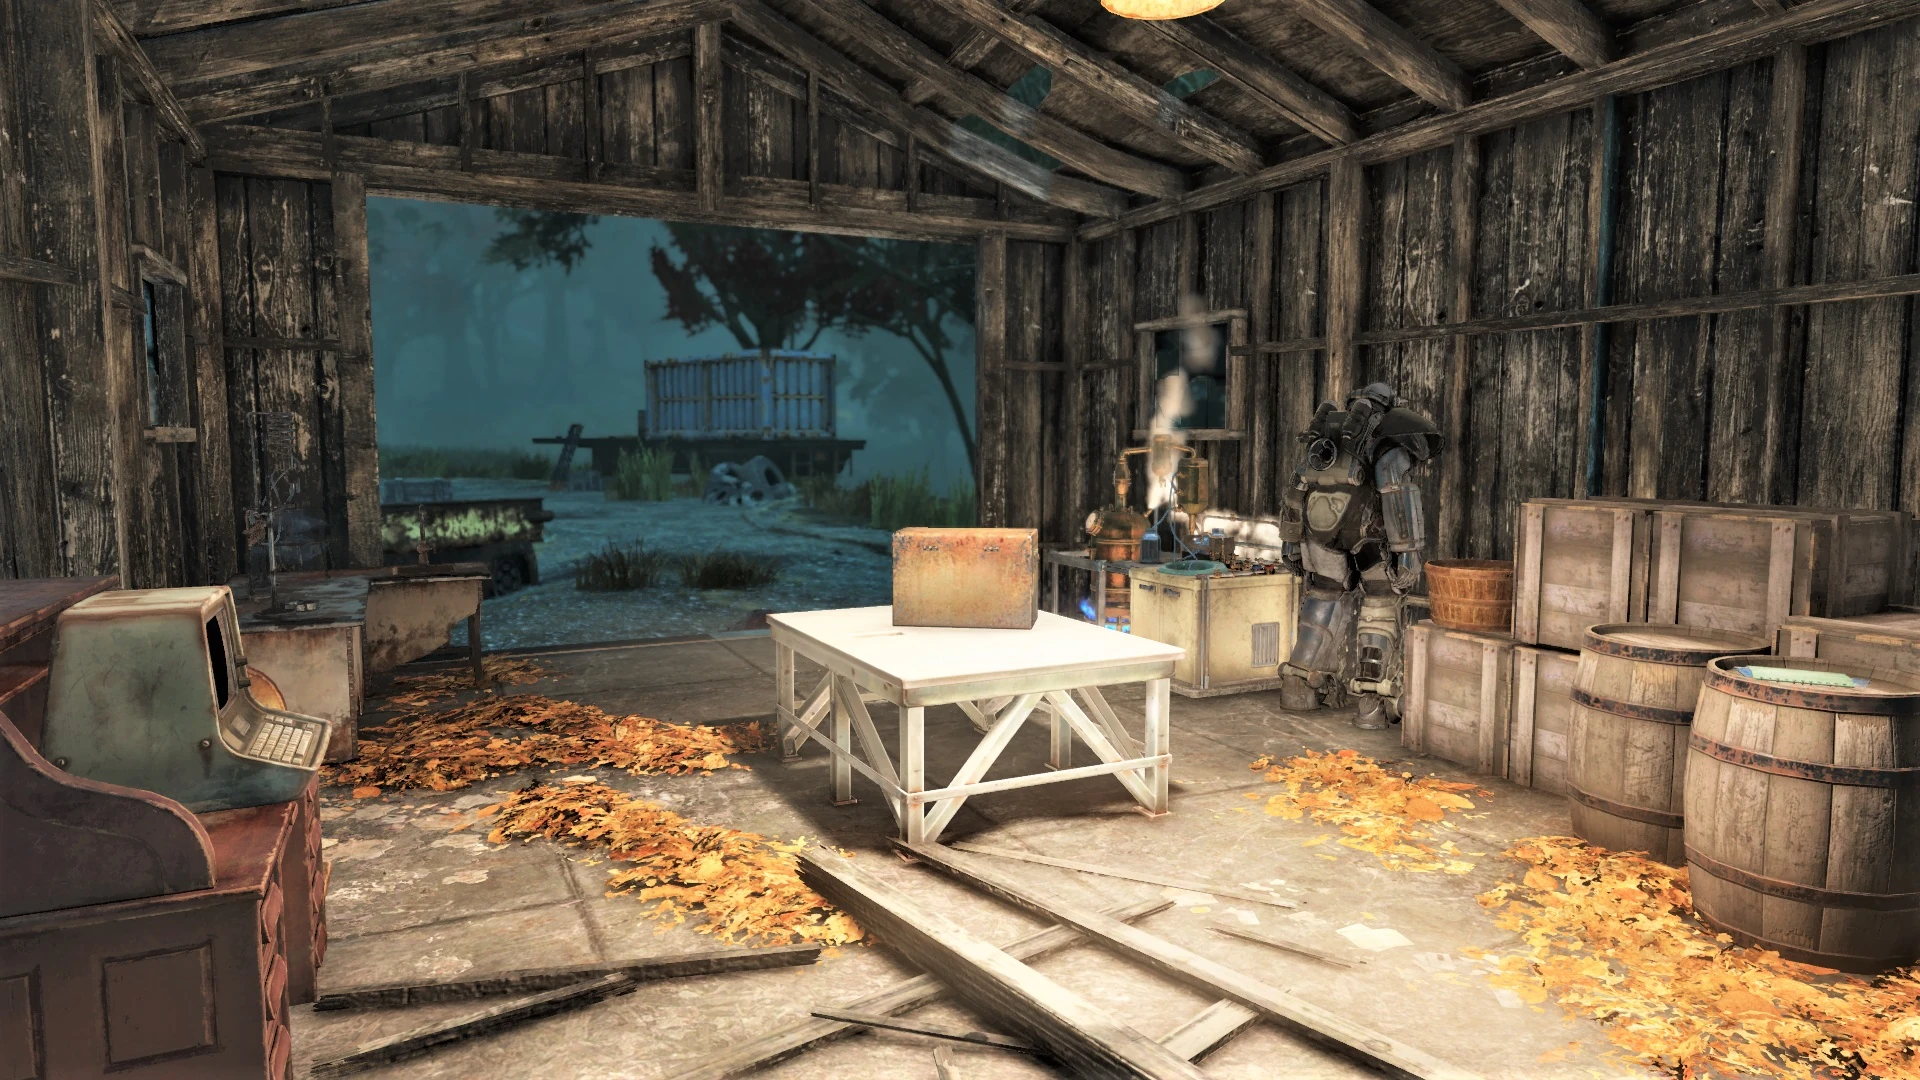
|
| Big B's Rest Stop | T-series | Behind the building at a power armor station. | 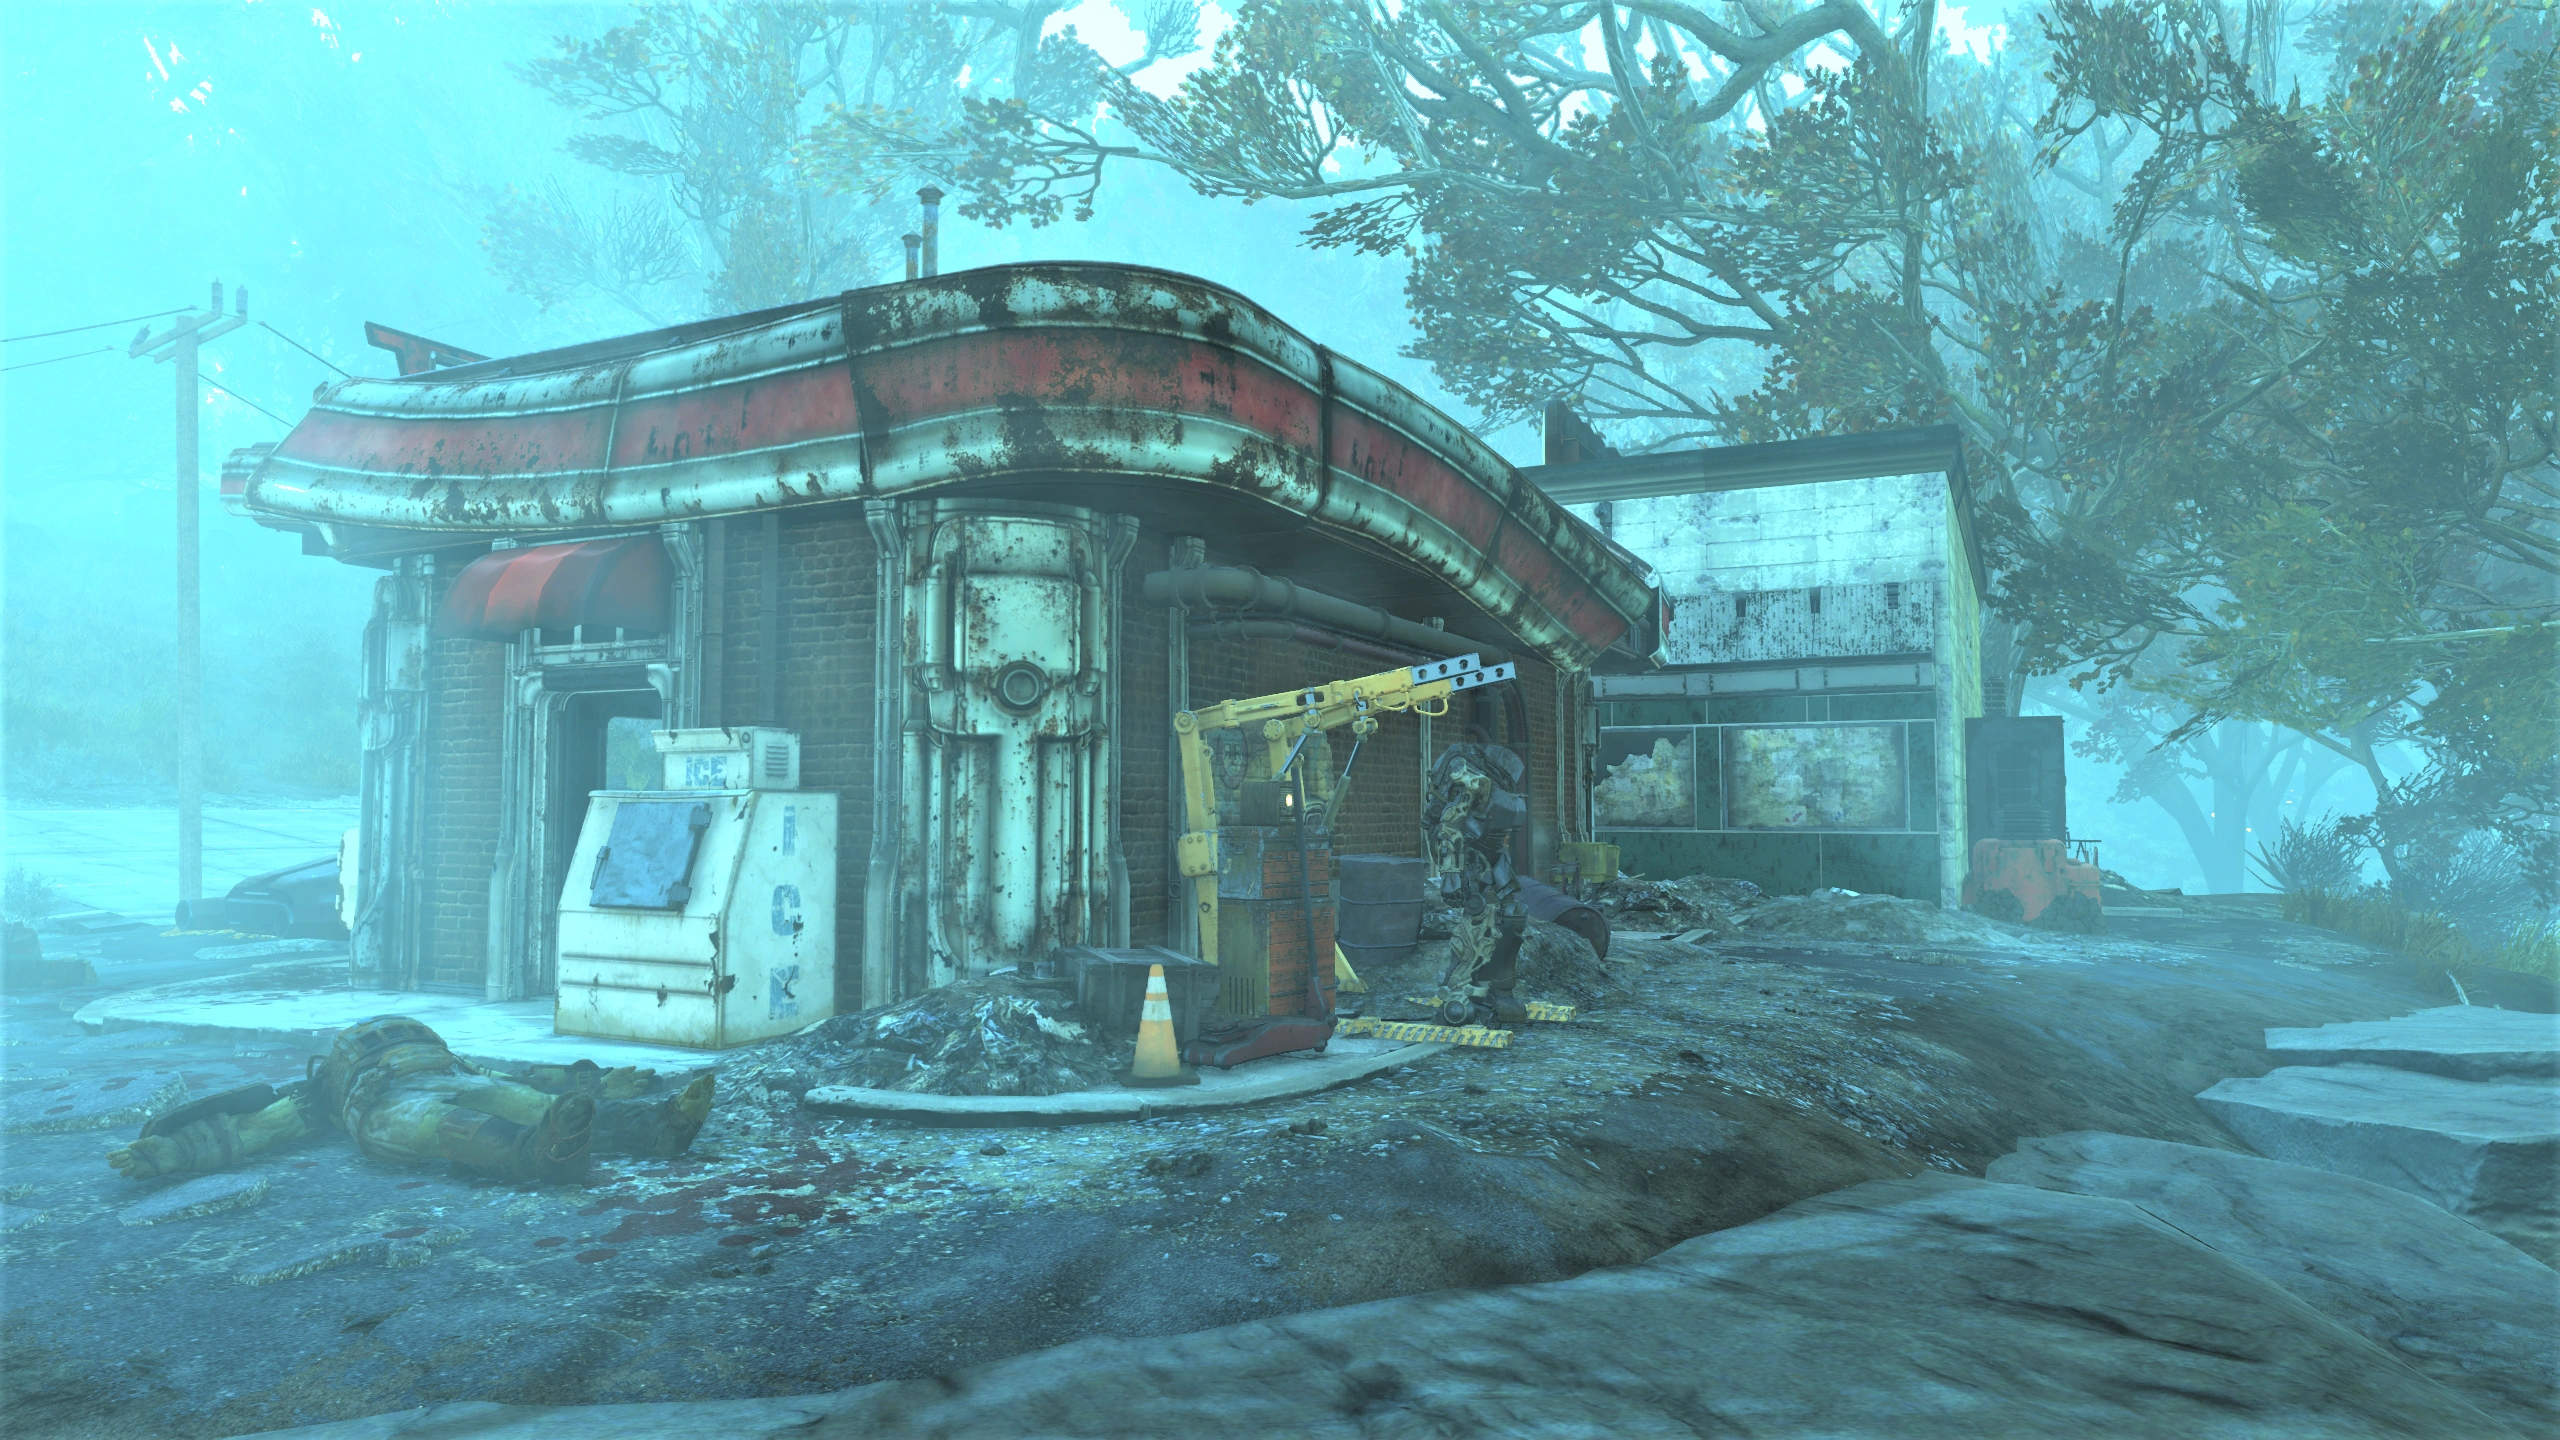
|
| Camp Venture | T-Series | In the southeast corner of the metal wall enclosed compound at one of the two power armor stations. | 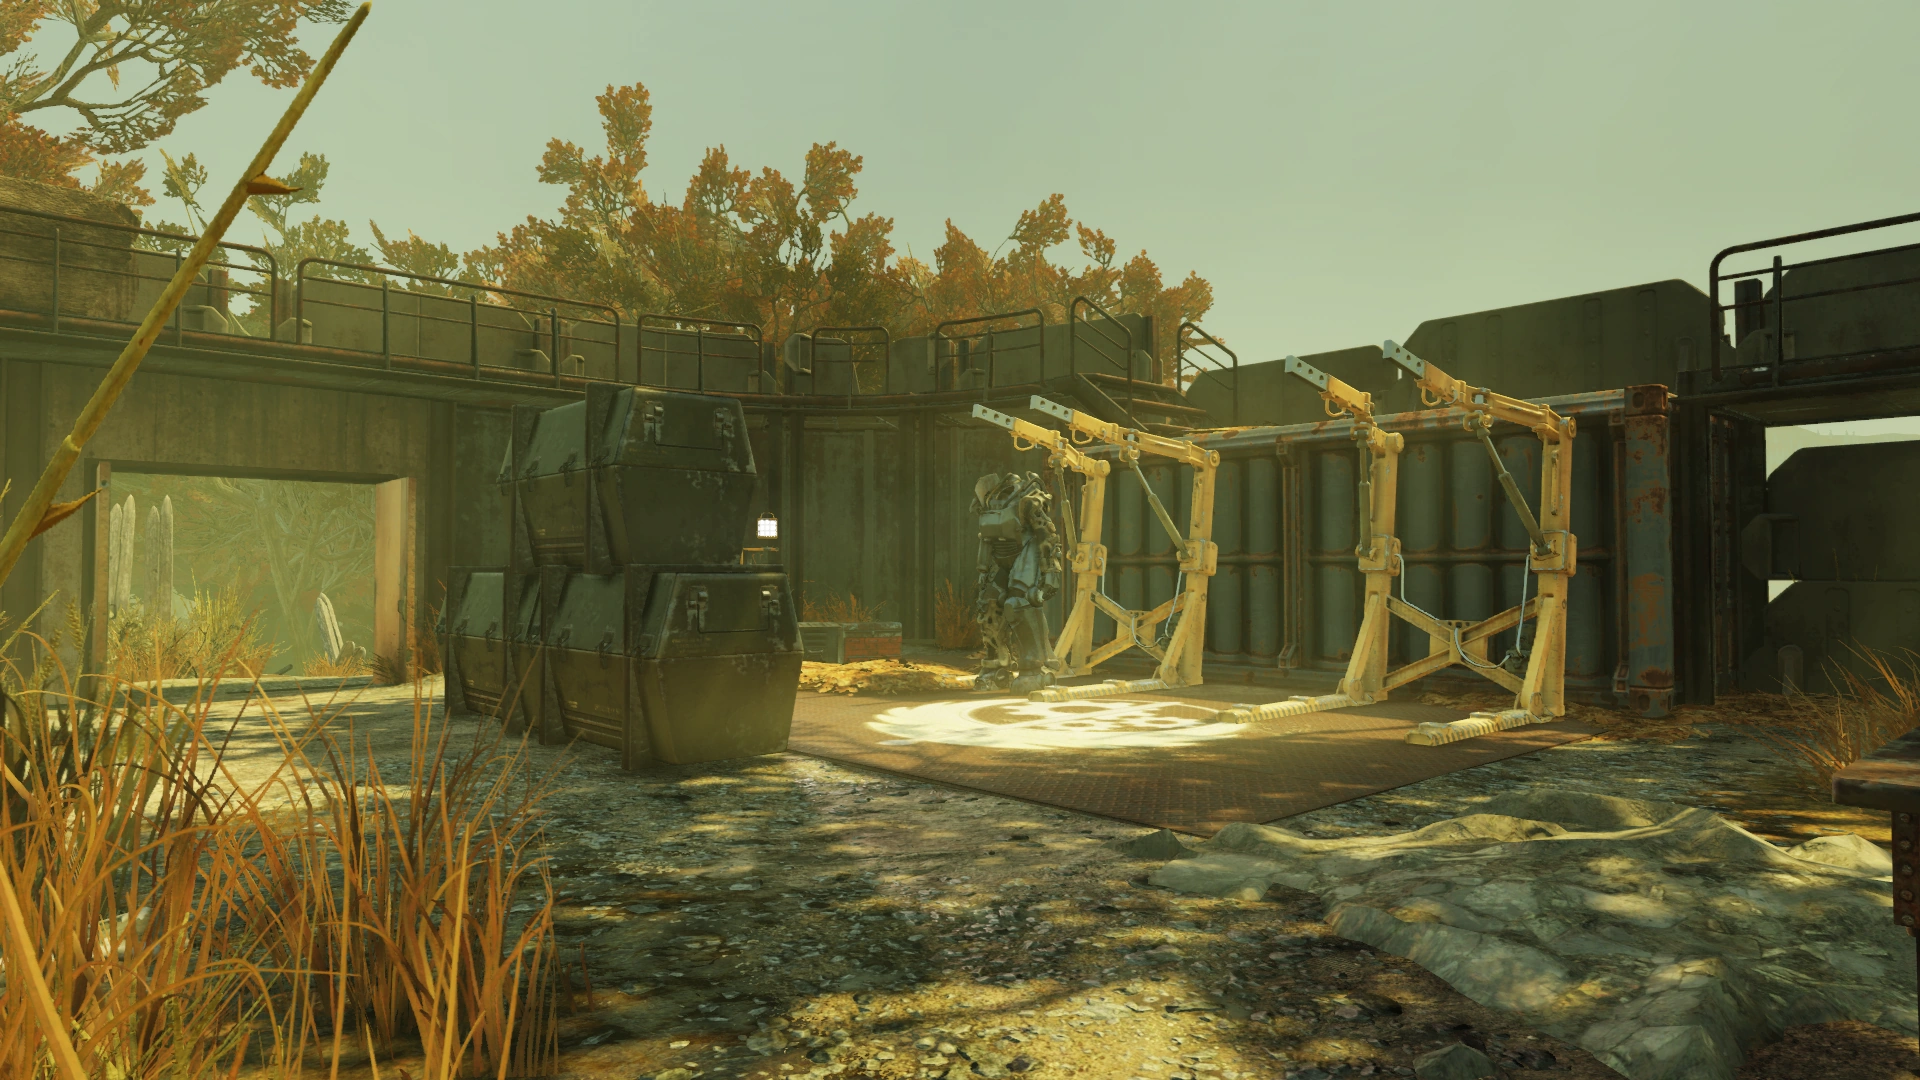
|
Cranberry Bog
North Cranberry Bog

| Location | Type | Description | Image |
|---|---|---|---|
| Kerwood Mine | T-series | Found in the larger of the two dry areas that are accessible only by swimming. It is in a stub side tunnel standing in very shallow water. If you find the Kerwood Mine key, the armor is in that same dry area. | 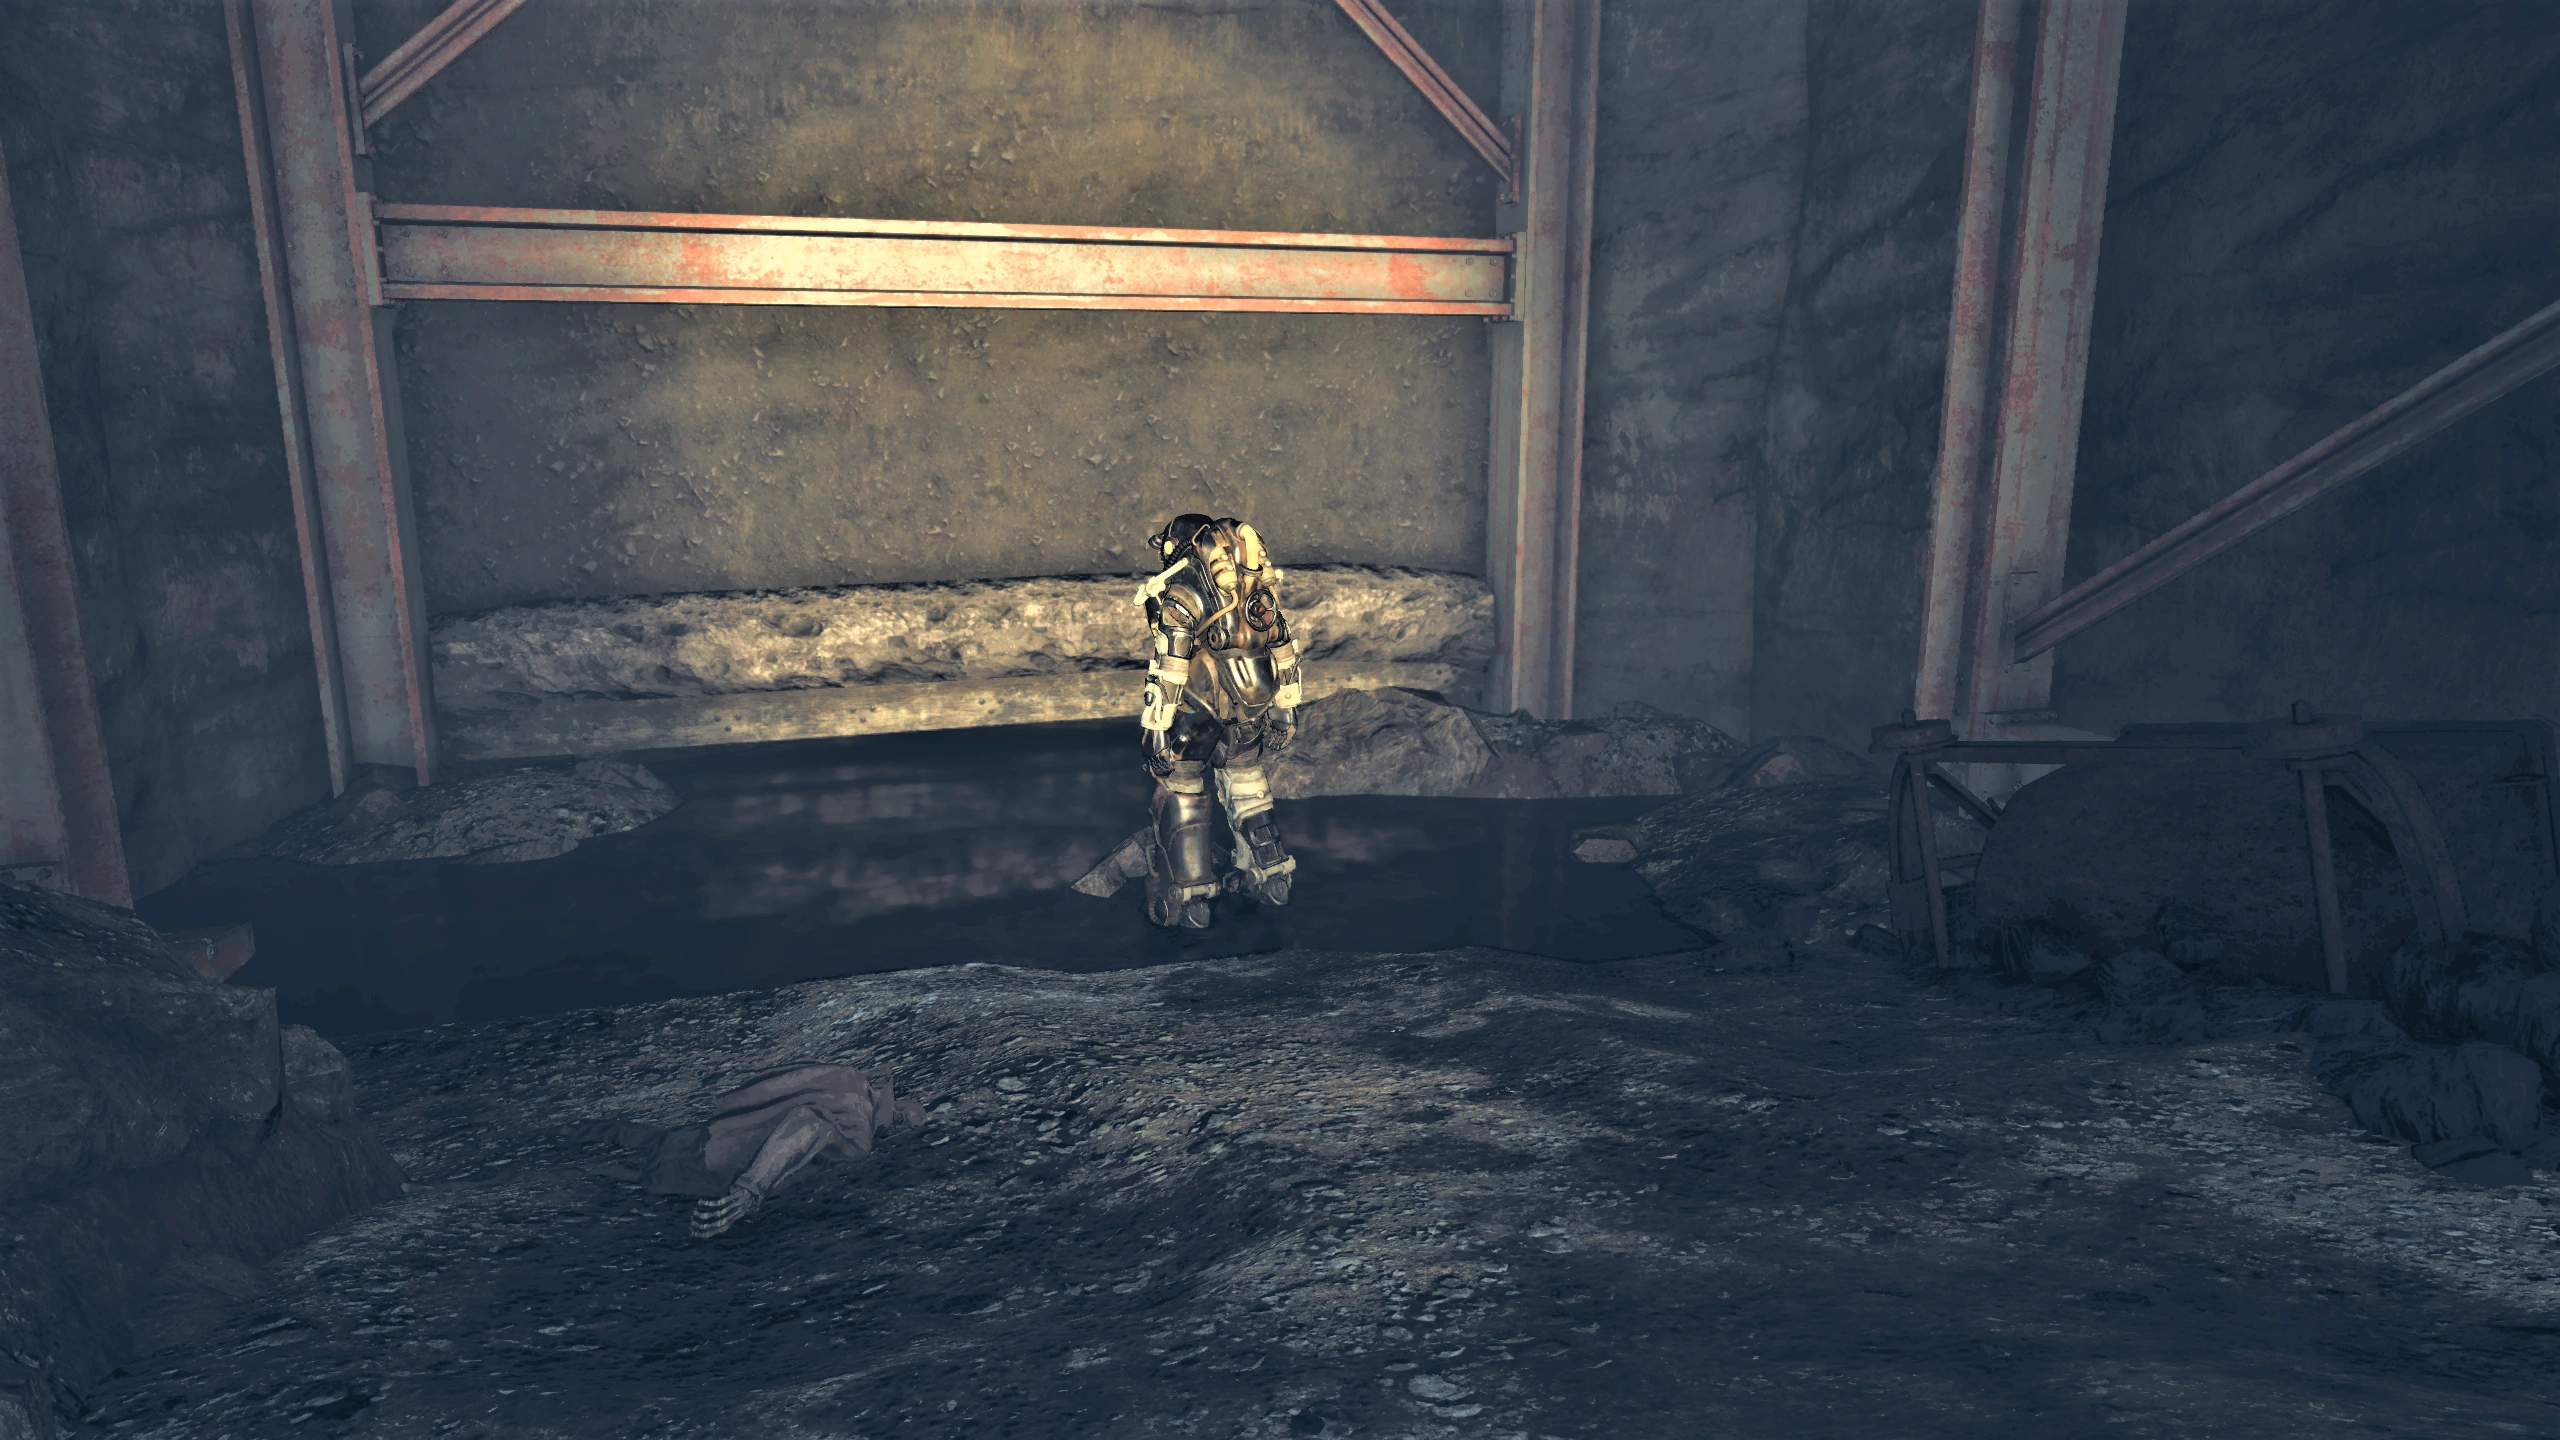
|
| Firebase Major | T-series | Behind the jeep. | 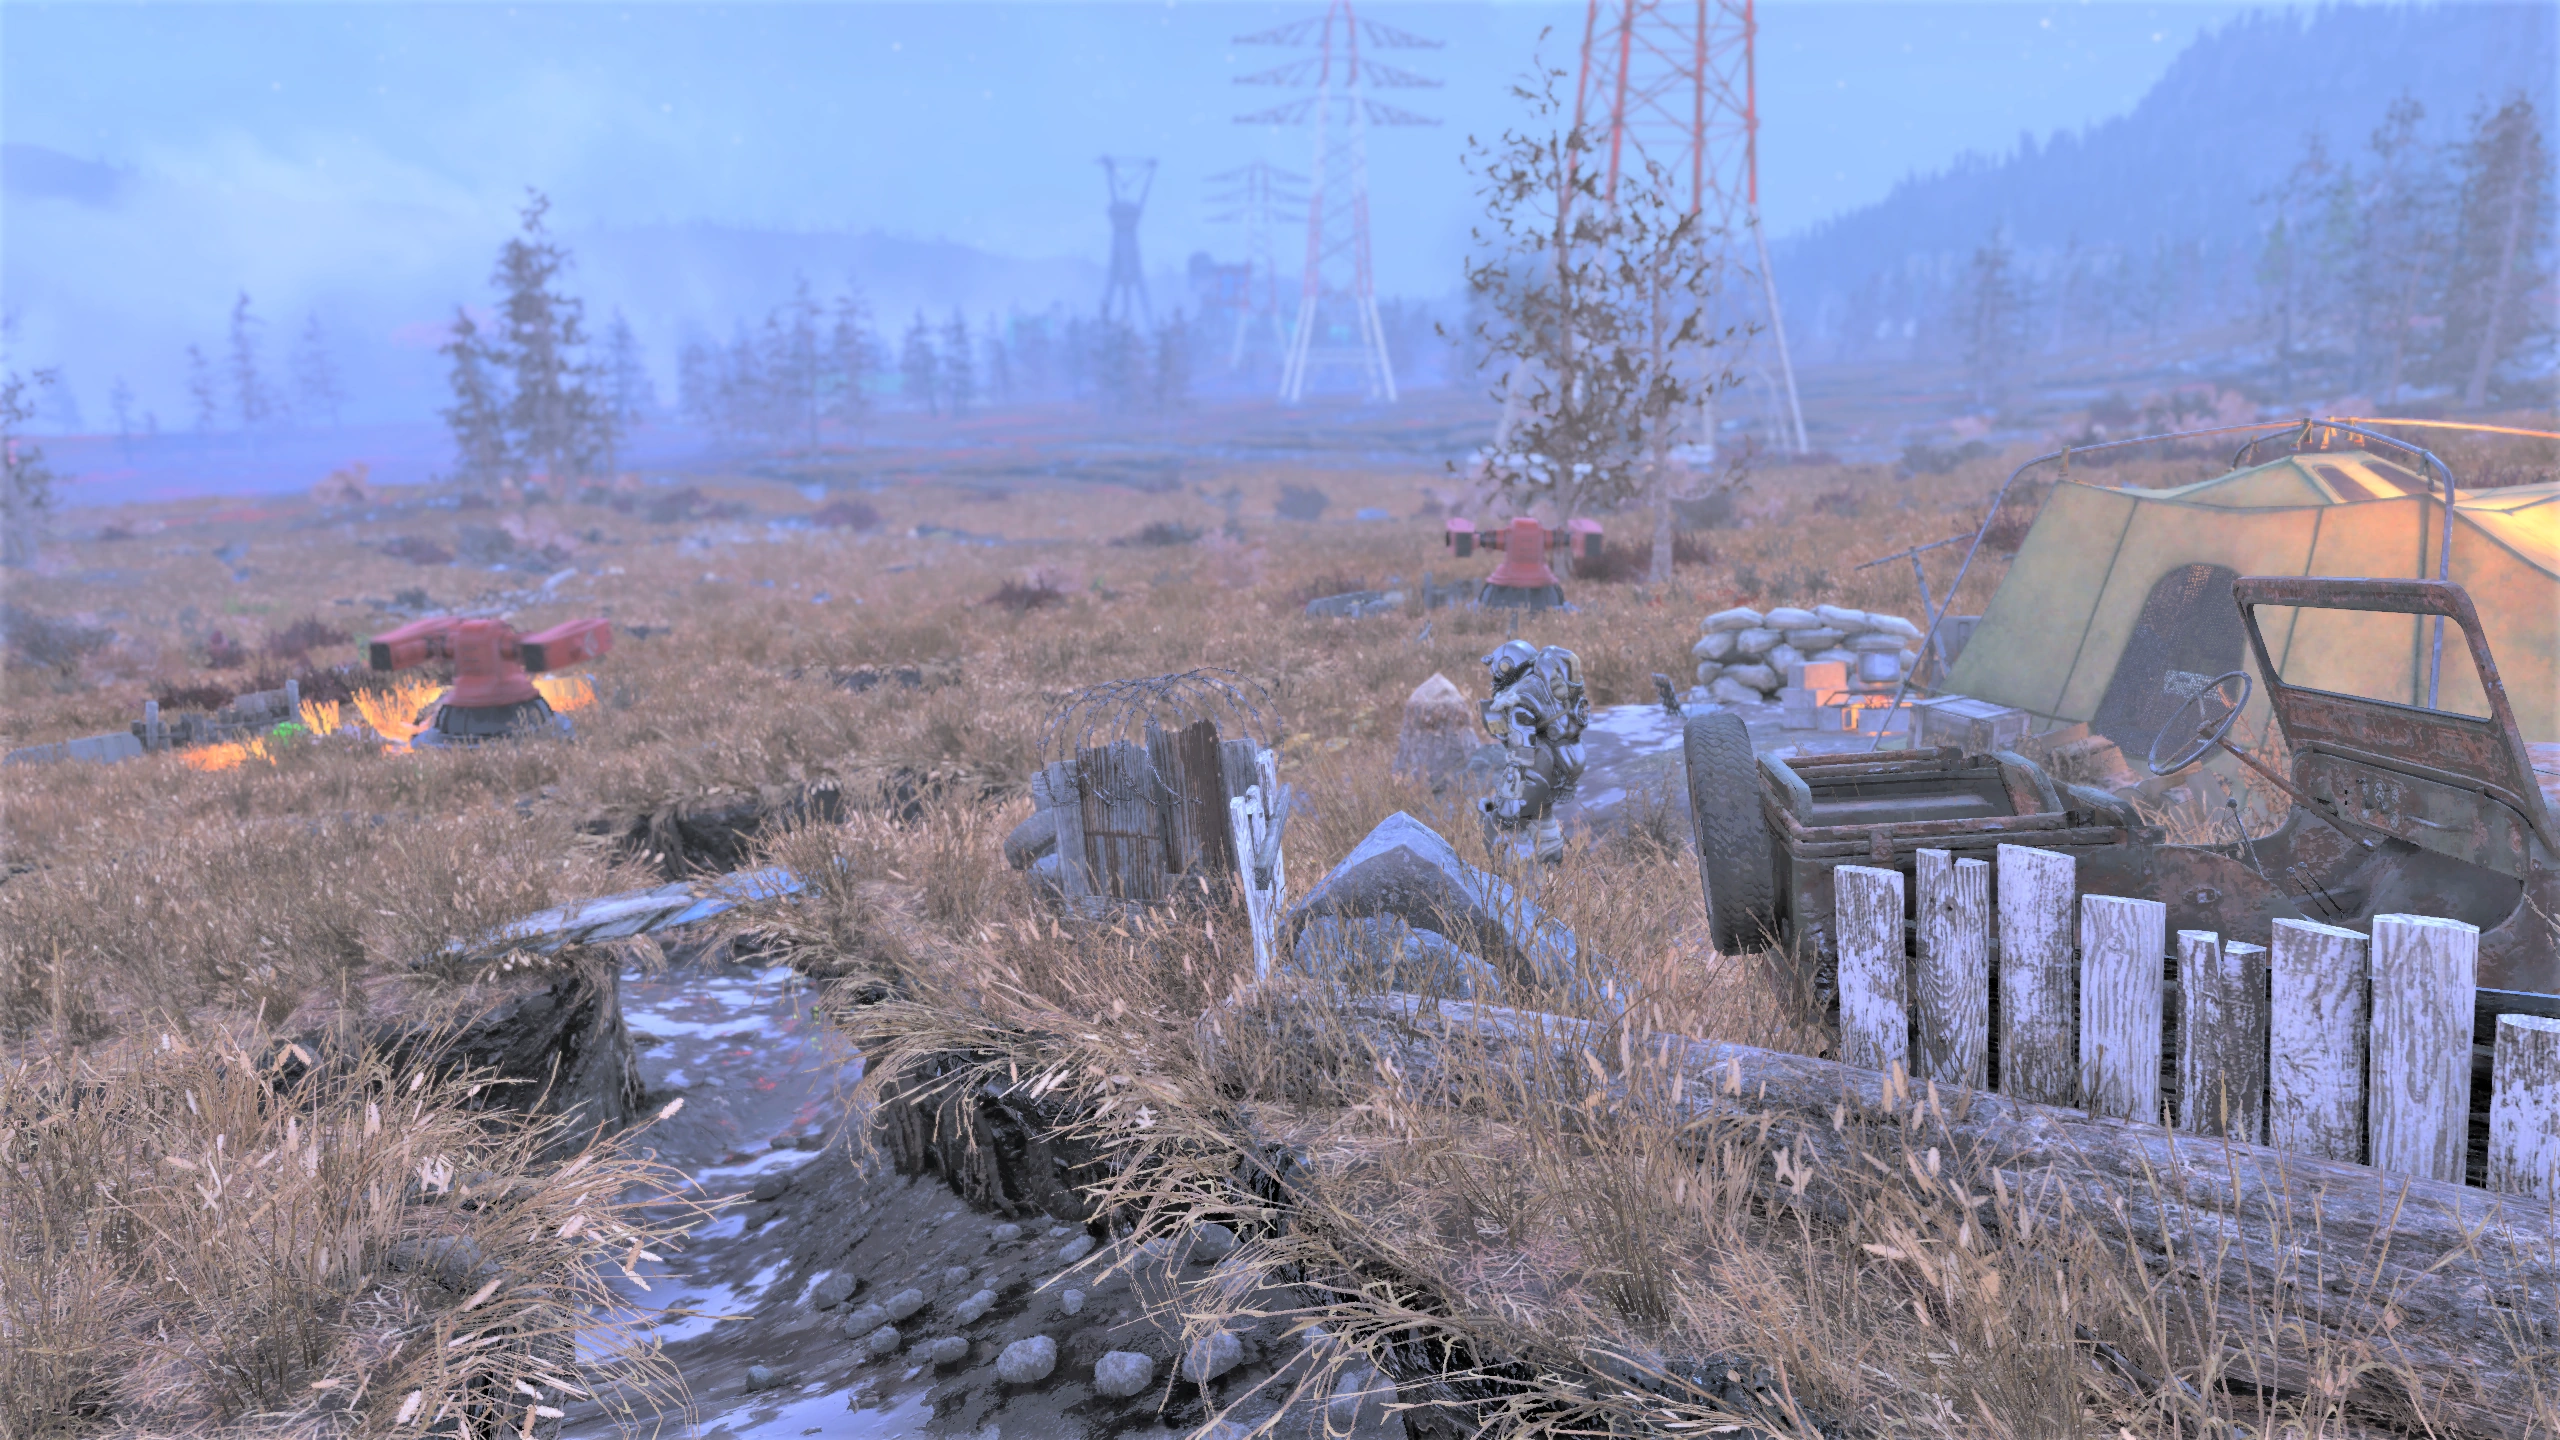
|
| Firebase LT | T-series | On the east side of the tent. | 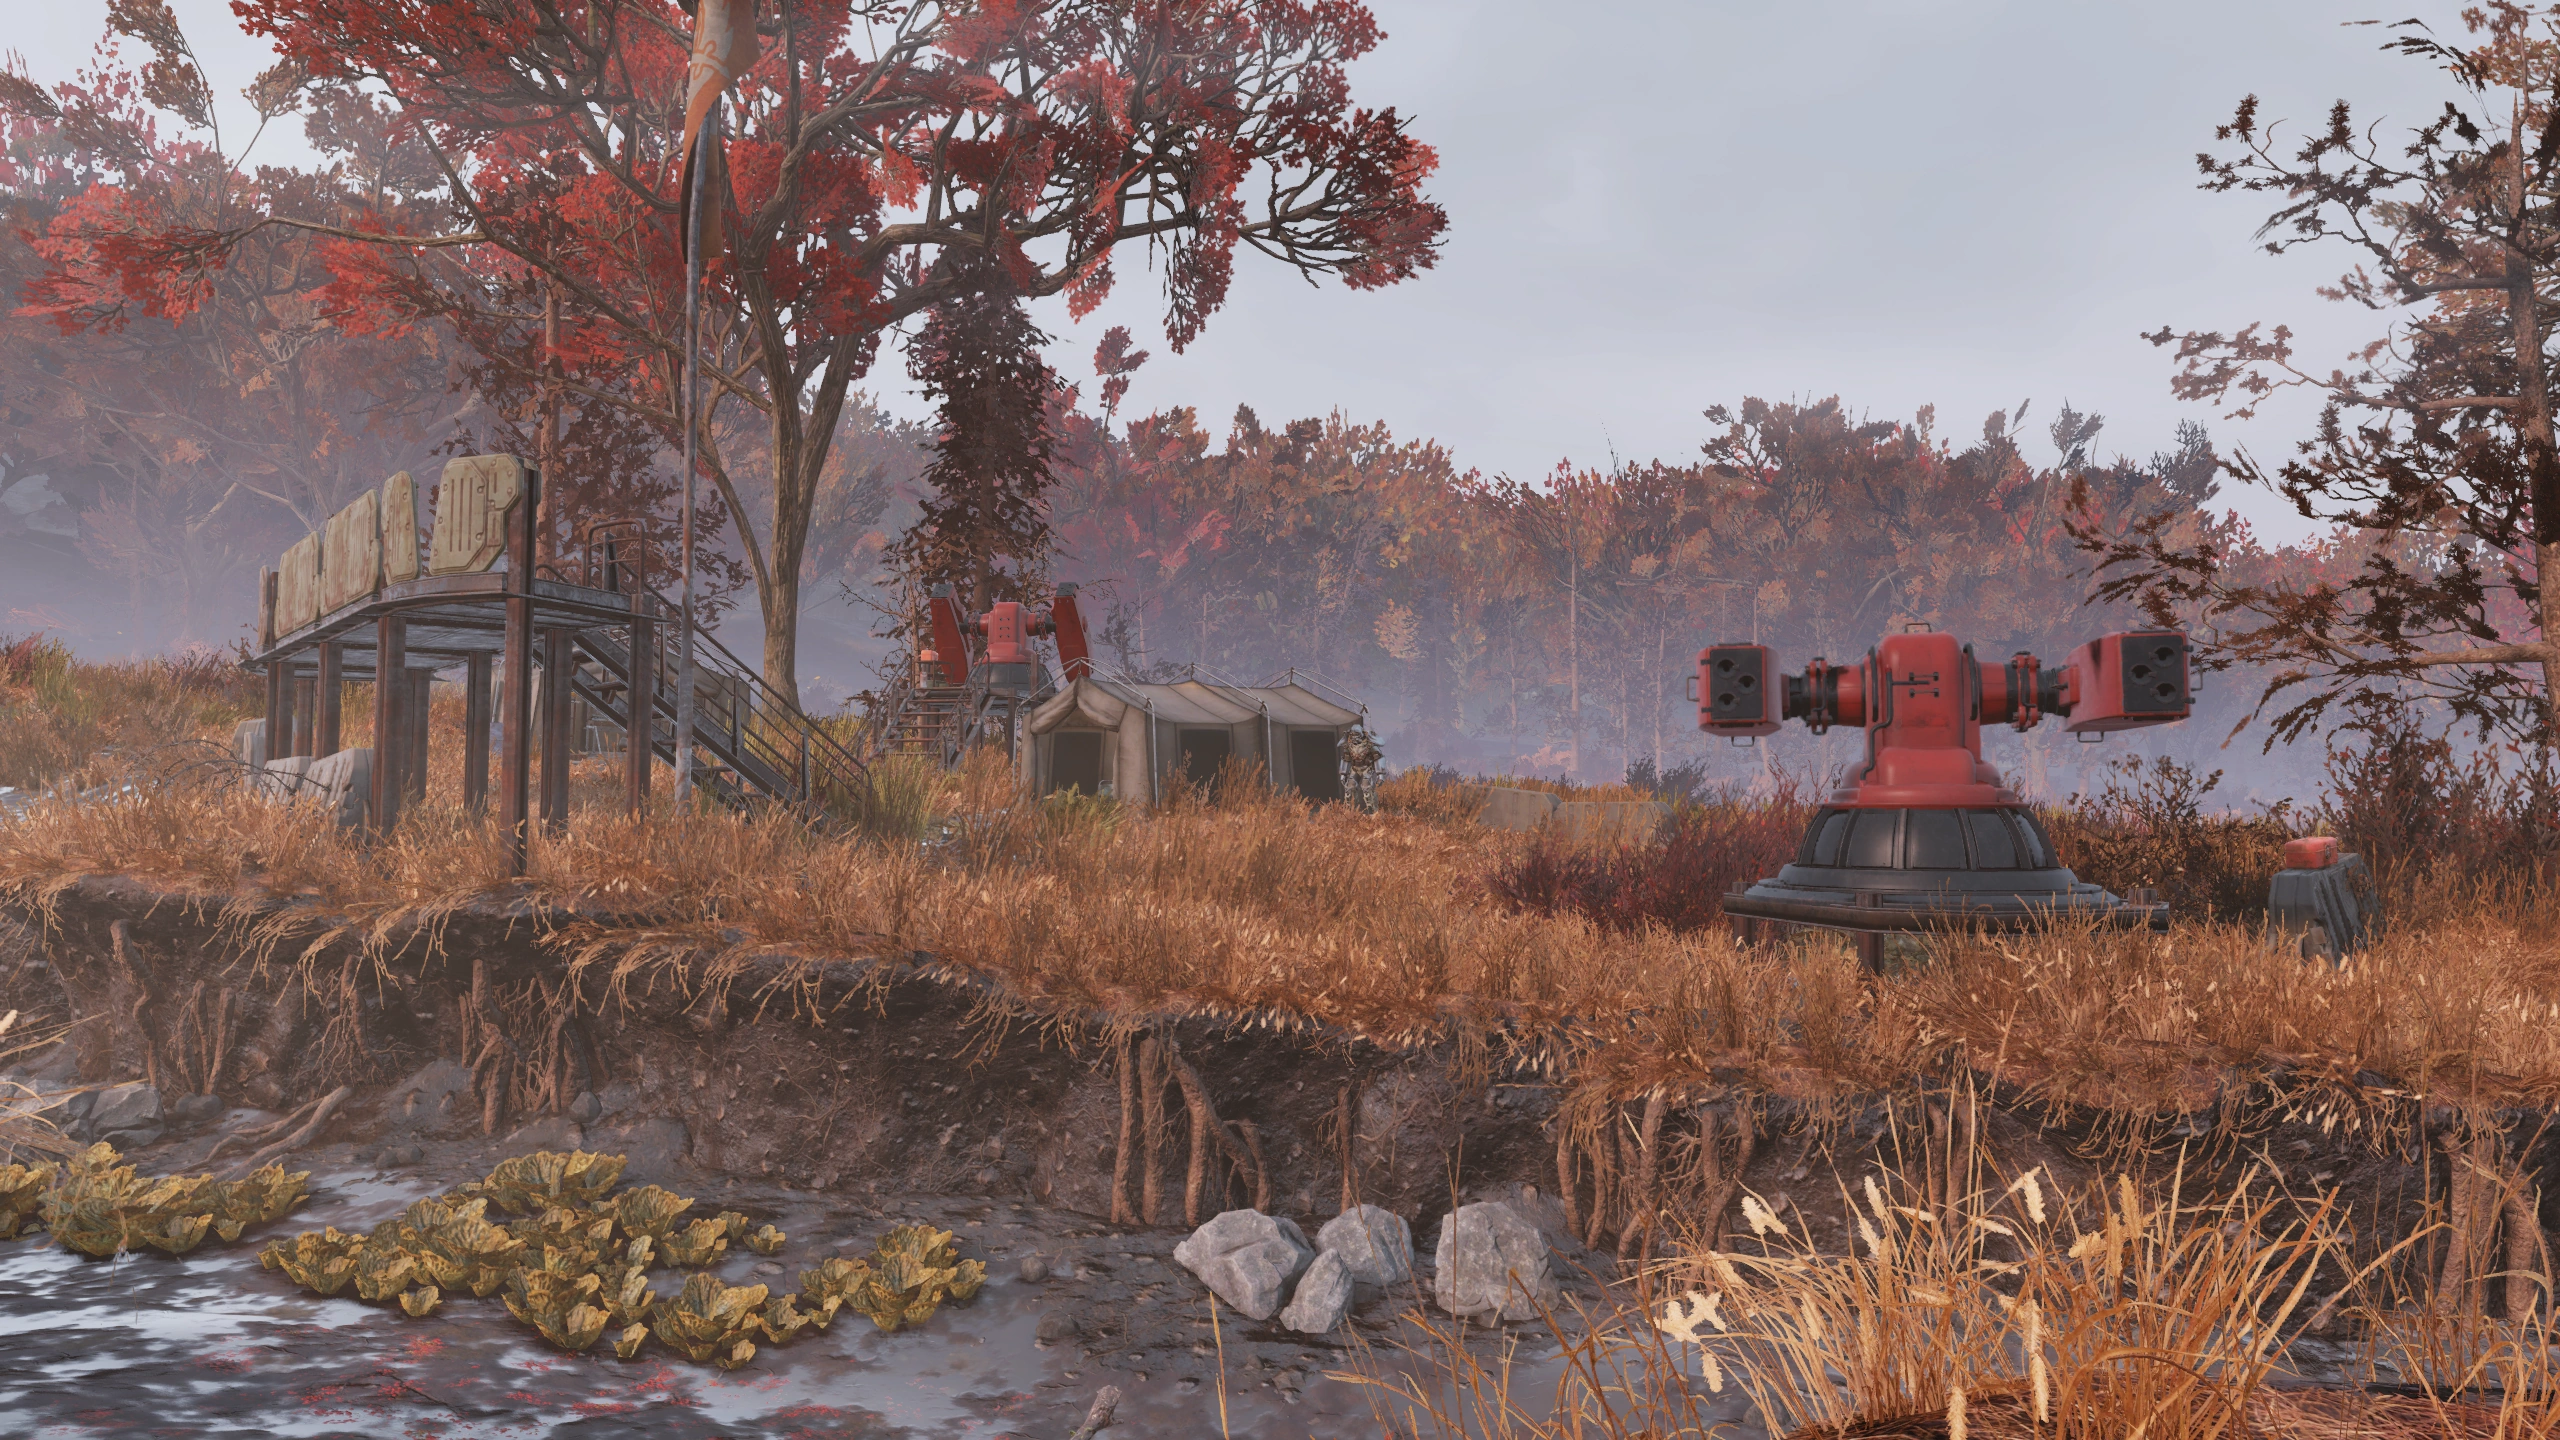
|
| The General's Steakhouse | T-series | In the metal garden shed in the walled garden west of the main building. | 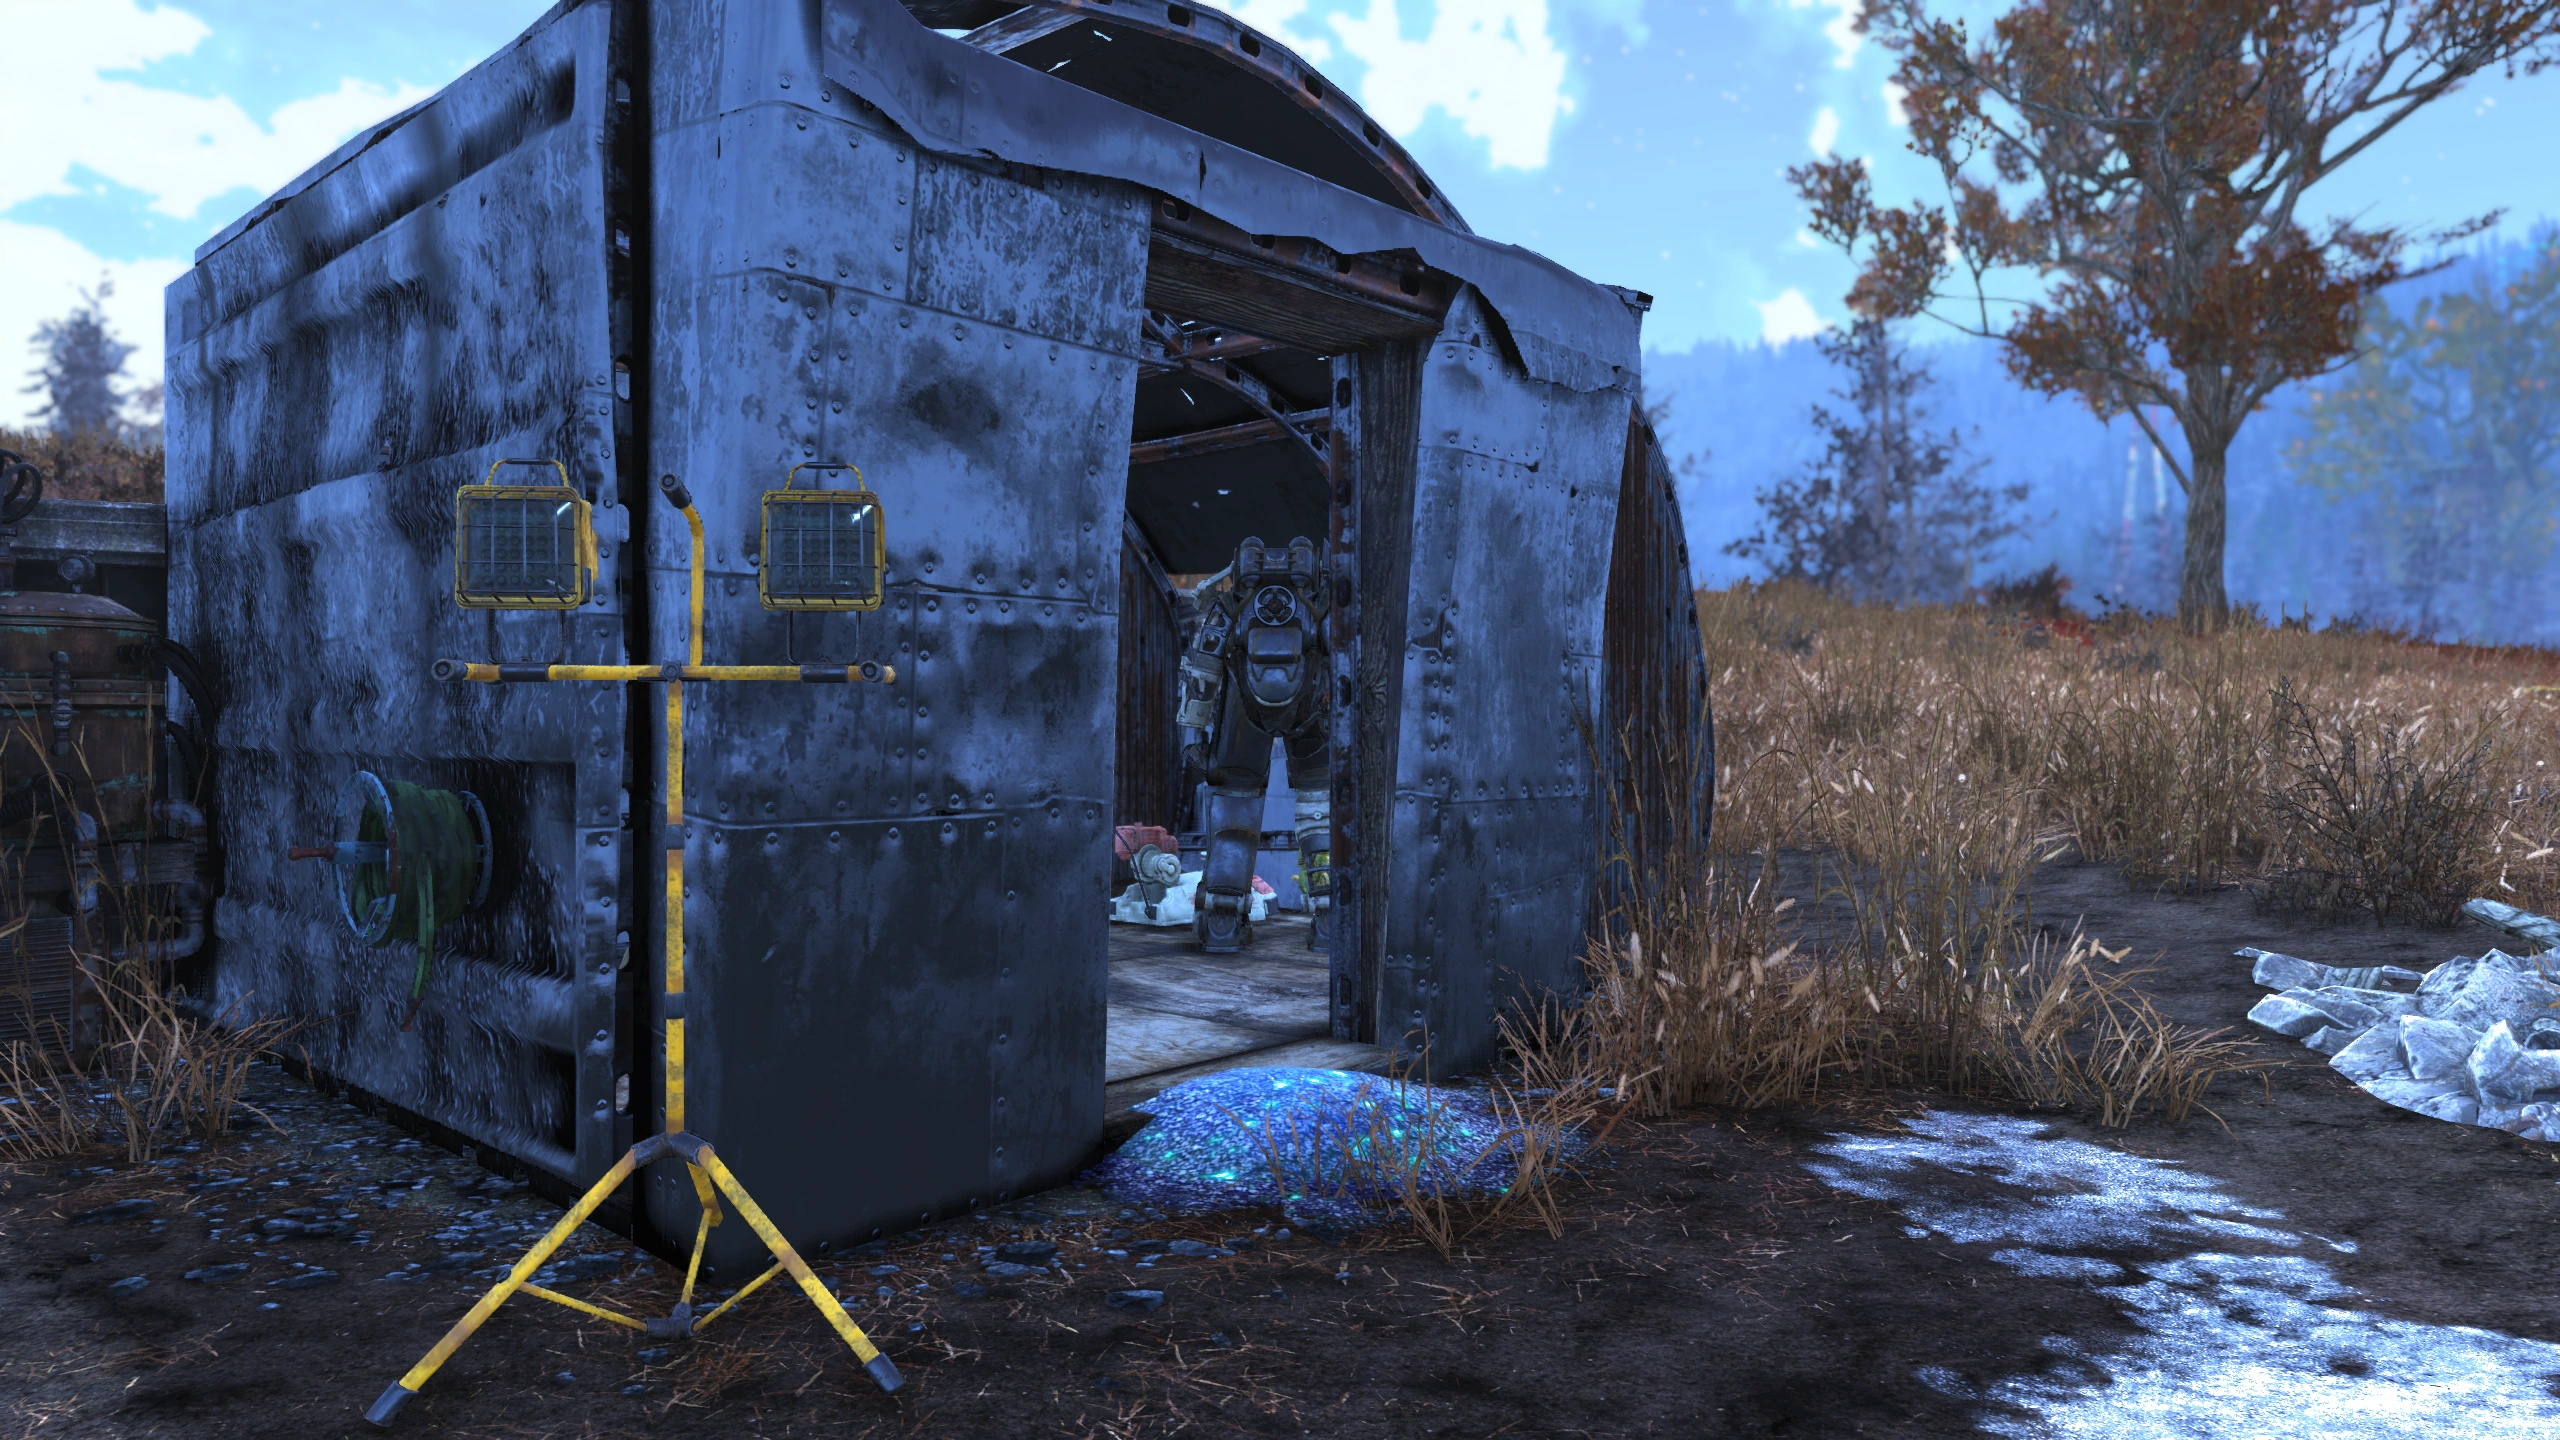
|
| RobCo Research Center | T-series | In the northwest wing, Robotic research. This part of the building has an open plaza under it. Take the elevator in the round red support column to the bottom floor. The power armor is at a power armor station in one of the research bays on the right. Note that there is another bay with an empty power armor station. | 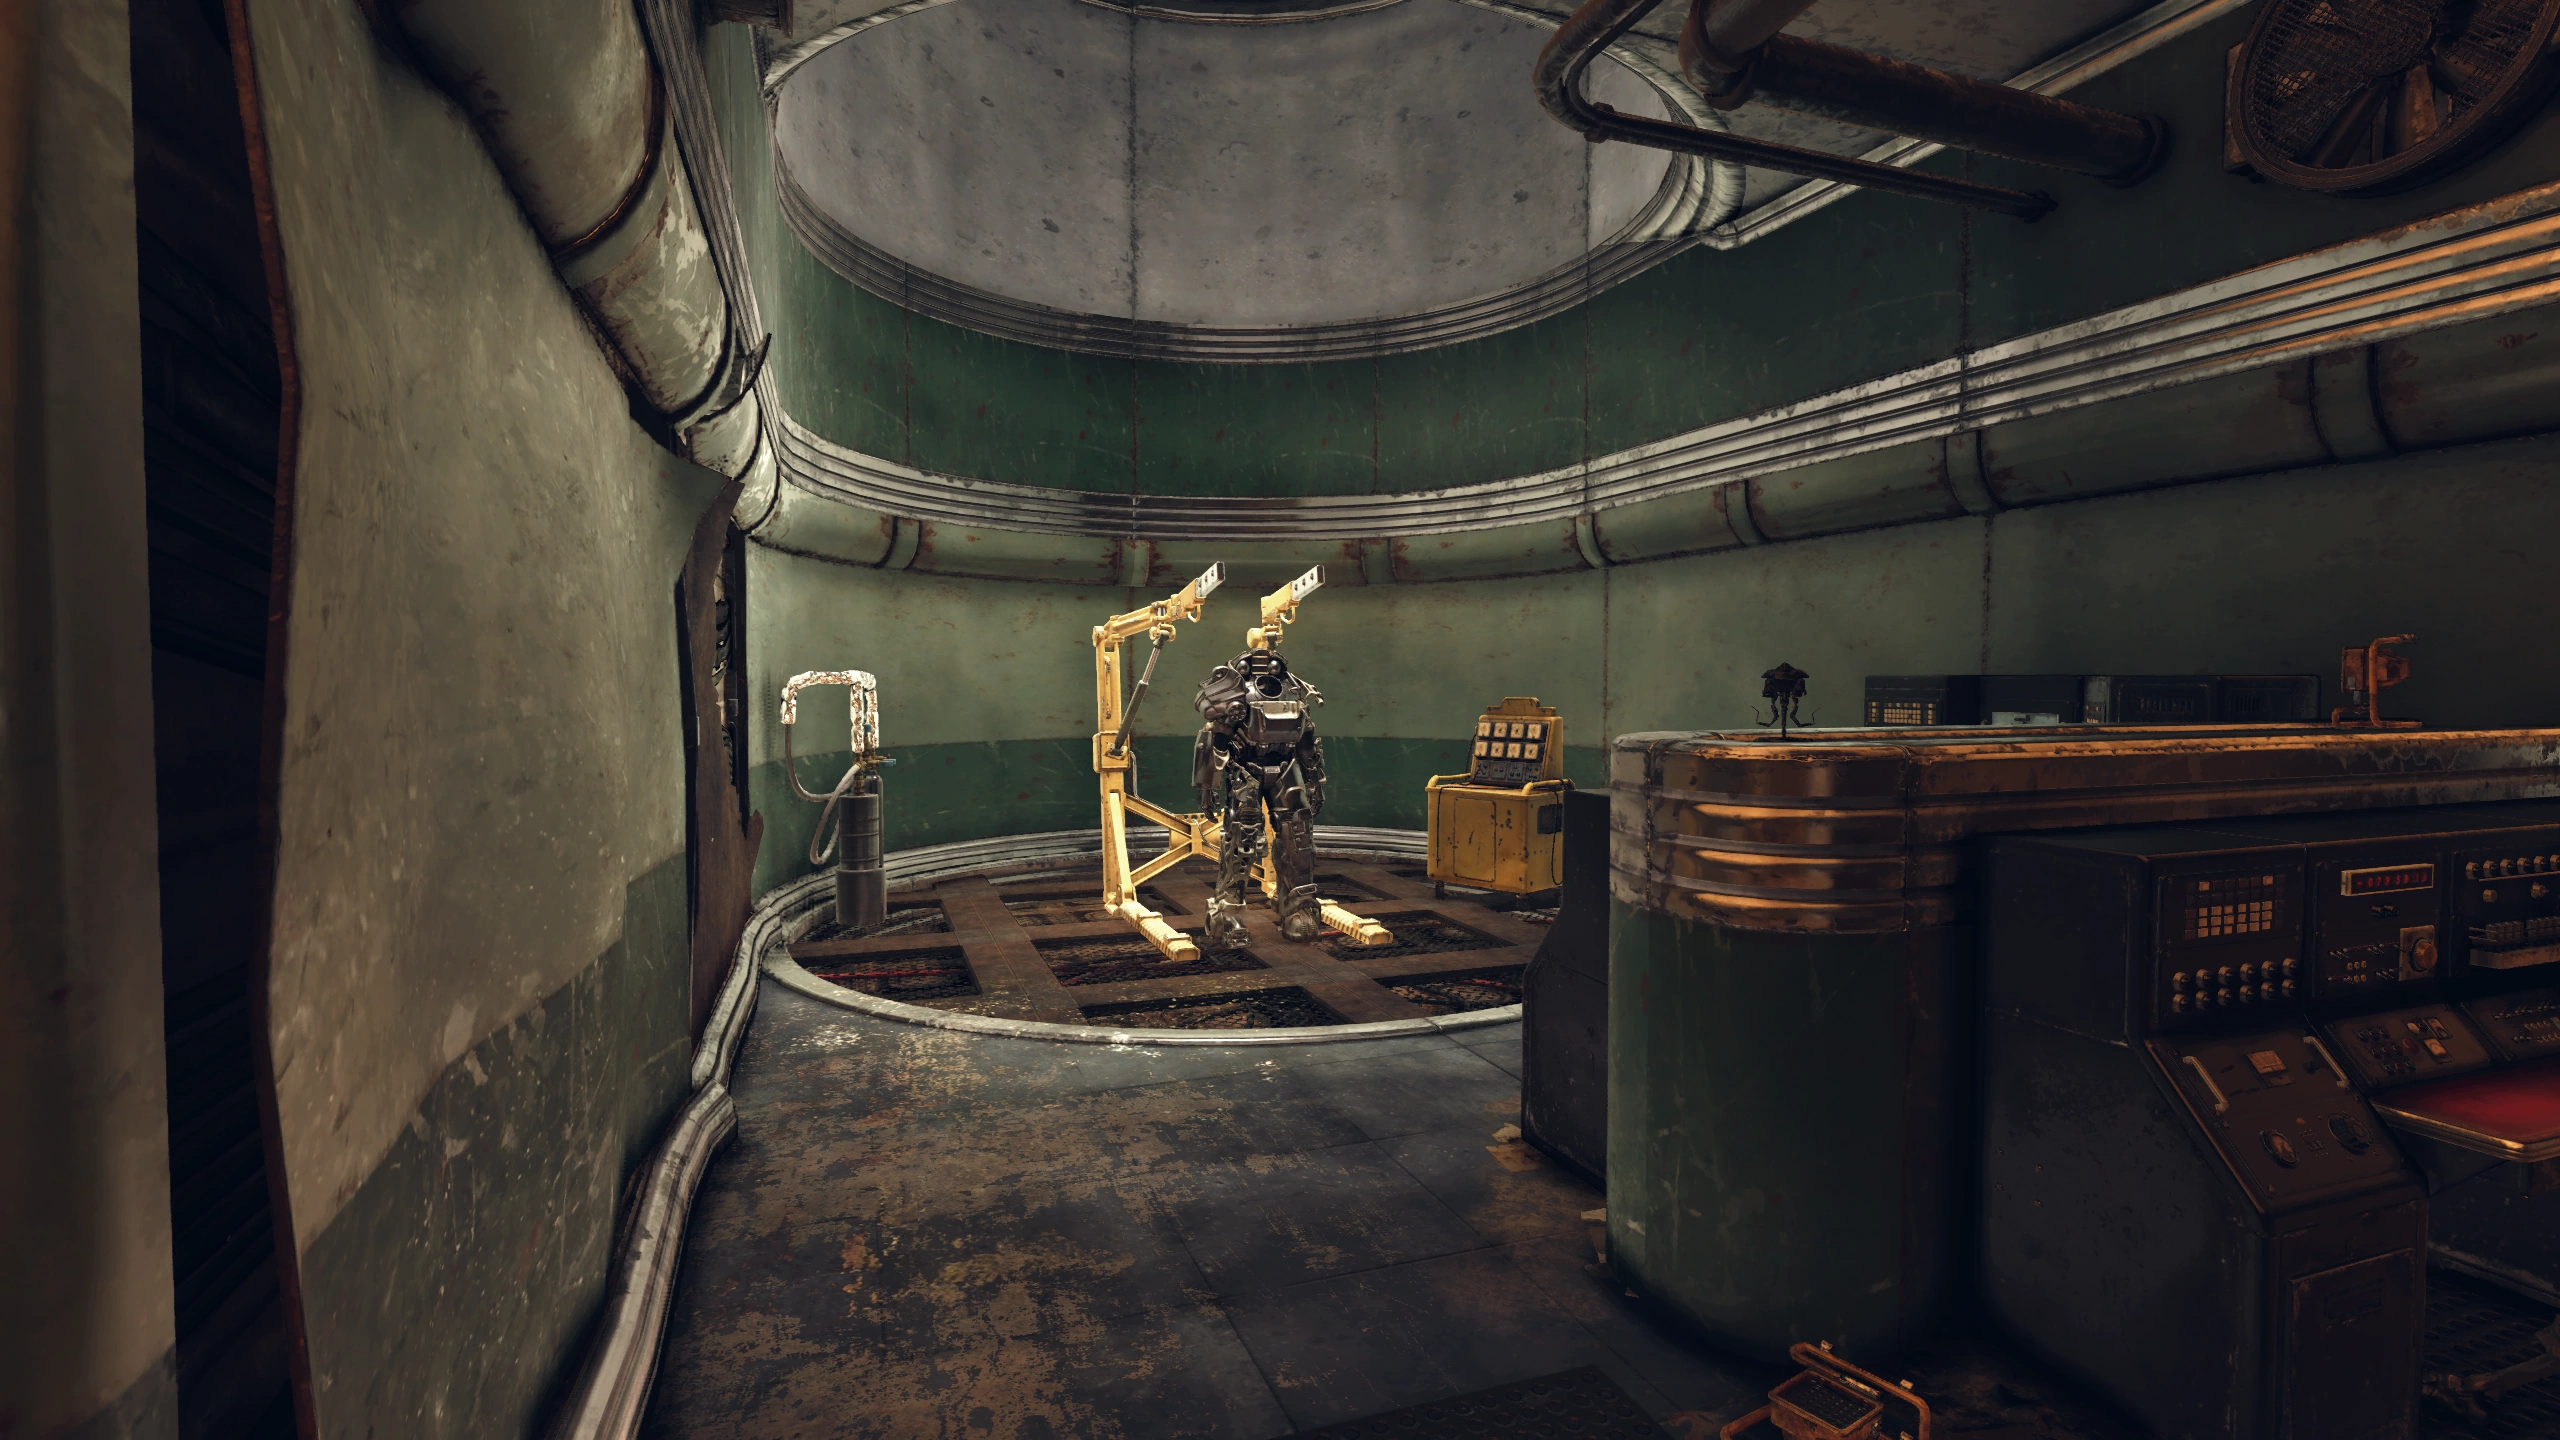
|
| Bootlegger's shack | Raider | Inside the west perimeter wall behind a truck cab | 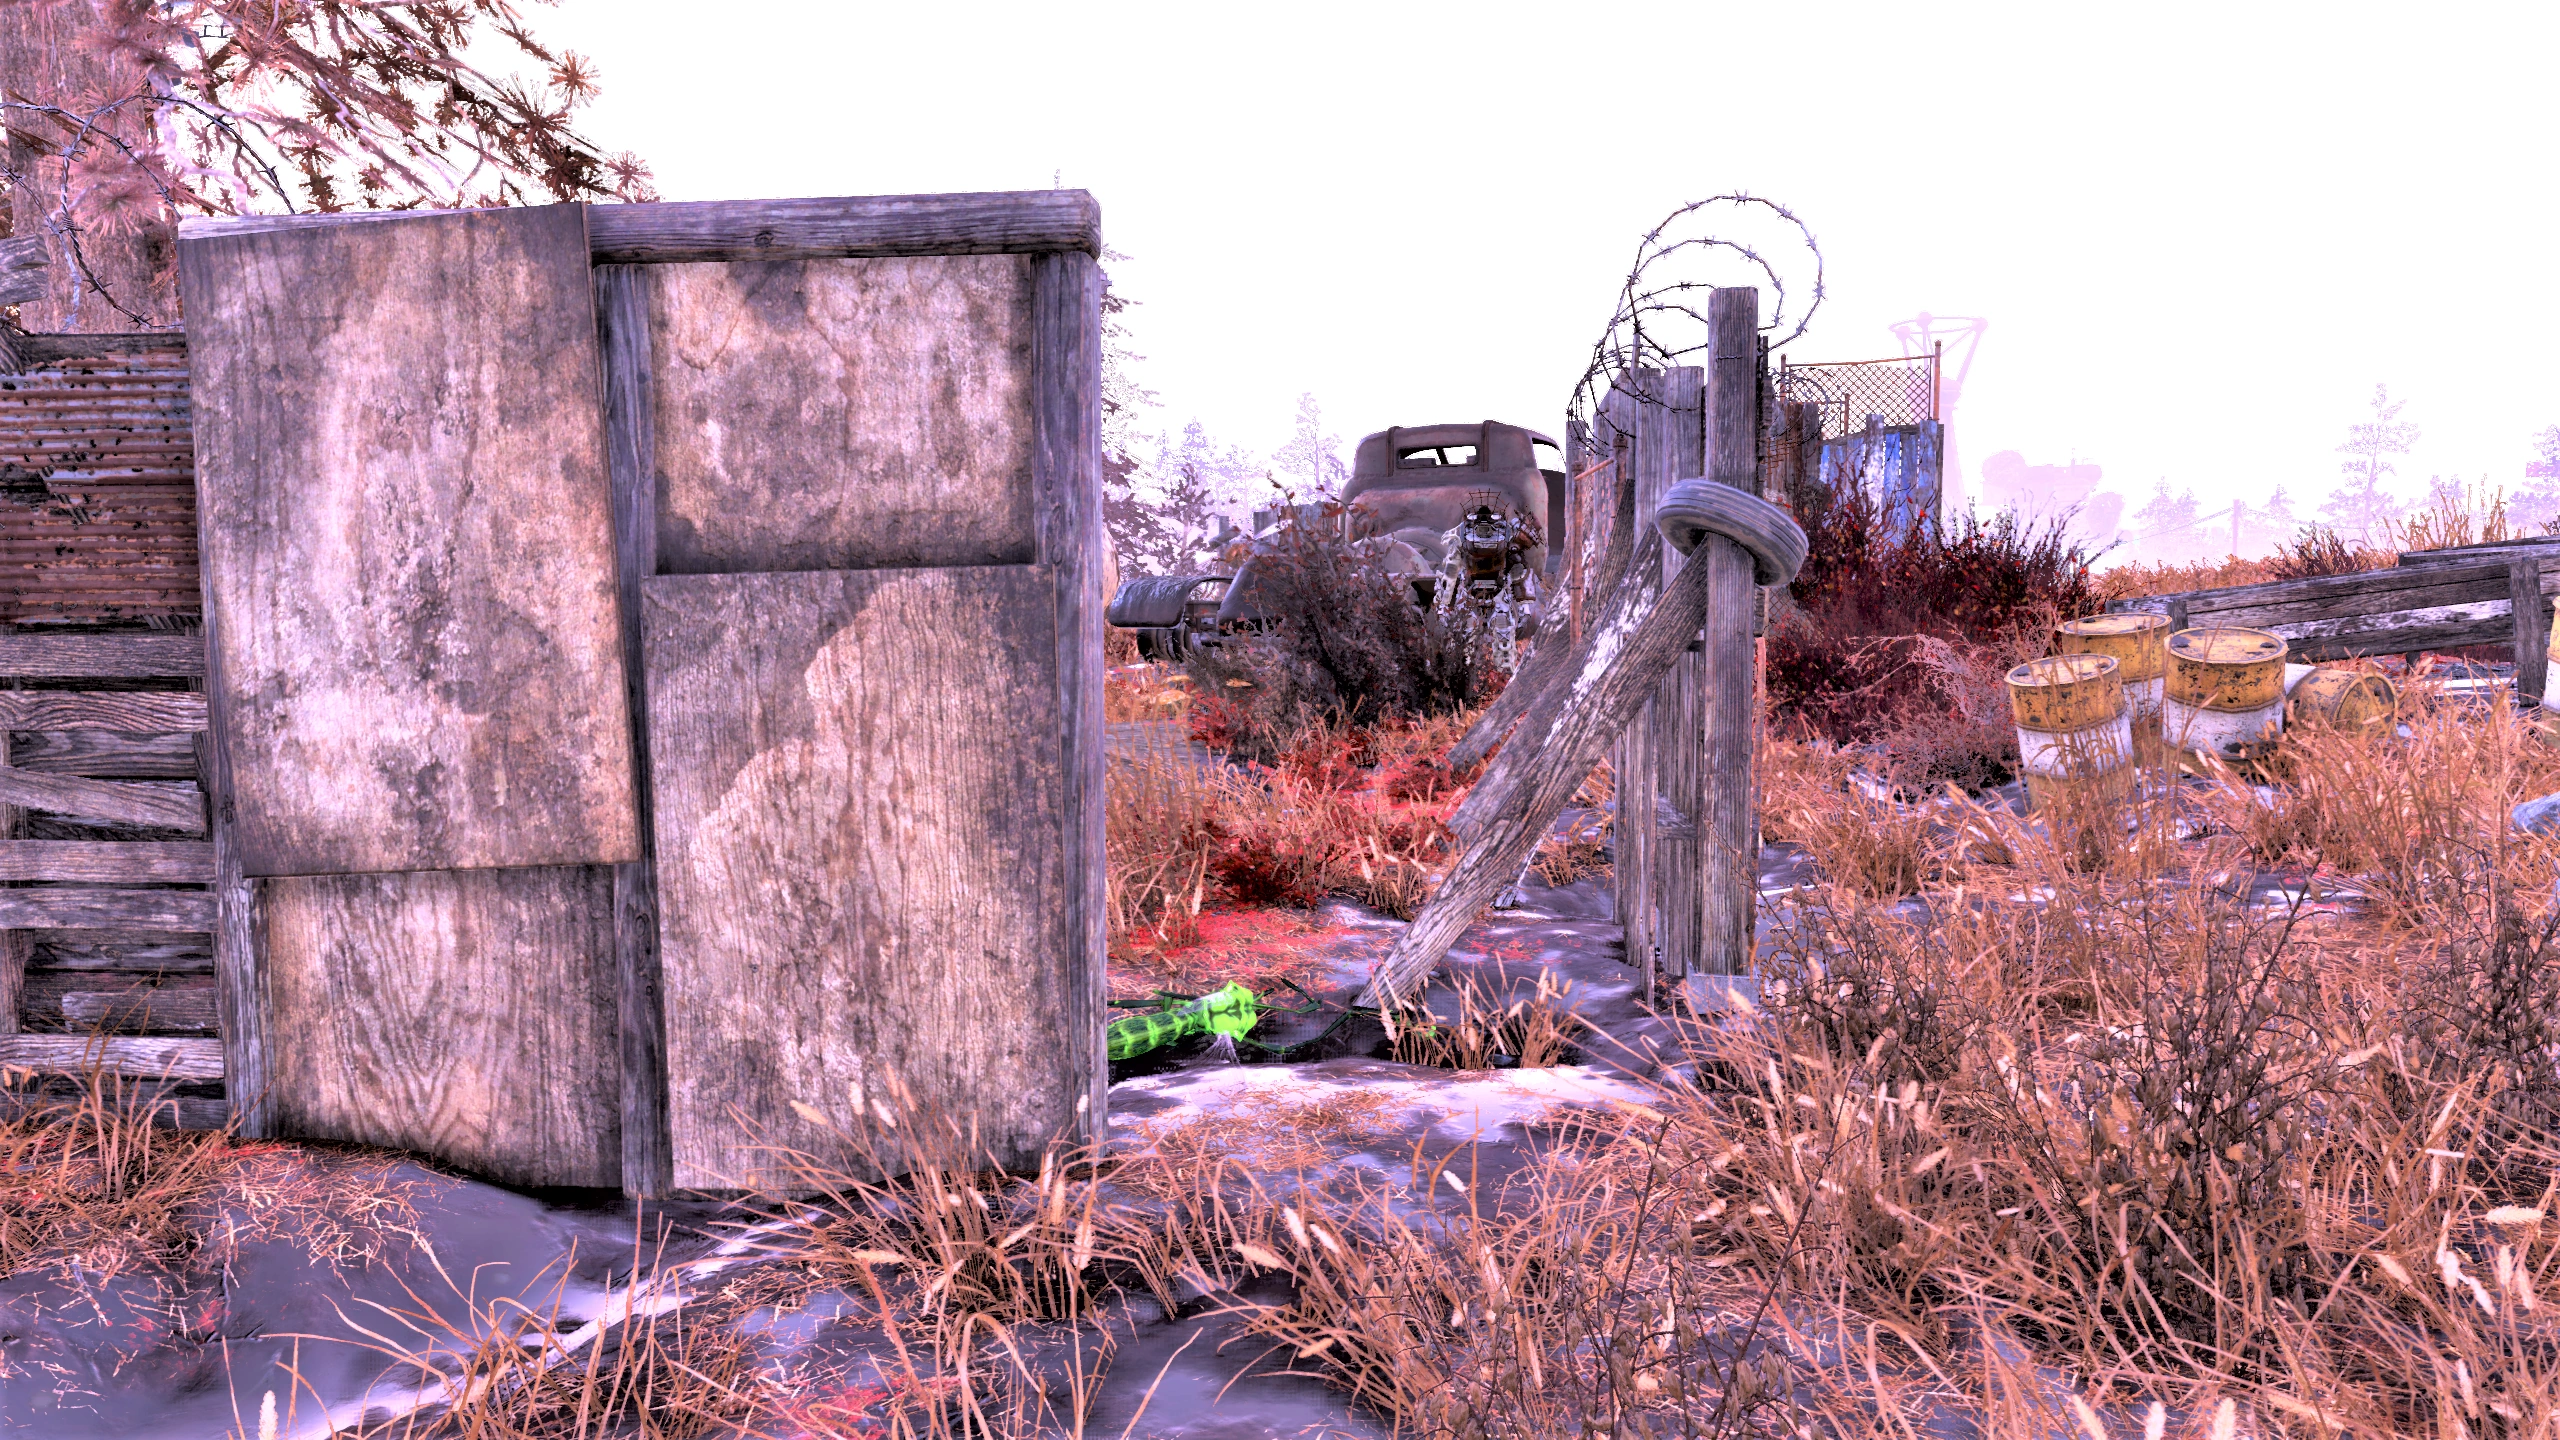
|
| Quarry X3 | T-series | At the edge of the road next to the modular building. | 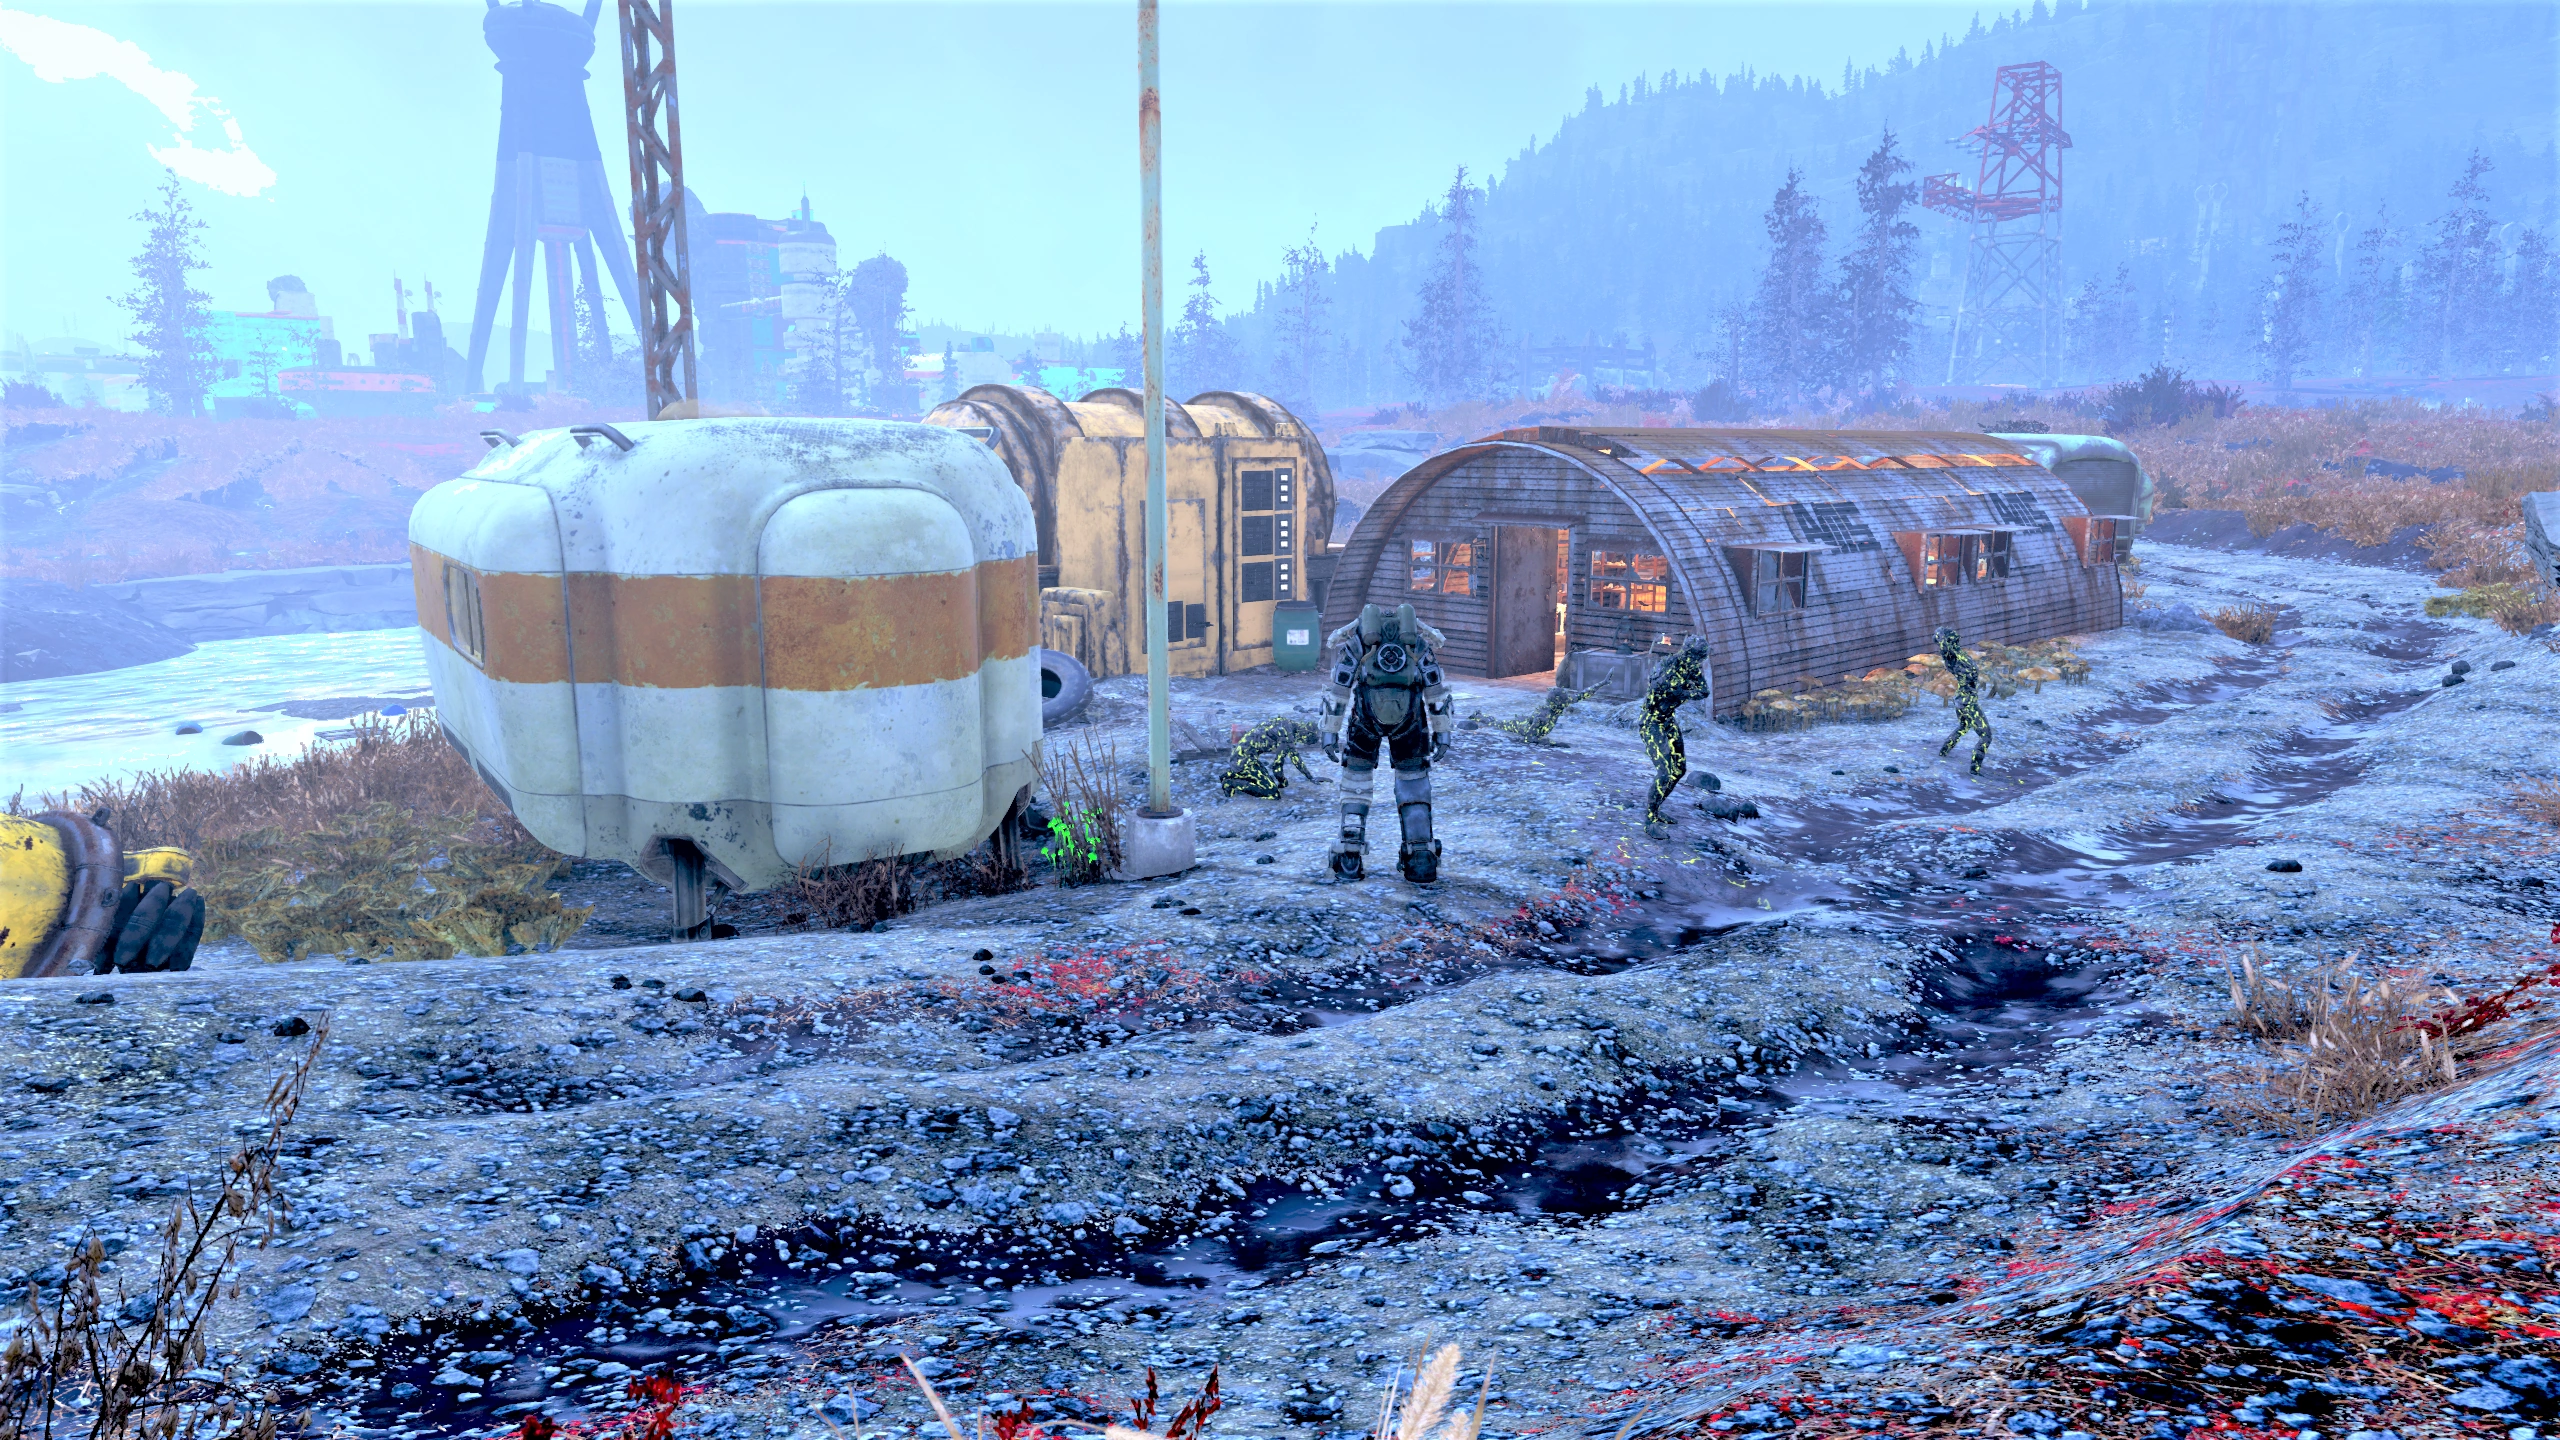
|
South Cranberry Bog

| Location | Type | Description | Image |
|---|---|---|---|
| Fort Defiance | T-series | On the forth floor at one of the two power armor stations. | 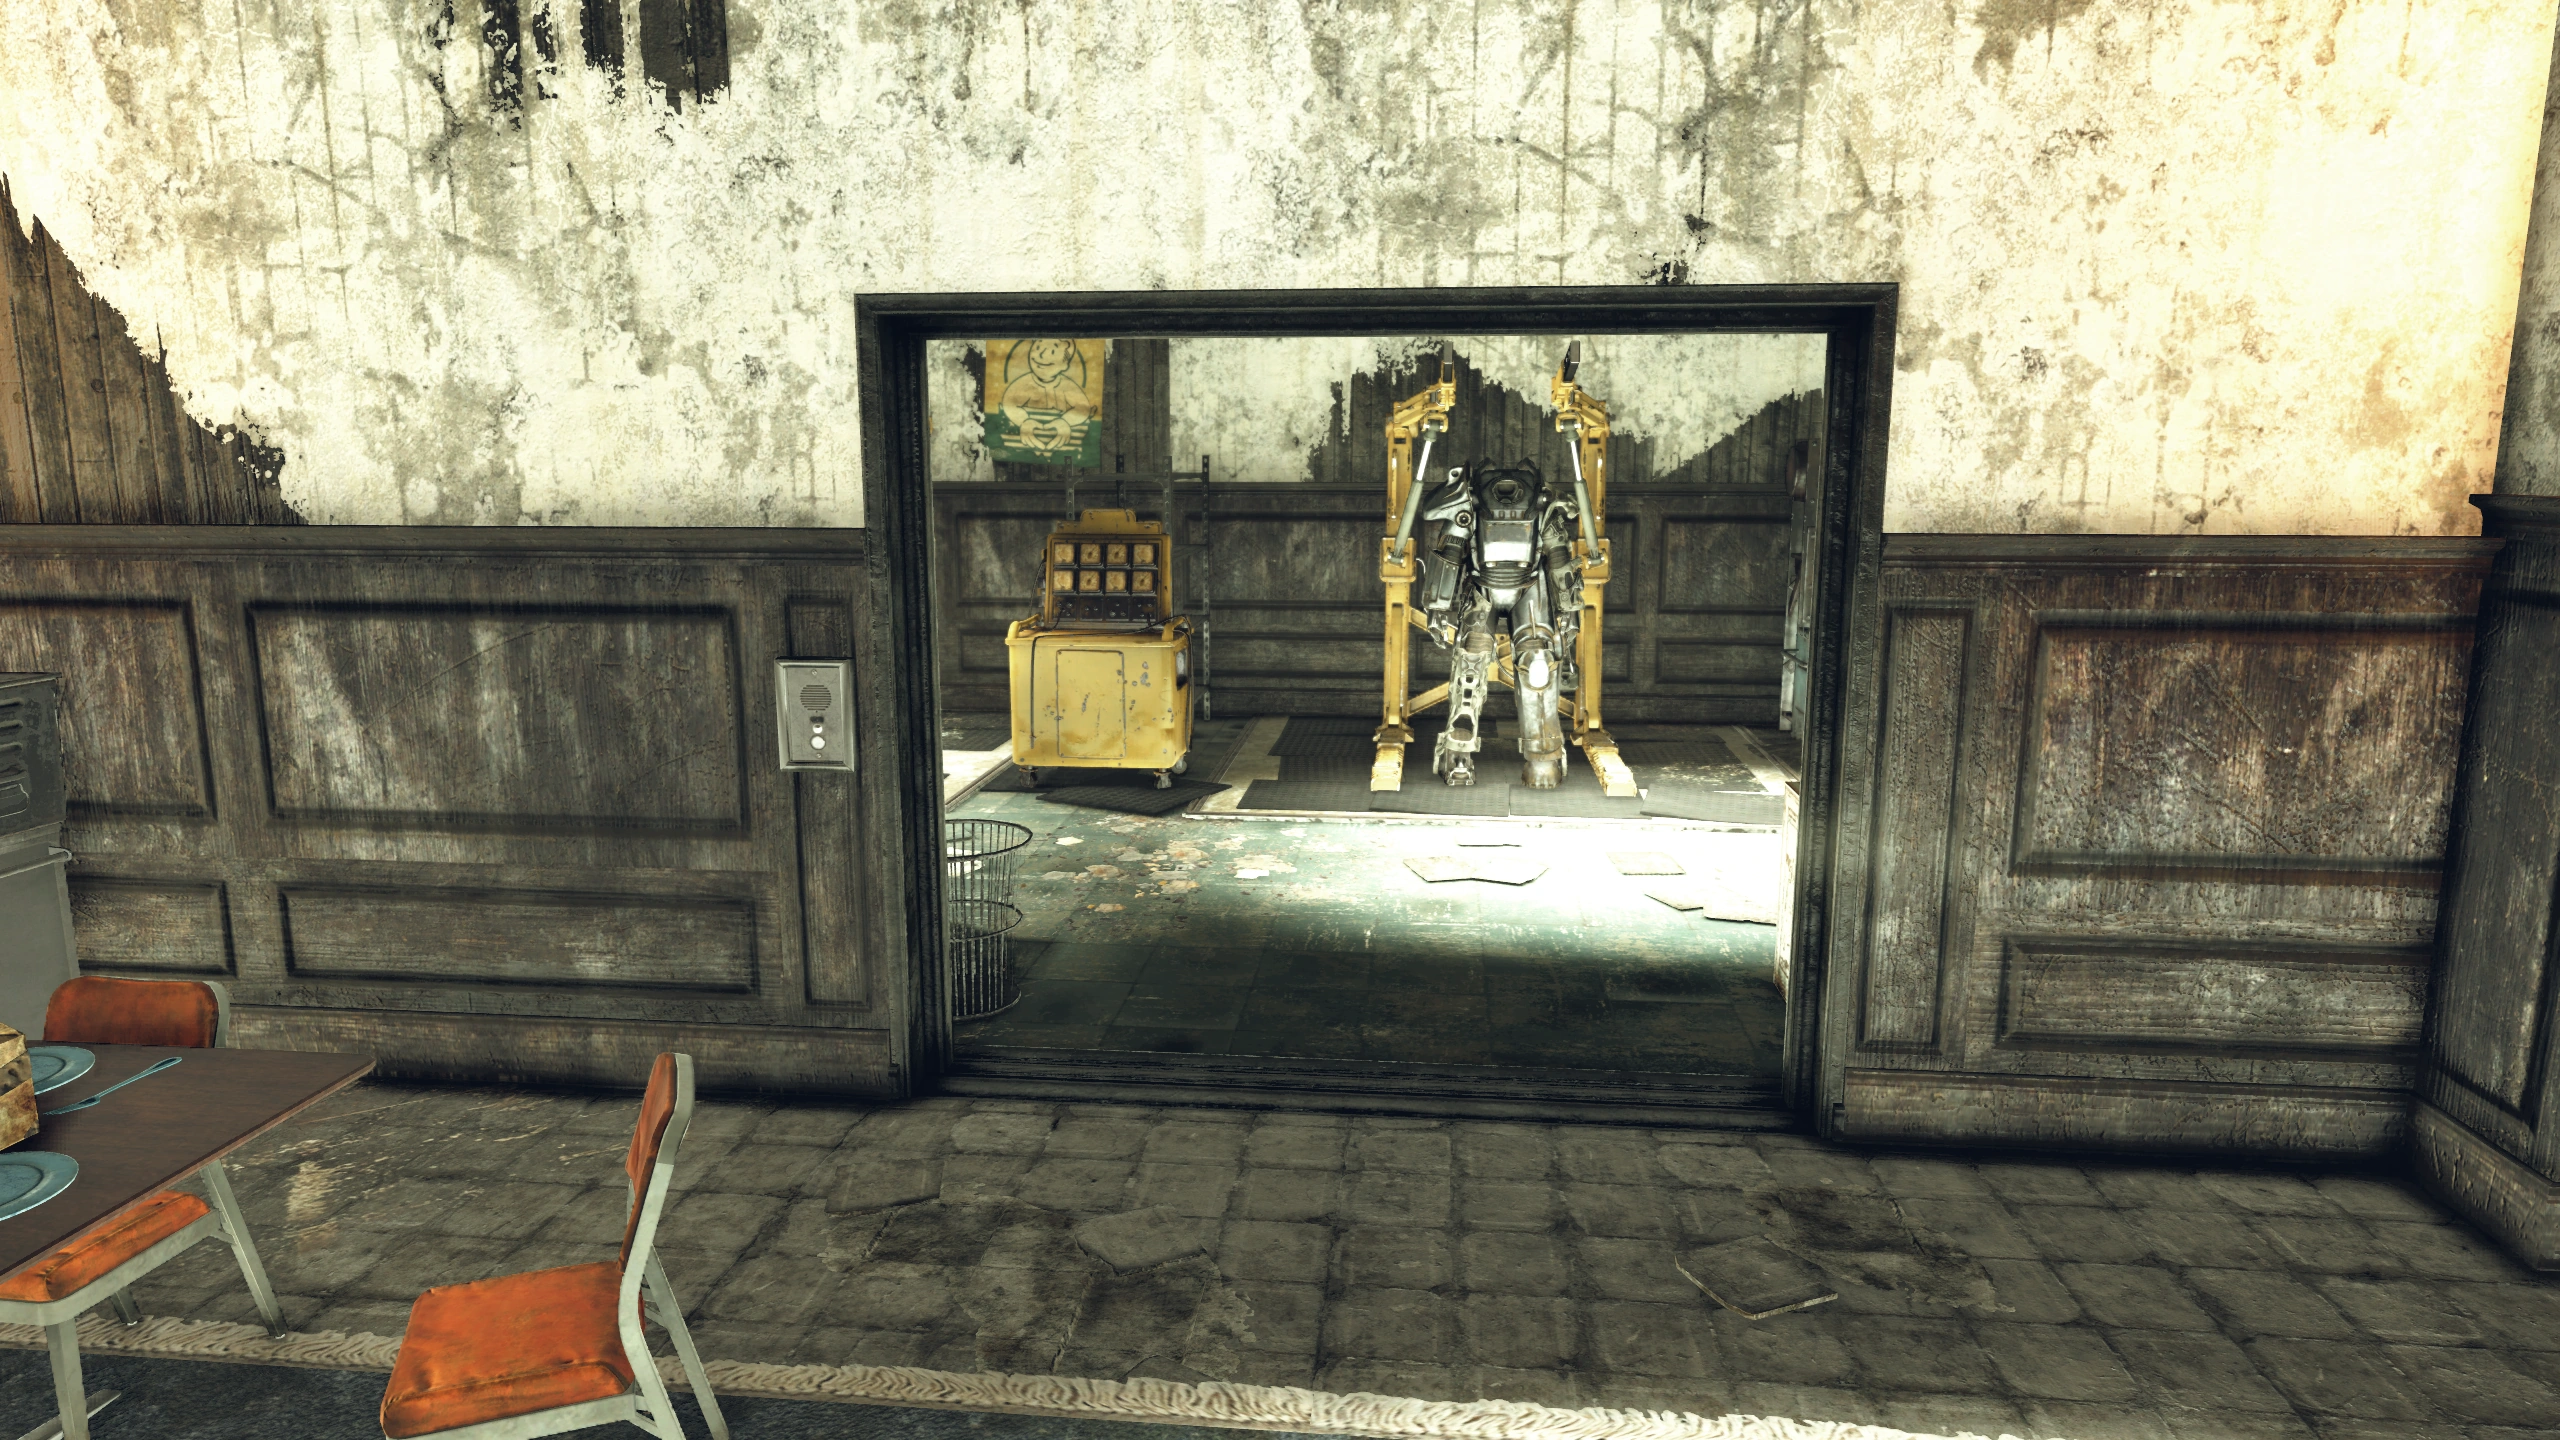
|
| Big Bend Tunnel East | T-series | At a power armor station in a Brotherhood compound outside the tunnel | 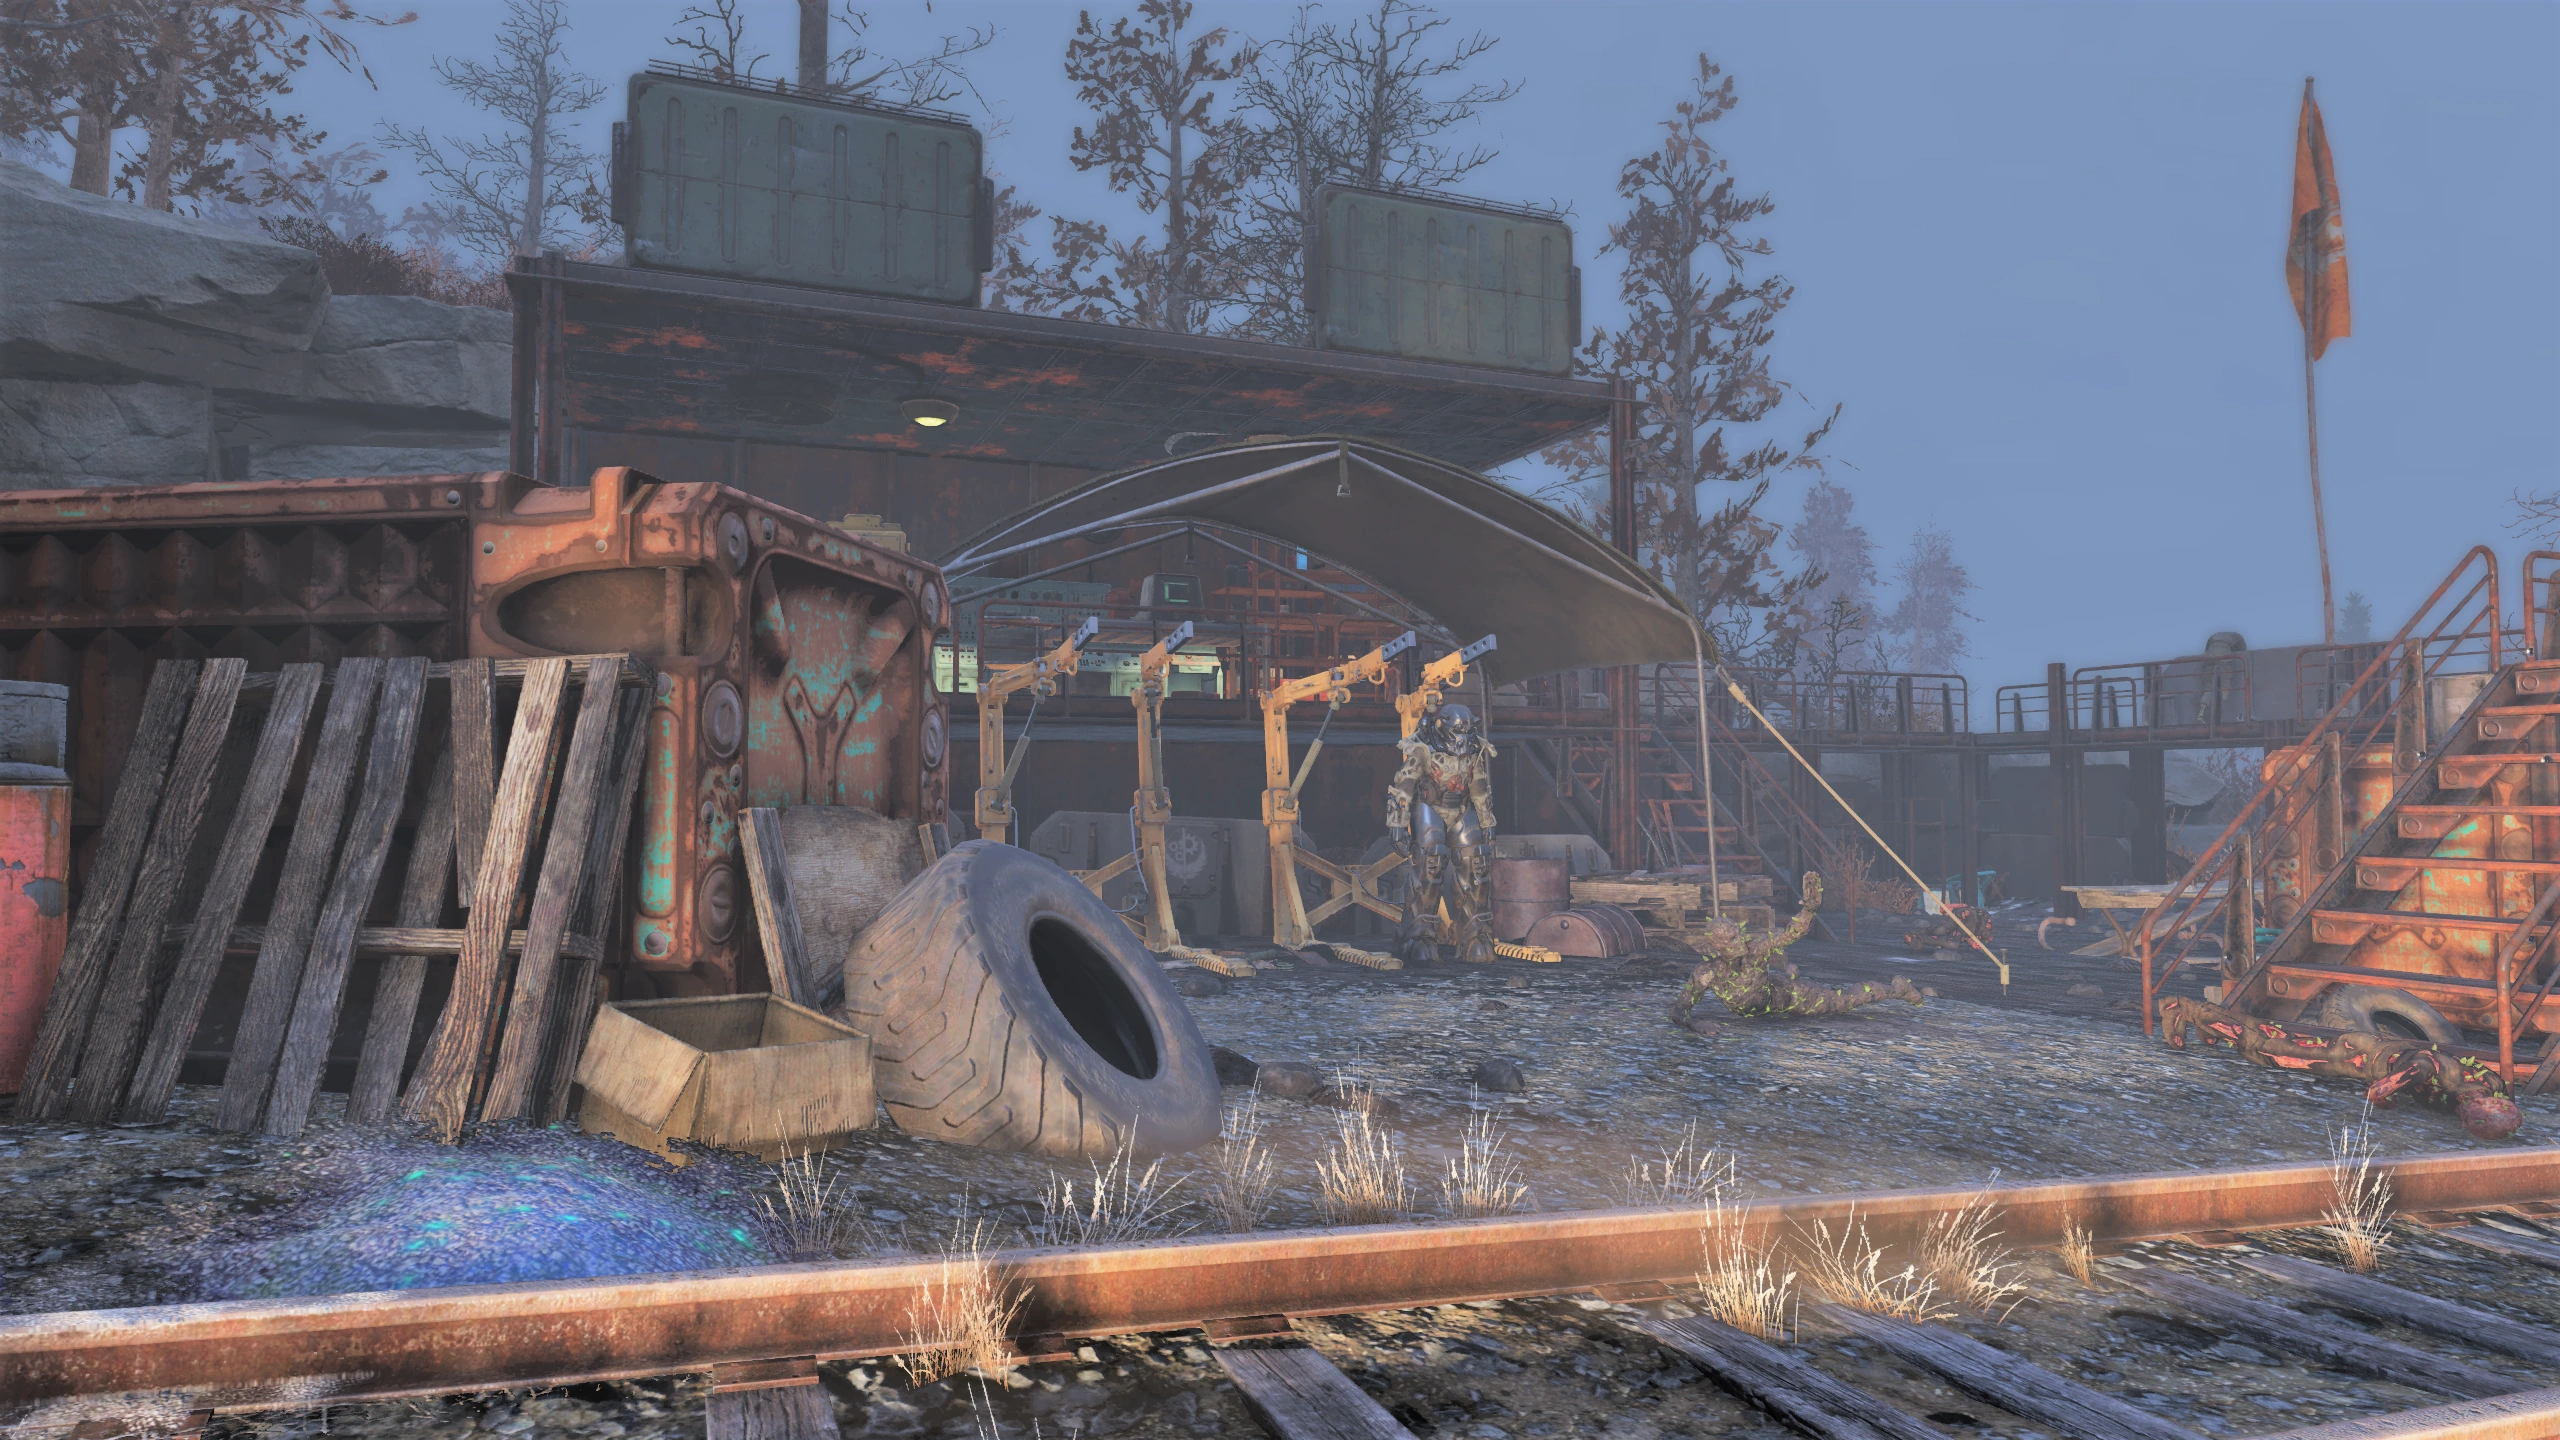
|
| Lost home | T-Series | In the largest shack at a power armor station | 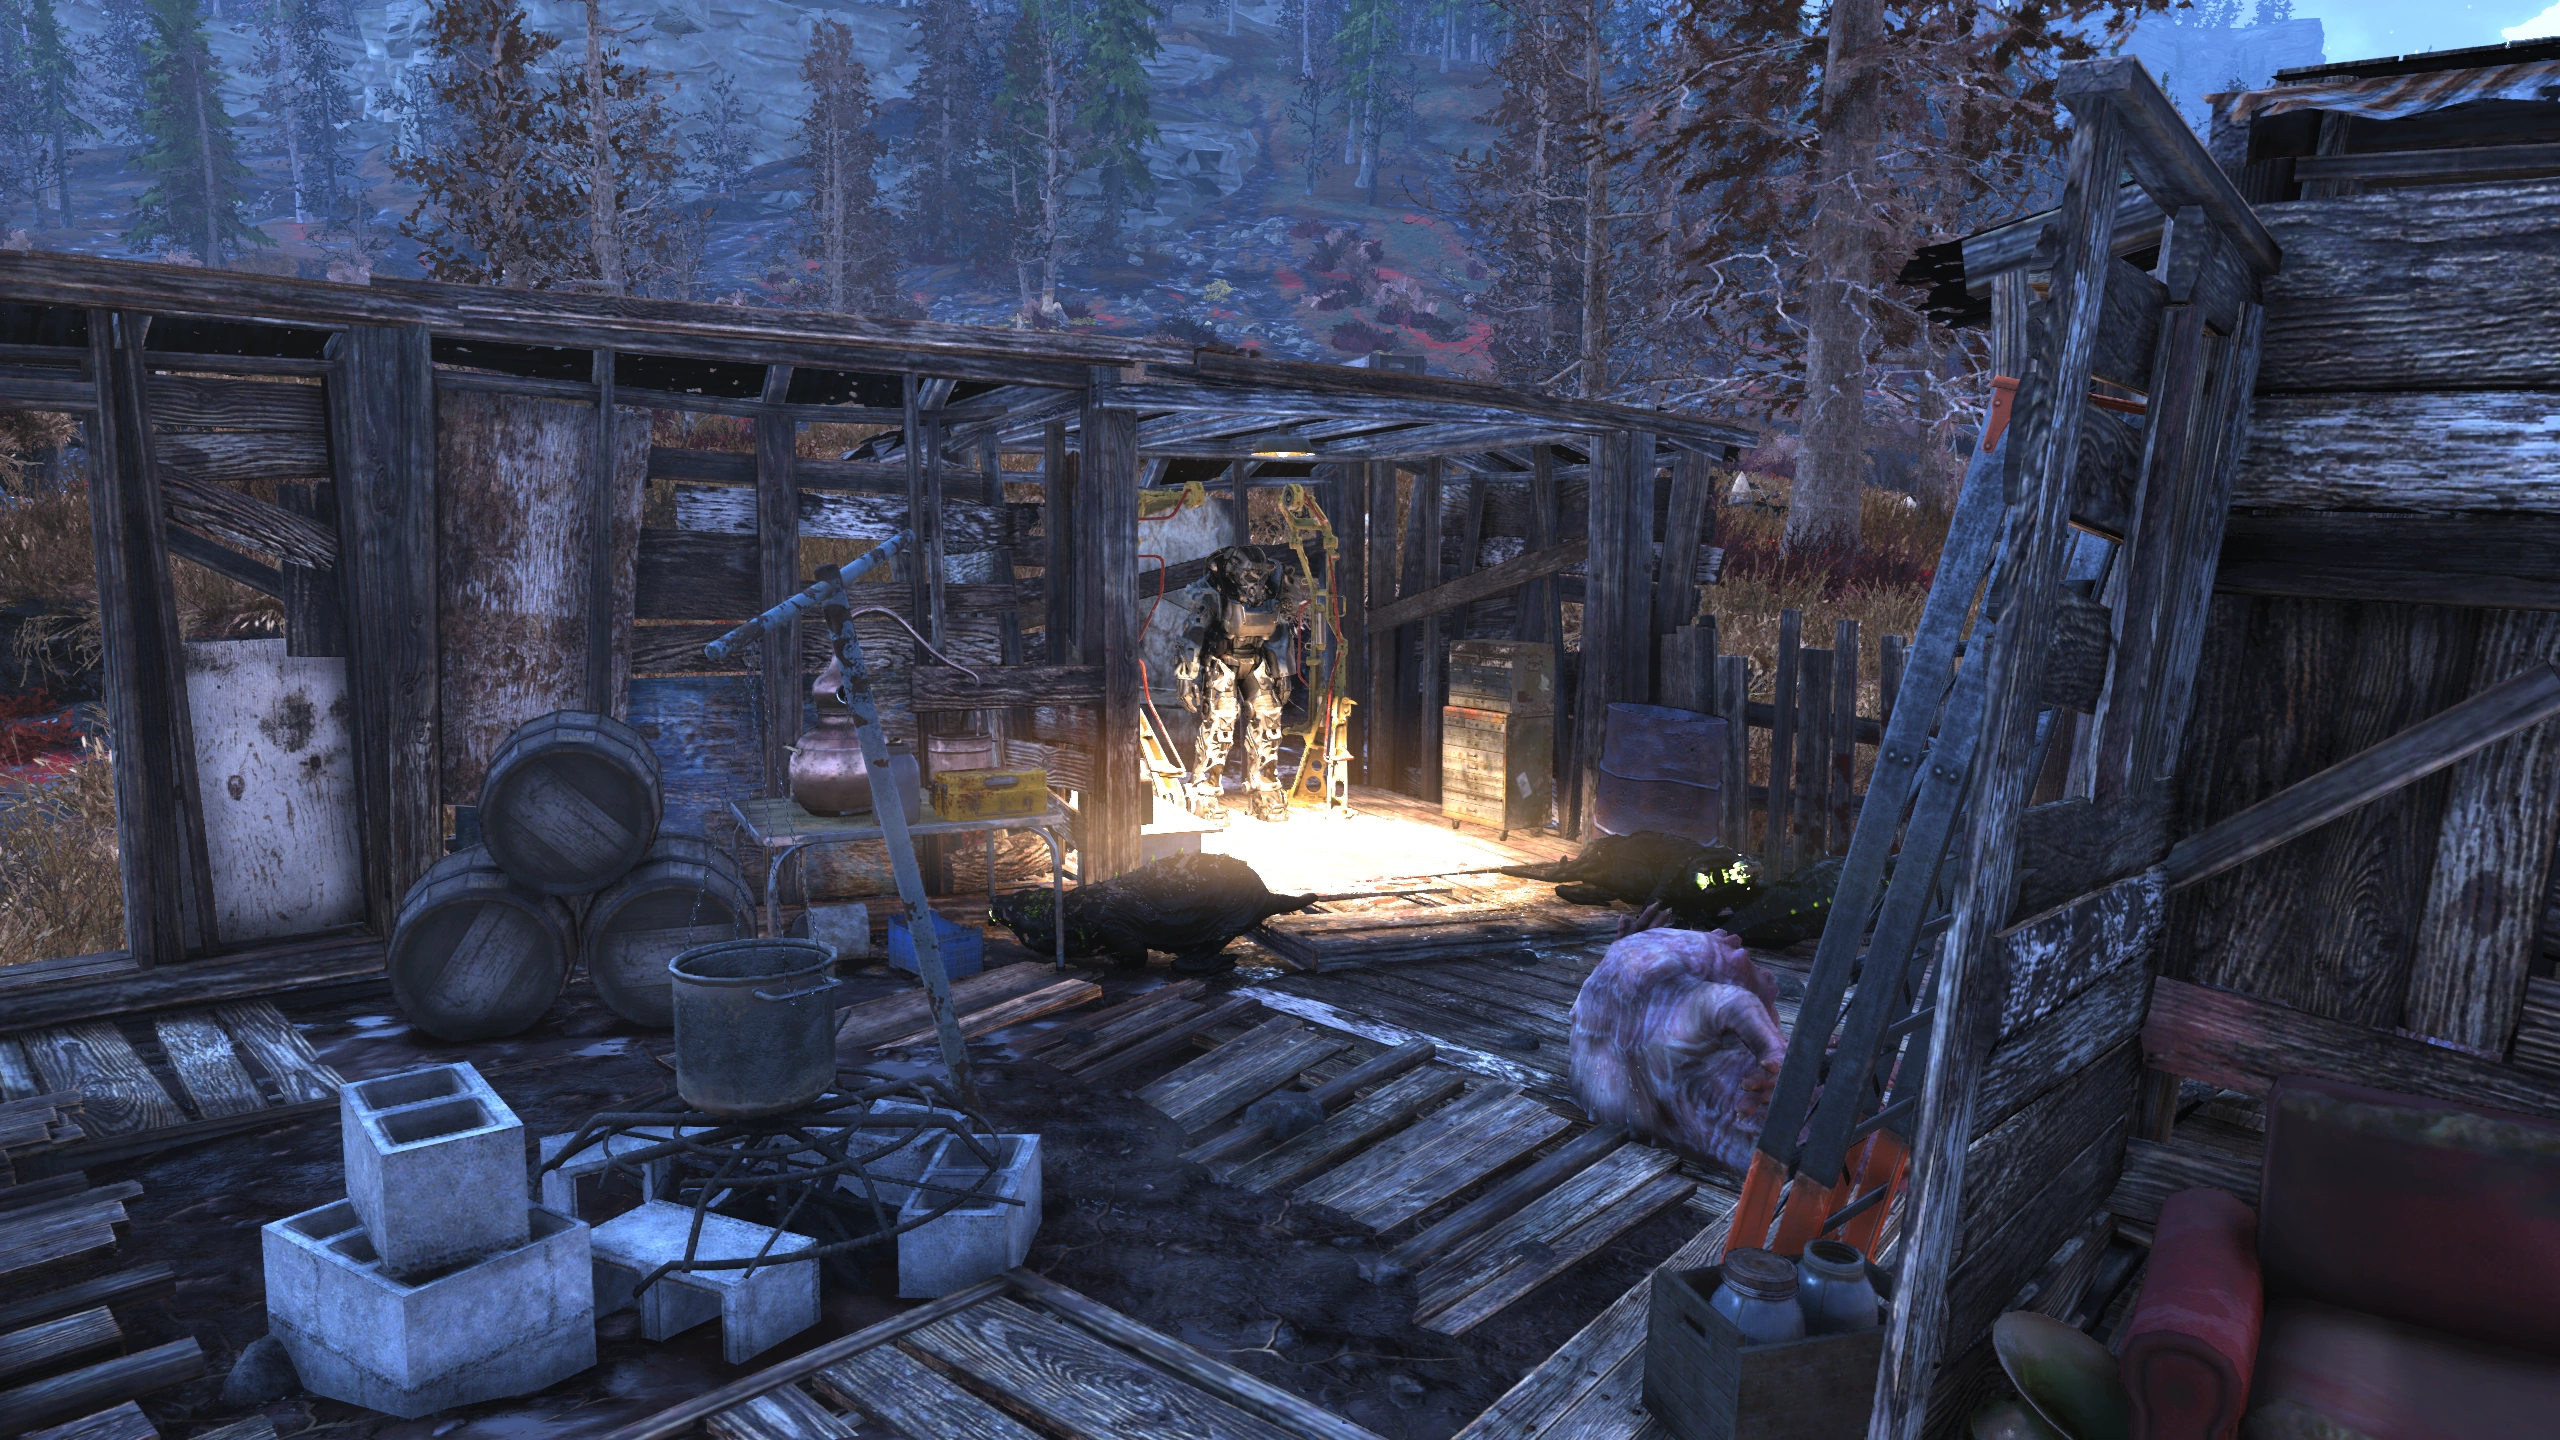
|
| Firebase Hancock | T-series | Between the modular buildings | 
|
| Watoga | T-series | There are at least six locations that can spawn T-series pieces around Watoga, most of them not too far from the two local merchants that sell T-type power armor mods too, making the city very good location for hunting the armor. One is in the central square next to a defunct Vertibot. | 
|
| Watoga rooftop | T-series | On the roof of the building east of the Watoga Civic Center. There are several access routes, one is the fire escapes on the east wall of the civic center. At the top, look for a Vertibot. | 
|
| Watoga Civic Center | T-series | In the main arena, at the west wall. | 
|
| Watoga Transit Hub | T-series | In a room just off the lobby with a skill 3 lock. The room also contains a generator with a fusion core. | 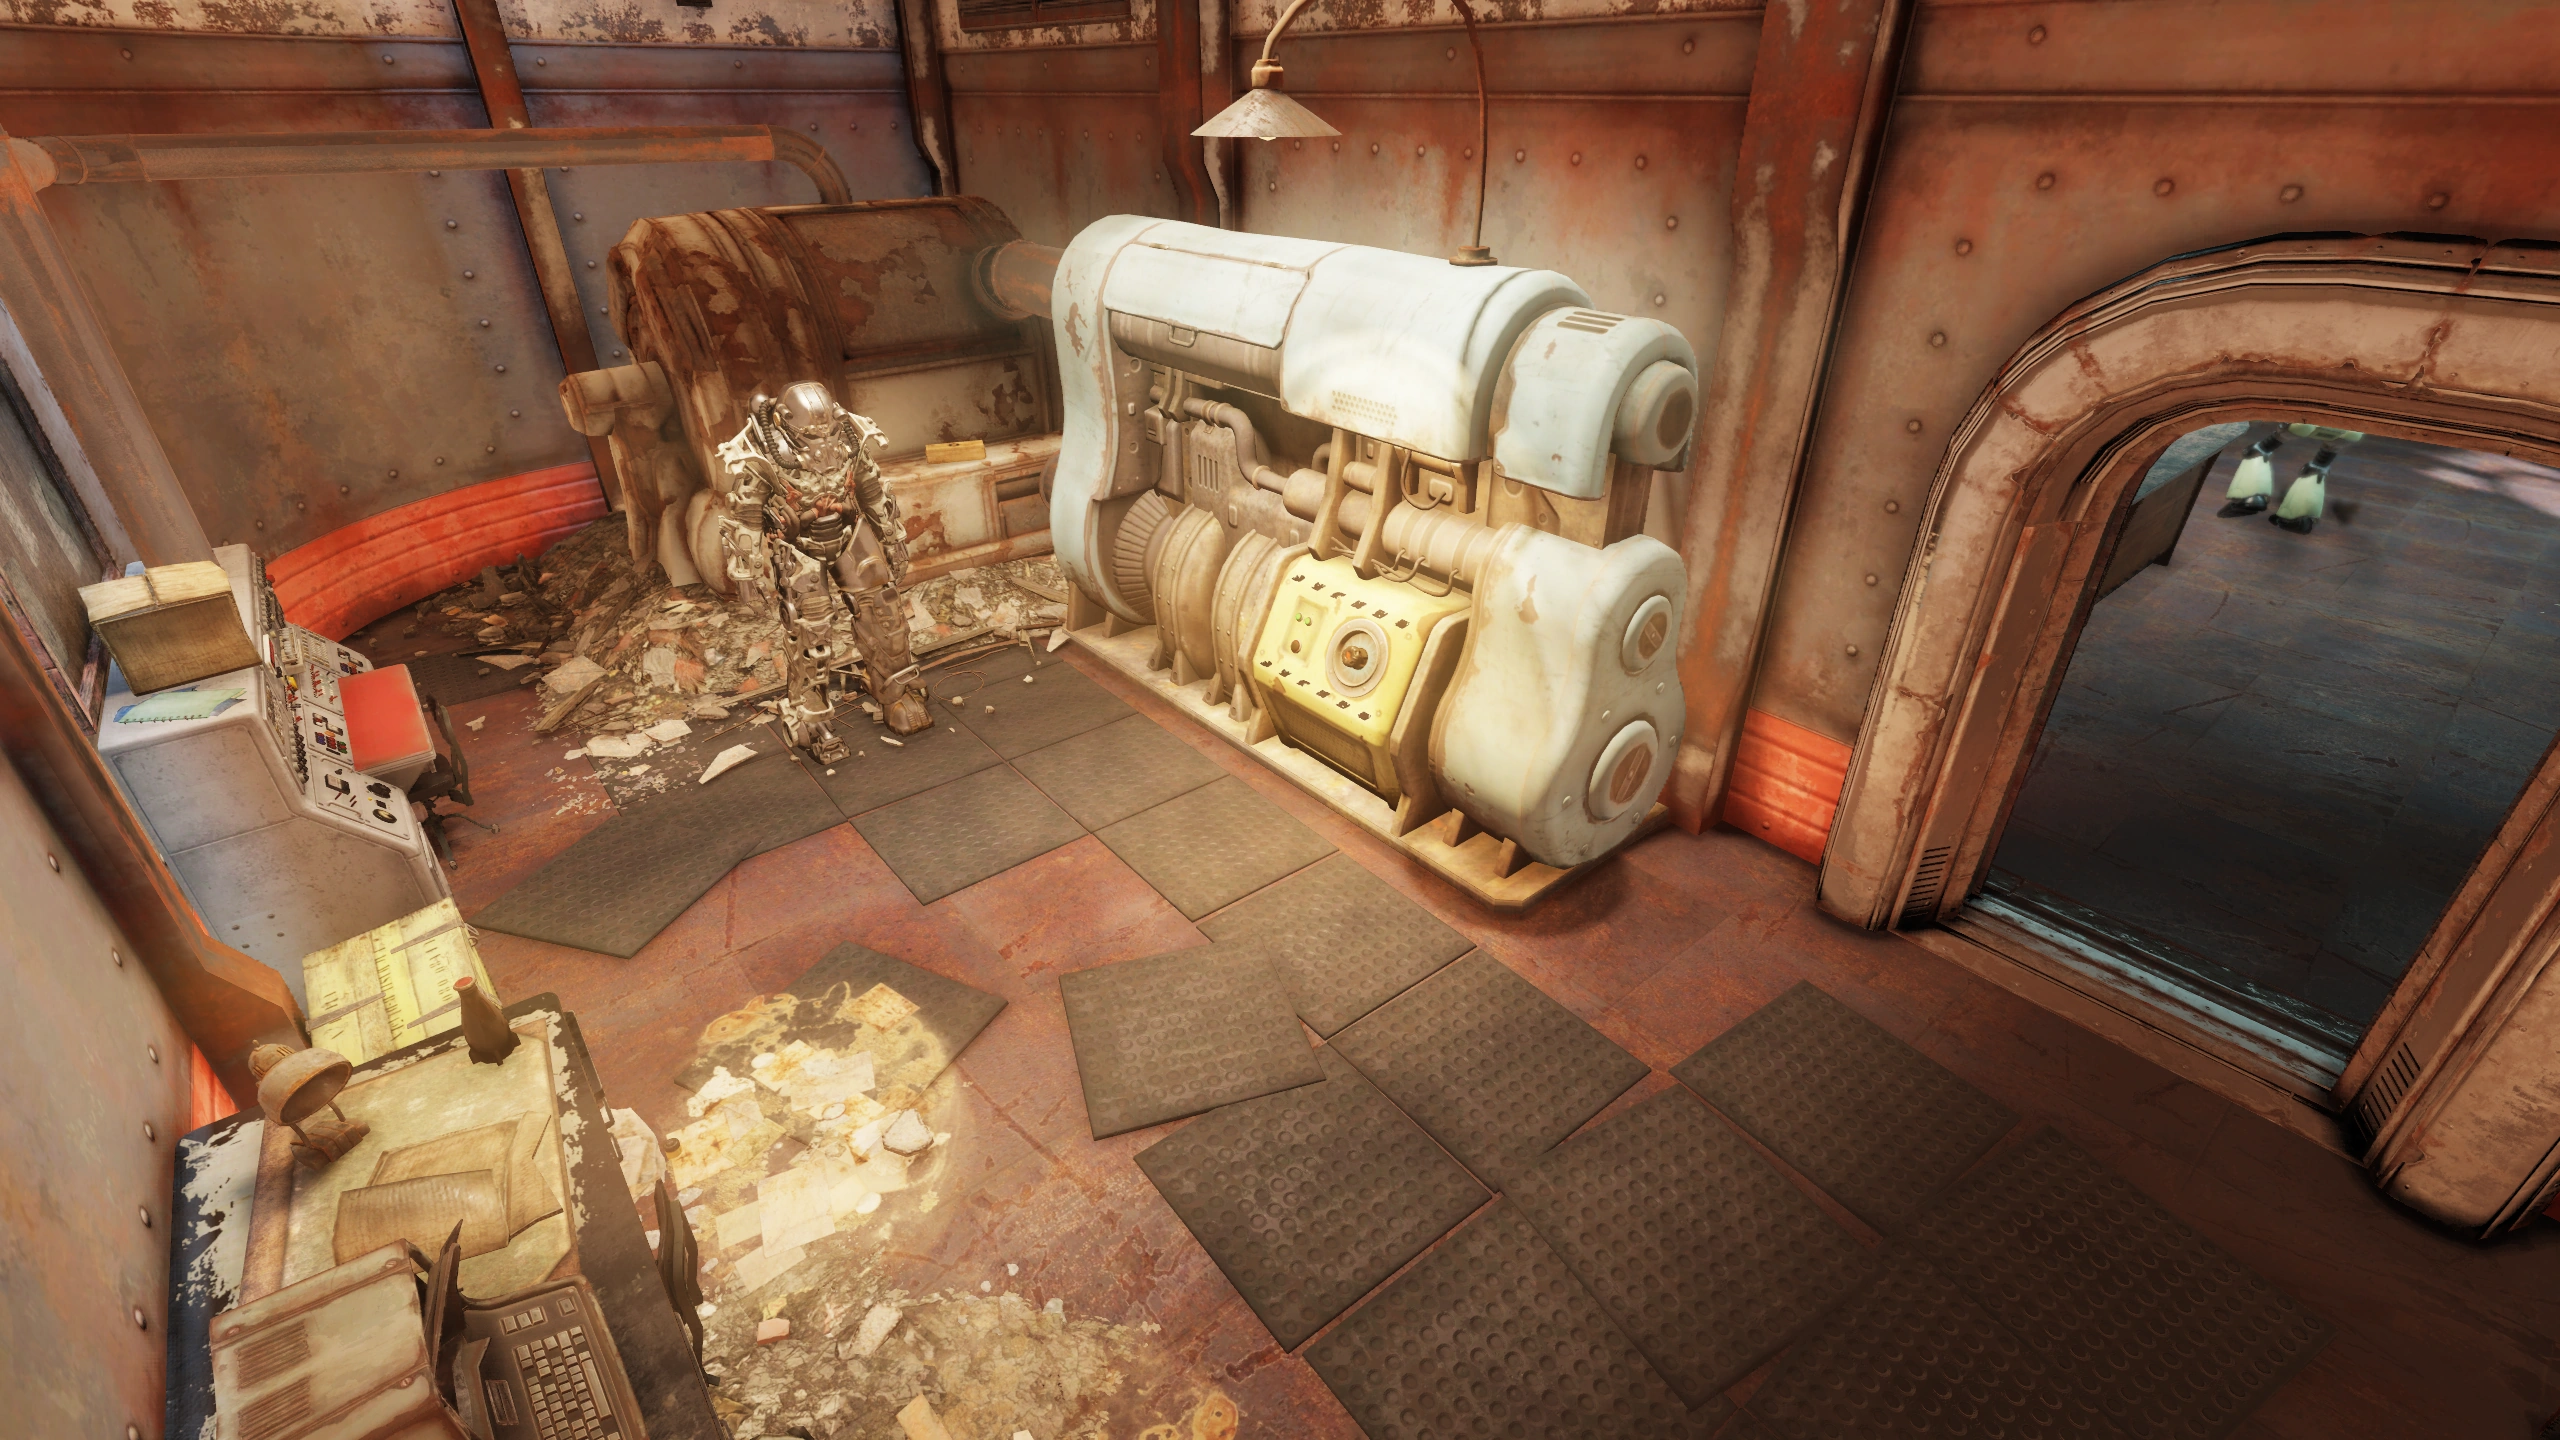
|
| Watoga Emergency Services | T-series | On the roof. Access using the stairs from the top floor to the roof or jump in power armor from the roof of the Watoga Municipal Center | 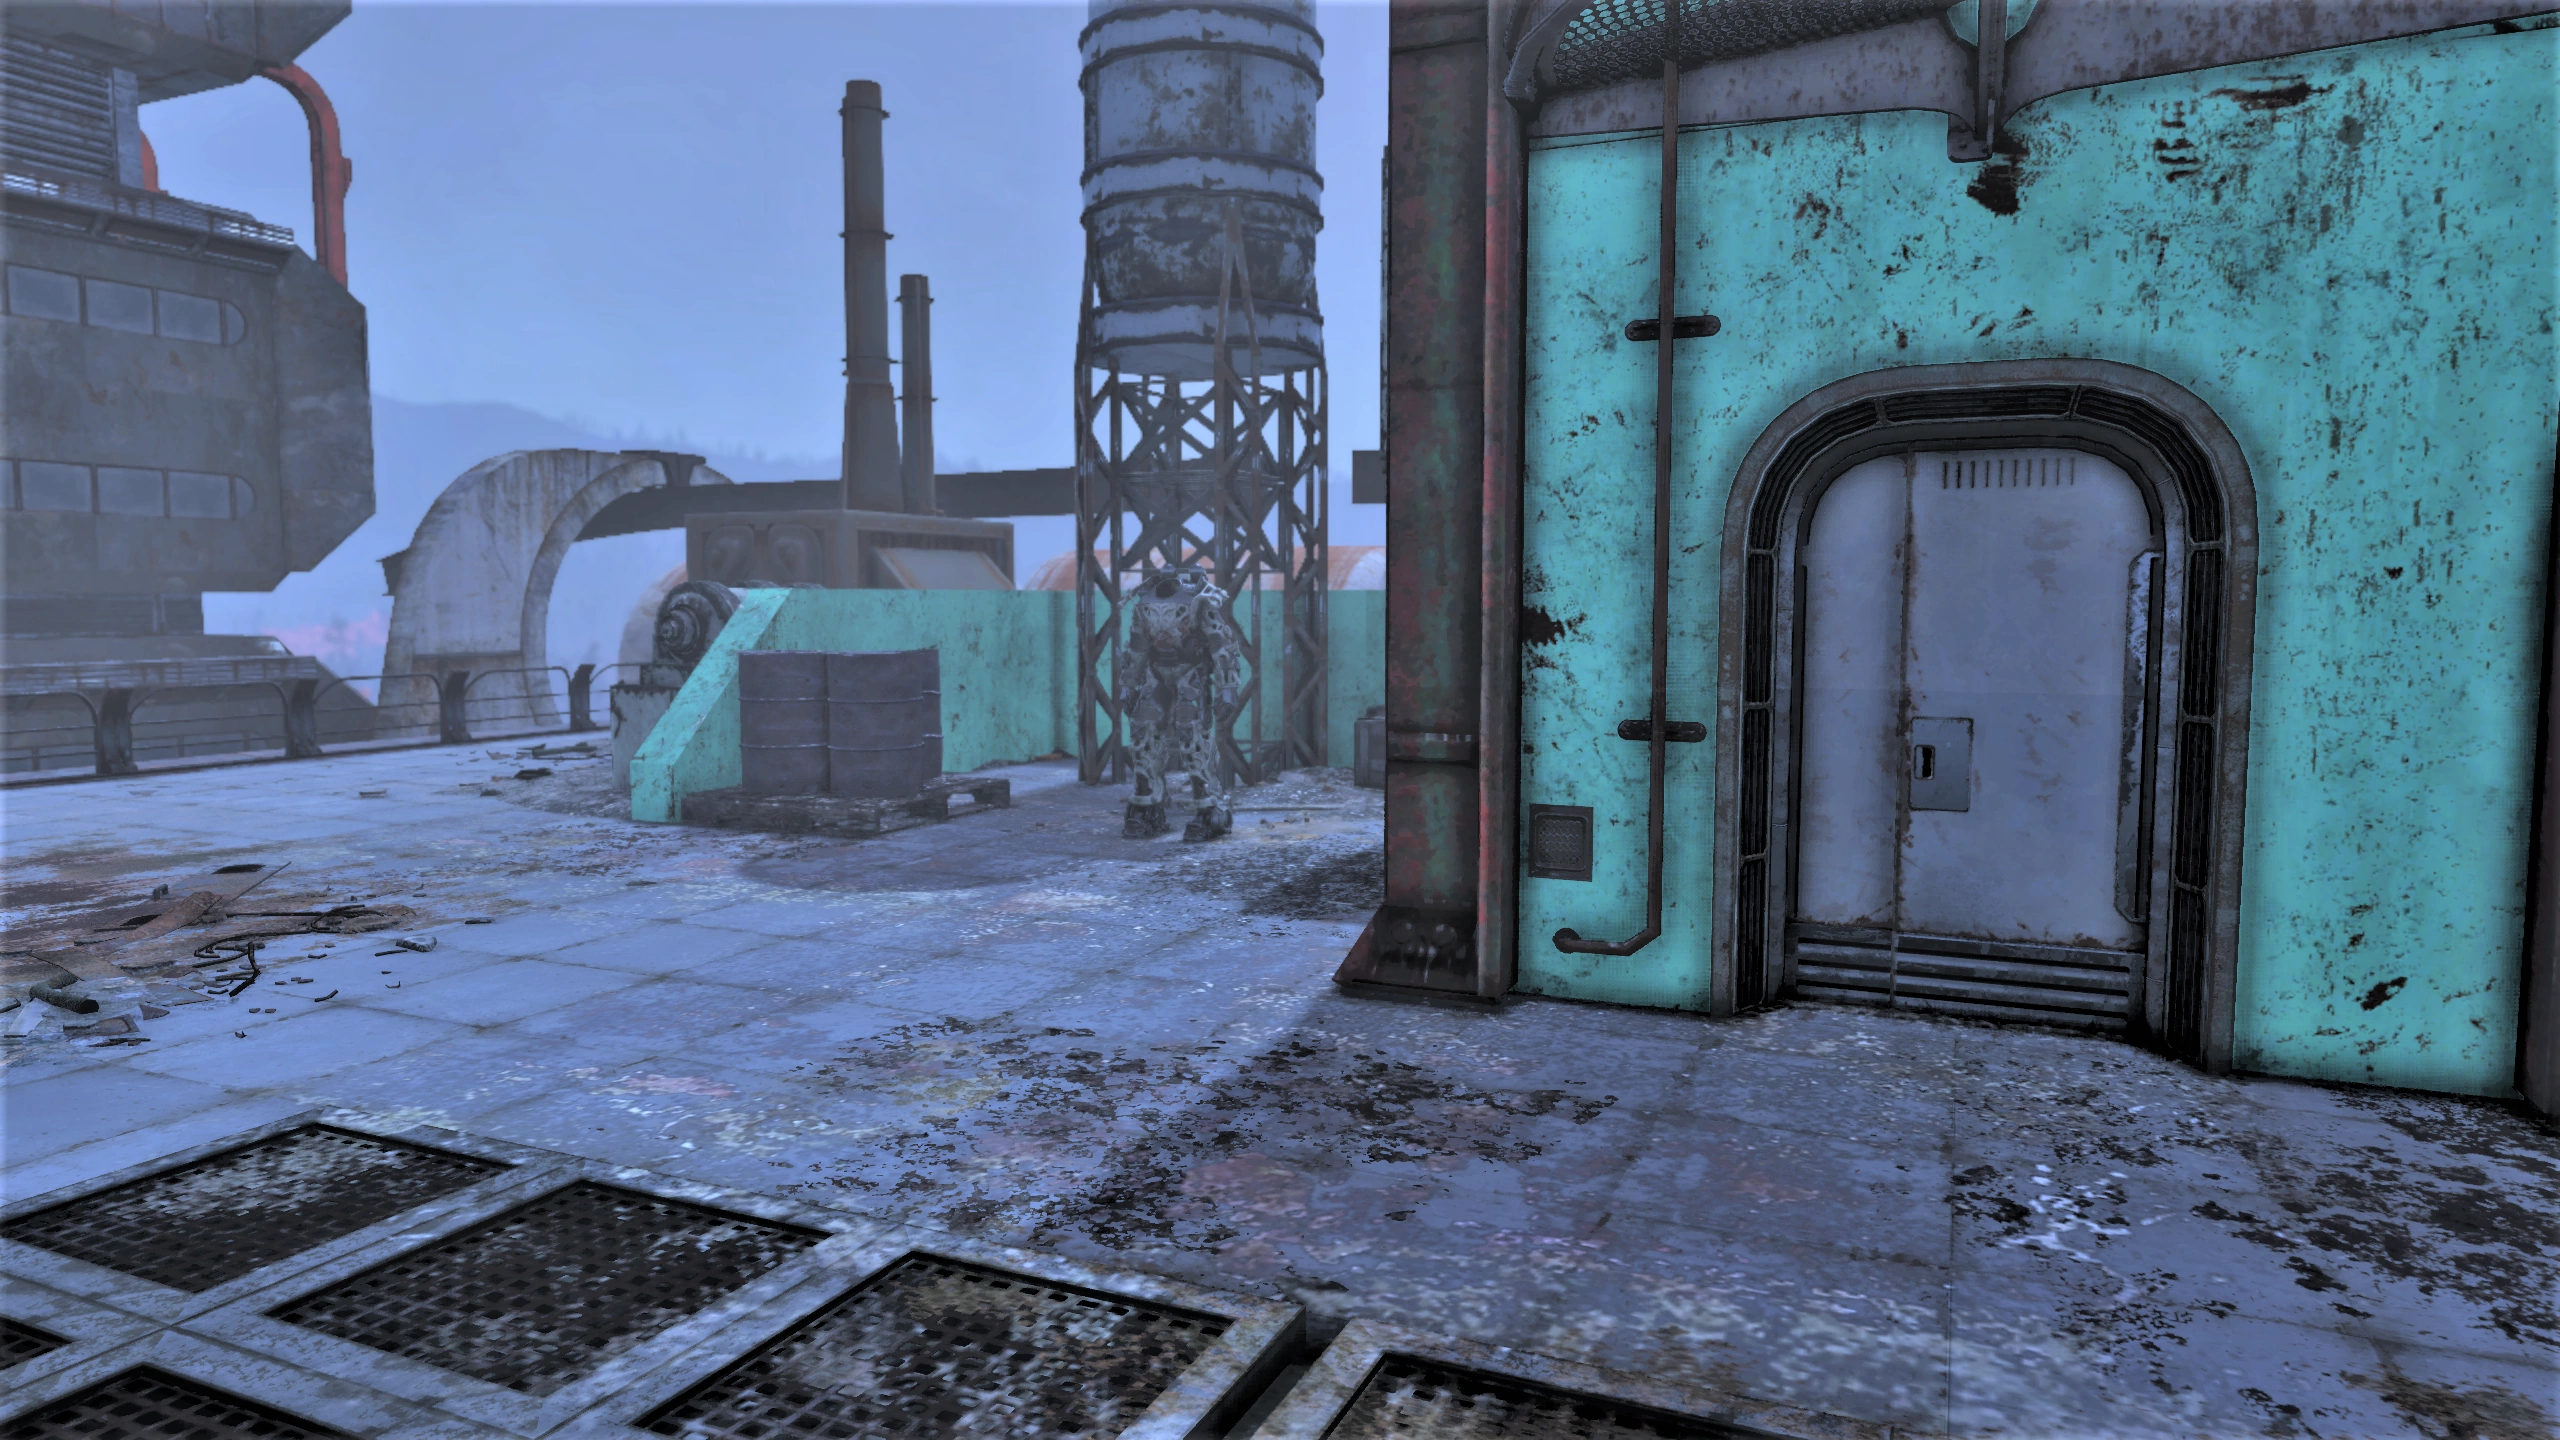
|
| Watoga High School | T-series | On the roof. Stairs to roof are outside on the south side of the building. | 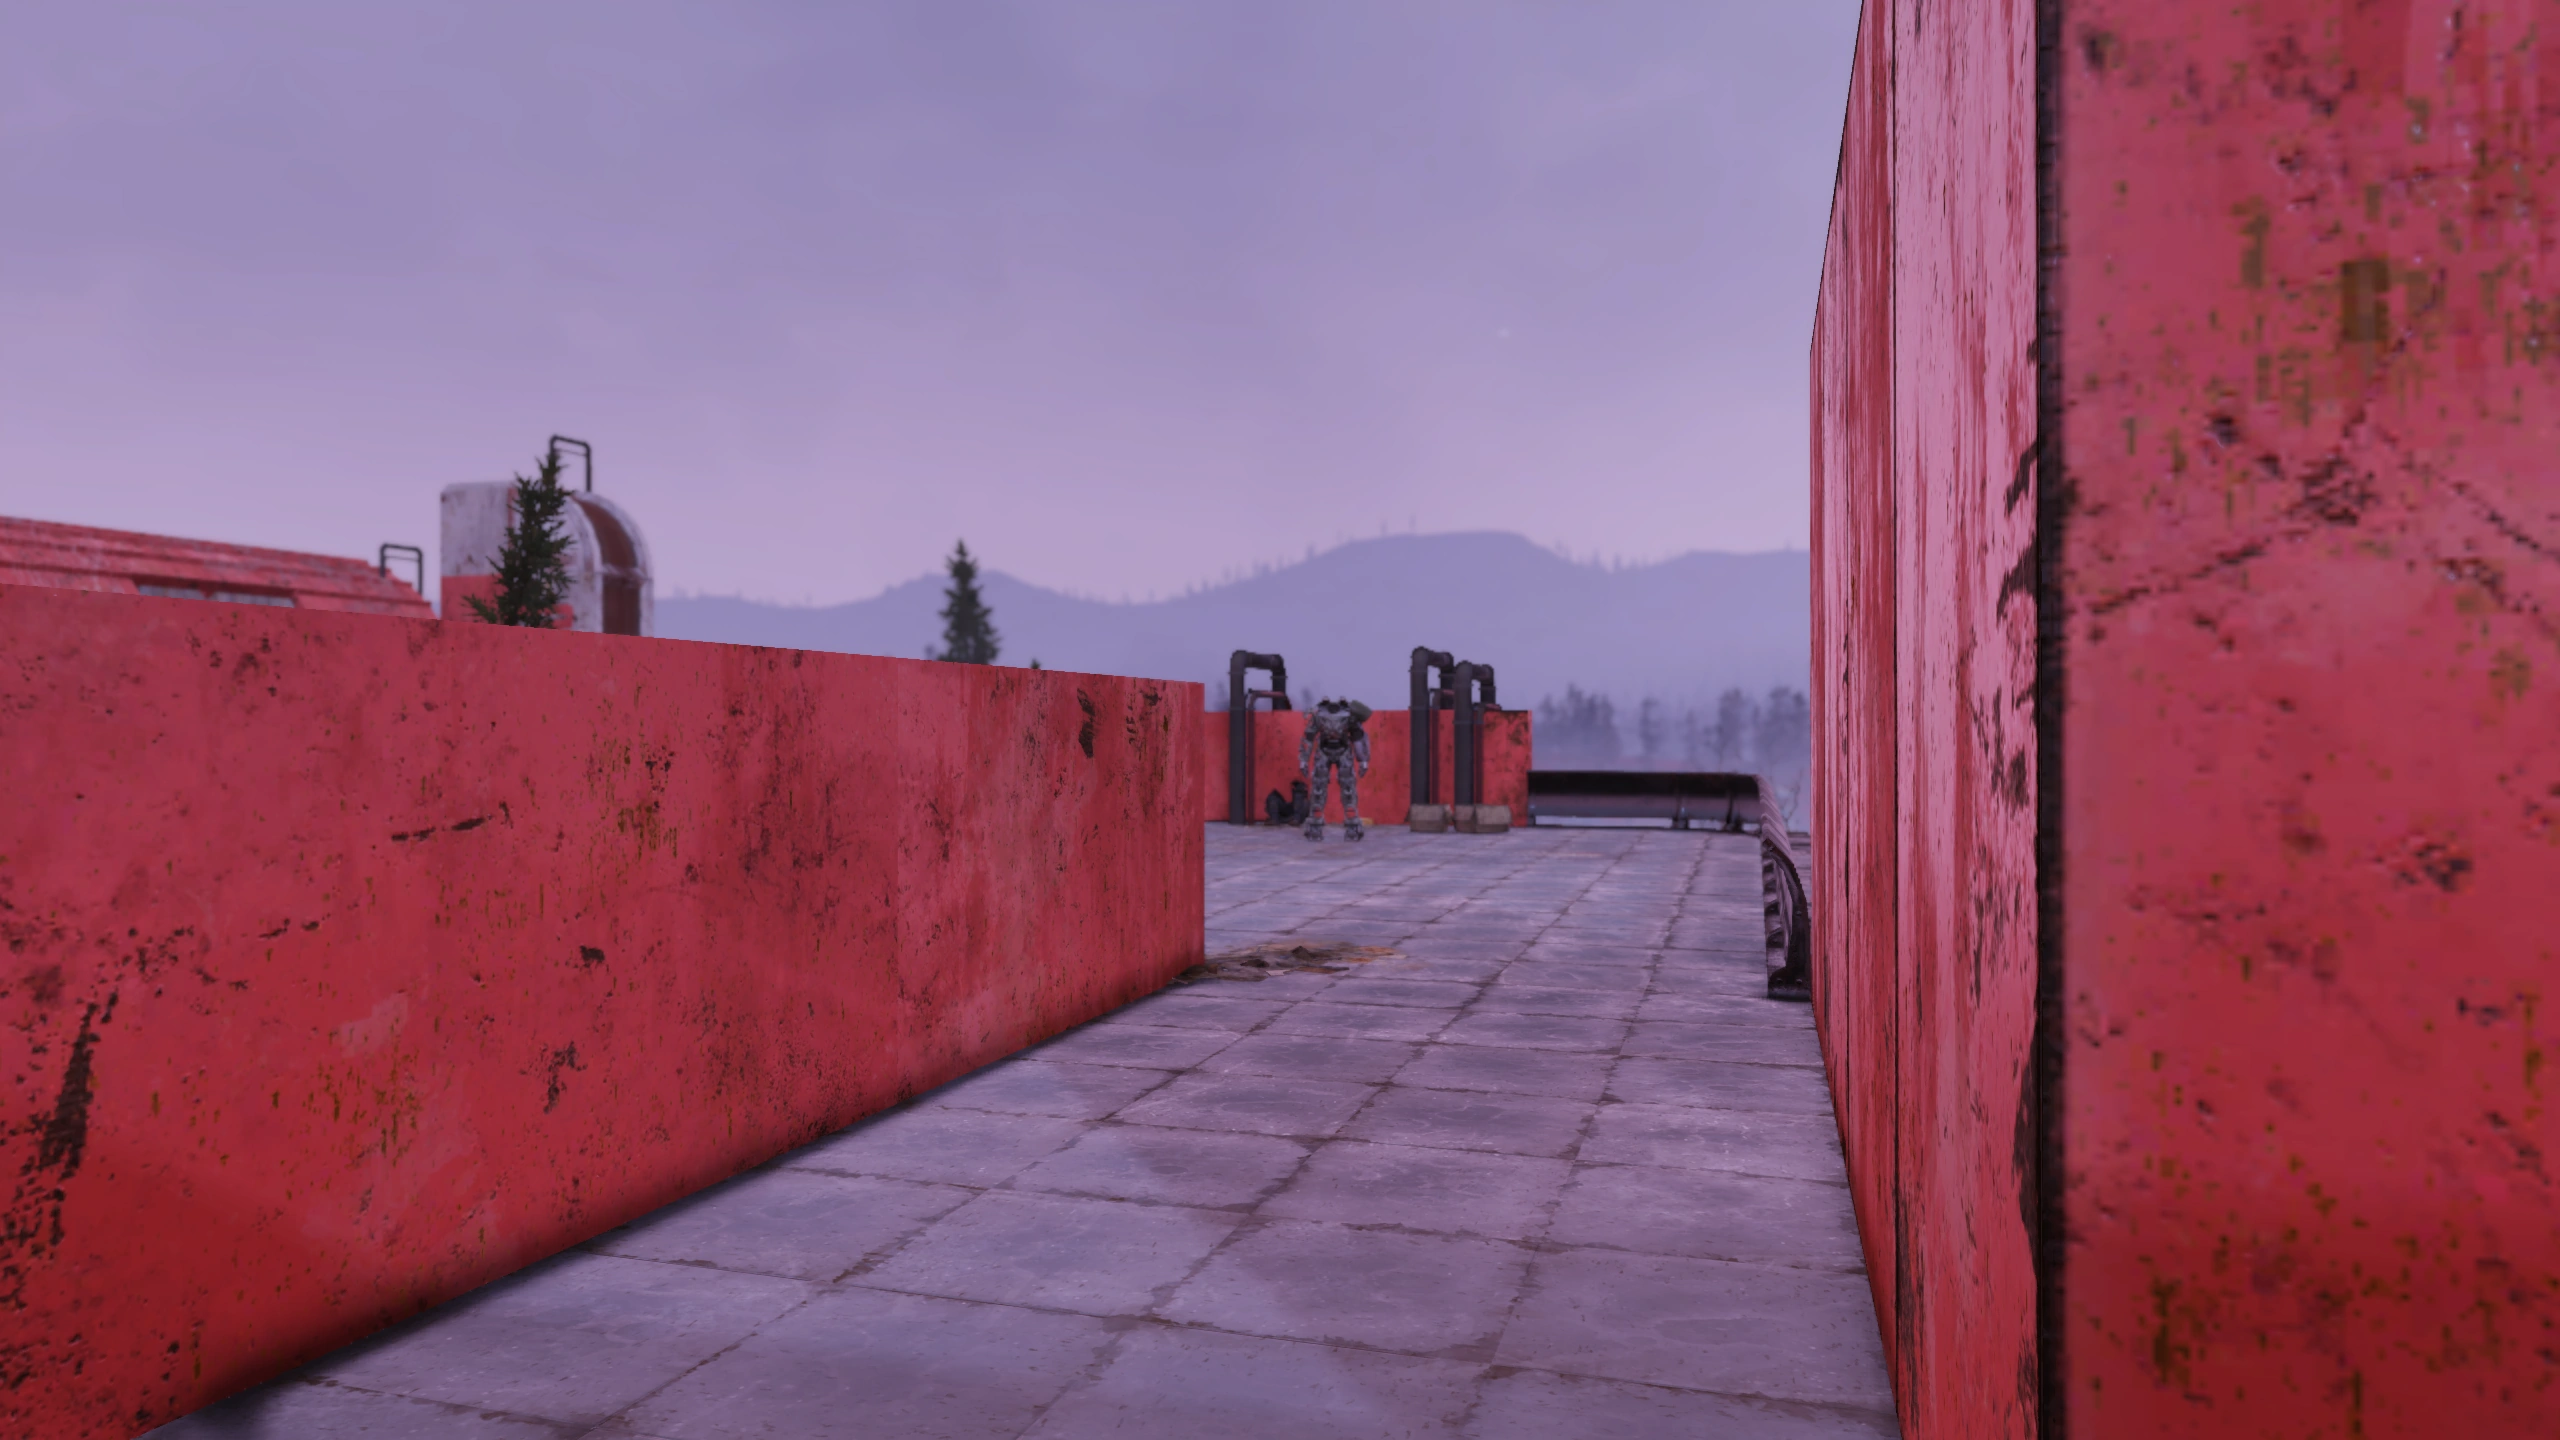
|
| Survey camp Alpha | T-Series | Under a canopy at a power armor station | 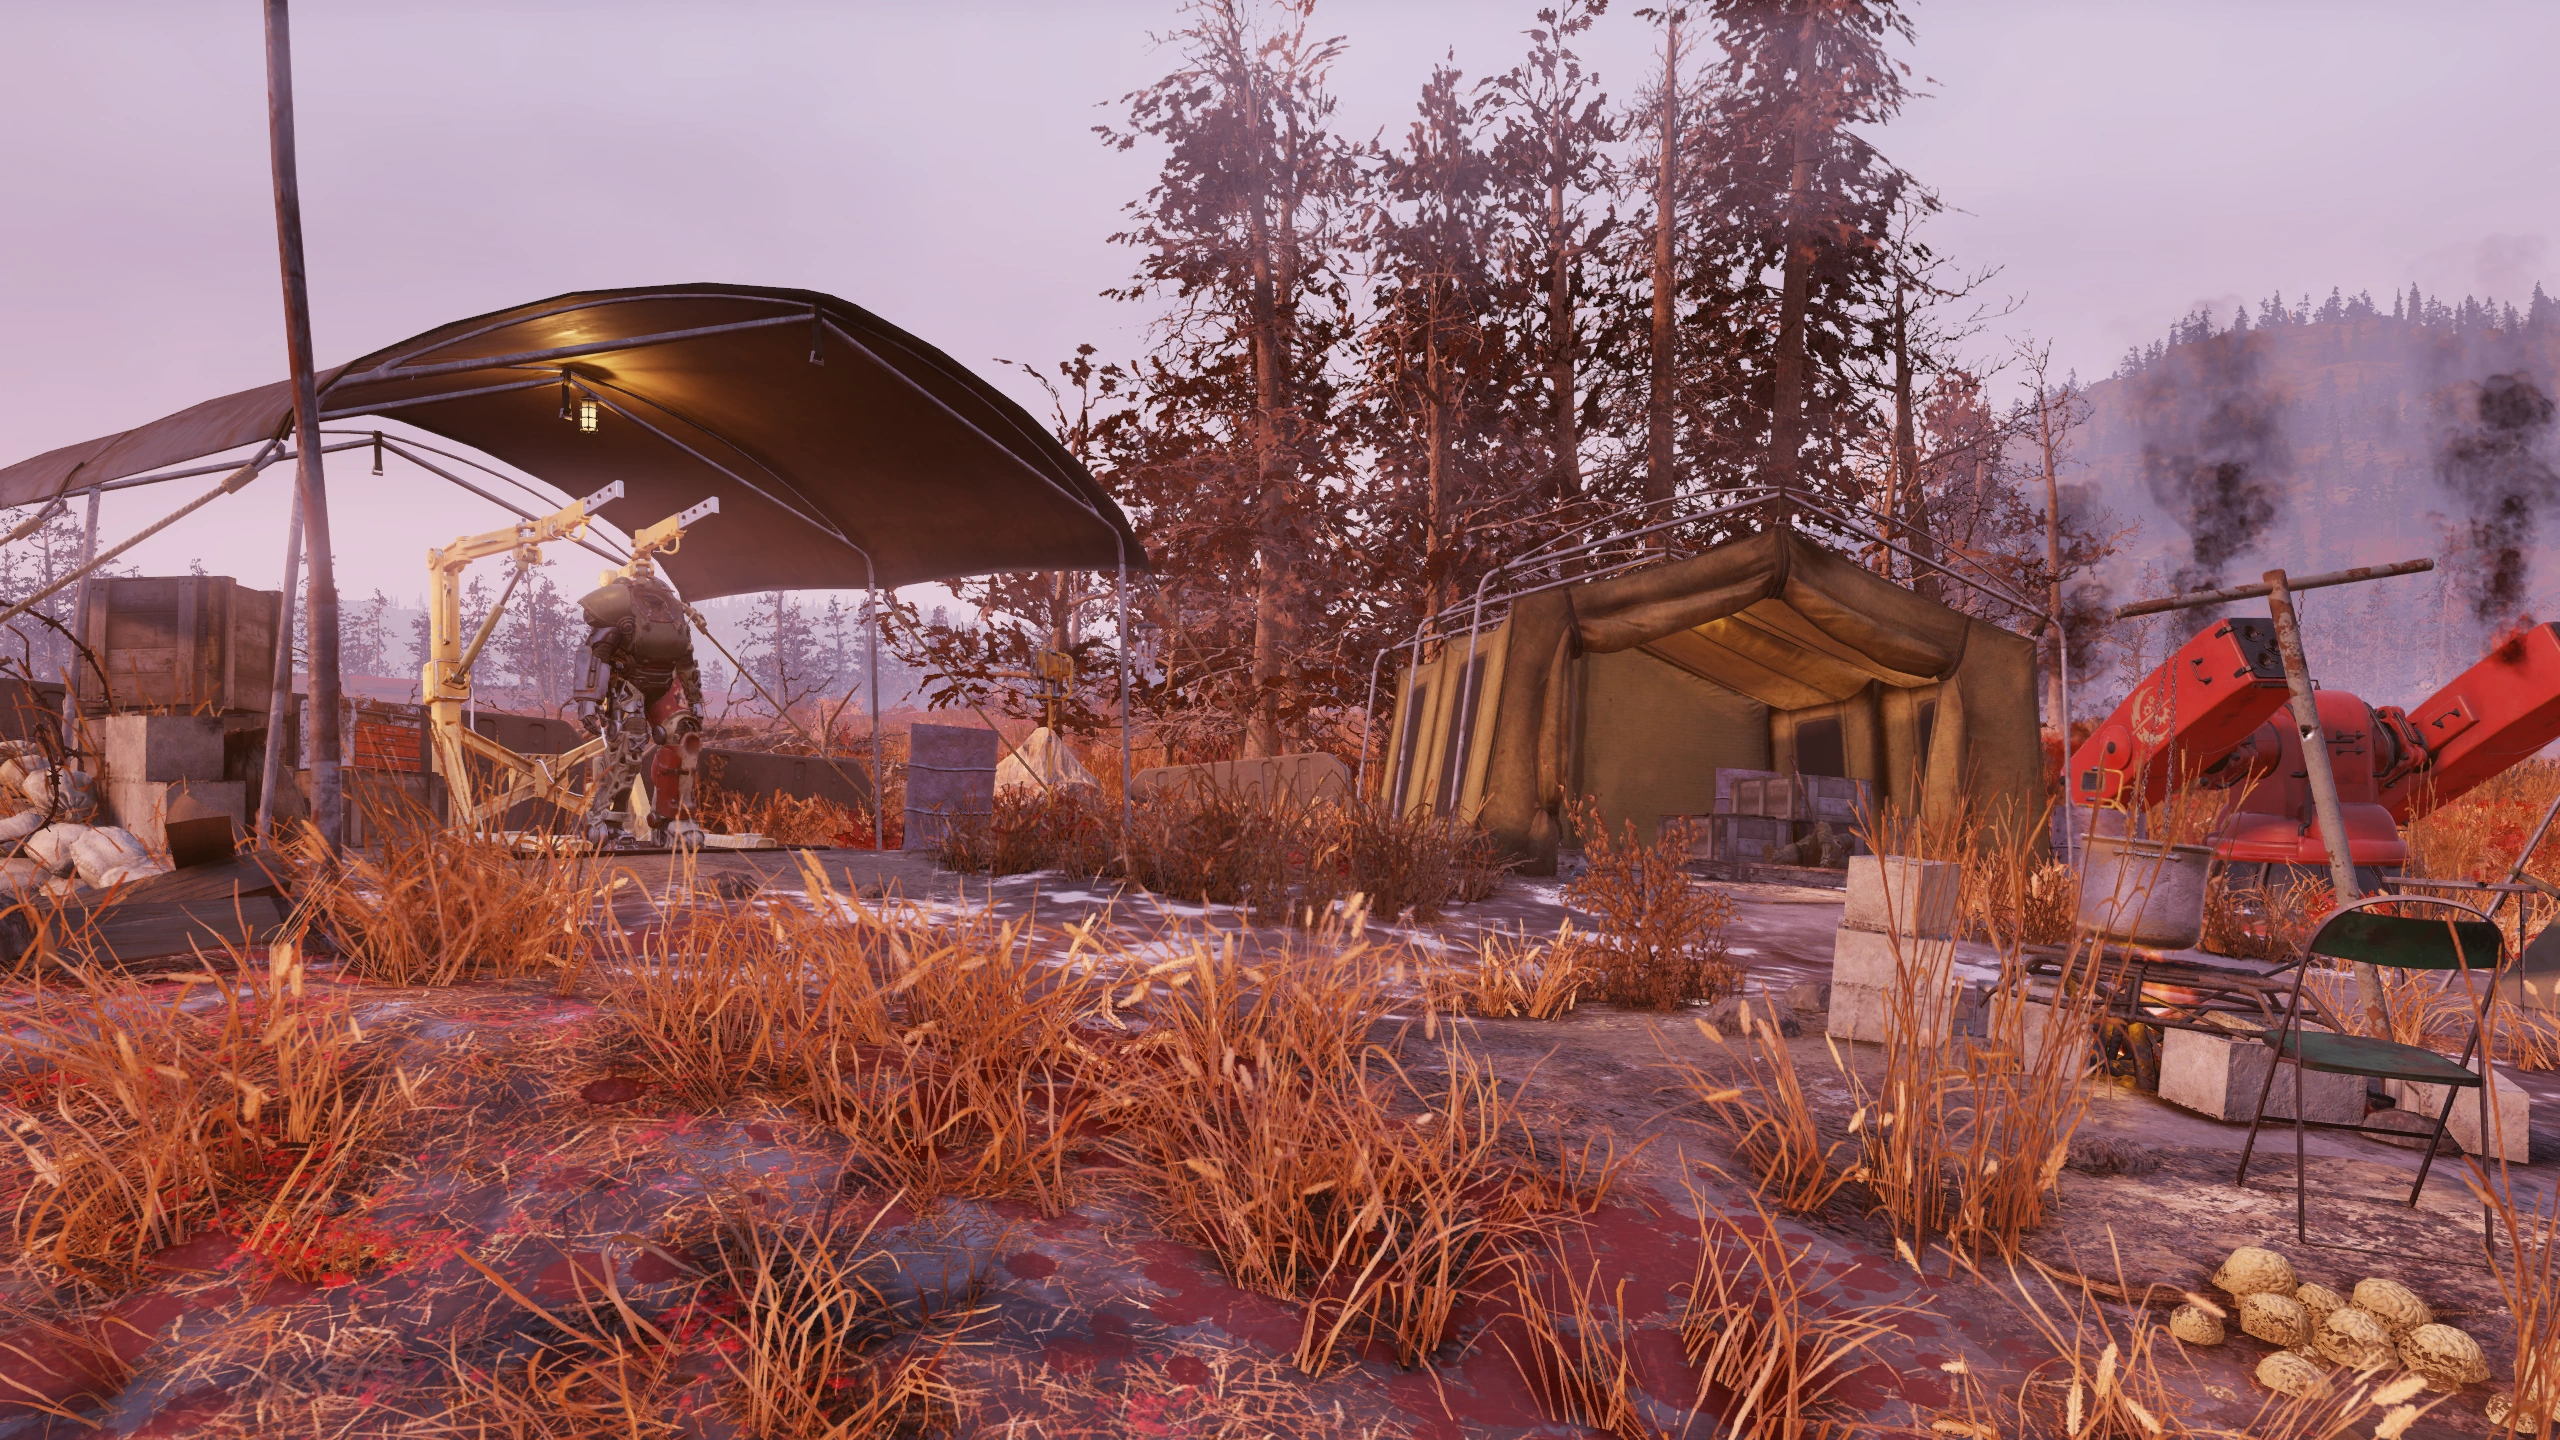
|
| Drop site V9 | T-series | In front of the building. | 
|
| Forward Station Delta | T-series | At a power armor station in the compound. | 
|