m (Reverted edits by 170.158.107.243 (talk) to last version by Jinau) |
|||
| (28 intermediate revisions by 21 users not shown) | |||
| Line 22: | Line 22: | ||
|- |
|- |
||
| − | ![[File:Fo4 Cait.jpg|90px]]<br>[[Cait]] |
+ | ![[File:Fo4 Cait.jpg|90px]]<br />[[Cait]] |
|[[Combat Zone]] |
|[[Combat Zone]] |
||
|Ask her to join after clearing the [[Combat Zone]] |
|Ask her to join after clearing the [[Combat Zone]] |
||
| Line 34: | Line 34: | ||
|- |
|- |
||
| − | ![[File:Codsworth E3 PostWar.png|90px]]<br>[[Codsworth]] |
+ | ![[File:Codsworth E3 PostWar.png|90px]]<br />[[Codsworth]] |
|[[Sanctuary Hills]] |
|[[Sanctuary Hills]] |
||
|Ask him to join after visiting Concord in the quest [[Out of Time]] |
|Ask him to join after visiting Concord in the quest [[Out of Time]] |
||
| Line 46: | Line 46: | ||
|- |
|- |
||
| − | ![[File:Curie.jpg|90px]]<br>[[Curie]] |
+ | ![[File:Curie.jpg|90px]]<br />[[Curie]] |
|[[Vault 81]] |
|[[Vault 81]] |
||
|Complete the quest [[Hole in the Wall]] |
|Complete the quest [[Hole in the Wall]] |
||
| Line 58: | Line 58: | ||
|- |
|- |
||
| − | ![[File:Danse.jpg|90px]]<br>[[Danse|Paladin Danse]] |
+ | ![[File:Danse.jpg|90px]]<br />[[Danse|Paladin Danse]] |
|[[Cambridge police station]]<br />[[The Prydwen]] (after [[Shadow of Steel]]) |
|[[Cambridge police station]]<br />[[The Prydwen]] (after [[Shadow of Steel]]) |
||
|Upon receiving the quest [[Tour of Duty]] |
|Upon receiving the quest [[Tour of Duty]] |
||
| Line 70: | Line 70: | ||
|- |
|- |
||
| − | ![[File:Fallout-4-deacon.jpg|90px]]<br>[[Deacon]] |
+ | ![[File:Fallout-4-deacon.jpg|90px]]<br />[[Deacon]] |
|[[Railroad HQ]] |
|[[Railroad HQ]] |
||
|Complete [[Tradecraft]] and join [[The Railroad]] |
|Complete [[Tradecraft]] and join [[The Railroad]] |
||
| Line 82: | Line 82: | ||
|- |
|- |
||
| − | ![[File:Fo4 Dogmeat E3 Outtro.png|90px]]<br>[[Dogmeat (Fallout 4)|Dogmeat]] |
+ | ![[File:Fo4 Dogmeat E3 Outtro.png|90px]]<br />[[Dogmeat (Fallout 4)|Dogmeat]] |
|[[Red Rocket truck stop]] |
|[[Red Rocket truck stop]] |
||
|Ask him to join |
|Ask him to join |
||
| Line 94: | Line 94: | ||
|- |
|- |
||
| − | ![[File:Fo4 John Hancock.jpg|90px]]<br>[[John Hancock]] |
+ | ![[File:Fo4 John Hancock.jpg|90px]]<br />[[John Hancock]] |
|[[Old State House]] in [[Goodneighbor]] |
|[[Old State House]] in [[Goodneighbor]] |
||
|Ask him to join after completing [[The Big Dig]] (if sided with [[Bobbi No-Nose]], after completing [[Recruiting Hancock]]) |
|Ask him to join after completing [[The Big Dig]] (if sided with [[Bobbi No-Nose]], after completing [[Recruiting Hancock]]) |
||
| Line 102: | Line 102: | ||
|[[Isodoped]] |
|[[Isodoped]] |
||
|{{yes}} |
|{{yes}} |
||
| − | |[[ |
+ | |[[Chems]] |
| |
| |
||
|- |
|- |
||
| − | ![[File:Fo4 Companion MacCready.jpg|90px]]<br>[[Robert |
+ | ![[File:Fo4 Companion MacCready.jpg|90px]]<br />[[Robert MacCready]] |
|[[The Third Rail]] in [[Goodneighbor]] |
|[[The Third Rail]] in [[Goodneighbor]] |
||
|Hire him for 250 caps or 200 (Easy speech check) |
|Hire him for 250 caps or 200 (Easy speech check) |
||
| Line 118: | Line 118: | ||
|- |
|- |
||
| − | ![[File:Nick Valentine.jpg|90px]]<br>[[Nick Valentine]] |
+ | ![[File:Nick Valentine.jpg|90px]]<br />[[Nick Valentine]] |
|[[Vault 114]]<br />[[Diamond City]] after [[Unlikely Valentine]] |
|[[Vault 114]]<br />[[Diamond City]] after [[Unlikely Valentine]] |
||
|Complete [[Getting a Clue]] |
|Complete [[Getting a Clue]] |
||
| Line 130: | Line 130: | ||
|- |
|- |
||
| − | ![[File:Piper Wright at DC.jpg|90px]]<br>[[Piper Wright]] |
+ | ![[File:Piper Wright at DC.jpg|90px]]<br />[[Piper Wright]] |
|[[Diamond City]] |
|[[Diamond City]] |
||
| − | |Complete [[Story of the Century]] |
+ | |Complete [[Story of the Century]] or during [[Dangerous Minds]] |
|{{SPECIAL|5,10,7,10,8,10,8}} |
|{{SPECIAL|5,10,7,10,8,10,8}} |
||
|185 + ([Player Level - 10] x 5) |
|185 + ([Player Level - 10] x 5) |
||
| Line 142: | Line 142: | ||
|- |
|- |
||
| − | ![[File:Preston Garvey.jpg|90px]]<br>[[Preston Garvey]] |
+ | ![[File:Preston Garvey.jpg|90px]]<br />[[Preston Garvey]] |
|[[Museum of Freedom]]<br />[[Sanctuary Hills]] (after [[When Freedom Calls]] |
|[[Museum of Freedom]]<br />[[Sanctuary Hills]] (after [[When Freedom Calls]] |
||
|Complete [[The First Step]] |
|Complete [[The First Step]] |
||
| Line 154: | Line 154: | ||
|- |
|- |
||
| − | ![[File:Strong.png|90px]]<br>[[Strong]] |
+ | ![[File:Strong.png|90px]]<br />[[Strong]] |
|[[Trinity Tower]] |
|[[Trinity Tower]] |
||
|Ask him to join after [[Curtain Call]] |
|Ask him to join after [[Curtain Call]] |
||
| Line 166: | Line 166: | ||
|- |
|- |
||
| − | ![[File:X6-88.jpg|90px]]<br>[[X6-88]] |
+ | ![[File:X6-88.jpg|90px]]<br />[[X6-88]] |
|[[The Institute]] |
|[[The Institute]] |
||
|Join the Institute and complete [[Mankind - Redefined]] |
|Join the Institute and complete [[Mankind - Redefined]] |
||
| Line 178: | Line 178: | ||
|- |
|- |
||
| − | ! [[File:Fallout 4 Automatron pre-release 7.png|90px]]<br>[[Ada]]<br>{{Icon|FO4AUT|link=Automatron (add-on)}} |
+ | ! [[File:Fallout 4 Automatron pre-release 7.png|90px]]<br />[[Ada]]<br />{{Icon|FO4AUT|link=Automatron (add-on)}} |
| − | | Near [[Wattz Consumer Electronics]]<br>[[Red Rocket truck stop]] |
+ | | Near [[Wattz Consumer Electronics]]<br />[[Red Rocket truck stop]] |
| Complete [[Mechanical Menace]] |
| Complete [[Mechanical Menace]] |
||
| {{SPECIAL|9,5,1,1,7,10,1}} |
| {{SPECIAL|9,5,1,1,7,10,1}} |
||
| Line 190: | Line 190: | ||
|- |
|- |
||
| − | ! [[File:Automatron-CompanionImage-Fallout4.jpg|90px]]<br>[[Automatron (companion)|Automatron]]<br>{{Icon|FO4AUT|link=Automatron (add-on)}} |
+ | ! [[File:Automatron-CompanionImage-Fallout4.jpg|90px]]<br />[[Automatron (companion)|Automatron]]<br />{{Icon|FO4AUT|link=Automatron (add-on)}} |
| N/A |
| N/A |
||
| Must be built at a [[Robot workbench]] |
| Must be built at a [[Robot workbench]] |
||
| {{SPECIAL|9,5,?,?,?,10,?}} |
| {{SPECIAL|9,5,?,?,?,10,?}} |
||
| Variable |
| Variable |
||
| + | | |
||
| − | | None |
||
| None |
| None |
||
| {{no}} |
| {{no}} |
||
| Line 202: | Line 202: | ||
|- |
|- |
||
| − | ![[File:Old Longfellow.jpg|90px]]<br>[[Old Longfellow]]<br>{{Icon|FO4FH|link=Far_Harbor_(add-on)}} |
+ | ![[File:Old Longfellow.jpg|90px]]<br />[[Old Longfellow]]<br />{{Icon|FO4FH|link=Far_Harbor_(add-on)}} |
|[[The Last Plank]] |
|[[The Last Plank]] |
||
|Complete [[Walk in the Park]] |
|Complete [[Walk in the Park]] |
||
| Line 214: | Line 214: | ||
|- |
|- |
||
| − | ![[File:FO4NW Porter Gage.png|75px]]<br>[[Porter Gage]]<br>{{Icon|FO4NW|link=Nuka-World_(add-on)}} |
+ | ![[File:FO4NW Porter Gage.png|75px]]<br />[[Porter Gage]]<br />{{Icon|FO4NW|link=Nuka-World_(add-on)}} |
|[[Fizztop Grille]] |
|[[Fizztop Grille]] |
||
|Complete [[An Ambitious Plan]] |
|Complete [[An Ambitious Plan]] |
||
| − | |7 [[ST]], 9 [[PE]], 7 [[EN]], 3 [[CH]], 6 [[IN]], 8 [[AG]], 7 [[LK]] |
+ | |7 [[Strength|ST]], 9 [[Perception|PE]], 7 [[Endurance|EN]], 3 [[Charisma|CH]], 6 [[Intelligence|IN]], 8 [[Agility|AG]], 7 [[Luck|LK]] |
| |
| |
||
| |
| |
||
| Line 325: | Line 325: | ||
|- |
|- |
||
| − | |[[Brandis|Paladin Brandis]] |
+ | |[[Brandis|Paladin Brandis*]] |
|[[Human]] |
|[[Human]] |
||
|[[The Nuclear Option (Brotherhood of Steel)|The Nuclear Option]] |
|[[The Nuclear Option (Brotherhood of Steel)|The Nuclear Option]] |
||
| Line 359: | Line 359: | ||
|[[Safari Adventure (quest)|Safari Adventure]] |
|[[Safari Adventure (quest)|Safari Adventure]] |
||
|[[Safari Adventure]] |
|[[Safari Adventure]] |
||
| + | |||
| + | |- |
||
| + | |[[Cleansed]] {{Icon|FO4NW}} |
||
| + | |[[Human]] |
||
| + | |[[Trip to the Stars]] |
||
| + | |[[Hubologist's camp]] |
||
|} |
|} |
||
==Interests== |
==Interests== |
||
{{main|Affinity}} |
{{main|Affinity}} |
||
| + | ;General behavior |
||
| − | Companion [[affinity]] is gained and lost with two varying degrees for both. |
||
| + | {{Affinity|start}} |
||
| − | Here is how the table below represents those changes: |
||
| + | {{Affinity|row |
||
| − | {{Legend |
||
| + | |scenario =Being generous |
||
| − | |symbol1 ={{yes}}{{yes}} |
||
| − | | |
+ | |cait =dislike |
| + | |codsworth =like |
||
| − | |symbol2 ={{yes}} |
||
| − | | |
+ | |curie =none |
| + | |danse =none |
||
| − | |symbol3 ={{no}} |
||
| − | | |
+ | |deacon =none |
| + | |hancock =like |
||
| − | |symbol4 ={{no}}{{no}} |
||
| + | |maccready =none |
||
| − | |desc4 =Actions that are hated. |
||
| + | |valentine =none |
||
| + | |piper =like |
||
| + | |preston =like |
||
| + | |strong =like |
||
| + | |x688 =dislike |
||
| + | |longfellow =dislike |
||
| + | |gage =dislike |
||
| + | }} |
||
| + | {{Affinity|row |
||
| + | |scenario =Being mean |
||
| + | |cait =none |
||
| + | |codsworth =dislike |
||
| + | |curie =dislike |
||
| + | |danse =dislike |
||
| + | |deacon =dislike |
||
| + | |hancock =none |
||
| + | |maccready =like |
||
| + | |valentine =dislike |
||
| + | |piper =none |
||
| + | |preston =none |
||
| + | |strong =none |
||
| + | |x688 =like |
||
| + | |longfellow =none |
||
| + | |gage =like |
||
| + | }} |
||
| + | {{Affinity|row |
||
| + | |scenario =Being nice |
||
| + | |cait =none |
||
| + | |codsworth =like |
||
| + | |curie =like |
||
| + | |danse =like |
||
| + | |deacon =like |
||
| + | |hancock =none |
||
| + | |maccready =dislike |
||
| + | |valentine =like |
||
| + | |piper =none |
||
| + | |preston =none |
||
| + | |strong =none |
||
| + | |x688 =dislike |
||
| + | |longfellow =none |
||
| + | |gage =dislike |
||
| + | }} |
||
| + | {{Affinity|row |
||
| + | |scenario =Being peaceful |
||
| + | |cait =dislike |
||
| + | |codsworth =none |
||
| + | |curie =like |
||
| + | |danse =dislike |
||
| + | |deacon =like |
||
| + | |hancock =dislike |
||
| + | |maccready =dislike |
||
| + | |valentine =like |
||
| + | |piper =like |
||
| + | |preston =like |
||
| + | |strong =dislike |
||
| + | |x688 =none |
||
| + | |longfellow =like |
||
| + | |gage =dislike |
||
| + | }} |
||
| + | {{Affinity|row |
||
| + | |scenario =Being selfish |
||
| + | |cait =like |
||
| + | |codsworth =dislike |
||
| + | |curie =dislike |
||
| + | |danse =none |
||
| + | |deacon =none |
||
| + | |hancock =dislike |
||
| + | |maccready =none |
||
| + | |valentine =none |
||
| + | |piper =dislike |
||
| + | |preston =dislike |
||
| + | |strong =dislike |
||
| + | |x688 =like |
||
| + | |longfellow =like |
||
| + | |gage =like |
||
| + | }} |
||
| + | {{Affinity|row |
||
| + | |scenario =Being violent |
||
| + | |cait =like |
||
| + | |codsworth =none |
||
| + | |curie =none |
||
| + | |danse =like |
||
| + | |deacon =dislike |
||
| + | |hancock =like |
||
| + | |maccready =like |
||
| + | |valentine =dislike |
||
| + | |piper =dislike |
||
| + | |preston =dislike |
||
| + | |strong =like |
||
| + | |x688 =none |
||
| + | |longfellow =dislike |
||
| + | |gage =like |
||
| + | }} |
||
| + | {{Affinity|row |
||
| + | |scenario =Flirting with someone else if romanced |
||
| + | |cait =hate |
||
| + | |codsworth =none |
||
| + | |curie =hate |
||
| + | |danse =hate |
||
| + | |deacon =none |
||
| + | |hancock =hate |
||
| + | |maccready =hate |
||
| + | |valentine =none |
||
| + | |piper =hate |
||
| + | |preston =none |
||
| + | |strong =none |
||
| + | |x688 =none |
||
| + | |longfellow =none |
||
| + | |gage =none |
||
}} |
}} |
||
| + | {{Affinity|end}} |
||
| + | ;Miscellaneous actions |
||
| − | {| class="va-table va-table-full va-table-shaded" |
||
| + | {{Affinity|start}} |
||
| − | ! colspan="13" | Table of companion affinities |
||
| + | {{Affinity|row |
||
| − | |||
| + | |scenario =Get [[Addiction#Fallout 4|addicted]] to a chem |
||
| − | |- |
||
| + | |cait =varies |
||
| − | ! colspan="13" | General behavior & interactions with other characters |
||
| + | |codsworth =dislike |
||
| − | |- |
||
| + | |curie =dislike |
||
| − | ! Action |
||
| + | |danse =none |
||
| − | ! [[Cait]] |
||
| + | |deacon =dislike |
||
| − | ! [[Codsworth]] |
||
| + | |hancock =none |
||
| − | ! [[Curie]] |
||
| + | |maccready =dislike |
||
| − | ! [[Danse|Danse]] |
||
| + | |valentine =none |
||
| − | ! [[Deacon]] |
||
| + | |piper =none |
||
| − | ! [[John_Hancock|Hancock]] |
||
| + | |preston =dislike |
||
| − | ! [[Robert_MacCready|MacCready]] |
||
| + | |strong =none |
||
| − | ! [[Nick Valentine]] |
||
| + | |x688 =dislike |
||
| − | ! [[Piper Wright|Piper]] |
||
| + | |longfellow =dislike |
||
| − | ! [[Preston Garvey|Preston]] |
||
| + | |gage =dislike |
||
| − | ! [[Strong]] |
||
| + | }} |
||
| − | ! [[X6-88|X6‑88]] |
||
| + | {{Affinity|row |
||
| − | |||
| + | |scenario =Use a [[Chems|chem]] |
||
| − | |- |
||
| + | |cait =varies |
||
| − | |Generous |
||
| + | |codsworth =dislike |
||
| − | |{{no}} |
||
| + | |curie =none |
||
| − | |{{yes}} |
||
| + | |danse =dislike |
||
| − | |{{yes}} |
||
| + | |deacon =dislike |
||
| − | | |
||
| + | |hancock =like |
||
| − | | |
||
| + | |maccready =none |
||
| − | |{{yes}} |
||
| + | |valentine =none |
||
| − | | |
||
| + | |piper =none |
||
| − | | |
||
| + | |preston =none |
||
| − | |{{yes}} |
||
| + | |strong =none |
||
| − | |{{yes}} |
||
| + | |x688 =dislike |
||
| − | |{{yes}} |
||
| + | |longfellow =dislike |
||
| − | |{{no}} |
||
| + | |gage =dislike |
||
| − | |||
| + | }} |
||
| − | |- |
||
| + | {{Affinity|row |
||
| − | |Mean |
||
| + | |scenario =Give away an item |
||
| − | |{{yes}} |
||
| + | |cait =dislike |
||
| − | | |
||
| + | |codsworth =like |
||
| − | |{{yes}} |
||
| + | |curie =like |
||
| − | |{{no}} |
||
| + | |danse =none |
||
| − | |{{yes}} |
||
| + | |deacon =like |
||
| − | |{{yes}}deserved<br />{{no}}otherwise |
||
| + | |hancock =like |
||
| − | |{{no}} |
||
| + | |maccready =dislike |
||
| − | |{{yes}} |
||
| + | |valentine =like |
||
| − | |{{no}} |
||
| + | |piper =like |
||
| − | |{{yes}} |
||
| + | |preston =love |
||
| − | |{{no}} |
||
| + | |strong =none |
||
| − | | |
||
| + | |x688 =dislike |
||
| − | |||
| + | |longfellow =dislike |
||
| − | |- |
||
| + | |gage =dislike |
||
| − | |Nice |
||
| + | }} |
||
| − | | |
||
| + | {{Affinity|row |
||
| − | |{{yes}} |
||
| + | |scenario =Drink [[alcohol]] |
||
| − | |{{yes}} |
||
| + | |cait =varies |
||
| − | |{{yes}}<br />{{no}}towards ghouls |
||
| + | |codsworth =none |
||
| − | |{{yes}} |
||
| + | |curie =none |
||
| − | | |
||
| + | |danse =none |
||
| − | |{{no}} |
||
| + | |deacon =none |
||
| − | |{{yes}} |
||
| + | |hancock =none |
||
| − | |{{yes}} |
||
| + | |maccready =none |
||
| − | | |
||
| + | |valentine =none |
||
| − | | |
||
| + | |piper =none |
||
| − | |{{no}} |
||
| + | |preston =none |
||
| − | |||
| + | |strong =none |
||
| − | |- |
||
| + | |x688 =none |
||
| − | |Peaceful |
||
| + | |longfellow =like |
||
| − | |{{no}} |
||
| + | |gage =dislike |
||
| − | | |
||
| − | + | }} |
|
| + | {{Affinity|row |
||
| − | |{{no}} |
||
| + | |scenario =[[Cannibal#Fallout 4|Eat a corpse]] |
||
| − | |{{yes}} |
||
| + | |cait =dislike |
||
| − | |{{yes}} |
||
| + | |codsworth =none |
||
| − | |{{no}} |
||
| + | |curie =none |
||
| − | |{{no}} |
||
| + | |danse =dislike |
||
| − | |{{no}} |
||
| + | |deacon =dislike |
||
| − | |{{yes}} |
||
| + | |hancock =none |
||
| − | |{{yes}} |
||
| + | |maccready =none |
||
| − | |{{yes}} |
||
| + | |valentine =dislike |
||
| − | |- |
||
| + | |piper =dislike |
||
| − | |Selfish |
||
| + | |preston =dislike |
||
| − | |{{yes}} |
||
| + | |strong =like |
||
| − | |{{no}} |
||
| + | |x688 =none |
||
| − | |{{no}} |
||
| + | |longfellow =dislike |
||
| − | | |
||
| + | |gage =none |
||
| − | | |
||
| − | + | }} |
|
| + | {{Affinity|row |
||
| − | |{{yes}} |
||
| + | |scenario =Use [[Power armor (Fallout 4)|power armor]] |
||
| − | | |
||
| + | |cait =none |
||
| − | |{{no}} |
||
| + | |codsworth =none |
||
| − | |{{no}} |
||
| + | |curie =none |
||
| − | |{{no}} |
||
| + | |danse =like |
||
| − | |{{yes}} |
||
| + | |deacon =none |
||
| − | |||
| + | |hancock =none |
||
| − | |- |
||
| + | |maccready =none |
||
| − | |Violent |
||
| + | |valentine =none |
||
| − | |{{yes}} |
||
| + | |piper =none |
||
| − | | |
||
| + | |preston =none |
||
| − | |{{no}} |
||
| + | |strong =dislike |
||
| − | |{{yes}} |
||
| + | |x688 =like |
||
| − | |{{no}} |
||
| + | |longfellow =none |
||
| − | | |
||
| + | |gage =none |
||
| − | |{{yes}} |
||
| − | + | }} |
|
| + | {{Affinity|row |
||
| − | |{{no}} |
||
| + | |scenario =Board a [[Vertibird (Fallout 4)|Vertibird]] |
||
| − | |{{no}} |
||
| + | |cait =none |
||
| − | |{{yes}} |
||
| + | |codsworth =none |
||
| − | | |
||
| + | |curie =none |
||
| − | |||
| + | |danse =like |
||
| − | |- |
||
| + | |deacon =none |
||
| − | |Sarcasm |
||
| + | |hancock =none |
||
| − | | |
||
| + | |maccready =none |
||
| − | | |
||
| + | |valentine =none |
||
| − | | |
||
| + | |piper =none |
||
| − | | |
||
| + | |preston =none |
||
| − | | |
||
| + | |strong =dislike |
||
| − | | |
||
| + | |x688 =dislike |
||
| − | |{{yes}} |
||
| + | |longfellow =none |
||
| − | | |
||
| + | |gage =none |
||
| − | |{{yes}}<br />Situational |
||
| + | }} |
||
| − | | |
||
| + | {{Affinity|row |
||
| − | | |
||
| + | |scenario =Hack a [[terminal]] |
||
| − | | |
||
| + | |cait =none |
||
| − | |||
| + | |codsworth =none |
||
| − | |- |
||
| + | |curie =none |
||
| − | |Flirt with someone else |
||
| + | |danse =none |
||
| − | |{{no}}{{no}} if romanced |
||
| + | |deacon =like |
||
| − | | |
||
| + | |hancock =none |
||
| − | |{{no}}{{no}} if romanced |
||
| + | |maccready =none |
||
| − | |{{no}}{{no}} if romanced |
||
| + | |valentine =like |
||
| − | | |
||
| + | |piper =none |
||
| − | |{{no}}{{no}} if romanced |
||
| + | |preston =none |
||
| − | |{{no}}{{no}} if romanced |
||
| + | |strong =none |
||
| − | | |
||
| + | |x688 =like |
||
| − | |{{no}}{{no}} if romanced |
||
| + | |longfellow =none |
||
| − | | |
||
| + | |gage =none |
||
| − | | |
||
| + | }} |
||
| − | | |
||
| + | {{Affinity|row |
||
| − | |||
| + | |scenario =Heal [[Dogmeat (Fallout 4)|Dogmeat]] |
||
| − | |- |
||
| + | |cait =like |
||
| − | |Give drugs |
||
| + | |codsworth =like |
||
| − | |{{yes}} Pre [[Benign Intervention]]<br />{{no}} Post [[Benign Intervention]] |
||
| + | |curie =like |
||
| − | |{{no}} |
||
| + | |danse =none |
||
| − | | |
||
| + | |deacon =like |
||
| − | | |
||
| + | |hancock =none |
||
| − | | |
||
| + | |maccready =none |
||
| − | |{{yes}} |
||
| + | |valentine =like |
||
| − | | |
||
| + | |piper =like |
||
| − | | |
||
| + | |preston =none |
||
| − | |{{no}} |
||
| + | |strong =dislike |
||
| − | |{{no}} |
||
| + | |x688 =dislike |
||
| − | | |
||
| + | |longfellow =like |
||
| − | | |
||
| + | |gage =none |
||
| − | |||
| + | }} |
||
| − | |- |
||
| + | {{Affinity|row |
||
| − | |Give item |
||
| + | |scenario =[[Fallout 4 armor mods|Modify armor]] |
||
| − | | |
||
| + | |cait =none |
||
| − | |{{yes}} |
||
| + | |codsworth =love |
||
| − | |{{yes}} |
||
| + | |curie =none |
||
| − | | |
||
| + | |danse =love |
||
| − | |{{yes}} |
||
| + | |deacon =none |
||
| − | |{{yes}} |
||
| + | |hancock =none |
||
| − | |{{no}} |
||
| + | |maccready =none |
||
| − | |{{yes}} |
||
| + | |valentine =none |
||
| − | |{{yes}} |
||
| + | |piper =none |
||
| − | |{{yes}} |
||
| + | |preston =none |
||
| − | |{{yes}} |
||
| + | |strong =none |
||
| − | |{{no}} |
||
| + | |x688 =like |
||
| − | |||
| + | |longfellow =none |
||
| − | |- |
||
| + | |gage =none |
||
| − | |Murder non-hostile |
||
| + | }} |
||
| − | |{{no}}{{no}} |
||
| + | {{Affinity|row |
||
| − | |{{no}}{{no}} |
||
| + | |scenario =[[Fallout 4 weapon mods|Modify a weapon]] |
||
| − | |{{no}}{{no}} |
||
| + | |cait =none |
||
| − | |{{no}}{{no}} |
||
| + | |codsworth =love |
||
| − | |hostile |
||
| + | |curie =none |
||
| − | |{{no}}{{no}} |
||
| + | |danse =love |
||
| − | |{{no}}{{no}} |
||
| + | |deacon =none |
||
| − | |{{no}}{{no}} |
||
| + | |hancock =none |
||
| − | |{{no}}{{no}} |
||
| + | |maccready =none |
||
| − | |{{no}}{{no}} |
||
| + | |valentine =none |
||
| − | |{{yes}}{{yes}} |
||
| + | |piper =none |
||
| − | |{{no}}{{no}} |
||
| + | |preston =like |
||
| − | |||
| + | |strong =none |
||
| − | |- |
||
| + | |x688 =like |
||
| − | |Speech success |
||
| + | |longfellow =none |
||
| − | | |
||
| + | |gage =like |
||
| − | | |
||
| + | }} |
||
| − | | |
||
| + | {{Affinity|row |
||
| − | | |
||
| + | |scenario =Commit a murder |
||
| − | |{{yes}} |
||
| + | |cait =hate |
||
| − | | |
||
| + | |codsworth =hate |
||
| − | |{{yes}} |
||
| + | |curie =hate |
||
| − | | |
||
| + | |danse =hate |
||
| − | | |
||
| + | |deacon =hate |
||
| − | | |
||
| + | |hancock =hate |
||
| − | |{{no}} |
||
| + | |maccready =hate |
||
| − | |{{yes}} |
||
| + | |valentine =hate |
||
| − | |||
| + | |piper =hate |
||
| − | |- |
||
| + | |preston =hate |
||
| − | |Say good things about synths |
||
| + | |strong =love |
||
| − | | |
||
| + | |x688 =none |
||
| − | | |
||
| + | |longfellow =dislike |
||
| − | |{{yes}} |
||
| + | |gage =like |
||
| − | |{{no}} |
||
| + | }} |
||
| − | | |
||
| + | {{Affinity|row |
||
| − | | |
||
| + | |scenario =Pick an unowned lock |
||
| − | | |
||
| + | |cait =like |
||
| − | | |
||
| + | |codsworth =none |
||
| − | | |
||
| + | |curie =none |
||
| − | | |
||
| + | |danse =none |
||
| − | | |
||
| + | |deacon =like |
||
| − | | |
||
| + | |hancock =none |
||
| − | |- |
||
| + | |maccready =none |
||
| − | |Say neutral things about synths |
||
| + | |valentine =none |
||
| − | | |
||
| + | |piper =like |
||
| − | | |
||
| + | |preston =none |
||
| − | | |
||
| + | |strong =dislike |
||
| − | |{{no}} |
||
| + | |x688 =none |
||
| − | | |
||
| + | |longfellow =none |
||
| − | | |
||
| + | |gage =like |
||
| − | | |
||
| + | }} |
||
| − | | |
||
| + | {{Affinity|row |
||
| − | | |
||
| + | |scenario =Pick an owned lock |
||
| − | | |
||
| + | |cait =like |
||
| − | | |
||
| + | |codsworth =dislike |
||
| − | | |
||
| + | |curie =none |
||
| − | |- |
||
| + | |danse =dislike |
||
| − | |Say bad things about synths |
||
| + | |deacon =like |
||
| − | | |
||
| + | |hancock =none |
||
| − | | |
||
| + | |maccready =like |
||
| − | | |
||
| + | |valentine =dislike |
||
| − | |{{no}}Post [[Blind Betrayal]] |
||
| + | |piper =dislike |
||
| − | | |
||
| + | |preston =dislike |
||
| − | | |
||
| + | |strong =dislike |
||
| − | | |
||
| + | |x688 =none |
||
| − | | |
||
| + | |longfellow =none |
||
| − | | |
||
| + | |gage =none |
||
| − | | |
||
| + | }} |
||
| − | | |
||
| + | {{Affinity|row |
||
| − | | |
||
| + | |scenario =Ask for extra [[Bottlecap (Fallout 4)|caps]] |
||
| − | |||
| + | |cait =none |
||
| − | |- |
||
| + | |codsworth =dislike |
||
| − | ! colspan="13" | Miscellaneous activities |
||
| + | |curie =none |
||
| − | |- |
||
| + | |danse =none |
||
| − | ! Action |
||
| + | |deacon =like |
||
| − | ! [[Cait]] |
||
| + | |hancock =none |
||
| − | ! [[Codsworth]] |
||
| + | |maccready =like |
||
| − | ! [[Curie]] |
||
| + | |valentine =none |
||
| − | ! [[Danse|Danse]] |
||
| + | |piper =none |
||
| − | ! [[Deacon]] |
||
| + | |preston =none |
||
| − | ! [[John_Hancock |Hancock]] |
||
| + | |strong =dislike |
||
| − | ! [[Robert_MacCready |MacCready]] |
||
| + | |x688 =like |
||
| − | ! [[Nick Valentine]] |
||
| + | |longfellow =none |
||
| − | ! [[Piper Wright|Piper]] |
||
| + | |gage =like |
||
| − | ! [[Preston Garvey|Preston]] |
||
| + | }} |
||
| − | ! [[Strong]] |
||
| + | {{Affinity|row |
||
| − | ! [[X6-88]] |
||
| + | |scenario =Steal an item |
||
| − | |||
| + | |cait =none |
||
| − | |- |
||
| + | |codsworth =hate |
||
| − | |Chem addiction |
||
| + | |curie =dislike |
||
| − | |{{yes}} Pre Benign Intervention<br />{{no}} Post Benign Intervention |
||
| + | |danse =dislike |
||
| − | |{{no}} |
||
| + | |deacon =none |
||
| − | |{{no}} |
||
| + | |hancock =dislike |
||
| − | |{{no}} |
||
| + | |maccready =like |
||
| − | |{{no}} |
||
| + | |valentine =dislike |
||
| − | |{{yes}} |
||
| + | |piper =dislike |
||
| − | |{{no}} |
||
| + | |preston =hate |
||
| − | | |
||
| + | |strong =none |
||
| − | | |
||
| + | |x688 =none |
||
| − | |{{no}} |
||
| + | |longfellow =none |
||
| − | | |
||
| + | |gage =like |
||
| − | |{{no}} |
||
| + | }} |
||
| − | |- |
||
| + | {{Affinity|row |
||
| − | |Chem usage |
||
| + | |scenario =Pickpocket an item |
||
| − | |{{yes}} Pre Benign Intervention<br />{{no}} Post Benign Intervention |
||
| + | |cait =none |
||
| − | |{{no}} |
||
| + | |codsworth =hate |
||
| − | | |
||
| + | |curie =dislike |
||
| − | |{{no}} |
||
| + | |danse =dislike |
||
| − | |{{no}} |
||
| + | |deacon =none |
||
| − | |{{yes}} |
||
| + | |hancock =none |
||
| − | | |
||
| + | |maccready =none |
||
| − | | |
||
| + | |valentine =dislike |
||
| − | | |
||
| + | |piper =dislike |
||
| − | | |
||
| + | |preston =hate |
||
| − | | |
||
| + | |strong =none |
||
| − | |{{no}} |
||
| + | |x688 =none |
||
| − | |||
| + | |longfellow =dislike |
||
| − | |- |
||
| + | |gage =none |
||
| − | |Eat corpse |
||
| − | + | }} |
|
| + | {{Affinity|row |
||
| − | | |
||
| + | |scenario =Walk around naked |
||
| − | | |
||
| + | |cait =like |
||
| − | |{{no}} |
||
| + | |codsworth =none |
||
| − | |{{no}} |
||
| + | |curie =none |
||
| − | | |
||
| + | |danse =none |
||
| − | | |
||
| + | |deacon =none |
||
| − | |{{no}} |
||
| + | |hancock =like |
||
| − | |{{no}} |
||
| + | |maccready =none |
||
| − | |{{no}} |
||
| + | |valentine =none |
||
| − | |{{yes}} |
||
| + | |piper =none |
||
| − | | |
||
| + | |preston =none |
||
| − | |||
| + | |strong =none |
||
| − | |- |
||
| + | |x688 =dislike |
||
| − | |Hack computer |
||
| + | |longfellow =none |
||
| − | | |
||
| + | |gage =none |
||
| − | | |
||
| + | }} |
||
| − | | |
||
| + | {{Affinity|end}} |
||
| − | | |
||
| + | ;Faction activities |
||
| − | |{{yes}} |
||
| + | {{Affinity|start}} |
||
| − | | |
||
| + | {{Affinity|row |
||
| − | | |
||
| + | |scenario =Help the [[Brotherhood of Steel (East Coast)|Brotherhood]] |
||
| − | |{{yes}} |
||
| + | |cait =dislike |
||
| − | | |
||
| + | |codsworth =none |
||
| − | | |
||
| + | |curie =like |
||
| − | | |
||
| + | |danse =like |
||
| − | |{{yes}} |
||
| + | |deacon =none |
||
| − | |||
| + | |hancock =none |
||
| − | |- |
||
| + | |maccready =none |
||
| − | |Heal [[Dogmeat (Fallout 4)|Dogmeat]] |
||
| + | |valentine =dislike |
||
| − | |{{yes}} |
||
| + | |piper =dislike |
||
| − | |{{yes}} |
||
| + | |preston =dislike |
||
| − | |{{yes}} |
||
| + | |strong =dislike |
||
| − | | |
||
| + | |x688 =none |
||
| − | |{{yes}} |
||
| + | |longfellow =? |
||
| − | | |
||
| + | |gage =? |
||
| − | | |
||
| − | + | }} |
|
| + | {{Affinity|row |
||
| − | |{{yes}} |
||
| + | |scenario =Help the [[Commonwealth Minutemen|Minutemen]] |
||
| − | | |
||
| + | |cait =dislike |
||
| − | |{{no}} |
||
| + | |codsworth =like |
||
| − | |{{no}} |
||
| + | |curie =none |
||
| − | |||
| + | |danse =like |
||
| − | |- |
||
| + | |deacon =none |
||
| − | |Modify armor |
||
| + | |hancock =none |
||
| − | | |
||
| + | |maccready =like |
||
| − | |{{yes}}{{yes}} |
||
| + | |valentine =none |
||
| − | | |
||
| + | |piper =like |
||
| − | |{{yes}}{{yes}} |
||
| + | |preston =none |
||
| − | | |
||
| + | |strong =none |
||
| − | | |
||
| + | |x688 =none |
||
| − | | |
||
| + | |longfellow =? |
||
| − | | |
||
| + | |gage =? |
||
| − | | |
||
| + | }} |
||
| − | | |
||
| + | {{Affinity|row |
||
| − | | |
||
| + | |scenario =Help [[the Railroad]] |
||
| − | |{{yes}} |
||
| + | |cait =dislike |
||
| − | |||
| + | |codsworth =none |
||
| − | |- |
||
| + | |curie =dislike |
||
| − | |Modify weapon |
||
| + | |danse =none |
||
| − | | |
||
| + | |deacon =none |
||
| − | |{{yes}}{{yes}} |
||
| + | |hancock =none |
||
| − | | |
||
| + | |maccready =none |
||
| − | |{{yes}}{{yes}} |
||
| + | |valentine =none |
||
| − | | |
||
| + | |piper =like |
||
| − | | |
||
| + | |preston =none |
||
| − | | |
||
| + | |strong =none |
||
| − | | |
||
| + | |x688 =none |
||
| − | | |
||
| + | |longfellow =? |
||
| − | |{{yes}} |
||
| + | |gage =? |
||
| − | | |
||
| − | + | }} |
|
| + | {{Affinity|row |
||
| − | |||
| + | |scenario =Help [[the Institute]] |
||
| − | |- |
||
| + | |cait =dislike |
||
| − | |Being naked |
||
| + | |codsworth =none |
||
| − | |{{yes}} |
||
| + | |curie =dislike |
||
| − | | |
||
| + | |danse =hate |
||
| − | | |
||
| + | |deacon =dislike |
||
| − | | |
||
| + | |hancock =dislike |
||
| − | | |
||
| + | |maccready =dislike |
||
| − | |{{yes}} |
||
| + | |valentine =dislike |
||
| − | | |
||
| + | |piper =dislike |
||
| − | | |
||
| + | |preston =dislike |
||
| − | | |
||
| + | |strong =dislike |
||
| − | | |
||
| + | |x688 =like |
||
| − | | |
||
| + | |longfellow =? |
||
| − | |{{no}} |
||
| + | |gage =? |
||
| − | |||
| + | }} |
||
| − | |- |
||
| + | {{Affinity|row |
||
| − | |Pick lock (owned) |
||
| + | |scenario =Accept a settlement quest |
||
| − | |{{yes}} |
||
| + | |cait =dislike |
||
| − | |{{no}} |
||
| + | |codsworth =like |
||
| − | |{{no}} |
||
| + | |curie =like |
||
| − | |{{no}} |
||
| + | |danse =like |
||
| − | |{{yes}} |
||
| + | |deacon =like |
||
| − | | |
||
| + | |hancock =like |
||
| − | |{{yes}} |
||
| + | |maccready =none |
||
| − | |{{no}} |
||
| + | |valentine =like |
||
| − | |{{no}} |
||
| + | |piper =like |
||
| − | |{{no}} |
||
| + | |preston =love |
||
| − | |{{no}} |
||
| + | |strong =like |
||
| − | | |
||
| + | |x688 =none |
||
| − | |||
| + | |longfellow =like |
||
| − | |- |
||
| + | |gage =hate |
||
| − | |Pick lock (unowned) |
||
| − | + | }} |
|
| + | {{Affinity|row |
||
| − | | |
||
| + | |scenario =Refuse a settlement quest |
||
| − | | |
||
| + | |cait =like |
||
| − | | |
||
| + | |codsworth =dislike |
||
| − | |{{yes}} |
||
| + | |curie =dislike |
||
| − | | |
||
| + | |danse =none |
||
| − | | |
||
| + | |deacon =dislike |
||
| − | | |
||
| + | |hancock =dislike |
||
| − | |{{yes}} |
||
| + | |maccready =none |
||
| − | | |
||
| + | |valentine =dislike |
||
| − | |{{no}} |
||
| + | |piper =dislike |
||
| − | | |
||
| + | |preston =dislike |
||
| − | |||
| + | |strong =none |
||
| − | |- |
||
| + | |x688 =none |
||
| − | |Pickpocketing |
||
| + | |longfellow =dislike |
||
| − | |{{yes}} |
||
| + | |gage =like |
||
| − | |{{no}}{{no}} |
||
| − | + | }} |
|
| − | + | {{Affinity|end}} |
|
| − | | |
||
| − | | |
||
| − | |{{yes}} |
||
| − | |{{no}} |
||
| − | |{{no}} |
||
| − | |{{no}}{{no}} |
||
| − | |{{no}}(unmarked) |
||
| − | | |
||
| − | |||
| − | |- |
||
| − | |Theft |
||
| − | | |
||
| − | |{{no}} |
||
| − | |{{no}} |
||
| − | |{{no}} |
||
| − | | |
||
| − | |{{no}} |
||
| − | |{{yes}} |
||
| − | |{{no}} |
||
| − | |{{no}} |
||
| − | |{{no}} |
||
| − | |{{no}}(unmarked) |
||
| − | | |
||
| − | |||
| − | |- |
||
| − | |Use power armor |
||
| − | | |
||
| − | | |
||
| − | | |
||
| − | |{{yes}} |
||
| − | | |
||
| − | | |
||
| − | | |
||
| − | | |
||
| − | | |
||
| − | | |
||
| − | |{{no}} |
||
| − | |{{yes}} |
||
| − | |||
| − | |- |
||
| − | |Use [[Vertibird (Fallout 4)|Vertibird]] |
||
| − | | |
||
| − | | |
||
| − | | |
||
| − | |{{yes}} |
||
| − | | |
||
| − | | |
||
| − | | |
||
| − | | |
||
| − | | |
||
| − | | |
||
| − | |{{no}} |
||
| − | |{{no}} |
||
| − | |||
| − | |- |
||
| − | ! colspan="13" | Reaction to faction quests |
||
| − | |- |
||
| − | ! Action |
||
| − | ! [[Cait]] |
||
| − | ! [[Codsworth]] |
||
| − | ! [[Curie]] |
||
| − | ! [[Danse|Danse]] |
||
| − | ! [[Deacon]] |
||
| − | ! [[John_Hancock |Hancock]] |
||
| − | ! [[Robert_MacCready |MacCready]] |
||
| − | ! [[Nick Valentine]] |
||
| − | ! [[Piper Wright|Piper]] |
||
| − | ! [[Preston Garvey|Preston]] |
||
| − | ! [[Strong]] |
||
| − | ! [[X6-88]] |
||
| − | |||
| − | |- |
||
| − | |Help [[Brotherhood of Steel (East Coast)|Brotherhood]] |
||
| − | |{{no}} |
||
| − | | |
||
| − | |{{yes}} |
||
| − | |{{yes}} |
||
| − | | |
||
| − | | |
||
| − | | |
||
| − | |{{no}} |
||
| − | |{{no}} |
||
| − | |{{no}} |
||
| − | |{{no}} |
||
| − | | |
||
| − | |||
| − | |- |
||
| − | |Help [[Commonwealth Minutemen|Minutemen]] |
||
| − | |{{no}} |
||
| − | |{{yes}} |
||
| − | | |
||
| − | |{{yes}} |
||
| − | | |
||
| − | | |
||
| − | |{{yes}} |
||
| − | | |
||
| − | |{{yes}} |
||
| − | | |
||
| − | | |
||
| − | | |
||
| − | |||
| − | |- |
||
| − | |Help [[The Railroad|Railroad]] |
||
| − | |{{no}} |
||
| − | | |
||
| − | |{{no}} |
||
| − | | |
||
| − | | |
||
| − | | |
||
| − | | |
||
| − | | |
||
| − | |{{yes}} |
||
| − | | |
||
| − | | |
||
| − | | |
||
| − | |||
| − | |- |
||
| − | |Help [[The Institute|Institute]] |
||
| − | |{{no}} |
||
| − | | |
||
| − | |{{no}} |
||
| − | |{{no}}{{no}} |
||
| − | |{{no}} |
||
| − | |{{no}} |
||
| − | |{{no}} |
||
| − | |{{no}} |
||
| − | |{{no}} |
||
| − | |{{no}} |
||
| − | |{{no}} |
||
| − | |{{yes}} |
||
| − | |||
| − | |- |
||
| − | |Help Settler/accept [[Commonwealth Minutemen|Minutemen]] quest |
||
| − | |{{no}} |
||
| − | |{{yes}} |
||
| − | |{{yes}} |
||
| − | |{{yes}} |
||
| − | |{{yes}} |
||
| − | |{{yes}} |
||
| − | | |
||
| − | |{{yes}} |
||
| − | |{{yes}} |
||
| − | |{{yes}}{{yes}} |
||
| − | |{{yes}} |
||
| − | |{{no}} |
||
| − | |||
| − | |- |
||
| − | |Kill Settler/[[The Railroad|Railroad]] member |
||
| − | | |
||
| − | | |
||
| − | | |
||
| − | | |
||
| − | |Hostile |
||
| − | | |
||
| − | | |
||
| − | | |
||
| − | | |
||
| − | | |
||
| − | | |
||
| − | | |
||
| − | |||
| − | |- |
||
| − | ! colspan="13" | Reaction to general quests |
||
| − | |- |
||
| − | ! Action |
||
| − | ! [[Cait]] |
||
| − | ! [[Codsworth]] |
||
| − | ! [[Curie]] |
||
| − | ! [[Danse|Danse]] |
||
| − | ! [[Deacon]] |
||
| − | ! [[John_Hancock |Hancock]] |
||
| − | ! [[Robert_MacCready |MacCready]] |
||
| − | ! [[Nick Valentine]] |
||
| − | ! [[Piper Wright|Piper]] |
||
| − | ! [[Preston Garvey|Preston]] |
||
| − | ! [[Strong]] |
||
| − | ! [[X6-88]] |
||
| − | |||
| − | |- |
||
| − | |Save [[Kent Connolly]] |
||
| − | | |
||
| − | | |
||
| − | | |
||
| − | | |
||
| − | | |
||
| − | |{{yes}} |
||
| − | | |
||
| − | |{{yes}} |
||
| − | |{{yes}}{{yes}} |
||
| − | | |
||
| − | | |
||
| − | | |
||
| − | |||
| − | |- |
||
| − | |Choose Hopefull opts in conversation with Piper in [[Story of the Century]] |
||
| − | | |
||
| − | |{{yes}}/{{yes}}{{yes}} |
||
| − | | |
||
| − | | |
||
| − | | |
||
| − | | |
||
| − | | |
||
| − | | |
||
| − | | |
||
| − | | |
||
| − | | |
||
| − | | |
||
| − | |||
| − | |- |
||
| − | |Accepting [[Painting the Town]] |
||
| − | | |
||
| − | | |
||
| − | | |
||
| − | | |
||
| − | | |
||
| − | | |
||
| − | | |
||
| − | | |
||
| − | |{{yes}} |
||
| − | | |
||
| − | | |
||
| − | | |
||
| − | |||
| − | |- |
||
| − | |Completing [[The_Gilded_Grasshopper]] |
||
| − | | |
||
| − | | |
||
| − | | |
||
| − | | |
||
| − | | |
||
| − | | |
||
| − | | |
||
| − | |{{yes}} |
||
| − | | |
||
| − | | |
||
| − | | |
||
| − | | |
||
| − | |||
| − | |- |
||
| − | |Saying you'd kill [[Conrad Kellogg|Kellogg]] again, after [[Dangerous Minds]] |
||
| − | |{{yes}} |
||
| − | | |
||
| − | |{{no}} |
||
| − | | |
||
| − | | |
||
| − | |{{yes}} |
||
| − | | |
||
| − | |{{no}} |
||
| − | |{{no}} |
||
| − | | |
||
| − | | |
||
| − | | |
||
| − | |||
| − | |- |
||
| − | |Give the egg to the Deathclaw during [[The Devil's Due]] |
||
| − | |{{no}} |
||
| − | | |
||
| − | |{{no}} |
||
| − | |{{no}}{{no}} |
||
| − | |{{no}} |
||
| − | | |
||
| − | |{{no}} |
||
| − | |{{yes}} |
||
| − | |{{yes}} |
||
| − | |{{no}} |
||
| − | |{{no}} |
||
| − | | |
||
| − | |||
| − | |- |
||
| − | |Enter [[Covenant]] |
||
| − | |{{yes}} |
||
| − | | |
||
| − | |{{no}} |
||
| − | | |
||
| − | |{{no}} |
||
| − | |{{no}} |
||
| − | |{{yes}} |
||
| − | |{{no}} |
||
| − | |{{no}} |
||
| − | | |
||
| − | |{{yes}} |
||
| − | | |
||
| − | |- |
||
| − | |Side with Covenant |
||
| − | |{{yes}} |
||
| − | | |
||
| − | | |
||
| − | |{{yes}} |
||
| − | | |
||
| − | | |
||
| − | |{{yes}} |
||
| − | | |
||
| − | | |
||
| − | |{{no}}{{no}} |
||
| − | | |
||
| − | | |
||
| − | |- |
||
| − | |Side against Covenant |
||
| − | |{{no}} |
||
| − | |{{yes}} |
||
| − | | |
||
| − | |{{no}} |
||
| − | |{{yes}}{{yes}} |
||
| − | |{{yes}}{{yes}} |
||
| − | | |
||
| − | |{{yes}} |
||
| − | | |
||
| − | | |
||
| − | | |
||
| − | | |
||
| − | |||
| − | |- |
||
| − | |Accept [[Pickman's Gift]] |
||
| − | |{{yes}} |
||
| − | |{{no}} |
||
| − | |{{no}} |
||
| − | |{{no}}{{no}} |
||
| − | |{{no}} |
||
| − | |{{no}} |
||
| − | |{{no}} |
||
| − | | |
||
| − | | |
||
| − | |{{yes}} |
||
| − | | |
||
| − | | |
||
| − | |||
| − | |- |
||
| − | |Give [[Vault-Tec rep]] a home |
||
| − | |{{no}} |
||
| − | |{{yes}}{{yes}} |
||
| − | | |
||
| − | |{{no}} |
||
| − | | |
||
| − | |{{no}} |
||
| − | |{{yes}} |
||
| − | |{{yes}} |
||
| − | |{{yes}} |
||
| − | | |
||
| − | | |
||
| − | | |
||
| − | |||
| − | |- |
||
| − | |Give the [[Vault 81 cure]] to Austin during [[Hole in the Wall]] |
||
| − | |{{no}} |
||
| − | |{{yes}}{{yes}} |
||
| − | |{{yes}} |
||
| − | |{{yes}} |
||
| − | |{{yes}}{{yes}} |
||
| − | |{{yes}}{{yes}} |
||
| − | |{{no}} |
||
| − | |{{yes}}{{yes}} |
||
| − | |{{yes}}{{yes}} |
||
| − | |{{yes}} |
||
| − | |{{yes}} |
||
| − | |? |
||
| − | |||
| − | |- |
||
| − | |Keep the [[Vault 81 cure]] to yourself |
||
| − | |{{yes}} |
||
| − | |? |
||
| − | |{{no}} |
||
| − | |{{no}} |
||
| − | |{{no}} |
||
| − | |{{no}} |
||
| − | |{{yes}} |
||
| − | |{{no}} |
||
| − | |{{no}} |
||
| − | |{{no}} |
||
| − | |? |
||
| − | |? |
||
| − | |||
| − | |- |
||
| − | |Give Sturges the datatape at the end of [[Inside Job]] |
||
| − | |? |
||
| − | |? |
||
| − | | |
||
| − | |{{no}}{{no}} |
||
| − | |{{no}} |
||
| − | |? |
||
| − | |? |
||
| − | |? |
||
| − | |{{yes}} |
||
| − | |{{yes}} |
||
| − | |? |
||
| − | |{{no}}{{no}} |
||
| − | |||
| − | |- |
||
| − | |Complete the research project in [[Cambridge Polymer Labs]] |
||
| − | |? |
||
| − | | |
||
| − | |{{yes}}{{yes}} |
||
| − | |{{yes}} |
||
| − | |? |
||
| − | |? |
||
| − | |? |
||
| − | |? |
||
| − | | |
||
| − | |? |
||
| − | |? |
||
| − | |? |
||
| − | |||
| − | |- |
||
| − | |Complete [[Last Voyage of the U.S.S. Constitution]] |
||
| − | |{{no}} |
||
| − | |{{yes}} |
||
| − | |{{yes}} |
||
| − | |? |
||
| − | |{{yes}}{{yes}} |
||
| − | |{{no}} |
||
| − | |? |
||
| − | |{{yes}} |
||
| − | |? |
||
| − | | |
||
| − | |? |
||
| − | |? |
||
| − | |||
| − | |- |
||
| − | |Join the [[Church of the Children of Atom|Children of Atom]] during [[Best Left Forgotten]] |
||
| − | |{{no}} |
||
| − | | |
||
| − | | |
||
| − | |{{no}} |
||
| − | |{{no}} |
||
| − | |? |
||
| − | |{{no}} |
||
| − | |? |
||
| − | |? |
||
| − | |{{no}} |
||
| − | |? |
||
| − | |? |
||
| − | |||
| − | |- |
||
| − | |Destroy [[The Nucleus]] |
||
| − | |{{yes}}{{yes}} |
||
| − | |? |
||
| − | |? |
||
| − | | |
||
| − | |? |
||
| − | |? |
||
| − | |? |
||
| − | |? |
||
| − | |? |
||
| − | |? |
||
| − | |? |
||
| − | |? |
||
| − | |||
| − | |- |
||
| − | |Agree to take [[Billy Peabody|Billy]] home in [[Kid in a Fridge]] |
||
| − | |{{no}} |
||
| − | |{{yes}}{{yes}} |
||
| − | |{{yes}} |
||
| − | |{{yes}} |
||
| − | |{{yes}} |
||
| − | |{{yes}} |
||
| − | |{{yes}} |
||
| − | |{{yes}}{{yes}} |
||
| − | |{{yes}}{{yes}} |
||
| − | |{{yes}}{{yes}} |
||
| − | |{{no}} |
||
| − | | |
||
| − | |||
| − | |- |
||
| − | |Kill the accused settler in [[Suspected Synth]] without knowing who the synth is |
||
| − | |{{yes}} |
||
| − | |{{no}} |
||
| − | |{{no}} |
||
| − | |{{no}} |
||
| − | |{{yes}} |
||
| − | | |
||
| − | |{{yes}} |
||
| − | |{{no}} |
||
| − | |{{no}} |
||
| − | |{{no}} |
||
| − | |{{yes}}{{yes}} |
||
| − | |{{yes}}{{yes}} |
||
| − | |||
| − | |- |
||
| − | |Accept [[The Big Dig]] Job |
||
| − | |{{yes}} |
||
| − | | |
||
| − | | |
||
| − | | |
||
| − | | |
||
| − | | |
||
| − | | |
||
| − | | |
||
| − | | |
||
| − | | |
||
| − | | |
||
| − | | |
||
| − | |} |
||
==Notes== |
==Notes== |
||
| Line 1,292: | Line 917: | ||
** Depending on what kind of innocent murdered, the companion may even become hostile towards the player character. For example, Piper and Nick will turn hostile if a DC guard is killed, while Hancock will turn hostile if a Goodneighbor guard is killed. |
** Depending on what kind of innocent murdered, the companion may even become hostile towards the player character. For example, Piper and Nick will turn hostile if a DC guard is killed, while Hancock will turn hostile if a Goodneighbor guard is killed. |
||
| Companions will give different thoughts and relationship statuses depending on their relationship with the player character. They will also differ in attitude when dismissing them or asking them to join. These comments can be hateful, disdainful, neutral, admirable, generous, and for romantic companions, affectionate. |
| Companions will give different thoughts and relationship statuses depending on their relationship with the player character. They will also differ in attitude when dismissing them or asking them to join. These comments can be hateful, disdainful, neutral, admirable, generous, and for romantic companions, affectionate. |
||
| − | | Raising or dropping a companion's affinity to a certain amount will trigger unique dialogue with the player character. Positive affinity will reveal some of the companion's background and how they ended up here. When reaching idolization, the companion will admit to having the player character being their best friend. Negative affinity results in disappointed companions asking the Sole Survivor to change their ways. When reaching hatred, the companion will threaten to leave for good. A moderate persuasion check can convince them to give the player character one more chance. If the persuasion was successful, but the affinity still goes down, the companion will eventually snap and leave for good. This applies to every companion except for Dogmeat, Ada, and an automatron. |
+ | | Raising or dropping a companion's affinity to a certain amount will trigger a unique dialogue with the player character. Positive affinity will reveal some of the companion's background and how they ended up here. When reaching idolization, the companion will admit to having the player character being their best friend. Negative affinity results in disappointed companions asking the Sole Survivor to change their ways. When reaching hatred, the companion will threaten to leave for good. A moderate persuasion check can convince them to give the player character one more chance. If the persuasion was successful, but the affinity still goes down, the companion will eventually snap and leave for good. This applies to every companion except for Dogmeat, Ada, and an automatron. |
| Companions can be directed and can have more options if they like the Sole Survivor a lot, whether being a human, a synth, a dog or a robot. This is influenced by how the Survivor approaches quests and talks to other people. |
| Companions can be directed and can have more options if they like the Sole Survivor a lot, whether being a human, a synth, a dog or a robot. This is influenced by how the Survivor approaches quests and talks to other people. |
||
| Humanoid companions can be ordered to use [[Power armor (Fallout 4)|power armor]]; to do so one needs to "command" the companion to simply enter the armor. Whether the armor is racked or not, they will walk up to it and enter it. One has to be standing a bit away from the armor; if too close, the command option will change to "enter" and if hitting the activate button, the Sole Survivor will mount the power armor instead. |
| Humanoid companions can be ordered to use [[Power armor (Fallout 4)|power armor]]; to do so one needs to "command" the companion to simply enter the armor. Whether the armor is racked or not, they will walk up to it and enter it. One has to be standing a bit away from the armor; if too close, the command option will change to "enter" and if hitting the activate button, the Sole Survivor will mount the power armor instead. |
||
** To get a companion out of power armor simply talk to them and there will be a dialogue option to ask them to get out of it. |
** To get a companion out of power armor simply talk to them and there will be a dialogue option to ask them to get out of it. |
||
| − | ** When the companion is dismissed they will return to the designated "home" wearing the armor |
+ | ** When the companion is dismissed they will return to the designated "home" wearing the armor and will continue to wear it until telling them to exit their power armor suit. Sometimes one may find the dismissed companion in the settlement sent to without their power armor. In that case, look around the settlement for the power armor suit as the companion may have exited it and left it somewhere in the settlement. The larger the settlement, the longer or more difficult the search for the lost armor suit may be. |
| − | *** To make a companion not leave the power armor at the settlement, make sure both the power armor and the companion is equipped with a fully charges fusion core. (It might also help |
+ | *** To make a companion not leave the power armor at the settlement, make sure both the power armor and the companion is equipped with a fully charges fusion core. (It might also help to assign them guard duty, so they don't go to sleep) |
** Humanoid companions can wear power armor without needing a fusion core. If removing the fusion core from the suit, they may still enter it and never need a fusion core. It is unclear if this is intended behavior. |
** Humanoid companions can wear power armor without needing a fusion core. If removing the fusion core from the suit, they may still enter it and never need a fusion core. It is unclear if this is intended behavior. |
||
| Humanoid companions can also be equipped with weapons and armor of choice. To do so, go to the trade dialogue option and place whatever items the player character wants them to use or wear in their inventory. Then, in their inventory, press the button to "equip" the item(s). Weapons equipped must also have an ammunition supply, so they must be provided with the ammo type the weapon requires. Even weapons that use the same ammunition as a companion's default weapon must have ammunition supplied. |
| Humanoid companions can also be equipped with weapons and armor of choice. To do so, go to the trade dialogue option and place whatever items the player character wants them to use or wear in their inventory. Then, in their inventory, press the button to "equip" the item(s). Weapons equipped must also have an ammunition supply, so they must be provided with the ammo type the weapon requires. Even weapons that use the same ammunition as a companion's default weapon must have ammunition supplied. |
||
** There are some exceptions to this rule: Paladin Danse cannot wear anything other than headgear as long as he has his power armor, Codsworth can wear certain hats, Nick Valentine will only wear his trenchcoat (although an extra one is given to the player character; this one can be modified and equipped on Nick) or he can wear the High Confessor Tektus' robes from the ''Far Harbor'' add-on or power armor, Strong can wear super mutant armor, Dogmeat can wear dog armor, bandanas and eyewear. |
** There are some exceptions to this rule: Paladin Danse cannot wear anything other than headgear as long as he has his power armor, Codsworth can wear certain hats, Nick Valentine will only wear his trenchcoat (although an extra one is given to the player character; this one can be modified and equipped on Nick) or he can wear the High Confessor Tektus' robes from the ''Far Harbor'' add-on or power armor, Strong can wear super mutant armor, Dogmeat can wear dog armor, bandanas and eyewear. |
||
** Humanoid companions can and will use all types of grenades when equipped with them. While they possess remarkable skill and are fully capable of hitting even moving targets with astounding accuracy, they are completely oblivious of any collateral damage they might inflict on allies caught in the blast radius, the Sole Survivor included. Investing at least one point in the [[Inspirational]] perk is therefore recommended before equipping companions with grenades or any explosive weapon for that matter. |
** Humanoid companions can and will use all types of grenades when equipped with them. While they possess remarkable skill and are fully capable of hitting even moving targets with astounding accuracy, they are completely oblivious of any collateral damage they might inflict on allies caught in the blast radius, the Sole Survivor included. Investing at least one point in the [[Inspirational]] perk is therefore recommended before equipping companions with grenades or any explosive weapon for that matter. |
||
| − | | All companions have a |
+ | | All companions have a carrying capacity of 150, except Strong with 200, and Danse with 210.<ref name="reddit">[https://www.reddit.com/r/Fallout/comments/3vm4ng/fallout_4_companion_information Companion information, Reddit]</ref> Note that this is changed substantially in [[Survival mode]], causing many companions to be able to carry little more than their own armor and weapons. |
** It is possible to make companions wear [[Fallout 4 armor mods|pocketed]] or [[Fallout 4 armor mods|deep pocketed]] armor to increase their carrying capacity by +30 or +60, respectively. |
** It is possible to make companions wear [[Fallout 4 armor mods|pocketed]] or [[Fallout 4 armor mods|deep pocketed]] armor to increase their carrying capacity by +30 or +60, respectively. |
||
| − | ** Companion carry capacity can be increased by +10 by acquiring [[Live & Love]] Issue #3. |
+ | ** Companion carry capacity can be increased by +10 by acquiring [[Live & Love (Fallout 4)|Live & Love]] Issue #3. |
** A trick can be used to push a companion past their carry capacity. Companions can always be commanded to pick up items or loot containers & bodies, even when at or beyond capacity. Note when commanding them to loot containers & bodies they will only grab one item at a time, so one may need to command them repeatedly. Once at or beyond capacity, it will not be possible to give them items any other way. This will not work with Dogmeat. |
** A trick can be used to push a companion past their carry capacity. Companions can always be commanded to pick up items or loot containers & bodies, even when at or beyond capacity. Note when commanding them to loot containers & bodies they will only grab one item at a time, so one may need to command them repeatedly. Once at or beyond capacity, it will not be possible to give them items any other way. This will not work with Dogmeat. |
||
| Dogmeat does not count as a companion for the purposes of the [[Lone Wanderer (perk)|Lone Wanderer]] perk, therefore the Survivor can adventure with him and keep the benefits of the perk. |
| Dogmeat does not count as a companion for the purposes of the [[Lone Wanderer (perk)|Lone Wanderer]] perk, therefore the Survivor can adventure with him and keep the benefits of the perk. |
||
| − | | Traveling with a companion bestows the player character with an inherent 5% bonus to all [[Experience]] gained. This bonus can be further increased by acquiring [[Live & Love]] Issue #8. These bonuses are multiplicative with other experience bonuses such as [[Intelligence]] and [[Gift of Gab]]. |
+ | | Traveling with a companion bestows the player character with an inherent 5% bonus to all [[Experience]] gained. This bonus can be further increased by acquiring [[Live & Love (Fallout 4)|Live & Love]] Issue #8. These bonuses are multiplicative with other experience bonuses such as [[Intelligence]] and [[Gift of Gab]]. |
| When choosing a location to send a dismissed companion, selecting 'Cancel' will not cancel the dismissal, but will instead send them back to the last location they were sent to when dismissed. If no settlement has ever been selected, the companion will be sent to their original location rather than a settlement. |
| When choosing a location to send a dismissed companion, selecting 'Cancel' will not cancel the dismissal, but will instead send them back to the last location they were sent to when dismissed. If no settlement has ever been selected, the companion will be sent to their original location rather than a settlement. |
||
| If one accidentally dismisses a companion, just walk up to them again and ask them to re-join. One must also confirm the companion's desire to re-join after asking. |
| If one accidentally dismisses a companion, just walk up to them again and ask them to re-join. One must also confirm the companion's desire to re-join after asking. |
||
| Line 1,314: | Line 939: | ||
| It is impossible to complete the main story of Fallout 4 and keep all companions (so if one wants to get all companion perks a few must be done before completing the main quest). |
| It is impossible to complete the main story of Fallout 4 and keep all companions (so if one wants to get all companion perks a few must be done before completing the main quest). |
||
| Companions can be tracked down using the [[Vault-Tec Population Management System]] introduced in the ''[[Vault-Tec Workshop]]'' [[Fallout 4 add-ons|add-on]]. |
| Companions can be tracked down using the [[Vault-Tec Population Management System]] introduced in the ''[[Vault-Tec Workshop]]'' [[Fallout 4 add-ons|add-on]]. |
||
| − | | Some pacifist companions, like Curie and Piper, will still have their affinity raised when asking them to wait while fighting enemies alone in that same area. |
+ | | Some pacifist companions, like Curie and Piper, will still have their affinity raised when asking them to wait while fighting enemies alone in that same area. In contrast, aggressive companions, like MacCready, will only have their affinity raised if they are directly in contact with the enemies together with the player character. |
| − | | Most companions complain when picking up junk, however Old Longfellow will praise the player character and even have his affinity raised. Piper will complement the player character's ability to find a use for junk but does not gain any affinity. |
+ | | Most companions complain when picking up junk, however, Old Longfellow will praise the player character and even have his affinity raised. Piper will complement the player character's ability to find a use for junk but does not gain any affinity. |
| − | | When the player activates an elevator that takes them into a different location, all companions will seem to disappear for a short period, and then reappear, although it is still possible to locate them with the reticle. An example is |
+ | | When the player activates an elevator that takes them into a different location, all companions will seem to disappear for a short period, and then reappear, although it is still possible to locate them with the reticle. An example is an elevator in Secret Vault 81 To [[Vault 81]], where the Curie follows the player to the last quest marker for [[Hole in the Wall]]. |
| Some companions will, when talked to, give the Survivor a gift. This can happen once/day. |
| Some companions will, when talked to, give the Survivor a gift. This can happen once/day. |
||
}} |
}} |
||
==Bugs== |
==Bugs== |
||
| − | * {{Platforms|pc,ps4}} A companion may become stuck in a reference pose position, flying around unanimated about 1-2 feet off the ground following the player character. The companion can be spoken with and interacted with in a normal manner, however the companion will not fight. Even loading a new area by going through a door will not fix this behavior.{{Verify|verified}} |
+ | * {{Platforms|pc,ps4}} A companion may become stuck in a reference pose position, flying around unanimated about 1-2 feet off the ground following the player character. The companion can be spoken with and interacted with in a normal manner, however, the companion will not fight. Even loading a new area by going through a door will not fix this behavior.{{Verify|verified}} |
** One potential fix is to fast travel to another location. |
** One potential fix is to fast travel to another location. |
||
** Another fix is to dismiss the companion. The companion can be re-recruited back. |
** Another fix is to dismiss the companion. The companion can be re-recruited back. |
||
| Line 1,327: | Line 952: | ||
** Should the Ripper sound be playing over and over, having the companion use the weapon again may fix the bug.{{Verify|verified}} |
** Should the Ripper sound be playing over and over, having the companion use the weapon again may fix the bug.{{Verify|verified}} |
||
** If a companion has the drilling-sound glitch from an armor workbench or weapon workbenches, allowing them to re-use the corresponding workbench from where the glitched sound is and let them end its use by themselves without interruptions, the sound glitch should stop and be fixed. |
** If a companion has the drilling-sound glitch from an armor workbench or weapon workbenches, allowing them to re-use the corresponding workbench from where the glitched sound is and let them end its use by themselves without interruptions, the sound glitch should stop and be fixed. |
||
| − | * {{Platforms|ps4,xboxone}} Ada may remain with you even though you have just selected dismiss in dialogue, as well as the option of settlement won't pop up.{{Verify|verified}} |
+ | * {{Platforms|ps4,xboxone}} Ada may remain with you even though you have just selected dismiss in dialogue, as well as the option of the settlement won't pop up.{{Verify|verified}} |
** One solution is to restart the game. |
** One solution is to restart the game. |
||
** Another solution is to acquire a different companion. |
** Another solution is to acquire a different companion. |
||
| − | * {{Platforms|ps4}} When sending a companion to another settlement using the workshop he/ she will not go there straight away, and bringing the settlement choices back up will show the place still |
+ | * {{Platforms|ps4}} When sending a companion to another settlement using the workshop he/ she will not go there straight away, and bringing the settlement choices back up will show the place still has an option to where they can be sent.{{Verify|verified}} |
** A fix for this is to turn the game off, then reloading the save. |
** A fix for this is to turn the game off, then reloading the save. |
||
** Another fix is to fast travel to a different place and sleep in a bed and return. |
** Another fix is to fast travel to a different place and sleep in a bed and return. |
||
| Line 1,346: | Line 971: | ||
[[fr:Compagnons de Fallout 4]] |
[[fr:Compagnons de Fallout 4]] |
||
[[hu:Társak Fallout 4]] |
[[hu:Társak Fallout 4]] |
||
| + | [[it:Compagni di Fallout 4]] |
||
[[ja:Fallout 4 companions]] |
[[ja:Fallout 4 companions]] |
||
[[pl:Towarzysze w Fallout 4]] |
[[pl:Towarzysze w Fallout 4]] |
||
Revision as of 00:01, 8 July 2020
| For companions in other Fallout games, see companion. |
|
| This page lists all companions in Fallout 4. |
|
Permanent companions
The base game has 13 companions; four more are available with the Automatron, Far Harbor, and Nuka-World add-ons.
| Companion | Location | Prerequisites | Base S.P.E.C.I.A.L. | Hit Points | Personal Quest | Perk | Romance | Gift | Special Skill |
|---|---|---|---|---|---|---|---|---|---|
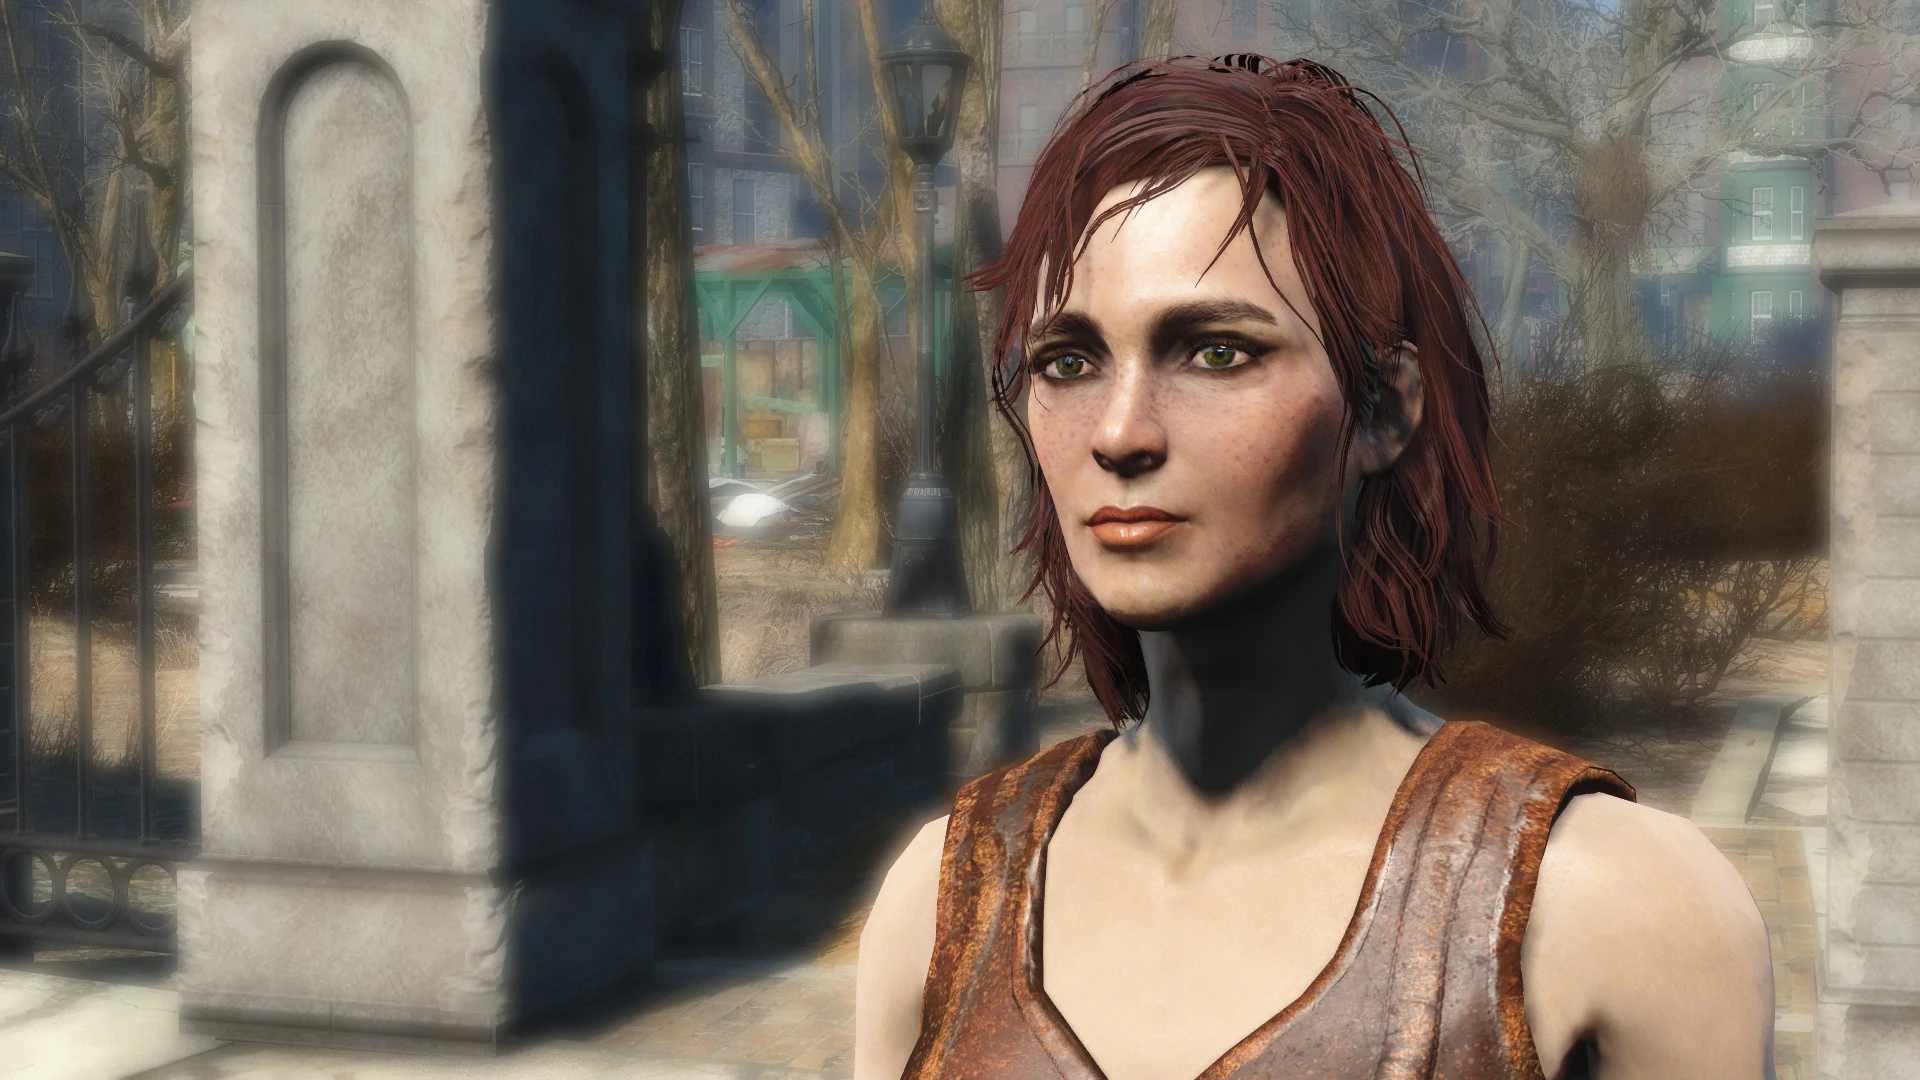 Cait |
Combat Zone | Ask her to join after clearing the Combat Zone | 5 ST, 10 PE, 7 EN, 7 CH, 7 IN, 10 AG, 7 LK | 185 + ([Player Level - 10] x 5) | Benign Intervention | Trigger Rush | Pick Locks | ||
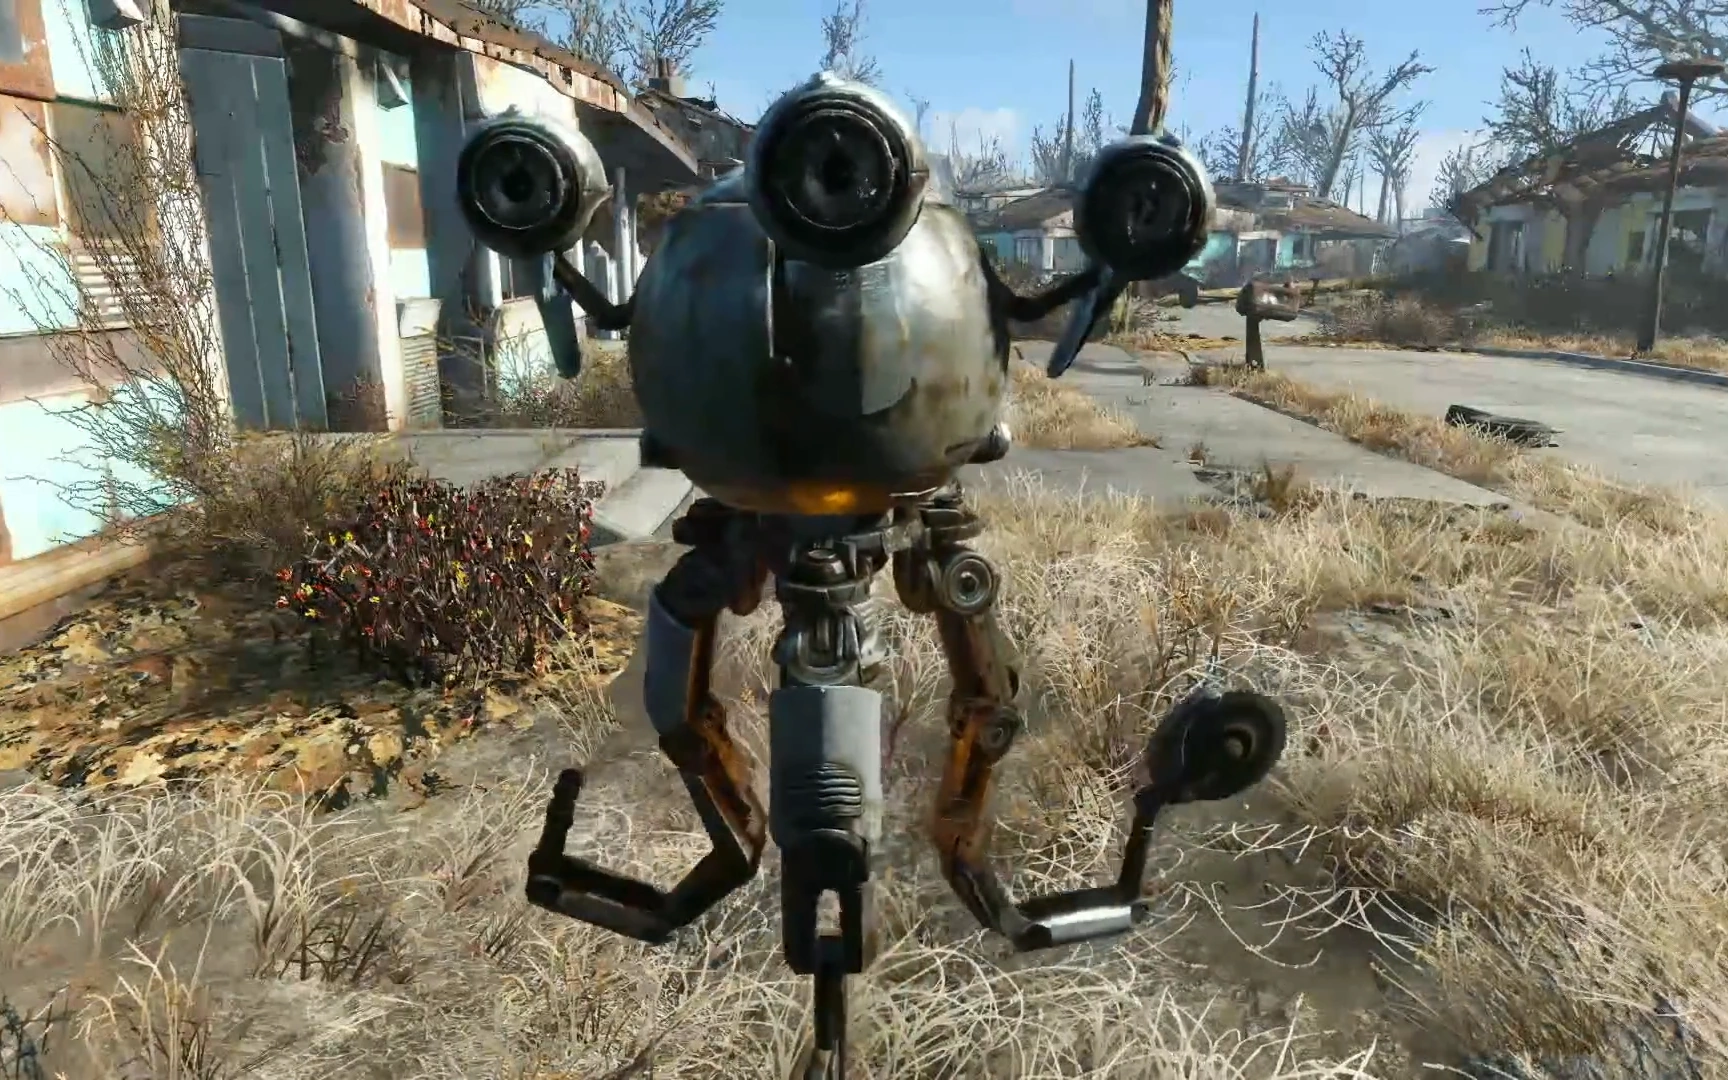 Codsworth |
Sanctuary Hills | Ask him to join after visiting Concord in the quest Out of Time | 9 ST, 10 PE, 7 EN, 7 CH, 16 IN, 10 AG, 7 LK | 195 + ([Player Level - 10] x 5) | Robot Sympathy | 1 Purified water | |||
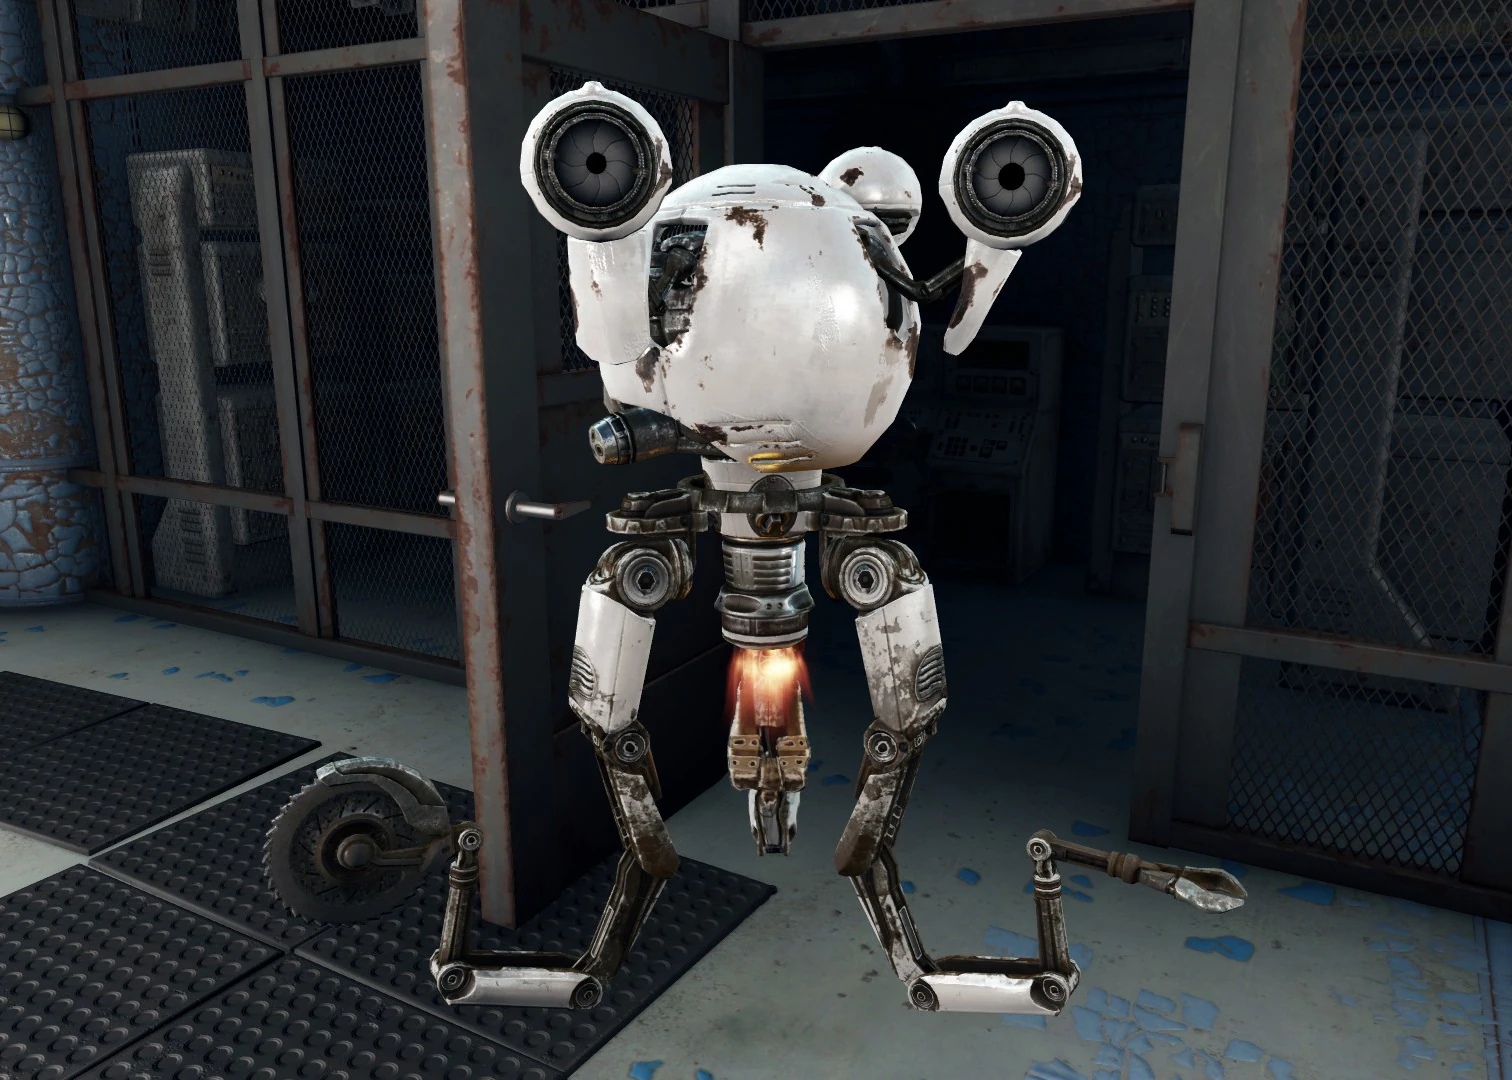 Curie |
Vault 81 | Complete the quest Hole in the Wall | 5 ST, 4 PE, 4 EN, 4 CH, 4 IN, 4 AG, 4 LK (Synth) 4 ST, 4 PE, 4 EN, 4 CH, 11 IN, 4 AG, 4 LK (Miss Nanny) |
440 (Miss Nanny) 670 (Synth) |
Emergent Behavior | Combat Medic | Stimpak | ||
 Paladin Danse |
Cambridge police station The Prydwen (after Shadow of Steel) |
Upon receiving the quest Tour of Duty | 5 ST, 10 PE, 8 EN, 8 CH, 8 IN, 10 AG, 7 LK | 185 + ([Player Level - 10] x 5) | Blind Betrayal | Know Your Enemy | Righteous Authority (quest reward) | ||
 Deacon |
Railroad HQ | Complete Tradecraft and join The Railroad | 5 ST, 10 PE, 7 EN, 9 CH, 8 IN, 10 AG, 8 LK | 185 + ([Player Level - 10] x 5) | Cloak & Dagger | ||||
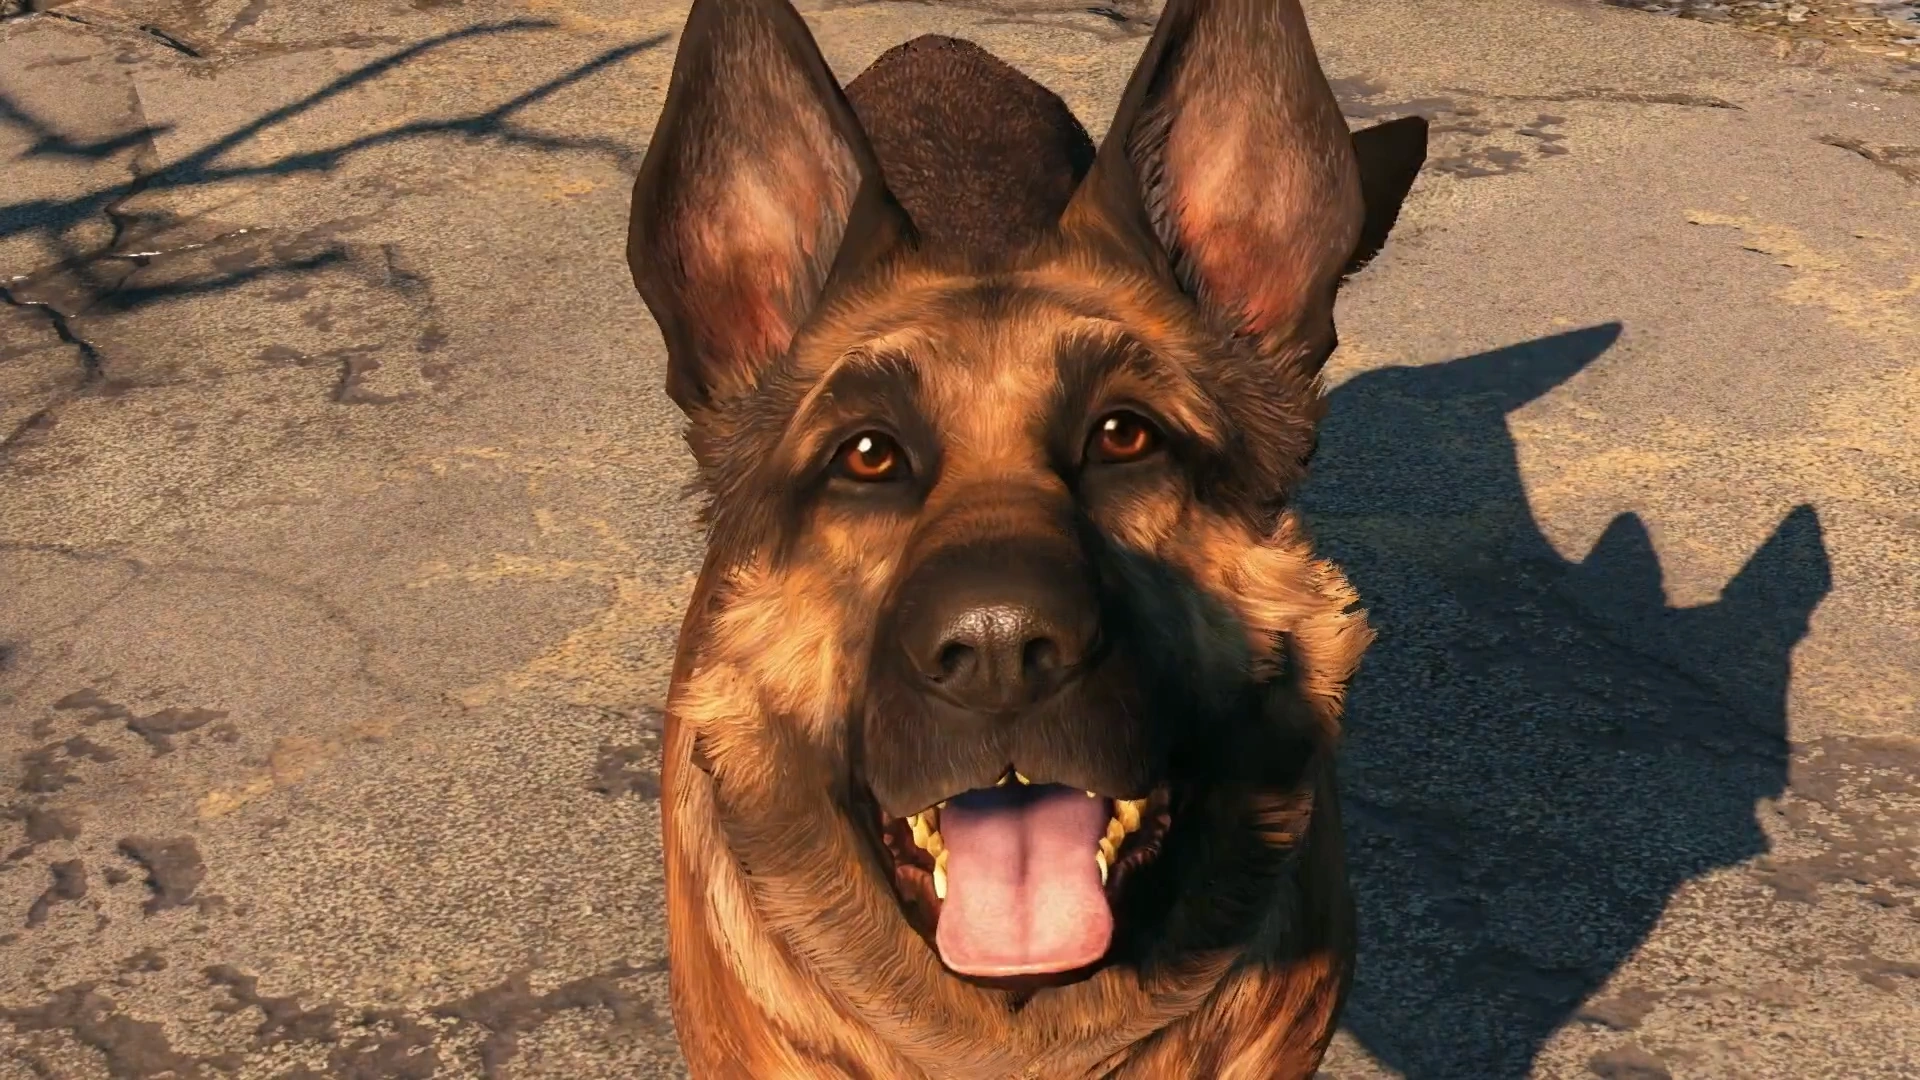 Dogmeat |
Red Rocket truck stop | Ask him to join | 4 ST, 14 PE, 4 EN, 4 CH, 8 IN, 14 AG, 4 LK | 150 + ([Player Level - 1] x 5) | Attack Dog | ||||
 John Hancock |
Old State House in Goodneighbor | Ask him to join after completing The Big Dig (if sided with Bobbi No-Nose, after completing Recruiting Hancock) | 5 ST, 10 PE, 8 EN, 9 CH, 14 IN, 10 AG, 8 LK | 185 + ([Player Level - 10] x 5) | Isodoped | Chems | |||
 Robert MacCready |
The Third Rail in Goodneighbor | Hire him for 250 caps or 200 (Easy speech check) | 5 ST, 10 PE, 4 EN, 6 CH, 7 IN, 5 AG, 5 LK | 185 + ([Player Level - 10] x 5) | Long Road Ahead | Killshot | Ammo | Steal Items Undetected | |
 Nick Valentine |
Vault 114 Diamond City after Unlikely Valentine |
Complete Getting a Clue | 5 ST, 7 PE, 8 EN, 8 CH, 16 IN, 10 AG, 8 LK | 225 + ([Player Level - 10] x 5) | Long Time Coming | Close to Metal | Hack Terminals | ||
 Piper Wright |
Diamond City | Complete Story of the Century or during Dangerous Minds | 5 ST, 10 PE, 7 EN, 10 CH, 8 IN, 10 AG, 8 LK | 185 + ([Player Level - 10] x 5) | Gift of Gab | Sweet Foods | |||
 Preston Garvey |
Museum of Freedom Sanctuary Hills (after When Freedom Calls |
Complete The First Step | 5 ST, 10 PE, 7 EN, 9 CH, 8 IN, 10 AG, 8 LK | 185 + ([Player Level - 10] x 5) | United We Stand | Radiant Quests | |||
 Strong |
Trinity Tower | Ask him to join after Curtain Call | 24 ST, 12 PE, 8 EN, 1 CH, 6 IN, 18 AG, 1 LK | 245 + ([Player Level - 10] x 5) | Berserk | Meats | |||
 X6-88 |
The Institute | Join the Institute and complete Mankind - Redefined | 16 ST, 18 PE, 17 EN, 8 CH, 10 IN, 18 AG, 8 LK | 185 + ([Player Level - 10] x 5) | Shield Harmonics | fusion cells | |||
 Ada |
Near Wattz Consumer Electronics Red Rocket truck stop |
Complete Mechanical Menace | 9 ST, 5 PE, 1 EN, 1 CH, 7 IN, 10 AG, 1 LK | Automatron quest line | None | Junk Items (possible radiant quests) | Steal Owned Items (may upgrade to Hack or Lockpick) | ||
 Automatron |
N/A | Must be built at a Robot workbench | 9 ST, 5 PE, 0 EN, 0 CH, 0 IN, 10 AG, 0 LK | Variable | None | Junk Items | May Upgrade to Hack or Lockpick | ||
 Old Longfellow |
The Last Plank | Complete Walk in the Park | 5 ST, 7 PE, 7 EN, 7 CH, 7 IN, 10 AG, 7 LK | Shipbreaker | Hunter's Wisdom | ||||
 Porter Gage |
Fizztop Grille | Complete An Ambitious Plan | 7 ST, 9 PE, 7 EN, 3 CH, 6 IN, 8 AG, 7 LK | Lessons in Blood | Limited Merchant |
Temporary companions
The game has a number of temporary companions that will only be available during certain quests.
Interests
Main article: Affinity
- General behavior
- Miscellaneous actions
- Faction activities
Notes
- Unlike Fallout 3, companions are marked as "essential" when acting as active companions, meaning they cannot be killed. If incapacitated, they will automatically heal after combat ends.
- If one is playing in Survival mode, the companion must be healed when incapacitated, even after combat. If they're not healed within a set period of time, or when the player travels beyond a certain distance, they will leave and return to their last used home base.
- Some companions lose their essential status when dismissed. They do, however, remain protected like other settlers and cannot be killed by NPC attacks (only by the player or their active companion or related action)
- Some companions lose their essential status upon reaching the lowest level of affinity and leaving the player character.
- If the Sole Survivor fires a weapon in a settlement, any companions present in that settlement will often become annoyed and make backbiting comments on how that is best saved for another time. This does not count as a disapproval.
- If the player character murders an innocent, their affinity with their current companion will drop by 10% and will trigger dialogue with the player character expressing anger and warning them to never do it again. They may also leave the player character instead of speaking to them. They will refuse to speak to the player character at first, but after a few days, the companion will be able to travel again. Should the player character ignore this warning and repeat a murder, companions will permanently leave. This applies to every companion except Strong, as he likes murder. Dogmeat, Ada, and automatrons are neutral about murder.
- Depending on what kind of innocent murdered, the companion may even become hostile towards the player character. For example, Piper and Nick will turn hostile if a DC guard is killed, while Hancock will turn hostile if a Goodneighbor guard is killed.
- Companions will give different thoughts and relationship statuses depending on their relationship with the player character. They will also differ in attitude when dismissing them or asking them to join. These comments can be hateful, disdainful, neutral, admirable, generous, and for romantic companions, affectionate.
- Raising or dropping a companion's affinity to a certain amount will trigger a unique dialogue with the player character. Positive affinity will reveal some of the companion's background and how they ended up here. When reaching idolization, the companion will admit to having the player character being their best friend. Negative affinity results in disappointed companions asking the Sole Survivor to change their ways. When reaching hatred, the companion will threaten to leave for good. A moderate persuasion check can convince them to give the player character one more chance. If the persuasion was successful, but the affinity still goes down, the companion will eventually snap and leave for good. This applies to every companion except for Dogmeat, Ada, and an automatron.
- Companions can be directed and can have more options if they like the Sole Survivor a lot, whether being a human, a synth, a dog or a robot. This is influenced by how the Survivor approaches quests and talks to other people.
- Humanoid companions can be ordered to use power armor; to do so one needs to "command" the companion to simply enter the armor. Whether the armor is racked or not, they will walk up to it and enter it. One has to be standing a bit away from the armor; if too close, the command option will change to "enter" and if hitting the activate button, the Sole Survivor will mount the power armor instead.
- To get a companion out of power armor simply talk to them and there will be a dialogue option to ask them to get out of it.
- When the companion is dismissed they will return to the designated "home" wearing the armor and will continue to wear it until telling them to exit their power armor suit. Sometimes one may find the dismissed companion in the settlement sent to without their power armor. In that case, look around the settlement for the power armor suit as the companion may have exited it and left it somewhere in the settlement. The larger the settlement, the longer or more difficult the search for the lost armor suit may be.
- To make a companion not leave the power armor at the settlement, make sure both the power armor and the companion is equipped with a fully charges fusion core. (It might also help to assign them guard duty, so they don't go to sleep)
- Humanoid companions can wear power armor without needing a fusion core. If removing the fusion core from the suit, they may still enter it and never need a fusion core. It is unclear if this is intended behavior.
- Humanoid companions can also be equipped with weapons and armor of choice. To do so, go to the trade dialogue option and place whatever items the player character wants them to use or wear in their inventory. Then, in their inventory, press the button to "equip" the item(s). Weapons equipped must also have an ammunition supply, so they must be provided with the ammo type the weapon requires. Even weapons that use the same ammunition as a companion's default weapon must have ammunition supplied.
- There are some exceptions to this rule: Paladin Danse cannot wear anything other than headgear as long as he has his power armor, Codsworth can wear certain hats, Nick Valentine will only wear his trenchcoat (although an extra one is given to the player character; this one can be modified and equipped on Nick) or he can wear the High Confessor Tektus' robes from the Far Harbor add-on or power armor, Strong can wear super mutant armor, Dogmeat can wear dog armor, bandanas and eyewear.
- Humanoid companions can and will use all types of grenades when equipped with them. While they possess remarkable skill and are fully capable of hitting even moving targets with astounding accuracy, they are completely oblivious of any collateral damage they might inflict on allies caught in the blast radius, the Sole Survivor included. Investing at least one point in the Inspirational perk is therefore recommended before equipping companions with grenades or any explosive weapon for that matter.
- All companions have a carrying capacity of 150, except Strong with 200, and Danse with 210.[1] Note that this is changed substantially in Survival mode, causing many companions to be able to carry little more than their own armor and weapons.
- It is possible to make companions wear pocketed or deep pocketed armor to increase their carrying capacity by +30 or +60, respectively.
- Companion carry capacity can be increased by +10 by acquiring Live & Love Issue #3.
- A trick can be used to push a companion past their carry capacity. Companions can always be commanded to pick up items or loot containers & bodies, even when at or beyond capacity. Note when commanding them to loot containers & bodies they will only grab one item at a time, so one may need to command them repeatedly. Once at or beyond capacity, it will not be possible to give them items any other way. This will not work with Dogmeat.
- Dogmeat does not count as a companion for the purposes of the Lone Wanderer perk, therefore the Survivor can adventure with him and keep the benefits of the perk.
- Traveling with a companion bestows the player character with an inherent 5% bonus to all Experience gained. This bonus can be further increased by acquiring Live & Love Issue #8. These bonuses are multiplicative with other experience bonuses such as Intelligence and Gift of Gab.
- When choosing a location to send a dismissed companion, selecting 'Cancel' will not cancel the dismissal, but will instead send them back to the last location they were sent to when dismissed. If no settlement has ever been selected, the companion will be sent to their original location rather than a settlement.
- If one accidentally dismisses a companion, just walk up to them again and ask them to re-join. One must also confirm the companion's desire to re-join after asking.
- Danse, Deacon, Gaige, and X6-88 are the only companions who can be killed by the Sole Survivor if they're not following the Survivor.
- Perks gained from companions are permanent. This holds true regardless of the status of the companion (e.g. hostile towards the player character, dead, etc.).
- It is impossible to complete the main story of Fallout 4 and keep all companions (so if one wants to get all companion perks a few must be done before completing the main quest).
- Companions can be tracked down using the Vault-Tec Population Management System introduced in the Vault-Tec Workshop add-on.
- Some pacifist companions, like Curie and Piper, will still have their affinity raised when asking them to wait while fighting enemies alone in that same area. In contrast, aggressive companions, like MacCready, will only have their affinity raised if they are directly in contact with the enemies together with the player character.
- Most companions complain when picking up junk, however, Old Longfellow will praise the player character and even have his affinity raised. Piper will complement the player character's ability to find a use for junk but does not gain any affinity.
- When the player activates an elevator that takes them into a different location, all companions will seem to disappear for a short period, and then reappear, although it is still possible to locate them with the reticle. An example is an elevator in Secret Vault 81 To Vault 81, where the Curie follows the player to the last quest marker for Hole in the Wall.
- Some companions will, when talked to, give the Survivor a gift. This can happen once/day.
Bugs
 A companion may become stuck in a reference pose position, flying around unanimated about 1-2 feet off the ground following the player character. The companion can be spoken with and interacted with in a normal manner, however, the companion will not fight. Even loading a new area by going through a door will not fix this behavior.[verified]
- One potential fix is to fast travel to another location.
- Another fix is to dismiss the companion. The companion can be re-recruited back.
- Certain sound effects can get "stuck" to companions and continue to play after said companion quit performing the respective action. Known examples include the sound of wielding a Ripper, firing a Gauss rifle and using the weapon bench's drill. When the bug occurs it follows the companion around, waxing and waning depending on their distance, and can neither be stopped by fast-traveling, reloading or taking the weapon away from them. It can, however, be fixed by closing and restarting the game. It is currently unknown what exactly causes the bug.[verified]
- Should the Ripper sound be playing over and over, having the companion use the weapon again may fix the bug.[verified]
- If a companion has the drilling-sound glitch from an armor workbench or weapon workbenches, allowing them to re-use the corresponding workbench from where the glitched sound is and let them end its use by themselves without interruptions, the sound glitch should stop and be fixed.
- Ada may remain with you even though you have just selected dismiss in dialogue, as well as the option of the settlement won't pop up.[verified]
- One solution is to restart the game.
- Another solution is to acquire a different companion.
- When sending a companion to another settlement using the workshop he/ she will not go there straight away, and bringing the settlement choices back up will show the place still has an option to where they can be sent.[verified]
- A fix for this is to turn the game off, then reloading the save.
- Another fix is to fast travel to a different place and sleep in a bed and return.
- If a companion is down while changing zones, they may remain "downed" permanently, only changing areas along with the Sole Survivor. This can be fixed by damaging their HP until they go "down" and regenerate again while out of combat.[verified]
References
| ||||||||||||