Steel Nomad (talk | contribs) No edit summary Tag: sourceedit |
No edit summary |
||
| (29 intermediate revisions by 13 users not shown) | |||
| Line 6: | Line 6: | ||
}}{{Games|FO3}} |
}}{{Games|FO3}} |
||
| − | {| class="va-table-collapse collapsible collapsed" style="text-align: left; border: none;" cellspacing="0" cellpadding="2" |
+ | {| class="va-table-collapse mw-collapsible mw-collapsed" style="text-align: left; border: none;" cellspacing="0" cellpadding="2" |
| − | !style="font-size:18px" | Legend |
+ | !style="font-size:18px; float: left;" | Legend |
|- |
|- |
||
| − | |{{ |
+ | |{{Icon|damage|x18px|tooltip=Damage per shot|link=Damage}} - '''Damage''': This information comes straight from the [[G.E.C.K. (editor)|G.E.C.K.]] and shows the damage caused by a single click of the mouse/trigger. For most [[small guns]], that's a single bullet, but for shotguns it's a single ''shell'' (containing several small pellets), and for the [[Gatling laser (Fallout 3)|Gatling laser]] it's a single beam. This stat is most useful for comparing semi-automatic weapons like rifles, where you can see the full damage caused by a single shot, regardless of how long it takes to load and fire the next one. |
|- |
|- |
||
| − | |{{ |
+ | |{{Icon|dps|x18px|tooltip=Damage per second}} - '''Damage per second''': The maximum cyclic damage dealt in one second, expressed as rate of fire times damage. Weapons that require a reload every shot have damage per second shown including reload times, all others show sustained rates without reloads. |
|- |
|- |
||
| − | |{{ |
+ | |{{Icon|attack|x18px|tooltip=Rate of fire}} l- '''Rate of fire''': The maximum cyclic number of shots/attacks per second, without considering reloading. |
|- |
|- |
||
| − | |{{ |
+ | |{{Icon|spread|x18px|tooltip=Weapon Spread|link=Spread}} - '''Spread''': This is the ''Min Spread'' stat from the G.E.C.K. (the ''Spread'' stat is not used). It refers to the accuracy of a ranged weapon. 0 means the weapon can potentially fire perfectly straight, if stance, weapon skill, and weapon condition are optimal. Anything above 0 means the shots may deviate from center by that many degrees regardless of stance, skill, or condition. |
|- |
|- |
||
| − | |{{ |
+ | |{{Icon|chance|x18px|tooltip=Critical chance multiplier}} - '''Critical chance multiplier''': The ''multiplier'' applied to your character's critical hit chance. This modifier applies to each individual attack you make (e.g. each [[5mm]] bullet fired from your [[Minigun (Fallout 3)|minigun]]). For example, if your character has a critical hit chance of 5%, and the weapon you're using has a '''CRIT % MULT''' of x2, then each shot has a 5% x 2 ='''10%''' chance to critically hit. For automatic weapons (assault rifles, SMGs, miniguns, etc.) the ''Crit % Mult'' stat in the G.E.C.K. is divided by the G.E.C.K.'s ''Fire Rate'' stat, hence the very small multiplier for automatic weapons. This is done to compensate for the sheer number of bullets being fired. Note that single V.A.T.S. attack, with automatic weapons, only checks for critical hit once, applying damage bonus for all bullets in such attack if critical hit is done. |
|- |
|- |
||
|{{Icon|crit|x18px|tooltip=Critical hit Damage}} - '''Critical hit Damage''': The amount of damage that is ''added'' when you score a critical strike. The more specialized [[Sneak Attack Critical]] deals twice the damage of a common critical strike. |
|{{Icon|crit|x18px|tooltip=Critical hit Damage}} - '''Critical hit Damage''': The amount of damage that is ''added'' when you score a critical strike. The more specialized [[Sneak Attack Critical]] deals twice the damage of a common critical strike. |
||
|- |
|- |
||
| − | |{{ |
+ | |{{Icon|ap|x18px|tooltip=Action point cost}} - '''Action Point cost''': The amount of [[Action Points]] used per shot in V.A.T.S. |
|- |
|- |
||
| − | |{{ |
+ | |{{Icon|explosion|x18px|tooltip=Area of Effect}} - '''Area of effect''': The blast radius of the explosion in units of measurement displayed in the G.E.C.K. |
|- |
|- |
||
| − | |{{ |
+ | |{{Icon|repair|x18px|tooltip=Weapon durability in shots until broken}} - '''Durability''': This is the maximum number of times a weapon can attack/fire from full health before completely breaking. |
|- |
|- |
||
| − | |{{ |
+ | |{{Icon|ammo|x18px|tooltip=Ammunition used|link=Fallout 3 ammunition}} - '''Ammunition used''': The type of ammunition the weapon uses. |
|- |
|- |
||
| − | |{{ |
+ | |{{Icon|mag|x18px|tooltip=Magazine capacity (shots per reload)}} - '''Magazine capacity''': The maximum ammunition capacity of the weapon. '''Shots per reload''': The maximum number of shots possible from a full magazine. |
|- |
|- |
||
| − | |{{ |
+ | |{{Icon|weight|x18px|tooltip=Weapon weight}} - '''Weapon weight''': Weight value of the weapon that applies to encumbrance. |
|- |
|- |
||
| − | |{{ |
+ | |{{Icon|merchant|x18px|tooltip=Weapon value in caps}} - '''Weapon value in caps''': Base value of the weapon in [[Bottle cap (Fallout 3)|caps]]. Resale value is effected by [[Barter]] skill. |
|- |
|- |
||
| − | |{{ |
+ | |{{Icon|ratio|x18px|tooltip=Value to weight ratio}} - '''Value to weight ratio''': The ratio of the base weapon value in [[Bottle cap (Fallout 3)|caps]] to the weapon weight. |
|} |
|} |
||
==[[Small Guns]]== |
==[[Small Guns]]== |
||
| Line 42: | Line 42: | ||
{| class="va-table va-table-center va-table-full sortable" |
{| class="va-table va-table-center va-table-full sortable" |
||
! |
! |
||
| − | ! {{ |
+ | ! {{Icon|pistol|24px|tooltip=Pistol name}} |
| − | ! {{ |
+ | ! {{Icon|damage|x18px|tooltip=Damage per shot|link=Damage}} |
| − | ! {{ |
+ | ! {{Icon|dps|x18px|tooltip=Damage per second}} |
| − | ! {{ |
+ | ! {{Icon|attack|x18px|tooltip=Attacks per second}} |
| − | ! {{ |
+ | ! {{Icon|chance|x18px|tooltip=Critical chance multiplier}} |
! {{Icon|crit|x18px|tooltip=Critical hit Damage}} |
! {{Icon|crit|x18px|tooltip=Critical hit Damage}} |
||
| − | ! {{ |
+ | ! {{Icon|ap|x18px|tooltip=Action point cost}} |
| − | ! {{ |
+ | ! {{Icon|dap|x18px|tooltip=Damage per Action Point}} |
| − | ! {{ |
+ | ! {{Icon|spread|x18px|tooltip=Weapon Spread|link=Spread}} |
| − | ! {{ |
+ | ! {{Icon|ammo|x18px|tooltip=Ammunition used|link=Fallout 3 ammunition}} |
| − | ! {{ |
+ | ! {{Icon|mag|x18px|tooltip=Magazine capacity (shots per reload)}} |
| − | ! {{ |
+ | ! {{Icon|repair|x18px|tooltip=Weapon durability in shots until broken}} |
| − | ! {{ |
+ | ! {{Icon|weight|x18px|tooltip=Weapon weight}} |
| − | ! {{ |
+ | ! {{Icon|merchant|x18px|tooltip=Weapon value in caps}} |
| − | ! {{ |
+ | ! {{Icon|ratio|x18px|tooltip=Value to weight ratio}} |
! Base ID |
! Base ID |
||
| Line 79: | Line 79: | ||
|- class="va-table-highlight" style="height:32px;" |
|- class="va-table-highlight" style="height:32px;" |
||
| − | | [[File:32snub_v2.png|40px|link=Wild Bill's Sidearm ( |
+ | | [[File:32snub_v2.png|40px|link=Wild Bill's Sidearm (The Pitt)]] |
| − | | [[Wild Bill's Sidearm ( |
+ | | [[Wild Bill's Sidearm (The Pitt)|Wild Bill's Sidearm]] {{Icon|FO3TP|link=The Pitt (add-on)}} |
| 10 |
| 10 |
||
| 30 |
| 30 |
||
| Line 176: | Line 176: | ||
| [[File:ChinesePistolv2.png|40px|link=Zhu-Rong v418 Chinese pistol]] |
| [[File:ChinesePistolv2.png|40px|link=Zhu-Rong v418 Chinese pistol]] |
||
| [[Zhu-Rong v418 Chinese pistol]] |
| [[Zhu-Rong v418 Chinese pistol]] |
||
| − | | 4 +2<br />{{ |
+ | | 4 +2<br />{{Icon|fire}}/5s |
| 20 |
| 20 |
||
| 4.5 |
| 4.5 |
||
| Line 195: | Line 195: | ||
| [[File:Dart_gun.png|60px|link=Dart gun]] |
| [[File:Dart_gun.png|60px|link=Dart gun]] |
||
| [[Dart gun]]¹ |
| [[Dart gun]]¹ |
||
| − | | 6<br />+8 {{ |
+ | | 6<br />+8 {{Icon|poison}}/8s |
| 44 |
| 44 |
||
| 6 |
| 6 |
||
| Line 251: | Line 251: | ||
|- class="va-table-highlight" style="height:32px;" |
|- class="va-table-highlight" style="height:32px;" |
||
| [[File:.44_magnum_revolver_with_scope.png|40px|link=Callahan's Magnum]] |
| [[File:.44_magnum_revolver_with_scope.png|40px|link=Callahan's Magnum]] |
||
| − | | [[Callahan's Magnum]]² {{ |
+ | | [[Callahan's Magnum]]² {{Icon|FO3BS|link=Broken Steel}} |
| 65 |
| 65 |
||
| 146.3 |
| 146.3 |
||
| Line 270: | Line 270: | ||
|- class="va-table-highlight" style="height:32px;" |
|- class="va-table-highlight" style="height:32px;" |
||
| [[File:.44_magnum_revolver_(Fallout_3).png|40px|link=Paulson's revolver]] |
| [[File:.44_magnum_revolver_(Fallout_3).png|40px|link=Paulson's revolver]] |
||
| − | | [[Paulson's revolver]] {{ |
+ | | [[Paulson's revolver]] {{Icon|FO3MZ|link=Mothership Zeta (add-on)}} |
| − | | 45<br>(5x9) |
+ | | 45<br />(5x9) |
| 101.3 |
| 101.3 |
||
| 2.25 |
| 2.25 |
||
| Line 298: | Line 298: | ||
{| class="va-table va-table-center sortable va-table-full" |
{| class="va-table va-table-center sortable va-table-full" |
||
! |
! |
||
| − | ! {{ |
+ | ! {{Icon|rifle|60px|tooltip=Rifle name}} |
| − | ! {{ |
+ | ! {{Icon|damage|x18px|tooltip=Damage per shot|link=Damage}} |
| − | ! {{ |
+ | ! {{Icon|dps|x18px|tooltip=Damage per second}} |
| − | ! {{ |
+ | ! {{Icon|attack|x18px|tooltip=Attacks per second}} |
| − | ! {{ |
+ | ! {{Icon|chance|x18px|tooltip=Critical chance multiplier}} |
! {{Icon|crit|x18px|tooltip=Critical hit Damage}} |
! {{Icon|crit|x18px|tooltip=Critical hit Damage}} |
||
| − | ! {{ |
+ | ! {{Icon|ap|x18px|tooltip=Action point cost}} |
| − | ! {{ |
+ | ! {{Icon|dap|x18px|tooltip=Damage per Action Point}} |
| − | ! {{ |
+ | ! {{Icon|spread|x18px|tooltip=Weapon Spread|link=Spread}} |
| − | ! {{ |
+ | ! {{Icon|ammo|x18px|tooltip=Ammunition used|link=Fallout 3 ammunition}} |
| − | ! {{ |
+ | ! {{Icon|mag|x18px|tooltip=Magazine capacity (shots per reload)}} |
| − | ! {{ |
+ | ! {{Icon|repair|x18px|tooltip=Weapon durability in shots until broken}} |
| − | ! {{ |
+ | ! {{Icon|weight|x18px|tooltip=Weapon weight}} |
| − | ! {{ |
+ | ! {{Icon|merchant|x18px|tooltip=Weapon value in caps}} |
| − | ! {{ |
+ | ! {{Icon|ratio|x18px|tooltip=Value to weight ratio}} |
! Base ID |
! Base ID |
||
| Line 335: | Line 335: | ||
|- style="height:32px;" |
|- style="height:32px;" |
||
| − | | [[File:Infiltrator_%28weapon%29.png|80px|link=Infiltrator ( |
+ | | [[File:Infiltrator_%28weapon%29.png|80px|link=Infiltrator (The Pitt)|Infiltrator]] |
| − | | [[Infiltrator ( |
+ | | [[Infiltrator (The Pitt)|Infiltrator]]¹² {{Icon|FO3TP|link=The Pitt (add-on)}} |
| 7 |
| 7 |
||
| 56 |
| 56 |
||
| Line 355: | Line 355: | ||
|- class="va-table-highlight" style="height:32px;" |
|- class="va-table-highlight" style="height:32px;" |
||
| [[File:Infiltrator_%28weapon%29.png|80px|link=Perforator]] |
| [[File:Infiltrator_%28weapon%29.png|80px|link=Perforator]] |
||
| − | | [[Perforator]]¹² {{ |
+ | | [[Perforator]]¹² {{Icon|FO3TP|link=The Pitt (add-on)}} |
| 10 |
| 10 |
||
| 60 |
| 60 |
||
| Line 392: | Line 392: | ||
|- style="height:32px;" |
|- style="height:32px;" |
||
| − | | [[File:Chinese_assault_rifle.png|80px|link=Chinese assault rifle]] |
+ | | [[File:Chinese_assault_rifle.png|80px|link=Chinese assault rifle (Fallout 3)]] |
| − | | [[Chinese assault rifle]] |
+ | | [[Chinese assault rifle (Fallout 3)|Chinese assault rifle]] |
| 11 |
| 11 |
||
| 88 |
| 88 |
||
| Line 469: | Line 469: | ||
|- style="height:32px;" |
|- style="height:32px;" |
||
| [[File:Lever_Rifle.png|80px|link=Lever-action rifle (Point Lookout)]] |
| [[File:Lever_Rifle.png|80px|link=Lever-action rifle (Point Lookout)]] |
||
| − | | [[Lever-action rifle (Point Lookout)|Lever-action rifle]] {{ |
+ | | [[Lever-action rifle (Point Lookout)|Lever-action rifle]] {{Icon|FO3PL|link=Point Lookout (add-on)}} |
| 40 |
| 40 |
||
| 30 |
| 30 |
||
| Line 488: | Line 488: | ||
|- class="va-table-highlight" style="height:32px;" |
|- class="va-table-highlight" style="height:32px;" |
||
| [[File:Lever_Rifle.png|80px|link=Backwater rifle]] |
| [[File:Lever_Rifle.png|80px|link=Backwater rifle]] |
||
| − | | [[Backwater rifle]] {{ |
+ | | [[Backwater rifle]] {{Icon|FO3PL|link=Point Lookout (add-on)}} |
| 45 |
| 45 |
||
| 33.75 |
| 33.75 |
||
| Line 611: | Line 611: | ||
{| class="va-table va-table-center va-table-full sortable" |
{| class="va-table va-table-center va-table-full sortable" |
||
! |
! |
||
| − | ! {{ |
+ | ! {{Icon|shotgun|60px|tooltip=Shotgun name}} |
| − | ! {{ |
+ | ! {{Icon|damage|x18px|tooltip=Damage per shot|link=Damage}} |
| − | ! {{ |
+ | ! {{Icon|dps|x18px|tooltip=Damage per second}} |
| − | ! {{ |
+ | ! {{Icon|attack|x18px|tooltip=Attacks per second}} |
| − | ! {{ |
+ | ! {{Icon|chance|x18px|tooltip=Critical chance multiplier}} |
! {{Icon|crit|x18px|tooltip=Critical hit Damage}} |
! {{Icon|crit|x18px|tooltip=Critical hit Damage}} |
||
| − | ! {{ |
+ | ! {{Icon|ap|x18px|tooltip=Action point cost}} |
| − | ! {{ |
+ | ! {{Icon|dap|x18px|tooltip=Damage per Action Point}} |
| − | ! {{ |
+ | ! {{Icon|spread|x18px|tooltip=Weapon Spread|link=Spread}} |
| − | ! {{ |
+ | ! {{Icon|ammo|x18px|tooltip=Ammunition used|link=Fallout 3 ammunition}} |
| − | ! {{ |
+ | ! {{Icon|mag|x18px|tooltip=Magazine capacity (shots per reload)}} |
| − | ! {{ |
+ | ! {{Icon|repair|x18px|tooltip=Weapon durability in shots until broken}} |
| − | ! {{ |
+ | ! {{Icon|weight|x18px|tooltip=Weapon weight}} |
| − | ! {{ |
+ | ! {{Icon|merchant|x18px|tooltip=Weapon value in caps}} |
| − | ! {{ |
+ | ! {{Icon|ratio|x18px|tooltip=Value to weight ratio}} |
! Base ID |
! Base ID |
||
| Line 631: | Line 631: | ||
| [[File:COMBATSHOTGUN.png|80px|link=Combat shotgun (Fallout 3)]] |
| [[File:COMBATSHOTGUN.png|80px|link=Combat shotgun (Fallout 3)]] |
||
| [[Combat shotgun (Fallout 3)|Combat shotgun]] |
| [[Combat shotgun (Fallout 3)|Combat shotgun]] |
||
| − | | 55<br>(6.1x9) |
+ | | 55<br />(6.1x9) |
| 82.5 |
| 82.5 |
||
| 1.5 |
| 1.5 |
||
| Line 667: | Line 667: | ||
|- style="height:32px;" |
|- style="height:32px;" |
||
| − | | [[File:DoubleBarrelShotgun.png|80px|link=Double-barrel shotgun ( |
+ | | [[File:DoubleBarrelShotgun.png|80px|link=Double-barrel shotgun (Point Lookout)]] |
| − | | [[Double-barrel shotgun ( |
+ | | [[Double-barrel shotgun (Point Lookout)|Double-barrel shotgun]] {{Icon|FO3PL|link=Point Lookout (add-on)}} |
| − | | 85<br>(9.4x9) |
+ | | 85<br />(9.4x9) |
| 191.3 |
| 191.3 |
||
| 2.25 |
| 2.25 |
||
| Line 707: | Line 707: | ||
| [[File:SAWEDOFFSHOTGUN.png|40px|link=The Kneecapper]] |
| [[File:SAWEDOFFSHOTGUN.png|40px|link=The Kneecapper]] |
||
| [[The Kneecapper]] |
| [[The Kneecapper]] |
||
| − | | 75<br>(8.3x9) |
+ | | 75<br />(8.3x9) |
| 140.62 |
| 140.62 |
||
| 1.88 |
| 1.88 |
||
| Line 733: | Line 733: | ||
{| class="va-table va-table-center va-table-full sortable" |
{| class="va-table va-table-center va-table-full sortable" |
||
! |
! |
||
| − | ! {{ |
+ | ! {{Icon|smg|60px|tooltip=Submachine gun name}} |
| − | ! {{ |
+ | ! {{Icon|damage|x18px|tooltip=Damage per shot|link=Damage}} |
| − | ! {{ |
+ | ! {{Icon|dps|x18px|tooltip=Damage per second}} |
| − | ! {{ |
+ | ! {{Icon|attack|x18px|tooltip=Attacks per second}} |
| − | ! {{ |
+ | ! {{Icon|chance|x18px|tooltip=Critical chance multiplier}} |
! {{Icon|crit|x18px|tooltip=Critical hit Damage}} |
! {{Icon|crit|x18px|tooltip=Critical hit Damage}} |
||
| − | ! {{ |
+ | ! {{Icon|ap|x18px|tooltip=Action point cost}} |
| − | ! {{ |
+ | ! {{Icon|dap|x18px|tooltip=Damage per Action Point}} |
| − | ! {{ |
+ | ! {{Icon|spread|x18px|tooltip=Weapon Spread|link=Spread}} |
| − | ! {{ |
+ | ! {{Icon|ammo|x18px|tooltip=Ammunition used|link=Fallout 3 ammunition}} |
| − | ! {{ |
+ | ! {{Icon|mag|x18px|tooltip=Magazine capacity (shots per reload)}} |
| − | ! {{ |
+ | ! {{Icon|repair|x18px|tooltip=Weapon durability in shots until broken}} |
| − | ! {{ |
+ | ! {{Icon|weight|x18px|tooltip=Weapon weight}} |
| − | ! {{ |
+ | ! {{Icon|merchant|x18px|tooltip=Weapon value in caps}} |
| − | ! {{ |
+ | ! {{Icon|ratio|x18px|tooltip=Value to weight ratio}} |
! Base ID |
! Base ID |
||
| Line 797: | Line 797: | ||
{| class="va-table va-table-center va-table-full sortable" |
{| class="va-table va-table-center va-table-full sortable" |
||
! |
! |
||
| − | ! {{ |
+ | ! {{Icon|big gun|60px|tooltip=Direct fire Big Gun name}} |
| − | ! {{ |
+ | ! {{Icon|damage|x18px|tooltip=Damage per shot|link=Damage}} |
| − | ! {{ |
+ | ! {{Icon|dps|x18px|tooltip=Damage per second}} |
| − | ! {{ |
+ | ! {{Icon|attack|x18px|tooltip=Attacks per second}} |
| − | ! {{ |
+ | ! {{Icon|chance|x18px|tooltip=Critical chance multiplier}} |
! {{Icon|crit|x18px|tooltip=Critical hit Damage}} |
! {{Icon|crit|x18px|tooltip=Critical hit Damage}} |
||
| − | ! {{ |
+ | ! {{Icon|ap|x18px|tooltip=Action point cost}} |
| − | ! {{ |
+ | ! {{Icon|dap|x18px|tooltip=Damage per Action Point}} |
| − | ! {{ |
+ | ! {{Icon|spread|x18px|tooltip=Weapon Spread|link=Spread}} |
| − | ! {{ |
+ | ! {{Icon|ammo|x18px|tooltip=Ammunition used|link=Fallout 3 ammunition}} |
| − | ! {{ |
+ | ! {{Icon|mag|x18px|tooltip=Magazine capacity (shots per reload)}} |
| − | ! {{ |
+ | ! {{Icon|repair|x18px|tooltip=Weapon durability in shots until broken}} |
| − | ! {{ |
+ | ! {{Icon|weight|x18px|tooltip=Weapon weight}} |
| − | ! {{ |
+ | ! {{Icon|merchant|x18px|tooltip=Weapon value in caps}} |
| − | ! {{ |
+ | ! {{Icon|ratio|x18px|tooltip=Value to weight ratio}} |
! Base ID |
! Base ID |
||
|- |
|- |
||
| [[File:Drone_cannon.png|80px|link=Drone cannon]] |
| [[File:Drone_cannon.png|80px|link=Drone cannon]] |
||
| − | | [[Drone cannon]]<br />{{ |
+ | | [[Drone cannon]]<br />{{Icon|FO3MZ|link=Mothership Zeta (add-on)}} |
| − | | 40<br />+100{{ |
+ | | 40<br />+100{{Icon|explosion}} |
| 466.7 |
| 466.7 |
||
| 3.33 |
| 3.33 |
||
| Line 835: | Line 835: | ||
|- class="va-table-highlight" |
|- class="va-table-highlight" |
||
| [[File:Drone_cannon.png|80px|link=Drone cannon Ex-B]] |
| [[File:Drone_cannon.png|80px|link=Drone cannon Ex-B]] |
||
| − | | [[Drone cannon Ex-B]]<br />{{ |
+ | | [[Drone cannon Ex-B]]<br />{{Icon|FO3MZ|link=Mothership Zeta (add-on)}} |
| − | | 40<br />+100{{ |
+ | | 40<br />+100{{Icon|explosion}} |
| 466.7 |
| 466.7 |
||
| 3.33 |
| 3.33 |
||
| Line 855: | Line 855: | ||
| [[File:FLAMER.png|80px|link=Flamer (Fallout 3)|Flamer]] |
| [[File:FLAMER.png|80px|link=Flamer (Fallout 3)|Flamer]] |
||
| [[Flamer (Fallout 3)|Flamer]] |
| [[Flamer (Fallout 3)|Flamer]] |
||
| − | | 16<br />+2{{ |
+ | | 16<br />+2{{Icon|fire}}/5s |
| 130 |
| 130 |
||
| 8 |
| 8 |
||
| x0.5 |
| x0.5 |
||
| − | | 1<br />+2{{ |
+ | | 1<br />+2{{Icon|fire}}/5s |
| 50 |
| 50 |
||
| 1.6 |
| 1.6 |
||
| Line 874: | Line 874: | ||
| [[File:FLAMER.png|80px|link=Flamer (Fallout 3)|Flamer]] |
| [[File:FLAMER.png|80px|link=Flamer (Fallout 3)|Flamer]] |
||
| [[Burnmaster (Fallout 3)|Burnmaster]] |
| [[Burnmaster (Fallout 3)|Burnmaster]] |
||
| − | | 24<br />+2{{ |
+ | | 24<br />+2{{Icon|fire}}/5s |
| 194 |
| 194 |
||
| 8 |
| 8 |
||
| x0.5 |
| x0.5 |
||
| − | | 1<br />+2{{ |
+ | | 1<br />+2{{Icon|fire}}/5s |
| 50 |
| 50 |
||
| 2.0 |
| 2.0 |
||
| Line 892: | Line 892: | ||
|- class="va-table-highlight" |
|- class="va-table-highlight" |
||
| [[File:FLAMER.png|80px|link=Flamer (Fallout 3)|Flamer]] |
| [[File:FLAMER.png|80px|link=Flamer (Fallout 3)|Flamer]] |
||
| − | | [[Rapid-torch flamer]]<br />{{ |
+ | | [[Rapid-torch flamer]]<br />{{Icon|FO3BS|link=Broken Steel}} |
| − | | 16<br />+2{{ |
+ | | 16<br />+2{{Icon|fire}}/5s |
| 130 |
| 130 |
||
| 8 |
| 8 |
||
| x0.5 |
| x0.5 |
||
| − | | 1<br />+2{{ |
+ | | 1<br />+2{{Icon|fire}}/5s |
| 50 |
| 50 |
||
| 1.6 |
| 1.6 |
||
| Line 911: | Line 911: | ||
|- class="va-table-highlight" |
|- class="va-table-highlight" |
||
| [[File:FLAMER.png|80px|link=Flamer (Fallout 3)|Flamer]] |
| [[File:FLAMER.png|80px|link=Flamer (Fallout 3)|Flamer]] |
||
| − | | [[Slo-burn flamer]]<br />{{ |
+ | | [[Slo-burn flamer]]<br />{{Icon|FO3BS|link=Broken Steel}} |
| − | | 18<br />+8{{ |
+ | | 18<br />+8{{Icon|fire}}/5s |
| 152 |
| 152 |
||
| 8 |
| 8 |
||
| x0.5 |
| x0.5 |
||
| − | | 1<br />+2{{ |
+ | | 1<br />+2{{Icon|fire}}/5s |
| 50 |
| 50 |
||
| 3.5 |
| 3.5 |
||
| Line 949: | Line 949: | ||
|- class="va-table-highlight" |
|- class="va-table-highlight" |
||
| [[File:GatlingLaser.png|80px|link=Precision Gatling laser]] |
| [[File:GatlingLaser.png|80px|link=Precision Gatling laser]] |
||
| − | | [[Precision Gatling laser]]<br />{{ |
+ | | [[Precision Gatling laser]]<br />{{Icon|FO3BS|link=Broken Steel}} |
| 8 |
| 8 |
||
| 160 |
| 160 |
||
| Line 986: | Line 986: | ||
|- |
|- |
||
| − | | [[File:Heavy_incinerator.png|80px|link=Heavy incinerator ( |
+ | | [[File:Heavy_incinerator.png|80px|link=Heavy incinerator (Broken Steel)|Heavy incinerator]] |
| − | | [[Heavy incinerator ( |
+ | | [[Heavy incinerator (Broken Steel)|Heavy incinerator]]<br />{{Icon|FO3BS|link=Broken Steel}} |
| − | | 35<br />+45{{ |
+ | | 35<br />+45{{Icon|explosion}}<br />+8{{Icon|fire}}/5s |
| 328 |
| 328 |
||
| 4 |
| 4 |
||
| Line 1,068: | Line 1,068: | ||
{| class="va-table va-table-center va-table-full sortable" |
{| class="va-table va-table-center va-table-full sortable" |
||
! |
! |
||
| − | ! {{ |
+ | ! {{Icon|bigger gun|60px|tooltip=Area of effect Big Gun name}} |
| − | ! {{ |
+ | ! {{Icon|damage|x18px|tooltip=Damage per shot|link=Damage}} |
| − | ! {{ |
+ | ! {{Icon|dps|x18px|tooltip=Damage per second}} |
| − | ! {{ |
+ | ! {{Icon|attack|x18px|tooltip=Attacks per second}} |
| − | ! {{ |
+ | ! {{Icon|ap|x18px|tooltip=Action point cost}} |
| − | ! {{ |
+ | ! {{Icon|dap|x18px|tooltip=Damage per Action Point}} |
| − | ! {{ |
+ | ! {{Icon|spread|x18px|tooltip=Weapon Spread|link=Spread}} |
| − | ! {{ |
+ | ! {{Icon|ammo|x18px|tooltip=Ammunition used|link=Fallout 3 ammunition}} |
| − | ! {{ |
+ | ! {{Icon|mag|x18px|tooltip=Magazine capacity (shots per reload)}} |
| − | ! {{ |
+ | ! {{Icon|repair|x18px|tooltip=Weapon durability in shots until broken}} |
| − | ! {{ |
+ | ! {{Icon|weight|x18px|tooltip=Weapon weight}} |
| − | ! {{ |
+ | ! {{Icon|merchant|x18px|tooltip=Weapon value in caps}} |
| − | ! {{ |
+ | ! {{Icon|ratio|x18px|tooltip=Value to weight ratio}} |
! Base ID |
! Base ID |
||
| Line 1,086: | Line 1,086: | ||
| [[File:Fat_Man.png|80px|link=Fat Man (Fallout 3)|Fat Man]] |
| [[File:Fat_Man.png|80px|link=Fat Man (Fallout 3)|Fat Man]] |
||
| [[Fat Man (Fallout 3)|Fat Man]] |
| [[Fat Man (Fallout 3)|Fat Man]] |
||
| − | | 10<br />+1600 {{ |
+ | | 10<br />+1600 {{Icon|explosion}} |
| 443.1 |
| 443.1 |
||
| 1.58 |
| 1.58 |
||
| Line 1,103: | Line 1,103: | ||
| [[File:Fat_Man.png|80px|link=Experimental MIRV]] |
| [[File:Fat_Man.png|80px|link=Experimental MIRV]] |
||
| [[Experimental MIRV]] |
| [[Experimental MIRV]] |
||
| − | | 80<br />(10x8)<br />+12800 {{ |
+ | | 80<br />(10x8)<br />+12800 {{Icon|explosion}} |
| 3545 |
| 3545 |
||
| 1.58 |
| 1.58 |
||
| Line 1,120: | Line 1,120: | ||
| [[File:MISSILELAUNCHER.png|80px|link=Missile launcher (Fallout 3)|Missile launcher]] |
| [[File:MISSILELAUNCHER.png|80px|link=Missile launcher (Fallout 3)|Missile launcher]] |
||
| [[Missile launcher (Fallout 3)|Missile launcher]] |
| [[Missile launcher (Fallout 3)|Missile launcher]] |
||
| − | | 20<br />+150 {{ |
+ | | 20<br />+150 {{Icon|explosion}} |
| 36 |
| 36 |
||
| 1.6 |
| 1.6 |
||
| Line 1,137: | Line 1,137: | ||
| [[File:MISSILELAUNCHER.png|80px|link=Miss Launcher (Fallout 3)]] |
| [[File:MISSILELAUNCHER.png|80px|link=Miss Launcher (Fallout 3)]] |
||
| [[Miss Launcher (Fallout 3)|Miss Launcher]] |
| [[Miss Launcher (Fallout 3)|Miss Launcher]] |
||
| − | | 20<br />+200 {{ |
+ | | 20<br />+200 {{Icon|explosion}} |
| 47 |
| 47 |
||
| 1.58 |
| 1.58 |
||
| Line 1,161: | Line 1,161: | ||
{| class="va-table va-table-center va-table-full sortable" |
{| class="va-table va-table-center va-table-full sortable" |
||
! |
! |
||
| − | ! {{ |
+ | ! {{Icon|pistol|24px|tooltip=Energy pistol name}} |
| − | ! {{ |
+ | ! {{Icon|damage|x18px|tooltip=Damage per shot|link=Damage}} |
| − | ! {{ |
+ | ! {{Icon|dps|x18px|tooltip=Damage per second}} |
| − | ! {{ |
+ | ! {{Icon|attack|x18px|tooltip=Attacks per second}} |
| − | ! {{ |
+ | ! {{Icon|chance|x18px|tooltip=Critical chance multiplier}} |
! {{Icon|crit|x18px|tooltip=Critical hit Damage}} |
! {{Icon|crit|x18px|tooltip=Critical hit Damage}} |
||
| − | ! {{ |
+ | ! {{Icon|ap|x18px|tooltip=Action point cost}} |
| − | ! {{ |
+ | ! {{Icon|dap|x18px|tooltip=Damage per Action Point}} |
| − | ! {{ |
+ | ! {{Icon|spread|x18px|tooltip=Weapon Spread|link=Spread}} |
| − | ! {{ |
+ | ! {{Icon|ammo|x18px|tooltip=Ammunition used|link=Fallout 3 ammunition}} |
| − | ! {{ |
+ | ! {{Icon|mag|x18px|tooltip=Magazine capacity (shots per reload)}} |
| − | ! {{ |
+ | ! {{Icon|repair|x18px|tooltip=Weapon durability in shots until broken}} |
| − | ! {{ |
+ | ! {{Icon|weight|x18px|tooltip=Weapon weight}} |
| − | ! {{ |
+ | ! {{Icon|merchant|x18px|tooltip=Weapon value in caps}} |
| − | ! {{ |
+ | ! {{Icon|ratio|x18px|tooltip=Value to weight ratio}} |
! Base ID |
! Base ID |
||
|- style="height:32px;" |
|- style="height:32px;" |
||
| − | | [[File:Alien_atomizer.png|40px|link=Alien atomizer]] |
+ | | [[File:Alien_atomizer.png|40px|link=Alien atomizer (Mothership Zeta)]] |
| − | | [[Alien atomizer]] {{ |
+ | | [[Alien atomizer (Mothership Zeta)|Alien atomizer]] {{Icon|FO3MZ|link=Mothership Zeta (add-on)}} |
| 35 |
| 35 |
||
| 105 |
| 105 |
||
| Line 1,199: | Line 1,199: | ||
|- class="va-table-highlight" style="height:32px;" |
|- class="va-table-highlight" style="height:32px;" |
||
| [[File:Alien_atomizer.png|40px|link=Atomic pulverizer]] |
| [[File:Alien_atomizer.png|40px|link=Atomic pulverizer]] |
||
| − | | [[Atomic pulverizer]] {{ |
+ | | [[Atomic pulverizer]] {{Icon|FO3MZ|link=Mothership Zeta (add-on)}} |
| 37 |
| 37 |
||
| 111 |
| 111 |
||
| Line 1,237: | Line 1,237: | ||
|- class="va-table-highlight" style="height:32px;" |
|- class="va-table-highlight" style="height:32px;" |
||
| [[File:Captain%27s_sidearm.png|40px|link=Captain's Sidearm]] |
| [[File:Captain%27s_sidearm.png|40px|link=Captain's Sidearm]] |
||
| − | | [[Captain's Sidearm]] {{ |
+ | | [[Captain's Sidearm]] {{Icon|FO3MZ|link=Mothership Zeta (add-on)}} |
| 35<br />(5.9x6) |
| 35<br />(5.9x6) |
||
| 105 |
| 105 |
||
| Line 1,257: | Line 1,257: | ||
| [[File:F3Firelance.png|40px|link=Firelance]] |
| [[File:F3Firelance.png|40px|link=Firelance]] |
||
| [[Firelance]] |
| [[Firelance]] |
||
| − | | 80<br />+2 {{ |
+ | | 80<br />+2 {{Icon|fire}}/5s |
| 242 |
| 242 |
||
| 3 |
| 3 |
||
| Line 1,313: | Line 1,313: | ||
|- class="va-table-highlight" style="height:32px;" |
|- class="va-table-highlight" style="height:32px;" |
||
| [[File:Laser_pistol_(Gamebryo).png|40px|link=Colonel Autumn's laser pistol (Broken Steel)]] |
| [[File:Laser_pistol_(Gamebryo).png|40px|link=Colonel Autumn's laser pistol (Broken Steel)]] |
||
| − | | [[Colonel Autumn's laser pistol (Broken Steel)|Colonel Autumn's laser pistol (Broken Steel)]] {{ |
+ | | [[Colonel Autumn's laser pistol (Broken Steel)|Colonel Autumn's laser pistol (Broken Steel)]] {{Icon|FO3BS|link=Broken Steel}} |
| 18 |
| 18 |
||
| 108 |
| 108 |
||
| Line 1,389: | Line 1,389: | ||
|- class="va-table-highlight" style="height:32px;" |
|- class="va-table-highlight" style="height:32px;" |
||
| [[File:Mesmetron.png|40px|link=Mesmetron]] |
| [[File:Mesmetron.png|40px|link=Mesmetron]] |
||
| − | | [[Microwave emitter]]<br>{{ |
+ | | [[Microwave emitter]]<br />{{Icon|FO3PL|link=Point Lookout (add-on)}} |
| 60 |
| 60 |
||
| 62.1 |
| 62.1 |
||
| Line 1,427: | Line 1,427: | ||
|- class="va-table-highlight" style="height:32px;" |
|- class="va-table-highlight" style="height:32px;" |
||
| [[File:PlasmaPistol.png|40px|link=MPLX Novasurge]] |
| [[File:PlasmaPistol.png|40px|link=MPLX Novasurge]] |
||
| − | | [[MPLX Novasurge]] {{ |
+ | | [[MPLX Novasurge]] {{Icon|FO3MZ|link=Mothership Zeta (add-on)}} |
| 80 |
| 80 |
||
| 240 |
| 240 |
||
| Line 1,454: | Line 1,454: | ||
{| class="va-table va-table-center va-table-full sortable" |
{| class="va-table va-table-center va-table-full sortable" |
||
! |
! |
||
| − | ! {{ |
+ | ! {{Icon|rifle|60px|tooltip=Energy rifle name}} |
| − | ! {{ |
+ | ! {{Icon|damage|x18px|tooltip=Damage per shot|link=Damage}} |
| − | ! {{ |
+ | ! {{Icon|dps|x18px|tooltip=Damage per second}} |
| − | ! {{ |
+ | ! {{Icon|attack|x18px|tooltip=Attacks per second}} |
| − | ! {{ |
+ | ! {{Icon|chance|x18px|tooltip=Critical chance multiplier}} |
! {{Icon|crit|x18px|tooltip=Critical hit Damage}} |
! {{Icon|crit|x18px|tooltip=Critical hit Damage}} |
||
| − | ! {{ |
+ | ! {{Icon|ap|x18px|tooltip=Action point cost}} |
| − | ! {{ |
+ | ! {{Icon|dap|x18px|tooltip=Damage per Action Point}} |
| − | ! {{ |
+ | ! {{Icon|spread|x18px|tooltip=Weapon Spread|link=Spread}} |
| − | ! {{ |
+ | ! {{Icon|ammo|x18px|tooltip=Ammunition used|link=Fallout 3 ammunition}} |
| − | ! {{ |
+ | ! {{Icon|mag|x18px|tooltip=Magazine capacity (shots per reload)}} |
| − | ! {{ |
+ | ! {{Icon|repair|x18px|tooltip=Weapon durability in shots until broken}} |
| − | ! {{ |
+ | ! {{Icon|weight|x18px|tooltip=Weapon weight}} |
| − | ! {{ |
+ | ! {{Icon|merchant|x18px|tooltip=Weapon value in caps}} |
| − | ! {{ |
+ | ! {{Icon|ratio|x18px|tooltip=Value to weight ratio}} |
! Base ID |
! Base ID |
||
|- style="height:32px;" |
|- style="height:32px;" |
||
| − | | [[File:Alien_disintegrator.png|80px|link=Alien disintegrator]] |
+ | | [[File:Alien_disintegrator.png|80px|link=Alien disintegrator (Mothership Zeta)]] |
| − | | [[Alien disintegrator]] {{ |
+ | | [[Alien disintegrator (Mothership Zeta)|Alien disintegrator]] {{Icon|FO3MZ|link=Mothership Zeta (add-on)}} |
| 65 |
| 65 |
||
| 130 |
| 130 |
||
| Line 1,491: | Line 1,491: | ||
|- class="va-table-highlight" style="height:32px;" |
|- class="va-table-highlight" style="height:32px;" |
||
| − | | [[File:Alien_disintegrator.png|80px|link=Destabilizer ( |
+ | | [[File:Alien_disintegrator.png|80px|link=Destabilizer (Mothership Zeta)]] |
| − | | [[Destabilizer ( |
+ | | [[Destabilizer (Mothership Zeta)|Destabilizer]] {{Icon|FO3MZ|link=Mothership Zeta (add-on)}} |
| 30 |
| 30 |
||
| 135 |
| 135 |
||
| Line 1,510: | Line 1,510: | ||
|- style="height:32px;" |
|- style="height:32px;" |
||
| − | | [[File:FO3_Gauss_rifle.png|80px|link=Gauss rifle ( |
+ | | [[File:FO3_Gauss_rifle.png|80px|link=Gauss rifle (Operation: Anchorage)|Gauss rifle]] |
| − | | [[Gauss rifle ( |
+ | | [[Gauss rifle (Operation: Anchorage)|Gauss rifle]] {{Icon|FO3OA|link=Operation: Anchorage (add-on)}} |
| 100 |
| 100 |
||
| 30.6 |
| 30.6 |
||
| Line 1,529: | Line 1,529: | ||
|- style="height:32px;" |
|- style="height:32px;" |
||
| − | | [[File: |
+ | | [[File:AER9 laser rifle.png|80px|link=Laser rifle (Fallout 3)|Laser rifle]] |
| [[Laser rifle (Fallout 3)|Laser rifle]] |
| [[Laser rifle (Fallout 3)|Laser rifle]] |
||
| 23 |
| 23 |
||
| Line 1,548: | Line 1,548: | ||
|- class="va-table-highlight" style="height:32px;" |
|- class="va-table-highlight" style="height:32px;" |
||
| − | | [[File: |
+ | | [[File:AER9 laser rifle.png|80px|link=Metal Blaster]] |
| − | | [[Metal Blaster]] {{ |
+ | | [[Metal Blaster]] {{Icon|FO3TP|link=The Pitt (add-on)}} |
| 55<br />(6.1x9) |
| 55<br />(6.1x9) |
||
| 112.5 |
| 112.5 |
||
| Line 1,567: | Line 1,567: | ||
|- class="va-table-highlight" style="height:32px;" |
|- class="va-table-highlight" style="height:32px;" |
||
| − | | [[File: |
+ | | [[File:AER9 laser rifle.png|80px|link=Wazer Wifle (Fallout 3)]] |
| [[Wazer Wifle (Fallout 3)|Wazer Wifle]] |
| [[Wazer Wifle (Fallout 3)|Wazer Wifle]] |
||
| 29 |
| 29 |
||
| Line 1,624: | Line 1,624: | ||
|- style="height:32px;" |
|- style="height:32px;" |
||
| − | | [[File:Tesla_cannon.png|80px|link=Tesla cannon ( |
+ | | [[File:Tesla_cannon.png|80px|link=Tesla cannon (Broken Steel)|Tesla cannon]] |
| − | | [[Tesla cannon ( |
+ | | [[Tesla cannon (Broken Steel)|Tesla cannon]] {{Icon|FO3BS|link=Broken Steel}} |
| − | | 40<br />+80{{ |
+ | | 40<br />+80{{Icon|explosion}}<br />+20{{Icon|electrical}}/2s |
| 31.6 |
| 31.6 |
||
| 1.6 |
| 1.6 |
||
| Line 1,643: | Line 1,643: | ||
|- style="height:32px;" |
|- style="height:32px;" |
||
| − | | [[File:Tri-beam_laser_rifle.png|80px|link=Tri-beam laser rifle ( |
+ | | [[File:Tri-beam_laser_rifle.png|80px|link=Tri-beam laser rifle (Broken Steel)|Tri-beam laser rifle]] |
| − | | [[Tri-beam laser rifle ( |
+ | | [[Tri-beam laser rifle (Broken Steel)|Tri-beam laser rifle]] {{Icon|FO3BS|link=Broken Steel}} |
| 75<br />(25x3) |
| 75<br />(25x3) |
||
| 204.5 |
| 204.5 |
||
| Line 1,663: | Line 1,663: | ||
<small> |
<small> |
||
* Unique weapons are highlighted with a darker background. |
* Unique weapons are highlighted with a darker background. |
||
| − | * All energy rifles except the Tesla |
+ | * All energy rifles except the Tesla cannon are affected by the Commando perk. |
</small> |
</small> |
||
| Line 1,671: | Line 1,671: | ||
{| class="va-table va-table-center va-table-full sortable" |
{| class="va-table va-table-center va-table-full sortable" |
||
! |
! |
||
| − | ! {{ |
+ | ! {{Icon|mine|24px|tooltip=Placed explosive name}} |
| − | ! {{ |
+ | ! {{Icon|damage|x18px|tooltip=Damage per attack|link=Damage}} |
| − | ! {{ |
+ | ! {{Icon|dps|x18px|tooltip=Damage per second}} |
| − | ! {{ |
+ | ! {{Icon|attack|x18px|tooltip=Attacks per second}} |
! AoE |
! AoE |
||
| − | ! {{ |
+ | ! {{Icon|ap|x18px|tooltip=Action point cost}} |
| − | ! {{ |
+ | ! {{Icon|dap|x18px|tooltip=Damage per Action Point}} |
| − | ! {{ |
+ | ! {{Icon|weight|x18px|tooltip=Weapon weight}} |
| − | ! {{ |
+ | ! {{Icon|merchant|x18px|tooltip=Weapon value in caps}} |
| − | ! {{ |
+ | ! {{Icon|ratio|x18px|tooltip=Value to weight ratio}} |
! Base ID |
! Base ID |
||
| − | ! {{ |
+ | ! {{Icon|info|x18px|tooltip=Notes}} |
|- style="height:32px;" |
|- style="height:32px;" |
||
| [[File:Bottlecap_mine.png|x32px|link=Bottlecap mine (Fallout 3)|Bottlecap mine]] |
| [[File:Bottlecap_mine.png|x32px|link=Bottlecap mine (Fallout 3)|Bottlecap mine]] |
||
| [[Bottlecap mine (Fallout 3)|Bottlecap mine]] |
| [[Bottlecap mine (Fallout 3)|Bottlecap mine]] |
||
| − | | 1<br />+500{{ |
+ | | 1<br />+500{{Icon|explosion}} |
| 155 |
| 155 |
||
| 0.31 |
| 0.31 |
||
| Line 1,701: | Line 1,701: | ||
|- style="height:32px;" |
|- style="height:32px;" |
||
| [[File:CryoMine.png|x32px]] |
| [[File:CryoMine.png|x32px]] |
||
| − | | [[Cryo mine (Mothership Zeta)|Cryo mine]] {{ |
+ | | [[Cryo mine (Mothership Zeta)|Cryo mine]] {{Icon|FO3MZ|link=Mothership Zeta (add-on)}} |
| 1 |
| 1 |
||
| 0.47 |
| 0.47 |
||
| Line 1,717: | Line 1,717: | ||
| [[File:FragMine.png|x32px|link=Frag mine (Fallout 3)|Frag mine]] |
| [[File:FragMine.png|x32px|link=Frag mine (Fallout 3)|Frag mine]] |
||
| [[Frag mine (Fallout 3)|Frag mine]] |
| [[Frag mine (Fallout 3)|Frag mine]] |
||
| − | | 1<br />+100{{ |
+ | | 1<br />+100{{Icon|explosion}} |
| 47 |
| 47 |
||
| 0.47 |
| 0.47 |
||
| Line 1,732: | Line 1,732: | ||
| [[File:Plasma_mine.png|x32px|link=Plasma mine (Fallout 3)|Plasma mine]] |
| [[File:Plasma_mine.png|x32px|link=Plasma mine (Fallout 3)|Plasma mine]] |
||
| [[Plasma mine (Fallout 3)|Plasma mine]] |
| [[Plasma mine (Fallout 3)|Plasma mine]] |
||
| − | | 1<br />+150 {{ |
+ | | 1<br />+150 {{Icon|plasma}} |
| 71 |
| 71 |
||
| 0.47 |
| 0.47 |
||
| Line 1,747: | Line 1,747: | ||
| [[File:PulseMine.png|x32px|link=Pulse mine (Fallout 3)|Pulse mine]] |
| [[File:PulseMine.png|x32px|link=Pulse mine (Fallout 3)|Pulse mine]] |
||
| [[Pulse mine (Fallout 3)|Pulse mine]] |
| [[Pulse mine (Fallout 3)|Pulse mine]] |
||
| − | | 1<br />+10 {{ |
+ | | 1<br />+10 {{Icon|emp}} |
| 5.17 |
| 5.17 |
||
| 0.47 |
| 0.47 |
||
| Line 1,757: | Line 1,757: | ||
| 80 |
| 80 |
||
| {{ID|0000433e}} |
| {{ID|0000433e}} |
||
| − | | align="left" |+200 {{ |
+ | | align="left" |+200 {{Icon|emp}} to robots |
|} |
|} |
||
| Line 1,764: | Line 1,764: | ||
{| class="va-table va-table-center va-table-full sortable" |
{| class="va-table va-table-center va-table-full sortable" |
||
! |
! |
||
| − | ! {{ |
+ | ! {{Icon|grenade|x18px|tooltip=Thrown explosive name}} |
| − | ! {{ |
+ | ! {{Icon|damage|x18px|tooltip=Damage per attack|link=Damage}} |
| − | ! {{ |
+ | ! {{Icon|dps|x18px|tooltip=Damage per second}} |
| − | ! {{ |
+ | ! {{Icon|attack|x18px|tooltip=Attacks per second}} |
! AoE |
! AoE |
||
| − | ! {{ |
+ | ! {{Icon|ap|x18px|tooltip=Action point cost}} |
| − | ! {{ |
+ | ! {{Icon|dap|x18px|tooltip=Damage per Action Point}} |
| − | ! {{ |
+ | ! {{Icon|weight|x18px|tooltip=Weapon weight}} |
| − | ! {{ |
+ | ! {{Icon|merchant|x18px|tooltip=Weapon value in caps}} |
| − | ! {{ |
+ | ! {{Icon|ratio|x18px|tooltip=Value to weight ratio}} |
! Base ID |
! Base ID |
||
| − | ! {{ |
+ | ! {{Icon|info|x18px|tooltip=Notes}} |
|- style="height:32px;" |
|- style="height:32px;" |
||
| [[File:CryoGrenade.png|x32px|link=Cryo grenade]] |
| [[File:CryoGrenade.png|x32px|link=Cryo grenade]] |
||
| − | | [[Cryo grenade]] {{ |
+ | | [[Cryo grenade]] {{Icon|FO3MZ|link=Mothership Zeta (add-on)}} |
| 1 |
| 1 |
||
| 0.65 |
| 0.65 |
||
| Line 1,795: | Line 1,795: | ||
| [[File:FRAGGRENADE.png|x32px|link=Frag grenade (Fallout 3)|Frag grenade]] |
| [[File:FRAGGRENADE.png|x32px|link=Frag grenade (Fallout 3)|Frag grenade]] |
||
| [[Frag grenade (Fallout 3)|Frag grenade]] |
| [[Frag grenade (Fallout 3)|Frag grenade]] |
||
| − | | 1<br />+100 {{ |
+ | | 1<br />+100 {{Icon|explosion}} |
| 65.6 |
| 65.6 |
||
| 0.65 |
| 0.65 |
||
| Line 1,810: | Line 1,810: | ||
| [[File:Nuka-grenade.png|x32px|link=Nuka-grenade (Fallout 3)|Nuka-grenade]] |
| [[File:Nuka-grenade.png|x32px|link=Nuka-grenade (Fallout 3)|Nuka-grenade]] |
||
| [[Nuka-grenade (Fallout 3)|Nuka-grenade]] |
| [[Nuka-grenade (Fallout 3)|Nuka-grenade]] |
||
| − | | 1<br />+500 {{ |
+ | | 1<br />+500 {{Icon|explosion}}<br />+2 {{Icon|fire}}/5s |
| 275 |
| 275 |
||
| 0.65 |
| 0.65 |
||
| Line 1,820: | Line 1,820: | ||
| 100 |
| 100 |
||
| {{ID|00004342}} |
| {{ID|00004342}} |
||
| − | | align="left" |+100 {{ |
+ | | align="left" |+100 {{Icon|radiation}} |
|- style="height:32px;" |
|- style="height:32px;" |
||
| [[File:PlasmaGrenade.png|x32px|link=Plasma grenade (Fallout 3)|Plasma grenade]] |
| [[File:PlasmaGrenade.png|x32px|link=Plasma grenade (Fallout 3)|Plasma grenade]] |
||
| [[Plasma grenade (Fallout 3)|Plasma grenade]] |
| [[Plasma grenade (Fallout 3)|Plasma grenade]] |
||
| − | | 1<br />+150 {{ |
+ | | 1<br />+150 {{Icon|plasma}} |
| 98.5 |
| 98.5 |
||
| 0.65 |
| 0.65 |
||
| Line 1,840: | Line 1,840: | ||
| [[File:PulseGrenade.png|x32px|link=Pulse grenade (Fallout 3)|Pulse grenade]] |
| [[File:PulseGrenade.png|x32px|link=Pulse grenade (Fallout 3)|Pulse grenade]] |
||
| [[Pulse grenade (Fallout 3)|Pulse grenade]] |
| [[Pulse grenade (Fallout 3)|Pulse grenade]] |
||
| − | | 1<br />+10 {{ |
+ | | 1<br />+10 {{Icon|emp}} |
| 7.17 |
| 7.17 |
||
| 0.65 |
| 0.65 |
||
| Line 1,850: | Line 1,850: | ||
| 80 |
| 80 |
||
| {{ID|00004331}} |
| {{ID|00004331}} |
||
| − | | align="left" |+200 {{ |
+ | | align="left" |+200 {{Icon|emp}} to robots |
|} |
|} |
||
| Line 1,858: | Line 1,858: | ||
{| class="va-table va-table-center va-table-full sortable" |
{| class="va-table va-table-center va-table-full sortable" |
||
! |
! |
||
| − | ! {{ |
+ | ! {{Icon|blade|x18px|tooltip=Bladed melee weapon name}} |
| − | ! {{ |
+ | ! {{Icon|damage|x18px|tooltip=Damage per attack|link=Damage}} |
| − | ! {{ |
+ | ! {{Icon|dps|x18px|tooltip=Damage per second}} |
| − | ! {{ |
+ | ! {{Icon|attack|x18px|tooltip=Attacks per second}} |
| − | ! {{ |
+ | ! {{Icon|chance|x18px|tooltip=Critical chance multiplier}} |
! {{Icon|crit|x18px|tooltip=Critical hit Damage}} |
! {{Icon|crit|x18px|tooltip=Critical hit Damage}} |
||
| − | ! {{ |
+ | ! {{Icon|ap|x18px|tooltip=Action point cost}} |
| − | ! {{ |
+ | ! {{Icon|dap|x18px|tooltip=Damage per Action Point}} |
| − | ! {{ |
+ | ! {{Icon|repair|x18px|tooltip=Weapon durability in strikes until broken}} |
| − | ! {{ |
+ | ! {{Icon|weight|x18px|tooltip=Weapon weight}} |
| − | ! {{ |
+ | ! {{Icon|merchant|x18px|tooltip=Weapon value in caps}} |
| − | ! {{ |
+ | ! {{Icon|ratio|x18px|tooltip=Value to weight ratio}} |
! Base ID |
! Base ID |
||
|- style="height:32px;" |
|- style="height:32px;" |
||
| [[File:AutoAxeRender_copy.png|60px|link=Auto axe]] |
| [[File:AutoAxeRender_copy.png|60px|link=Auto axe]] |
||
| − | | [[Auto axe]] {{ |
+ | | [[Auto axe]] {{Icon|FO3TP|link=The Pitt (add-on)}} |
| 35 |
| 35 |
||
| 35 |
| 35 |
||
| Line 1,890: | Line 1,890: | ||
|- class="va-table-highlight" style="height:32px;" |
|- class="va-table-highlight" style="height:32px;" |
||
| [[File:AutoAxeRender_copy.png|60px|link=Man Opener]] |
| [[File:AutoAxeRender_copy.png|60px|link=Man Opener]] |
||
| − | | [[Man Opener]] {{ |
+ | | [[Man Opener]] {{Icon|FO3TP|link=The Pitt (add-on)}} |
| 35 |
| 35 |
||
| 35 |
| 35 |
||
| Line 1,906: | Line 1,906: | ||
|- class="va-table-highlight" style="height:32px;" |
|- class="va-table-highlight" style="height:32px;" |
||
| [[File:AutoAxeRender_copy.png|60px|link=The Mauler]] |
| [[File:AutoAxeRender_copy.png|60px|link=The Mauler]] |
||
| − | | [[The Mauler]] {{ |
+ | | [[The Mauler]] {{Icon|FO3TP|link=The Pitt (add-on)}} |
| 45 |
| 45 |
||
| 45 |
| 45 |
||
| Line 1,922: | Line 1,922: | ||
|- style="height:32px;" |
|- style="height:32px;" |
||
| [[File:Axe.png|x32px|link=Axe (Point Lookout)]] |
| [[File:Axe.png|x32px|link=Axe (Point Lookout)]] |
||
| − | | [[Axe (Point Lookout)|Axe]] {{ |
+ | | [[Axe (Point Lookout)|Axe]] {{Icon|FO3PL|link=Point Lookout (add-on)}} |
| 20 |
| 20 |
||
| 28.6 |
| 28.6 |
||
| Line 1,938: | Line 1,938: | ||
|- class="va-table-highlight" style="height:32px;" |
|- class="va-table-highlight" style="height:32px;" |
||
| [[File:Axe.png|x32px|link=The Dismemberer]] |
| [[File:Axe.png|x32px|link=The Dismemberer]] |
||
| − | | [[The Dismemberer]] {{ |
+ | | [[The Dismemberer]] {{Icon|FO3PL|link=Point Lookout (add-on)}} |
| 25 |
| 25 |
||
| 35.7 |
| 35.7 |
||
| Line 1,970: | Line 1,970: | ||
|- class="va-table-highlight" style="height:32px;" |
|- class="va-table-highlight" style="height:32px;" |
||
| [[File:Jingwei%27s_Shock_Sword.png|80px|link=Jingwei's shocksword]] |
| [[File:Jingwei%27s_Shock_Sword.png|80px|link=Jingwei's shocksword]] |
||
| − | | [[Jingwei's shocksword]] {{ |
+ | | [[Jingwei's shocksword]] {{Icon|FO3OA|link=Operation: Anchorage (add-on)}} |
| − | | 35<br />+2{{ |
+ | | 35<br />+2{{Icon|electrical}}/5s |
| 82.8 |
| 82.8 |
||
| 2.31 |
| 2.31 |
||
| Line 2,050: | Line 2,050: | ||
|- class="va-table-highlight" style="height:32px;" |
|- class="va-table-highlight" style="height:32px;" |
||
| [[File:Trench_knife.png|x32px|link=Trench knife]] |
| [[File:Trench_knife.png|x32px|link=Trench knife]] |
||
| − | | [[Trench knife]] {{ |
+ | | [[Trench knife]] {{Icon|FO3OA|link=Operation: Anchorage (add-on)}} |
| 7 |
| 7 |
||
| 21 |
| 21 |
||
| Line 2,083: | Line 2,083: | ||
| [[File:Knife_FO3.png|x32px|link=Ant's Sting]] |
| [[File:Knife_FO3.png|x32px|link=Ant's Sting]] |
||
| [[Ant's Sting]] |
| [[Ant's Sting]] |
||
| − | | 4<br />+4 {{ |
+ | | 4<br />+4 {{Icon|poison}}/10s |
| 16 |
| 16 |
||
| 3 |
| 3 |
||
| Line 2,098: | Line 2,098: | ||
|- class="va-table-highlight" style="height:32px;" |
|- class="va-table-highlight" style="height:32px;" |
||
| [[File:Knife_FO3.png|x32px|link=Ritual knife]] |
| [[File:Knife_FO3.png|x32px|link=Ritual knife]] |
||
| − | | [[Ritual knife]] {{ |
+ | | [[Ritual knife]] {{Icon|FO3PL|link=Point Lookout (add-on)}} |
| 6 |
| 6 |
||
| 18 |
| 18 |
||
| Line 2,130: | Line 2,130: | ||
|- class="va-table-highlight" style="height:32px;" |
|- class="va-table-highlight" style="height:32px;" |
||
| [[File:Knife_FO3.png|x32px|link=Toy knife]] |
| [[File:Knife_FO3.png|x32px|link=Toy knife]] |
||
| − | | [[Toy knife]] {{ |
+ | | [[Toy knife]] {{Icon|FO3PL|link=Point Lookout (add-on)}} |
| 1 |
| 1 |
||
| 3 |
| 3 |
||
| Line 2,178: | Line 2,178: | ||
|- class="va-table-highlight" style="height:32px;" |
|- class="va-table-highlight" style="height:32px;" |
||
| [[File:Katana.png|x32px|link=Samurai's sword]] |
| [[File:Katana.png|x32px|link=Samurai's sword]] |
||
| − | | [[Samurai's sword]] {{ |
+ | | [[Samurai's sword]] {{Icon|FO3MZ|link=Mothership Zeta (add-on)}} |
| 24 |
| 24 |
||
| 55.4 |
| 55.4 |
||
| Line 2,195: | Line 2,195: | ||
| [[File:Shishkebab.png|80px|link=Shishkebab (Fallout 3)|Shishkebab]] |
| [[File:Shishkebab.png|80px|link=Shishkebab (Fallout 3)|Shishkebab]] |
||
| [[Shishkebab (Fallout 3)|Shishkebab]] |
| [[Shishkebab (Fallout 3)|Shishkebab]] |
||
| − | | 35<br />+2{{ |
+ | | 35<br />+2{{Icon|fire}}/5s |
| 80.8 |
| 80.8 |
||
| 2.3 |
| 2.3 |
||
| Line 2,209: | Line 2,209: | ||
|- style="height:32px;" |
|- style="height:32px;" |
||
| − | | [[File:Shovel.png|x32px|link=Shovel ( |
+ | | [[File:Shovel.png|x32px|link=Shovel (Point Lookout)|Shovel]] |
| − | | [[Shovel ( |
+ | | [[Shovel (Point Lookout)|Shovel]] {{Icon|FO3PL|link=Point Lookout (add-on)}} |
| 12 |
| 12 |
||
| 17.1 |
| 17.1 |
||
| Line 2,226: | Line 2,226: | ||
|- class="va-table-highlight" style="height:32px;" |
|- class="va-table-highlight" style="height:32px;" |
||
| [[File:Shovel.png|x32px|link=Fertilizer shovel]] |
| [[File:Shovel.png|x32px|link=Fertilizer shovel]] |
||
| − | | [[Fertilizer shovel]] {{ |
+ | | [[Fertilizer shovel]] {{Icon|FO3PL|link=Point Lookout (add-on)}} |
| − | | 15<br />+4{{ |
+ | | 15<br />+4{{Icon|poison}}/10s |
| 25.4 |
| 25.4 |
||
| 1.43 |
| 1.43 |
||
| Line 2,242: | Line 2,242: | ||
|- style="height:32px;" |
|- style="height:32px;" |
||
| [[File:AutoAxeRender_copy.png|60px|link=Steel saw]] |
| [[File:AutoAxeRender_copy.png|60px|link=Steel saw]] |
||
| − | | [[Steel saw]] {{ |
+ | | [[Steel saw]] {{Icon|FO3TP|link=The Pitt (add-on)}} |
| 16 |
| 16 |
||
| 16 |
| 16 |
||
| Line 2,297: | Line 2,297: | ||
{| class="va-table va-table-center va-table-full sortable" |
{| class="va-table va-table-center va-table-full sortable" |
||
! |
! |
||
| − | ! {{ |
+ | ! {{Icon|blunt|x24px|tooltip=Bladed melee weapon name}} |
| − | ! {{ |
+ | ! {{Icon|damage|x18px|tooltip=Damage per attack|link=Damage}} |
| − | ! {{ |
+ | ! {{Icon|dps|x18px|tooltip=Damage per second}} |
| − | ! {{ |
+ | ! {{Icon|attack|x18px|tooltip=Attacks per second}} |
| − | ! {{ |
+ | ! {{Icon|chance|x18px|tooltip=Critical chance multiplier}} |
! {{Icon|crit|x18px|tooltip=Critical hit Damage}} |
! {{Icon|crit|x18px|tooltip=Critical hit Damage}} |
||
| − | ! {{ |
+ | ! {{Icon|ap|x18px|tooltip=Action point cost}} |
| − | ! {{ |
+ | ! {{Icon|dap|x18px|tooltip=Damage per Action Point}} |
| − | ! {{ |
+ | ! {{Icon|repair|x18px|tooltip=Weapon durability in strikes until broken}} |
| − | ! {{ |
+ | ! {{Icon|weight|x18px|tooltip=Weapon weight}} |
| − | ! {{ |
+ | ! {{Icon|merchant|x18px|tooltip=Weapon value in caps}} |
| − | ! {{ |
+ | ! {{Icon|ratio|x18px|tooltip=Value to weight ratio}} |
! Base ID |
! Base ID |
||
| Line 2,473: | Line 2,473: | ||
|- style="height:32px;" |
|- style="height:32px;" |
||
| [[File:Shock_baton.png|x32px|link=Shock baton]] |
| [[File:Shock_baton.png|x32px|link=Shock baton]] |
||
| − | | [[Shock baton]] {{ |
+ | | [[Shock baton]] {{Icon|FO3MZ|link=Mothership Zeta (add-on)}} |
| − | | 20<br />+2{{ |
+ | | 20<br />+2{{Icon|electrical}}/5s |
| 48.2 |
| 48.2 |
||
| 2.31 |
| 2.31 |
||
| Line 2,489: | Line 2,489: | ||
|- class="va-table-highlight" style="height:32px;" |
|- class="va-table-highlight" style="height:32px;" |
||
| [[File:Shock_baton.png|x32px|link=Electro-Suppressor]] |
| [[File:Shock_baton.png|x32px|link=Electro-Suppressor]] |
||
| − | | [[Electro-Suppressor]] {{ |
+ | | [[Electro-Suppressor]] {{Icon|FO3MZ|link=Mothership Zeta (add-on)}} |
| 25 |
| 25 |
||
| 57.7 |
| 57.7 |
||
| Line 2,607: | Line 2,607: | ||
{| class="va-table va-table-center va-table-full sortable" |
{| class="va-table va-table-center va-table-full sortable" |
||
! |
! |
||
| − | ! {{ |
+ | ! {{Icon|unarmed|x24px|tooltip=Unarmed weapon name}} |
| − | ! {{ |
+ | ! {{Icon|damage|x18px|tooltip=Damage per attack|link=Damage}} |
| − | ! {{ |
+ | ! {{Icon|dps|x18px|tooltip=Damage per second}} |
| − | ! {{ |
+ | ! {{Icon|attack|x18px|tooltip=Attacks per second}} |
| − | ! {{ |
+ | ! {{Icon|chance|x18px|tooltip=Critical chance multiplier}} |
! {{Icon|crit|x18px|tooltip=Critical hit Damage}} |
! {{Icon|crit|x18px|tooltip=Critical hit Damage}} |
||
| − | ! {{ |
+ | ! {{Icon|ap|x18px|tooltip=Action point cost}} |
| − | ! {{ |
+ | ! {{Icon|dap|x18px|tooltip=Damage per Action Point}} |
| − | ! {{ |
+ | ! {{Icon|repair|x18px|tooltip=Weapon durability in strikes until broken}} |
| − | ! {{ |
+ | ! {{Icon|weight|x18px|tooltip=Weapon weight}} |
| − | ! {{ |
+ | ! {{Icon|merchant|x18px|tooltip=Weapon value in caps}} |
| − | ! {{ |
+ | ! {{Icon|ratio|x18px|tooltip=Value to weight ratio}} |
! Base ID |
! Base ID |
||
| Line 2,639: | Line 2,639: | ||
|- class="va-table-highlight" style="height:32px;" |
|- class="va-table-highlight" style="height:32px;" |
||
| [[File:Brass_knuckles.png|x32px|link=Steel knuckles]] |
| [[File:Brass_knuckles.png|x32px|link=Steel knuckles]] |
||
| − | | [[Steel knuckles]] {{ |
+ | | [[Steel knuckles]] {{Icon|FO3TP|link=The Pitt (add-on)}} |
| 9 |
| 9 |
||
| 14.2 |
| 14.2 |
||
| Line 2,704: | Line 2,704: | ||
| [[File:POWERFIST.png|x32px|link=The Shocker]] |
| [[File:POWERFIST.png|x32px|link=The Shocker]] |
||
| [[The Shocker]] |
| [[The Shocker]] |
||
| − | | 20<br />+25 {{ |
+ | | 20<br />+25 {{Icon|emp}} robots |
| 21.8 |
| 21.8 |
||
| 1.09 |
| 1.09 |
||
| Line 2,783: | Line 2,783: | ||
| [[Unarmed]] |
| [[Unarmed]] |
||
| {{ID|0000432B}}, <span style="color:darkred;">{{ID|000BAFFC}}</span> |
| {{ID|0000432B}}, <span style="color:darkred;">{{ID|000BAFFC}}</span> |
||
| − | | align="left" | [[Deathclaw hand]]<br />[[Leather belt]]<br />[[Medical brace]]<br />[[Wonderglue (Fallout 3)|Wonderglue]] |
+ | | align="left" | [[Deathclaw hand (Fallout 3)|Deathclaw hand]]<br />[[Leather belt]]<br />[[Medical brace]]<br />[[Wonderglue (Fallout 3)|Wonderglue]] |
|- |
|- |
||
| Line 2,814: | Line 2,814: | ||
|} |
|} |
||
* <span style="color:darkred;">Red codes are for the Schematics.</span> |
* <span style="color:darkred;">Red codes are for the Schematics.</span> |
||
| − | * [[Cryolator]], also a [[Custom-built weapon components|custom-built weapon]], was cut from the game |
+ | * [[Cryolator (Fallout 3)|Cryolator]], also a [[Custom-built weapon components|custom-built weapon]], was cut from the game |
==Unused weapons== |
==Unused weapons== |
||
| − | ===Cut content=== |
+ | ===Cut content/Not in game=== |
{| class="va-table va-table-center va-table-full sortable" |
{| class="va-table va-table-center va-table-full sortable" |
||
! class="unsortable" | |
! class="unsortable" | |
||
| − | ! {{ |
+ | ! {{Icon|pistol|24px|tooltip=Weapon name}} |
| − | ! {{ |
+ | ! {{Icon|damage|x18px|tooltip=Damage per attack|link=Damage}} |
| − | ! {{ |
+ | ! {{Icon|dps|x18px|tooltip=Damage per second}} |
| − | ! {{ |
+ | ! {{Icon|attack|x18px|tooltip=Attacks per second}} |
| − | ! {{ |
+ | ! {{Icon|chance|x18px|tooltip=Critical chance multiplier}} |
! {{Icon|crit|x18px|tooltip=Critical hit Damage}} |
! {{Icon|crit|x18px|tooltip=Critical hit Damage}} |
||
| − | ! {{ |
+ | ! {{Icon|ap|x18px|tooltip=Action point cost}} |
| − | ! {{ |
+ | ! {{Icon|dap|x18px|tooltip=Damage per Action Point}} |
| − | ! {{ |
+ | ! {{Icon|spread|x18px|tooltip=Weapon Spread|link=Spread}} |
| − | ! {{ |
+ | ! {{Icon|ammo|x18px|tooltip=Ammunition used|link=Fallout 3 ammunition}} |
| − | ! {{ |
+ | ! {{Icon|mag|x18px|tooltip=Magazine capacity (shots per reload)}} |
| − | ! {{ |
+ | ! {{Icon|repair|x18px|tooltip=Weapon durability in attacks until broken}} |
| − | ! {{ |
+ | ! {{Icon|weight|x18px|tooltip=Weapon weight}} |
| − | ! {{ |
+ | ! {{Icon|merchant|x18px|tooltip=Weapon value in caps}} |
| − | ! {{ |
+ | ! {{Icon|ratio|x18px|tooltip=Value to weight ratio}} |
| − | ! {{ |
+ | ! {{Icon|ability|x18px|tooltip=Related weapon skill}} |
! Base ID |
! Base ID |
||
| Line 2,940: | Line 2,940: | ||
|- class="va-table-highlight" style="height:32px;" |
|- class="va-table-highlight" style="height:32px;" |
||
| [[File:SUPERSLEDGE.png|x32px|link=Discharge hammer]] |
| [[File:SUPERSLEDGE.png|x32px|link=Discharge hammer]] |
||
| − | | [[Discharge hammer]] {{ |
+ | | [[Discharge hammer]] {{Icon|FO3BS}} |
| 25 |
| 25 |
||
| 35.7 |
| 35.7 |
||
| Line 2,979: | Line 2,979: | ||
|- style="height:32px;" |
|- style="height:32px;" |
||
| − | | [[File: |
+ | | [[File:AER9 laser rifle.png|80px|link=Gauss rifle (Beta)]] |
| − | | [[Gauss rifle (Beta)]] {{ |
+ | | [[Gauss rifle (Beta)]] {{Icon|FO3OA}} |
| 23 |
| 23 |
||
| 47.0 |
| 47.0 |
||
| Line 3,000: | Line 3,000: | ||
|- style="height:32px;" |
|- style="height:32px;" |
||
| [[File:Katana.png|x32px|link=Katana (Mothership Zeta)|Katana]] |
| [[File:Katana.png|x32px|link=Katana (Mothership Zeta)|Katana]] |
||
| − | | [[Katana (Mothership Zeta)|Katana]] {{ |
+ | | [[Katana (Mothership Zeta)|Katana]] {{Icon|FO3MZ}} |
| 15 |
| 15 |
||
| 34.6 |
| 34.6 |
||
| Line 3,061: | Line 3,061: | ||
| [[File:FRAGGRENADE.png|x32px|link=Mirelurk bait grenade]] |
| [[File:FRAGGRENADE.png|x32px|link=Mirelurk bait grenade]] |
||
| [[Mirelurk bait grenade]] |
| [[Mirelurk bait grenade]] |
||
| − | | <span style="color:transparent">0</span>0<br />+0{{ |
+ | | <span style="color:transparent">0</span>0<br />+0{{Icon|explosion}} |
| 0 |
| 0 |
||
| 6.0 |
| 6.0 |
||
| Line 3,100: | Line 3,100: | ||
|- class="va-table-highlight" style="height:32px;" |
|- class="va-table-highlight" style="height:32px;" |
||
| [[File:DoubleBarrelShotgun.png|80px|link=Pa's Fishing Aid]] |
| [[File:DoubleBarrelShotgun.png|80px|link=Pa's Fishing Aid]] |
||
| − | | [[Pa's Fishing Aid]] {{ |
+ | | [[Pa's Fishing Aid]] {{Icon|FO3PL}} |
| 80 |
| 80 |
||
| 32.7 |
| 32.7 |
||
| Line 3,120: | Line 3,120: | ||
|- style="height:32px;" |
|- style="height:32px;" |
||
| [[File:FRAGGRENADE.png|x32px|link=Signal flare]] |
| [[File:FRAGGRENADE.png|x32px|link=Signal flare]] |
||
| − | | [[Signal flare]] {{ |
+ | | [[Signal flare]] {{Icon|FO3OA}} |
| − | | <span style="color:transparent">0</span>1<br />+1{{ |
+ | | <span style="color:transparent">0</span>1<br />+1{{Icon|explosion}} |
| 1.3 |
| 1.3 |
||
| 0.7 |
| 0.7 |
||
| Line 3,140: | Line 3,140: | ||
|- style="height:32px;" |
|- style="height:32px;" |
||
| [[File:FRAGGRENADE.png|x32px|link=Smoke grenade (Operation: Anchorage)|Smoke grenade]] |
| [[File:FRAGGRENADE.png|x32px|link=Smoke grenade (Operation: Anchorage)|Smoke grenade]] |
||
| − | | [[Smoke grenade (Operation: Anchorage)|Smoke grenade]] {{ |
+ | | [[Smoke grenade (Operation: Anchorage)|Smoke grenade]] {{Icon|FO3OA}} |
| − | | <span style="color:transparent">0</span>1<br />+100{{ |
+ | | <span style="color:transparent">0</span>1<br />+100{{Icon|explosion}} |
| 65.87 |
| 65.87 |
||
| 0.7 |
| 0.7 |
||
| Line 3,160: | Line 3,160: | ||
|- style="height:32px;" |
|- style="height:32px;" |
||
| [[File:Spanner.png|x32px|link=Spanner (Mothership Zeta)]] |
| [[File:Spanner.png|x32px|link=Spanner (Mothership Zeta)]] |
||
| − | | [[Spanner (Mothership Zeta)|Spanner]] {{ |
+ | | [[Spanner (Mothership Zeta)|Spanner]] {{Icon|FO3MZ}} |
| 15 |
| 15 |
||
| 34.6 |
| 34.6 |
||
| Line 3,180: | Line 3,180: | ||
|- style="height:32px;" |
|- style="height:32px;" |
||
| [[File:MISSILELAUNCHER.png|80px|link=Tesla cannon (Beta)]] |
| [[File:MISSILELAUNCHER.png|80px|link=Tesla cannon (Beta)]] |
||
| − | | [[Tesla cannon (Beta)]] {{ |
+ | | [[Tesla cannon (Beta)]] {{Icon|FO3BS}} |
| − | | 20<br />+80{{ |
+ | | 20<br />+80{{Icon|explosion}}<br />+20{{Icon|electrical}}/2s |
| 121.6 |
| 121.6 |
||
| 1.6 |
| 1.6 |
||
| Line 3,200: | Line 3,200: | ||
|- style="height:32px;" |
|- style="height:32px;" |
||
| [[File:10mm_pistol_%28Gamebryo%29.png|40px|link=Test gun]] |
| [[File:10mm_pistol_%28Gamebryo%29.png|40px|link=Test gun]] |
||
| − | | [[Test gun]] {{ |
+ | | [[Test gun]] {{Icon|FO3OA}} |
| <span style="color:transparent">0</span>9 |
| <span style="color:transparent">0</span>9 |
||
| 54.0 |
| 54.0 |
||
| Line 3,248: | Line 3,248: | ||
==Concept art weapons== |
==Concept art weapons== |
||
These weapons were made into concept art but never made into the base ''Fallout 3'': |
These weapons were made into concept art but never made into the base ''Fallout 3'': |
||
| − | * [[Cryolator]] |
+ | * [[Cryolator (Fallout 3)|Cryolator]] |
* [[Mason jar mine]] |
* [[Mason jar mine]] |
||
* [[Piggy bank grenade]] |
* [[Piggy bank grenade]] |
||
| Line 3,254: | Line 3,254: | ||
==Notes== |
==Notes== |
||
| − | The base damages of these weapons, both unique and non-unique may change due to special [[add-on]] perks, such as [[Pitt Fighter]], [[Superior Defender]] |
+ | The base damages of these weapons, both unique and non-unique may change due to special [[Fallout 3 add-ons|add-on]] perks, such as [[Pitt Fighter]], [[Superior Defender]] and [[Xenotech Expert]]. |
==See also== |
==See also== |
||
* [[Fallout weapons]] |
* [[Fallout weapons]] |
||
* [[Fallout 2 weapons]] |
* [[Fallout 2 weapons]] |
||
| ⚫ | |||
* [[Fallout: New Vegas weapons]] |
* [[Fallout: New Vegas weapons]] |
||
| + | * [[Fallout 4 weapons]] |
||
| + | * [[Fallout 76 weapons]] |
||
| ⚫ | |||
| + | * [[Fallout: Brotherhood of Steel weapons]] |
||
* [[Fallout 3 ammunition]] |
* [[Fallout 3 ammunition]] |
||
| Line 3,267: | Line 3,270: | ||
[[de:Fallout 3 Waffen]] |
[[de:Fallout 3 Waffen]] |
||
[[es:Armas de Fallout 3]] |
[[es:Armas de Fallout 3]] |
||
| + | [[fr:Armes de Fallout 3]] |
||
[[pt:Armas do Fallout 3]] |
[[pt:Armas do Fallout 3]] |
||
[[ru:Оружие Fallout 3]] |
[[ru:Оружие Fallout 3]] |
||
Revision as of 01:24, 12 November 2019
| For a list of unique weapon locations in Fallout 3, see Fallout 3 unique weapons. For a list of non-player weapons in Fallout 3, see Fallout 3 non-player weapons. |
|
| This page lists all weapons in Fallout 3. |
|
| Legend |
|---|
Small Guns
Pistols
| Base ID | ||||||||||||||||
|---|---|---|---|---|---|---|---|---|---|---|---|---|---|---|---|---|
| .32 pistol | 6 | 18 | 3 | x1 | 6 | 20 | 0.3 | 0.5 | .32 caliber | 5 | 556 | 2 | 110 | 55 | 0000080A | |
| Wild Bill's Sidearm |
10 | 30 | 3 | x1 | 15 | 20 | 0.5 | 0.5 | .32 caliber | 5 | 833 | 2 | 250 | 125 | xx00A7CB | |
| 10mm pistol | 9 | 54 | 6 | x1 | 9 | 17 | 0.53 | 0.5 | 10mm round | 12 | 556 | 3 | 225 | 75 | 0000434F | |
| Colonel Autumn's 10mm pistol | 13 | 78 | 6 | x1 | 13 | 17 | 0.77 | 0.5 | 10mm round | 12 | 577 | 3 | 325 | 108 | 0006B531 | |
| Silenced 10mm pistol¹ | 8 | 48 | 6 | x2 | 5 | 21 | 0.38 | 0.5 | 10mm round | 12 | 333 | 3 | 250 | 83 | 00004350 | |
| Chinese pistol | 4 | 24 | 6 | x1 | 4 | 17 | 0.24 | 1.0 | 10mm round | 10 | 1250 | 2 | 190 | 95 | 00004325 | |
| Zhu-Rong v418 Chinese pistol | 4 +2 |
20 | 4.5 | x2 | 4 | 17 | 0.24 | 1 | 10mm round | 10 | 1667 | 2 | 290 | 145 | 00060C2C | |
| Dart gun¹ | 6 +8 |
44 | 6 | x2.5 | 12 | 25 | 0.24 | 0 | Dart | 1 | 883 | 3 | 500 | 167 | 0000432A | |
| Scoped .44 Magnum² | 35 | 78.8 | 2.25 | x2 | 35 | 32 | 1.09 | 0.3 | .44 Magnum round | 6 | 229 | 4 | 300 | 75 | 0000434D | |
| Blackhawk² | 55 | 123.8 | 2.25 | x2 | 45 | 32 | 1.72 | 0.3 | .44 Magnum round | 6 | 218 | 4 | 500 | 125 | 000303A2 | |
| Callahan's Magnum² |
65 | 146.3 | 2.25 | x2 | 50 | 25 | 2.6 | 0.3 | .44 Magnum round | 6 | 205 | 4 | 750 | 188 | xx00B806 | |
| Paulson's revolver |
45 (5x9) |
101.3 | 2.25 | x2 | 315 (35x9) |
32 | 1.4 | 3 | .44 Magnum round | 6 | 178 | 4 | 300 | 75 | xx00829F |
- Unique weapons are highlighted with a darker background.
- Pistols are affected by Gunslinger.
- ¹ Weapon is silenced.
- ² Weapon is scoped.
Rifles
| Base ID | ||||||||||||||||
|---|---|---|---|---|---|---|---|---|---|---|---|---|---|---|---|---|
| Assault rifle | 8 | 64 | 8 | x0.125 | 8 | 23 | 1.04 | 1.5 | 5.56mm round | 24 | 1250 | 7 | 300 | 43 | 0001FFEC | |
| Infiltrator¹² |
7 | 56 | 8 | x0.125 | 10 | 23 | 0.91 | 1.5 | 5.56mm round | 24 | 1429 | 7 | 400 | 57 | xx00737C | |
| Perforator¹² |
10 | 60 | 6 | x0.33 | 14 | 27 | 0.86 | 0.5 | 5.56mm round | 24 | 1000 | 7 | 600 | 86 | xx00B512 | |
| BB gun¹ | 4 | 3 | 0.8 | x1 | 4 | 28 | 0.14 | 0.5 | BB | 100 | 417 | 2 | 36 | 18 | 00004323 | |
| Chinese assault rifle | 11 | 88 | 8 | x0.125 | 10 | 23 | 1.44 | 1.5 | 5.56mm round | 24 | 1212 | 7 | 500 | 71 | 0000080B | |
| Xuanlong assault rifle | 12 | 96 | 8 | x0.125 | 12 | 23 | 1.57 | 1.5 | 5.56mm round | 36 | 1111 | 7 | 400 | 57 | 000C800E | |
| Hunting rifle | 25 | 18.75 | 0.75 | x1 | 25 | 25 | 1 | 0.3 | .32 caliber | 5 | 667 | 6 | 150 | 25 | 00004333 | |
| Ol' Painless | 30 | 33.75 | 0.75 | x1 | 30 | 23 | 1.3 | 0 | .32 caliber | 5 | 556 | 6 | 250 | 42 | 00066C76 | |
| Lever-action rifle |
40 | 30 | 0.75 | x5 | 40 | 30 | 1.33 | 0.25 | 10mm round | 10 | 250 | 8 | 200 | 25 | xx0088DE | |
| Backwater rifle |
45 | 33.75 | 0.75 | x5 | 45 | 30 | 1.5 | 0.25 | 10mm round | 10 | 519 | 7 | 250 | 36 | xx00ED14 | |
| Lincoln's repeater | 50 | 37.5 | 0.75 | x2 | 50 | 25 | 2 | 0 | .44 Magnum round | 15 | 400 | 5 | 500 | 100 | 0003C07A | |
| Railway rifle | 30 | 60 | 2.0 | x3 | 30 | 24 | 1.25 | 0.75 | Railway spikes | 8 | 222 | 9 | 200 | 22 | 00004348 | |
| Sniper rifle² | 40 | 42.85 | 1.07 | x5 | 40 | 38 | 1.05 | 0 | .308 caliber | 5 | 83 | 10 | 300 | 30 | 00004353 | |
| Reservist's rifle² | 40 | 64.28 | 1.61 | x5 | 40 | 32 | 1.25 | 0 | .308 caliber | 3 | 125 | 10 | 500 | 50 | 00092966 | |
| Victory rifle² | 40 | 42.85 | 1.07 | x3 | 40 | 38 | 0.89 | 0 | .308 caliber | 5 | 250 | 10 | 450 | 45 | 000CB548 |
- Unique weapons are highlighted with a darker background.
- Rifles are affected by Commando.
- ¹ Weapon is silenced.
- ² Weapon is scoped.
Shotguns
| Base ID | ||||||||||||||||
|---|---|---|---|---|---|---|---|---|---|---|---|---|---|---|---|---|
| Combat shotgun | 55 (6.1x9) |
82.5 | 1.5 | x1 | 243 (27x9) |
27 | 2.04 | 3 | 12 gauge | 12 | 145 | 7 | 200 | 29 | 00004327 | |
| The Terrible Shotgun | 80 (8.9x9) |
120 | 1.5 | x1 | 360 (40x9) |
27 | 2.96 | 6 | 12 gauge | 12 | 146 | 10 | 250 | 25 | 0006B534 | |
| Double-barrel shotgun |
85 (9.4x9) |
191.3 | 2.25 | x1 | 270 (30x9) |
35 | 2.43 | 5 | 12 gauge | 2 (1) | 118 | 6 | 175 | 29 | xx007473 | |
| Sawed-off shotgun | 50 (5.6x9) |
112.5 | 2.25 | x0 | 0 | 37 | 1.35 | 7 | 12 gauge | 2 | 167 | 6 | 190 | 32 | 0000434C | |
| The Kneecapper | 75 (8.3x9) |
140.62 | 1.88 | x0 | 0 | 37 | 2.03 | 4 | 12 gauge | 2 | 111 | 5 | 350 | 70 | 0006B53A |
- Unique weapons are highlighted with a darker background.
- Sawed-off shotguns are affected by Gunslinger.
- All other shotguns are affected by Commando.
Submachine guns
| Base ID | ||||||||||||||||
|---|---|---|---|---|---|---|---|---|---|---|---|---|---|---|---|---|
| 10mm SMG | 7 | 70 | 10 | x0.1 | 7 | 20 | 1.4 | 1.5 | 10mm round | 30 | 1190 | 5 | 330 | 66 | 00004321 | |
| Sydney's 10mm "Ultra" SMG | 9 | 90 | 10 | x0.1 | 9 | 20 | 1.8 | 1.5 | 10mm round | 50 | 926 | 5 | 430 | 86 | 0006E7CC |
- Unique weapons are highlighted with a darker background.
- SMGs are affected by Gunslinger.
Big Guns
Direct-Fire
| Base ID | ||||||||||||||||
|---|---|---|---|---|---|---|---|---|---|---|---|---|---|---|---|---|
| Drone cannon |
40 +100 |
466.7 | 3.33 | x1 | 50 | 30 | 4.67 | 0.5 | Alien power module | 1 | 417 | 18 | 1999 | 111 | xx000845 | |
| Drone cannon Ex-B |
40 +100 |
466.7 | 3.33 | x1 | 50 | 30 | 4.67 | 0.5 | Alien power module | 1 | 417 | 18 | 1999 | 111 | xx00A77D | |

|
Flamer | 16 +2 |
130 | 8 | x0.5 | 1 +2 |
50 | 1.6 | 0.5 | Flamer fuel | 60 | 208 | 15 | 500 | 33 | 0000432D |
|
|
Burnmaster | 24 +2 |
194 | 8 | x0.5 | 1 +2 |
50 | 2.0 | 0.5 | Flamer fuel | 60 | 139 | 15 | 500 | 33 | 000C80BD |
|
|
Rapid-torch flamer |
16 +2 |
130 | 8 | x0.5 | 1 +2 |
50 | 1.6 | 0.5 | Flamer fuel | 60 | 208 | 15 | 500 | 33 | xx0091B1 |
|
|
Slo-burn flamer |
18 +8 |
152 | 8 | x0.5 | 1 +2 |
50 | 3.5 | 0.5 | Flamer fuel | 60 | 185 | 15 | 500 | 33 | xx0091B3 |
| Gatling laser | 8 | 160 | 20 | x0.05 | 6 | 30 | 2.13 | 0.5 | ECP | 240 | 3125 | 18 | 2000 | 111 | 0000432E | |
| Precision Gatling laser |
8 | 160 | 20 | x0.2 | 6 | 30 | 2.13 | 0.5 | ECP | 240 | 3125 | 18 | 3000 | 167 | xx008895 | |
| Vengeance | 11 | 220 | 20 | x0.05 | 12 | 30 | 2.93 | 0.5 | ECP | 240 | 3030 | 18 | 2400 | 133 | 000CB547 | |
| Heavy incinerator |
35 +45 +8 |
328 | 4 | x1 | 5 | 50 | 2.4 | 0.5 | Flamer fuel | 24 | 222 | 15 | 500 | 33 | xx001084 | |
| Minigun | 5 | 100 | 20 | x0 | 0 | 30 | 1.33 | 2.0 | 5mm round | 240 | 3333 | 18 | 1000 | 56 | 0000433F | |
| Eugene | 7 | 140 | 20 | x0 | 0 | 30 | 1.87 | 2.0 | 5mm round | 240 | 3571 | 18 | 1500 | 83 | 0006B538 | |
| Rock-It Launcher | 50 | 167 | 3.3 | x1 | 25 | 32 | 1.56 | 1.0 | Junk | N/A | 100 | 8 | 200 | 25 | 0000434B |
- Unique weapons are highlighted with a darker background.
Area-of-Effect
| Base ID | ||||||||||||||
|---|---|---|---|---|---|---|---|---|---|---|---|---|---|---|
| Fat Man | 10 +1600 |
443.1 | 1.58 | 65 | 24.77 | 2.0 | Mini nuke | 1 | 167 | 30 | 1000 | 33 | 0000432C | |
| Experimental MIRV | 80 (10x8) +12800 |
3545 | 1.58 | 65 | 198.15 | 13.0 | Mini nuke | 8 | 63 | 30 | 2498 | 83 | 0003422B | |
| Missile launcher | 20 +150 |
36 | 1.6 | 55 | 3.09 | 0.5 | Missile | 1 | 83 | 20 | 500 | 25 | 00004340 | |
| Miss Launcher | 20 +200 |
47 | 1.58 | 55 | 4.0 | 0.5 | Missile | 1 | 83 | 15 | 400 | 27 | 000B2644 |
- Unique weapons are highlighted with a darker background.
- Area-of-Effect weapons have a Crit % Modifier of 0, which eliminates any chance to critically hit with them.
Energy Weapons
Energy pistols
| Base ID | ||||||||||||||||
|---|---|---|---|---|---|---|---|---|---|---|---|---|---|---|---|---|
| Alien atomizer |
35 | 105 | 3 | x1 | 40 | 20 | 1.75 | 0 | Alien power module | 20 | 714 | 2 | 500 | 250 | xx00083F | |
| Atomic pulverizer |
37 | 111 | 3 | x2 | 40 | 12 | 3.08 | 0 | Alien power module | 20 | 676 | 2 | 500 | 250 | xx00A77F | |
| Alien blaster | 100 | 300 | 3 | x100 | 100 | 20 | 5 | 0 | Alien power cell | 10 | 125 | 2 | 500 | 250 | 00004322 | |
| Captain's Sidearm |
35 (5.9x6) |
105 | 3 | x1 | 240 (40x6) |
20 | 1.75 | 3.0 | Alien power module | 30 (10) | 714 | 2 | 500 | 250 | xx00A9DD | |
| Firelance | 80 +2 |
242 | 3 | x100 | 80 | 20 | 4.5 | 0 | Alien power cell | 10 | 63 | 2 | 750 | 375 | 000C80BA | |
| Laser pistol | 12 | 72 | 6 | x1.5 | 12 | 17 | 0.71 | 0 | SEC | 30 | 729 | 3 | 320 | 107 | 00004335 | |
| Colonel Autumn's laser pistol | 10 | 120 | 12 | x0.08 | 22 | 17 | 1.18 | 0 | SEC | 30 | 1250 | 2 | 420 | 210 | 000ABBE4 | |
| Colonel Autumn's laser pistol (Broken Steel) |
18 | 108 | 6 | x1.5 | 18 | 17 | 1.1 | 0 | SEC | 30 | 694 | 3 | 420 | 140 | 000ABBE4 | |
| Protectron's Gaze | 24 (4.9x5) |
72 | 3 | x1 | 120 (24x5) |
17 | 1.41 | 2.5 | SEC | 20 | 521 | 3 | 320 | 107 | 000C553F | |
| Smuggler's End | 18 | 108 | 6 | x1.5 | 18 | 17 | 1.06 | 0 | SEC | 30 | 694 | 2 | 450 | 225 | 0006B536 | |
| Mesmetron | 1 | 1 | 1.03 | x1 | 0 | 65 | 0.015 | 0 | Mesmetron power cell | 5 | 2500 | 2 | 500 | 250 | 00004339 | |
| Microwave emitter |
60 | 62.1 | 1.03 | x2 | 100 | 30 | 2.0 | 0.2 | MFC | 5 | 375 | 8 | 500 | 63 | xx00C1C3 | |
| Plasma pistol | 25 | 75 | 3 | x2 | 25 | 21 | 1.2 | 0.5 | SEC | 16 | 400 | 3 | 360 | 120 | 00004343 | |
| MPLX Novasurge |
80 | 240 | 3 | x3 | 75 | 21 | 3.8 | 0.5 | SEC | 16 (8) | 188 | 6 | 850 | 142 | xx00AB86 |
- Unique weapons are highlighted with a darker background.
- Energy pistols are affected by the Gunslinger perk.
Energy rifles
| Base ID | ||||||||||||||||
|---|---|---|---|---|---|---|---|---|---|---|---|---|---|---|---|---|
| Alien disintegrator |
65 | 130 | 2 | x2 | 50 | 30 | 2.2 | 1.0 | Alien power module | 100 | 385 | 7 | 300 | 43 | xx000842 | |
| Destabilizer |
30 | 135 | 4.5 | x0.44 | 20 | 25 | 1.2 | 1.5 | Alien power module | 100 | 1250 | 7 | 1200 | 171 | xx00A77E | |
| Gauss rifle |
100 | 30.6 | 1.1 | x5 | 50 | 38 | 2.63 | 0 | MFC | 1 | 375 | 12 | 500 | 42 | xx00C07D | |
| Laser rifle | 23 | 47 | 2.05 | x1.5 | 22 | 17 | 1.35 | 0 | MFC | 24 | 1087 | 8 | 1000 | 125 | 00004336 | |
| Metal Blaster |
55 (6.1x9) |
112.5 | 2.05 | x1.5 | 243 (27x9) |
17 | 3.24 | 2.5 | MFC | 24 | 455 | 8 | 1000 | 125 | xx00B513 | |
| Wazer Wifle | 29 | 59.3 | 2.05 | x1.5 | 28 | 17 | 1.65 | 0 | MFC | 30 | 1552 | 8 | 900 | 113 | 00061793 | |
| Plasma rifle | 45 | 90 | 2.0 | x2 | 44 | 25 | 1.8 | 0.2 | MFC | 12 | 500 | 8 | 1799 | 225 | 00004344 | |
| A3-21's plasma rifle | 50 | 100 | 2.0 | x2.5 | 50 | 25 | 2.0 | 0.2 | MFC | 12 | 600 | 8 | 2200 | 275 | 0006B539 | |
| Tesla cannon |
40 +80 +20 |
31.6 | 1.6 | x2 | 30 | 37 | 3.78 | 0 | ECP | 1 | 563 | 8 | 1799 | 225 | xx006725 | |
| Tri-beam laser rifle |
75 (25x3) |
204.5 | 2.73 | x1.5 | 45 (15x3) |
23 | 3.26 | 2.0 | MFC | 24 (8) | 333 | 9 | 1000 | 111 | xx005818 |
- Unique weapons are highlighted with a darker background.
- All energy rifles except the Tesla cannon are affected by the Commando perk.
Explosives
Placed
| AoE | Base ID | |||||||||||
|---|---|---|---|---|---|---|---|---|---|---|---|---|
| Bottlecap mine | 1 +500 |
155 | 0.31 | 256 | 35 | 14.31 | 0.5 | 75 | 150 | 0000433A | ||
| Cryo mine |
1 | 0.47 | 0.47 | 210 | 35 | 0.03 | 0.5 | 25 | 50 | xx006FC0 | Stun & freeze for 3s | |
| Frag mine | 1 +100 |
47 | 0.47 | 192 | 35 | 2.89 | 0.5 | 25 | 50 | 0000433C | ||
| Plasma mine | 1 +150 |
71 | 0.47 | 192 | 35 | 4.31 | 0.5 | 50 | 100 | 0000433D | ||
| Pulse mine | 1 +10 |
5.17 | 0.47 | 450 | 35 | 0.31 | 0.5 | 40 | 80 | 0000433E | +200 |
Thrown
| AoE | Base ID | |||||||||||
|---|---|---|---|---|---|---|---|---|---|---|---|---|
| Cryo grenade |
1 | 0.65 | 0.65 | 250 | 24 | 0.04 | 0.5 | 50 | 100 | xx002A71 | Stun & freeze for 3s | |
| Frag grenade | 1 +100 |
65.6 | 0.65 | 450 | 24 | 4.21 | 0.5 | 25 | 50 | 00004330 | ||
| Nuka-grenade | 1 +500 +2 |
275 | 0.65 | 328 | 24 | 20.95 | 0.5 | 50 | 100 | 00004342 | +100 | |
| Plasma grenade | 1 +150 |
98.5 | 0.65 | 450 | 24 | 6.29 | 0.5 | 50 | 100 | 00004332 | ||
| Pulse grenade | 1 +10 |
7.17 | 0.65 | 450 | 24 | 0.46 | 0.5 | 40 | 80 | 00004331 | +200 |
Melee Weapons
Bladed
| Base ID | |||||||||||||
|---|---|---|---|---|---|---|---|---|---|---|---|---|---|
| File:AutoAxeRender copy.png | Auto axe |
35 | 35 | 1.0 | x0 | 0 | 65 | 1.1 | 457 | 20 | 200 | 10 | xx0032E1 |
| File:AutoAxeRender copy.png | Man Opener |
35 | 35 | 1.0 | x0 | 0 | 65 | 1.1 | 457 | 20 | 200 | 10 | xx00B66C |
| File:AutoAxeRender copy.png | The Mauler |
45 | 45 | 1.0 | x0 | 0 | 50 | 1.8 | 356 | 20 | 200 | 10 | xx00B514 |
| Axe |
20 | 28.6 | 1.43 | x2 | 30 | 30 | 1.7 | 500 | 6 | 60 | 10 | xx00838F | |
| The Dismemberer |
25 | 35.7 | 1.43 | x2 | 40 | 30 | 1.7 | 480 | 6 | 55 | 9 | xx00ED0F | |
| Chinese officer's sword | 10 | 23.1 | 2.31 | x2 | 15 | 28 | 0.72 | 1000 | 3 | 75 | 25 | 0002B3CB | |
| Jingwei's shocksword |
35 +2 |
82.8 | 2.31 | x2 | 25 | 28 | 2.9 | 486 | 3 | 500 | 167 | xx00C07C | |
| Vampire's Edge | 15 | 34.6 | 2.31 | x3 | 20 | 28 | 1.1 | 1000 | 1 | 100 | 100 | 00078441 | |
| Combat knife | 7 | 21 | 3 | x3 | 13 | 17 | 0.82 | 1286 | 1 | 50 | 50 | 00004326 | |
| Occam's Razor | 10 | 30 | 3 | x3 | 13 | 17 | 1.2 | 1200 | 1 | 65 | 65 | 000CB602 | |
| Stabhappy | 10 | 30 | 3 | x4 | 15 | 17 | 1.2 | 1200 | 1 | 65 | 65 | 000C80BE | |
| Trench knife |
7 | 21 | 3 | x3 | 13 | 17 | 0.8 | 1286 | 1 | 50 | 50 | xx00C07B | |
| Knife | 4 | 12 | 3 | x1 | 4 | 20 | 0.4 | 500 | 1 | 20 | 20 | 00004334 | |
| Ant's Sting | 4 +4 |
16 | 3 | x1 | 4 | 20 | 2.4 | 1250 | 1 | 30 | 30 | 000C553E | |
| Ritual knife |
6 | 18 | 3 | x3 | 18 | 12 | 1.0 | 1333 | 1 | 20 | 20 | xx01098A | |
| Slasher knife | 50 | 115.4 | 2.3 | x0 | 0 | 0 | 0 | 400 | 1 | 50 | 50 | 0002869C | |
| Toy knife |
1 | 3 | 3 | x1 | 10 | 10 | 0.2 | 200 | 1 | 20 | 20 | xx006AB7 | |
| Ripper | 30 | 30 | 1.0 | x0 | 0 | 65 | 0.92 | 400 | 6 | 100 | 17 | 00004349 | |
| Jack | 30 | 30 | 1.0 | x1 | 15 | 65 | 0.92 | 533 | 6 | 200 | 33 | 000C6E5B | |
| Samurai's sword |
24 | 55.4 | 2.31 | x2 | 40 | 19 | 2.52 | 833 | 3 | 75 | 25 | xx00083B | |

|
Shishkebab | 35 +2 |
80.8 | 2.3 | x2 | 24 | 28 | 3.21 | 429 | 3 | 200 | 67 | 0000434E |
| Shovel |
12 | 17.1 | 1.43 | x3 | 20 | 20 | 1.2 | 500 | 3 | 55 | 18 | xx0082B5 | |
| Fertilizer shovel |
15 +4 |
25.4 | 1.43 | x3 | 30 | 20 | 3.5 | 533 | 3 | 55 | 18 | xx00D5A8 | |
| File:AutoAxeRender copy.png | Steel saw |
16 | 16 | 1.0 | x0 | 0 | 65 | 0.5 | 625 | 20 | 200 | 10 | xx00B643 |
| Switchblade | 5 | 15 | 3 | x2 | 9 | 18 | 0.56 | 400 | 1 | 35 | 35 | 000289C3 | |
| Butch's Toothpick | 10 | 30 | 3 | x2.5 | 13 | 18 | 1.12 | 300 | 5 | 50 | 10 | 00078440 |
- Unique weapons are highlighted with a darker background.
- Melee damage is doubled in V.A.T.S.
Blunt
| Base ID | |||||||||||||
|---|---|---|---|---|---|---|---|---|---|---|---|---|---|
| Baseball bat | 9 | 12.9 | 1.4 | x1 | 9 | 25 | 0.72 | 889 | 3 | 55 | 18 | 0000421C | |
| Lead pipe | 9 | 20.8 | 2.3 | x1 | 18 | 24 | 0.75 | 667 | 3 | 75 | 25 | 00004337 | |
| Nail board | 8 | 11.4 | 1.43 | x0 | 0 | 27 | 0.6 | 150 | 4 | 30 | 7.5 | 000A01DD | |
| Board of Education | 12 | 17.1 | 1.43 | x1 | 12 | 27 | 0.9 | 250 | 4 | 60 | 15 | 000C310F | |
| Police baton | 4 | 9.2 | 2.3 | x1 | 4 | 25 | 0.32 | 1250 | 2 | 25 | 35 | 00004345 | |
| Pool cue | 3 | 4.3 | 1.43 | x0 | 0 | 27 | 0.2 | 333 | 1 | 15 | 15 | 00004346 | |
| The Break | 6 | 8.6 | 1.43 | x1 | 6 | 27 | 0.4 | 667 | 1 | 50 | 50 | 00066C77 | |
| Repellent stick | 5 | 11.5 | 2.3 | x0 | 0 | 40 | 0.25 | 2000 | 3 | 120 | 40 | 0002D3B7 | |
| Rolling pin | 3 | 5.2 | 1.7 | x0 | 0 | 24 | 0.3 | 667 | 1 | 10 | 10 | 000B2943 | |
| Rolling pin (simulation) | 20 | 46 | 2.3 | x0 | 0 | 24 | 1.6 | 100 | 2 | 10 | 5 | 00029769 | |
| Shock baton |
20 +2 |
48.2 | 2.31 | x1 | 4 | 19 | 2.6 | 250 | 2 | 70 | 35 | xx00083D | |
| Electro-Suppressor |
25 | 57.7 | 2.31 | x1 | 4 | 15 | 3.3 | 200 | 2 | 70 | 35 | xx003C54 | |
| Sledgehammer | 20 | 28.6 | 1.43 | x1 | 10 | 38 | 1.1 | 500 | 12 | 130 | 11 | 00004351 | |
| The Tenderizer | 30 | 42.9 | 1.43 | x1 | 15 | 38 | 1.6 | 500 | 12 | 230 | 19 | 000A874B | |
| Super sledge | 25 | 35.7 | 1.43 | x1 | 25 | 38 | 1.3 | 600 | 20 | 180 | 9 | 00004352 | |
| Fawkes' super sledge | 32 | 45.7 | 1.43 | x1 | 32 | 38 | 1.7 | 625 | 18 | 300 | 17 | 0007843F | |
| Tire iron | 6 | 13.8 | 2.31 | x1 | 6 | 27 | 0.4 | 667 | 3 | 40 | 13 | 00004328 | |
| Highwayman's Friend | 10 | 23.1 | 2.31 | x1 | 10 | 27 | 0.7 | 1000 | 5 | 75 | 15 | 00078442 |
- Unique weapons are highlighted with a darker background.
- Melee damage is doubled in V.A.T.S.
Unarmed
| Base ID | |||||||||||||
|---|---|---|---|---|---|---|---|---|---|---|---|---|---|
| Brass knuckles | 6 | 9.5 | 1.58 | x1 | 6 | 18 | 0.7 | 667 | 1 | 20 | 20 | 00004324 | |
| Steel knuckles |
9 | 14.2 | 1.58 | x1 | 9 | 14 | 1.3 | 1111 | 1 | 20 | 20 | xx00B4B3 | |
| Deathclaw gauntlet | 20 | 32.6 | 1.6 | x5 | 30 | 26 | 1.5 | 600 | 10 | 150 | 15 | 0000432B | |
| Power fist | 20 | 21.8 | 1.09 | x1 | 20 | 28 | 1.4 | 500 | 6 | 100 | 17 | 00004347 | |
| Fisto! | 25 | 27.3 | 1.09 | x1.5 | 25 | 25 | 2.0 | 480 | 6 | 100 | 17 | 000CB601 | |
| The Shocker | 20 +25 |
21.8 | 1.09 | x1 | 20 | 25 | 1.6 | 400 | 6 | 150 | 25 | 000BFF62 | |
| Spiked knuckles | 9 | 14.2 | 1.58 | x1 | 9 | 19 | 0.9 | 667 | 1 | 25 | 25 | 00004354 | |
| Plunkett's Valid Points | 12 | 18.9 | 1.58 | x2 | 12 | 15 | 1.6 | 333 | 1 | 30 | 30 | 000CAFA9 |
- Unique weapons are highlighted with a darker background.
- Unarmed damage is doubled in V.A.T.S.
Custom-built weapons
| IMAGE | NAME | SKILL | CODE | Components |
|---|---|---|---|---|
|
Bottlecap mine | Explosives | 0000433A, 000BAFFB | Bottle cap x10 Cherry bomb Lunchbox Sensor module |
| Dart gun | Small Guns | 0000432A, 000BAFFA | Paint gun Radscorpion poison gland Surgical tubing Toy car | |
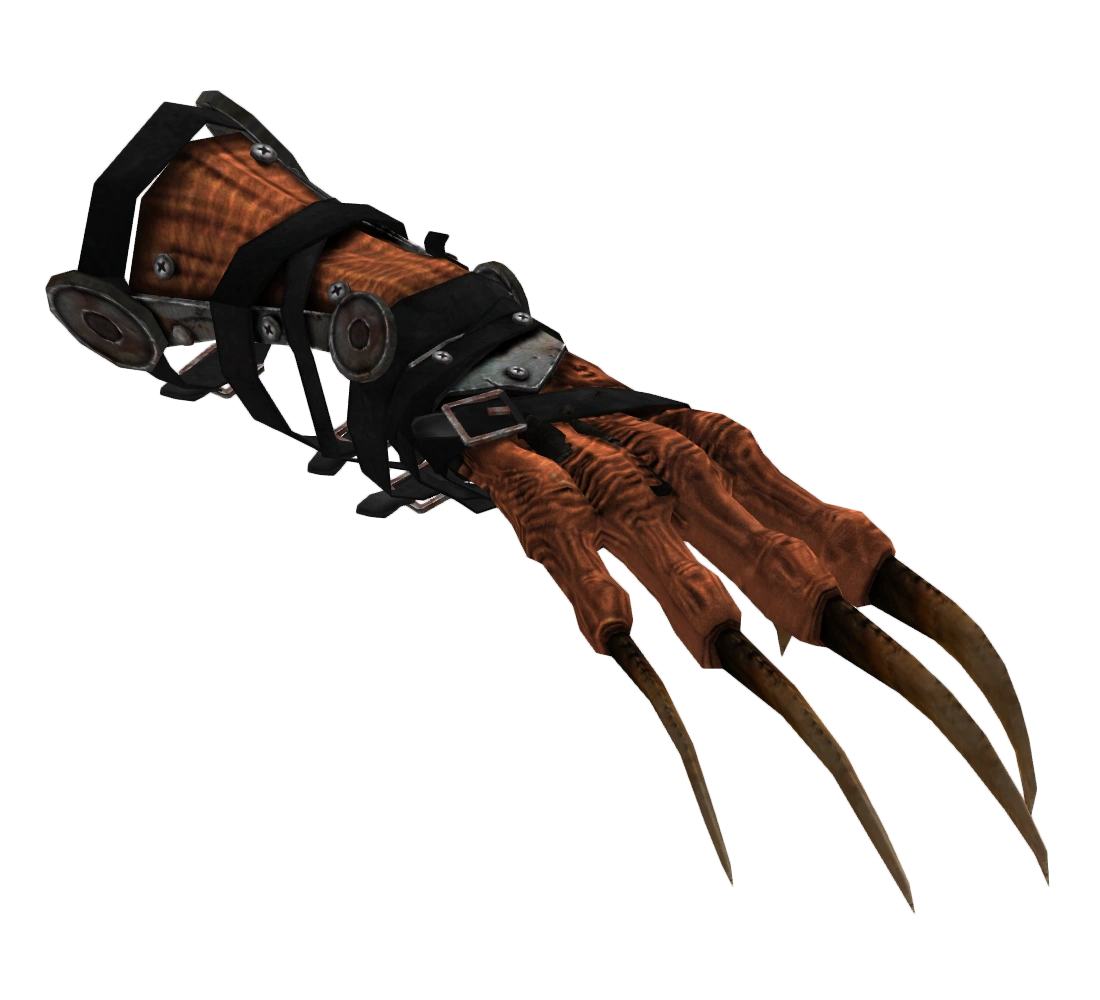
|
Deathclaw gauntlet | Unarmed | 0000432B, 000BAFFC | Deathclaw hand Leather belt Medical brace Wonderglue |
| Nuka-grenade | Explosives | 00004342, 000BAFFD | Abraxo cleaner Nuka-Cola Quantum Tin can Turpentine | |
| Railway rifle | Small Guns | 00004348, 000BAFFE | Crutch Fission battery Pressure cooker Steam gauge assembly | |
| Rock-It Launcher | Big Guns | 0000434B, 000BAFFF | Conductor Firehose nozzle Leaf blower Vacuum cleaner | |
| Shishkebab | Melee Weapons | 0000434E, 000BB000 | Lawn mower blade Motorcycle gas tank Motorcycle handbrake Pilot light |
- Red codes are for the Schematics.
- Cryolator, also a custom-built weapon, was cut from the game
Unused weapons
Cut content/Not in game
| Base ID | |||||||||||||||||
|---|---|---|---|---|---|---|---|---|---|---|---|---|---|---|---|---|---|
| .22 pistol | Small guns | ||||||||||||||||
| Black Bart's Bane | 08 | 6.0 | 0.8 | x1 | 8 | 28 | 0.29 | 0.5 | BB | 100 | 417 | 2 | 60 | 30 | Small guns | 0006B535 | |
| Breaker | 12 | 17.1 | 1.4 | x0 | 0 | 35 | 0.7 | - | - | - | 250 | 4 | 30 | 8 | Melee Weapons | 000CB546 | |
| Clover's Cleaver | 15 | 34.6 | 2.3 | x1.5 | 27 | 28 | 1.1 | - | - | - | 666 | 3 | 100 | 33 | Melee Weapons | 000C80B8 | |
| Curse Breaker | 13 | 18.6 | 1.4 | x1.5 | 13 | 25 | 1.04 | - | - | - | 923 | 3 | 75 | 25 | Melee Weapons | 000C80BB | |
| Discharge hammer |
25 | 35.7 | 1.4 | x1 | 25 | 38 | 1.3 | - | - | - | 600 | 20 | 180 | 9 | Melee Weapons | xx0088BF | |
| Excalibat | 13 | 18.6 | 1.4 | x1.5 | 13 | 25 | 1.04 | - | - | - | 250 | 3 | 75 | 25 | Melee Weapons | 000C80BC | |
| Gauss rifle (Beta) |
23 | 47.0 | 2.5 | x1.5 | 22 | 17 | 1.4 | 0 | MFC | 5 | 1086 | 8 | 1000 | 125 | Energy Weapons | xx001616 | |
| Katana |
15 | 34.6 | 2.3 | x1 | 4 | 19 | 1.6 | - | - | - | 333 | 2 | 70 | 35 | Melee Weapons | xx0080B5 | |
| Law Dog | 09 | 27.0 | 3.0 | x1 | 9 | 20 | 0.45 | 0.5 | .32 caliber |
5 | 112 | 2 | 210 | 105 | Small guns | 0006B532 | |
| Love Tap | 08 | 12.6 | 1.6 | x2 | 8 | 15 | 1.1 | - | - | - | 250 | 1 | 20 | 20 | Unarmed | 000C80B9 | |
| Mirelurk bait grenade | 00 +0 |
0 | 6.0 | x1 | 0 | 0 | 0 | - | - | - | - | 1 | 5 | 5 | Explosives | 00030664 | |
| O'Grady's Peacemaker | 06 | 13.8 | 2.3 | x1 | 6 | 45 | 0.26 | - | - | - | 1333 | 2 | 100 | 50 | Melee Weapons | 0007843D | |
| Pa's Fishing Aid |
80 | 32.7 | 2.3 | x1 | 40 | 35 | 2.29 | 1.0 | 12 ga | 2 (1) | 125 | 6 | 350 | 58 | Small guns | xx00D5B3 | |
| Signal flare |
01 +1 |
1.3 | 0.7 | x1 | 0 | 24 | 0.08 | - | - | - | - | 0.5 | 25 | 50 | Explosives | xx00A4DD | |
| Smoke grenade |
01 +100 |
65.87 | 0.7 | x1 | 0 | 24 | 4.2 | - | - | - | - | 0.5 | 25 | 50 | Explosives | xx008236 | |
| Spanner |
15 | 34.6 | 2.3 | x1 | 4 | 19 | 1.6 | - | - | - | 333 | 2 | 70 | 35 | Melee Weapons | xx003C52 | |
| Tesla cannon (Beta) |
20 +80 +20 |
121.6 | 1.6 | x0 | 0 | 55 | 2.6 | 0.5 | Missile | 1 (1) | 83 | 20 | 500 | 25 | Big Guns | xx0026FF | |
| Test gun |
09 | 54.0 | 6.0 | x1 | 9 | 17 | 0.53 | 0.5 | 10mm | 12 | 556 | 3 | 225 | 75 | Small guns | xx00A4DF | |
| Wanda | 12 | 96.0 | 8.0 | x0.125 | 12 | 23 | 1.57 | 1.5 | 5.56mm | 30 | 1250 | 7 | 500 | 71 | Small guns | 0006B533 |
- Unique weapons are highlighted with a darker background.
- Melee and Unarmed damage are doubled in V.A.T.S.
Non-player weapons
Concept art weapons
These weapons were made into concept art but never made into the base Fallout 3:
Notes
The base damages of these weapons, both unique and non-unique may change due to special add-on perks, such as Pitt Fighter, Superior Defender and Xenotech Expert.